How to Create Forms for SQL Databases in 3 Steps
Databases are vital for every business. But as soon as you create your database, a question arises. How can you maintain the information you store? Of course, you could write out queries manually, but you’ll also want a way for less technical staff to enter data.
This means building forms. Today we’ll look at how to create forms for SQL databases.
You can also use forms to limit access to your database.
This makes it easy for users to add and edit data using a friendly interface. In addition, you can control what they see, and how fields are populated, or even create more complex data entry workflows and approval systems.
Building forms is one of the best use cases for no/low-code tools.
With traditional, slow-code development, you’d need a lot of work to create a secure and reliable app to interact with your database. But nowadays, you can create forms to perform CRUD operations in SQL in just 3 steps.
This is all you need to do:
- Set up the database connection.
- Auto-generate CRUD screens.
- Customize your forms.
In this article, we’ll dive into how you can do this using Budibase, and create your SQL forms for free in just a few minutes.
Let’s get started!
What are we building?
We’re building a simple app to create and manage entries within a MySQL database. This is made up of two tables:
- Posts - representing the titles, content, and categories of our blog posts.
- Settings - which can store a series of custom key/value pairs.
Our app will feature three screens - including several forms. First, we’ll create two separate CRUD screens - one for each of our database tables. These will feature searchable tables. When we click on a row, we’ll be able to access an update form for the relevant entry.
We’ll also build a custom multi-step form for adding new entries to the Posts table.
Let’s jump right in.
How to build forms for SQL databases in three steps
The first thing we need to do is create a new Budibase app. If you haven’t already, sign up for a free account using the link below.
When we hit create new app we’ll be given the choice of using a template or starting from scratch. We’re going to start from scratch. We’re prompted to give our new app a name, which will also be used to generate a URL slug:
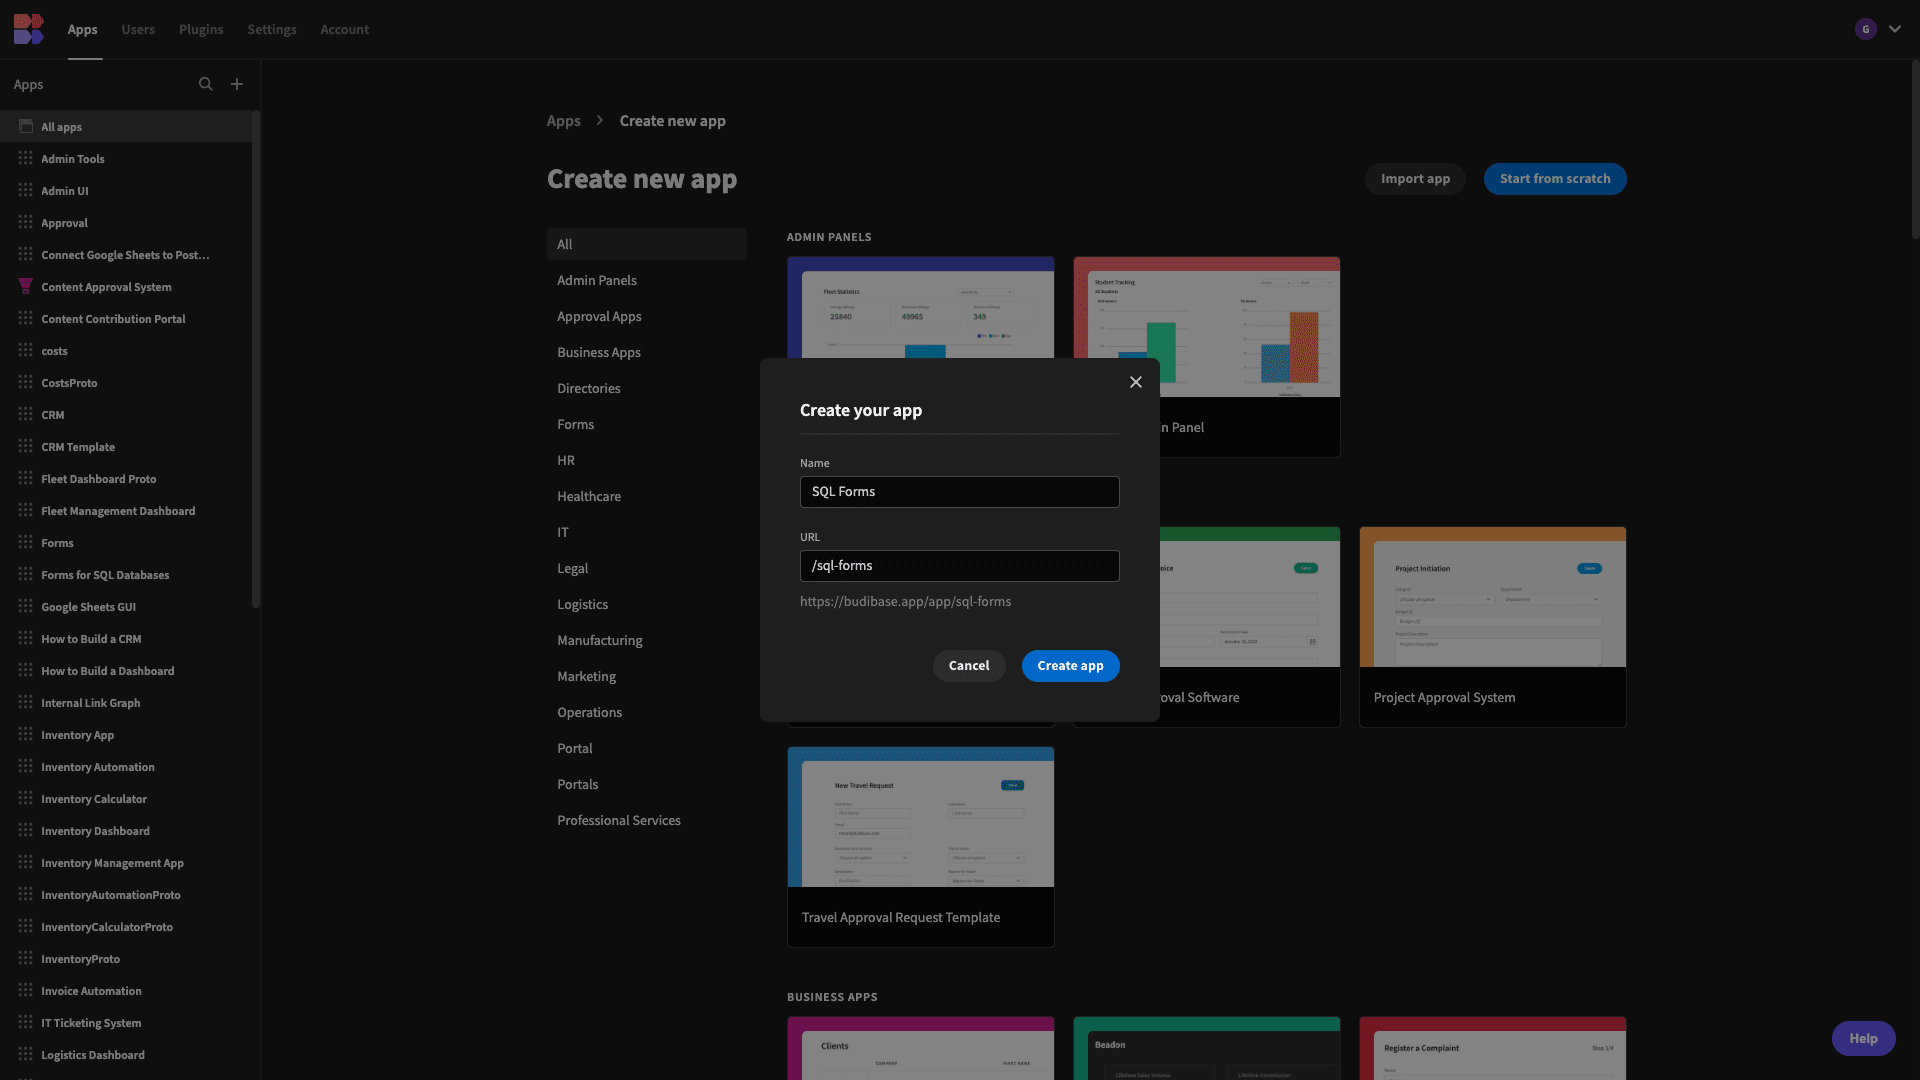
1. Connect to our database
Once we’ve created our app, the first thing we need to do is choose a data source. Budibase offers its own internal database, as well as a range of relational and non-relational DBMSs - along with Google Sheets, Airtable, REST APIs, and more.
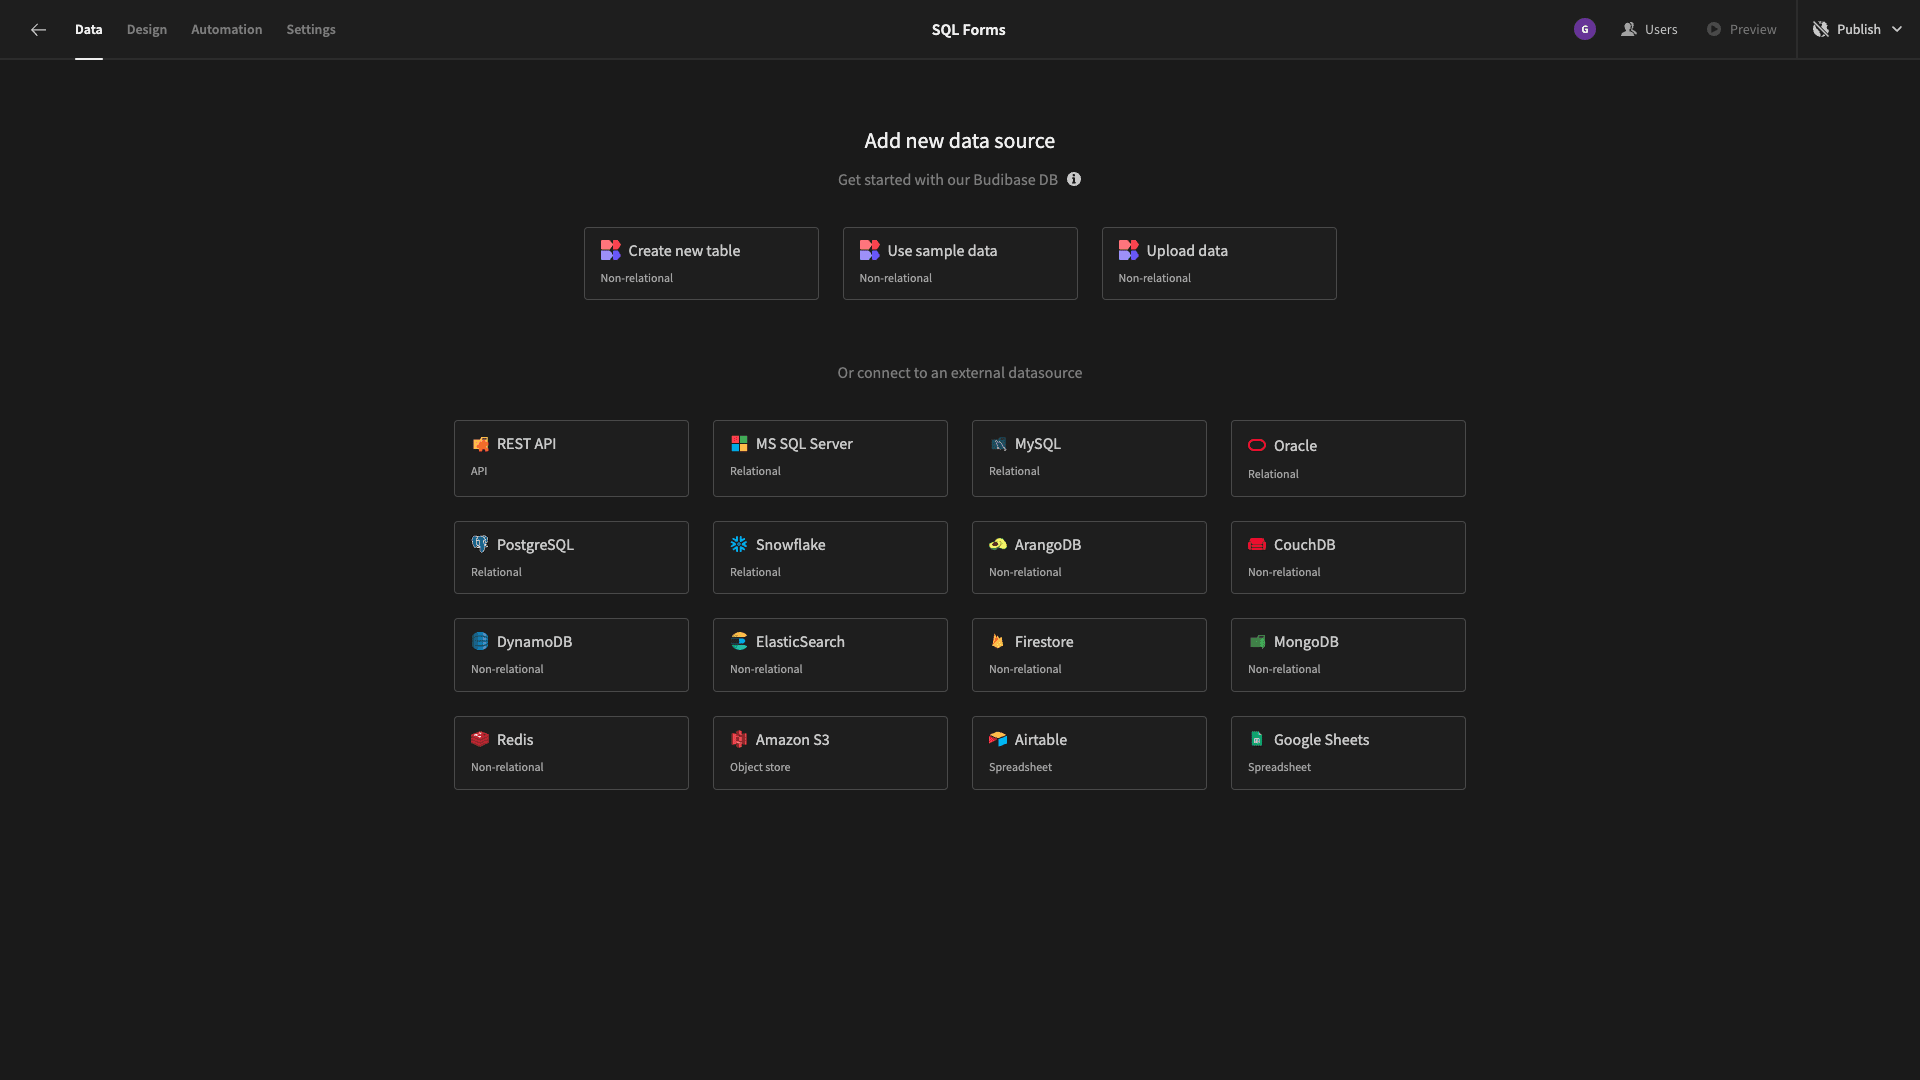
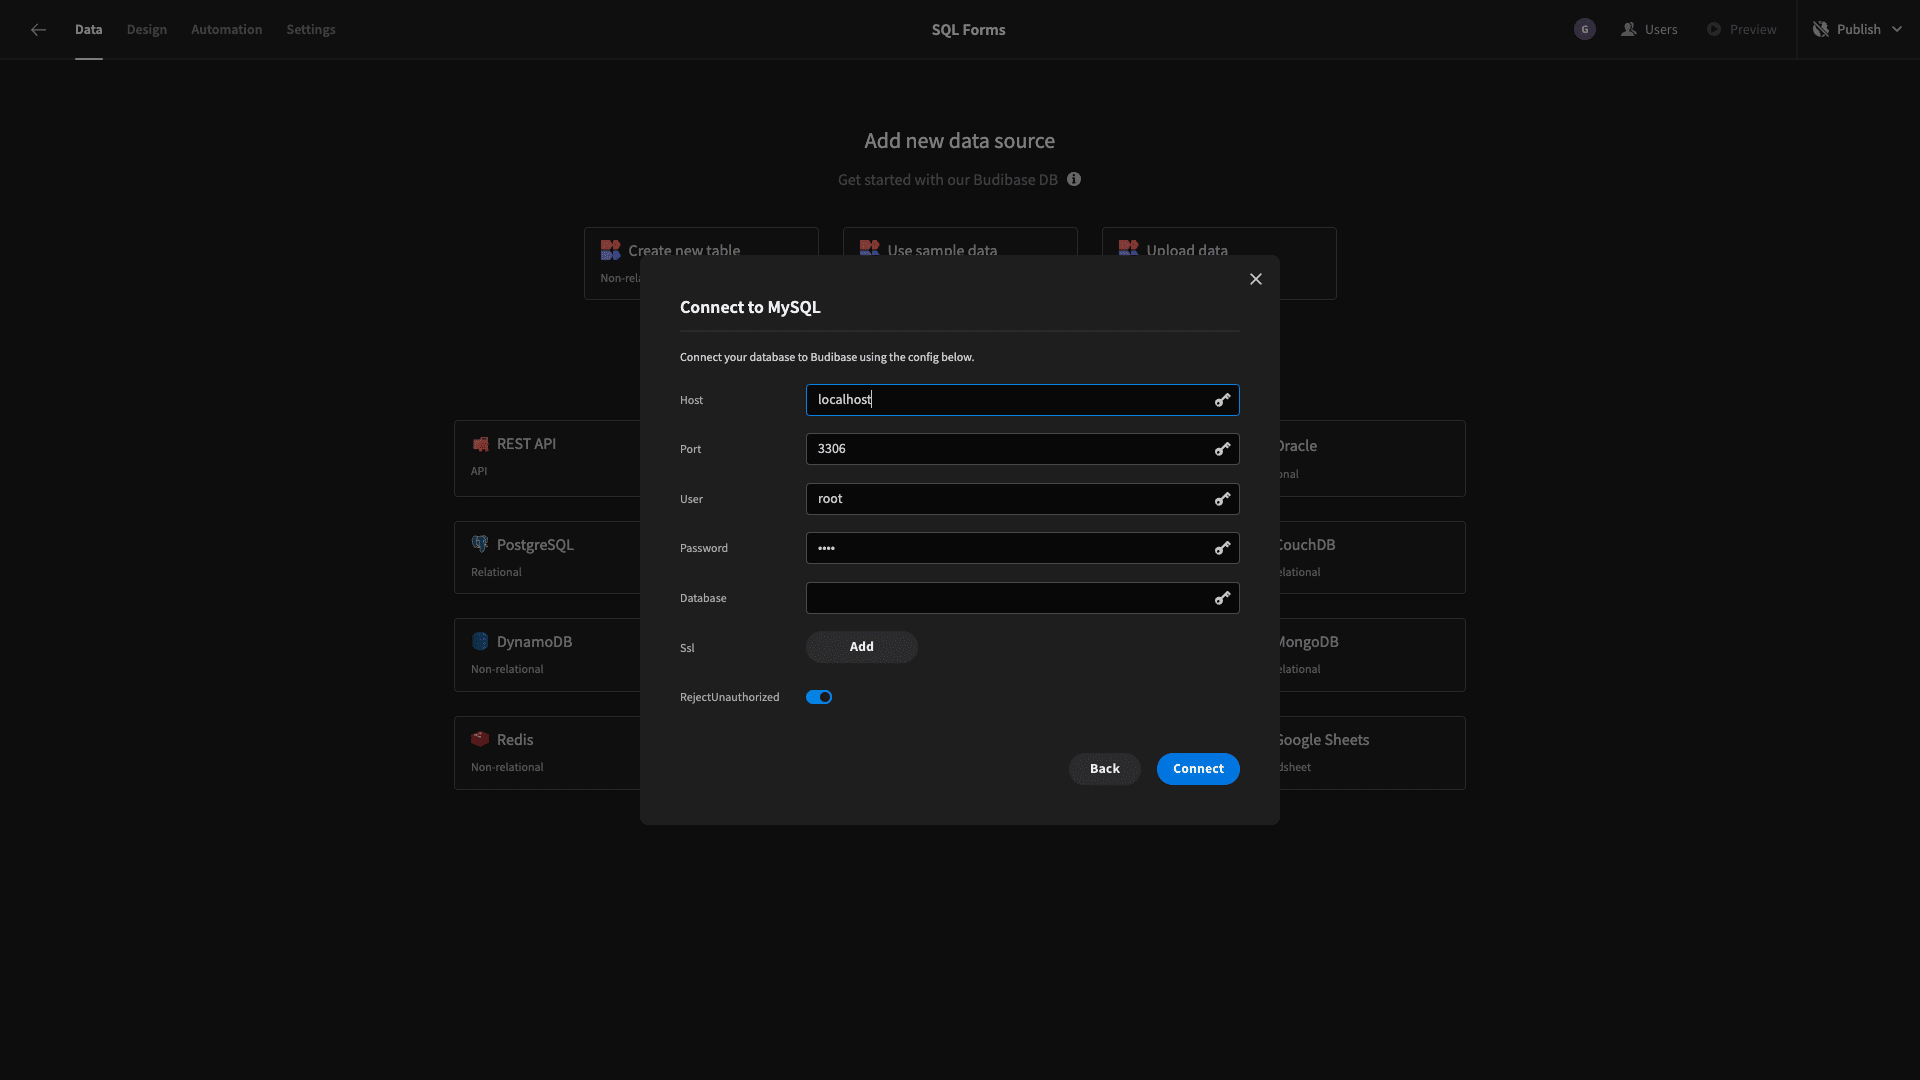
We’re using MySQL. When we choose this, we’re prompted to input our config details:
We then have the option of choosing which of the tables within our database we want to fetch - pulling them into Budibase.
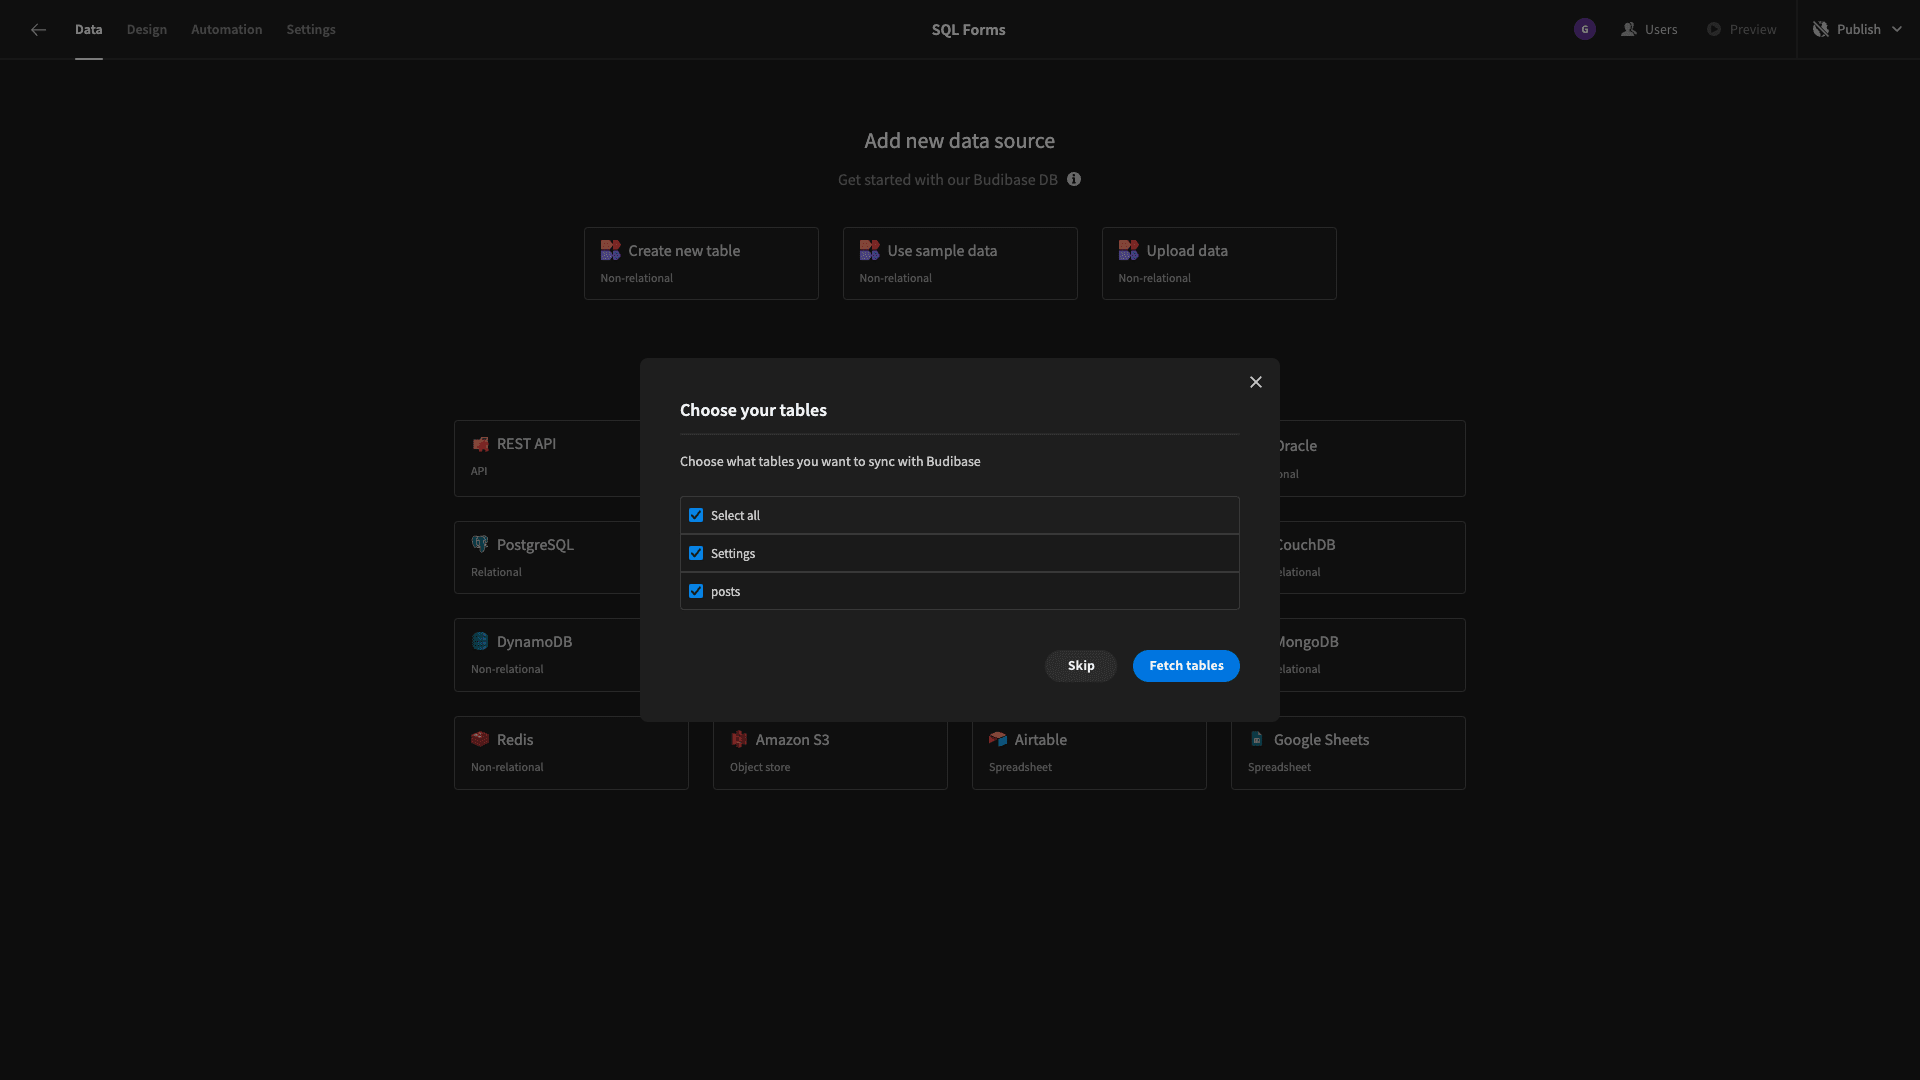
Our database only has two tables, and we want both of them. Straight away, we can edit our data and the schema of each table within the backend of Budibase:
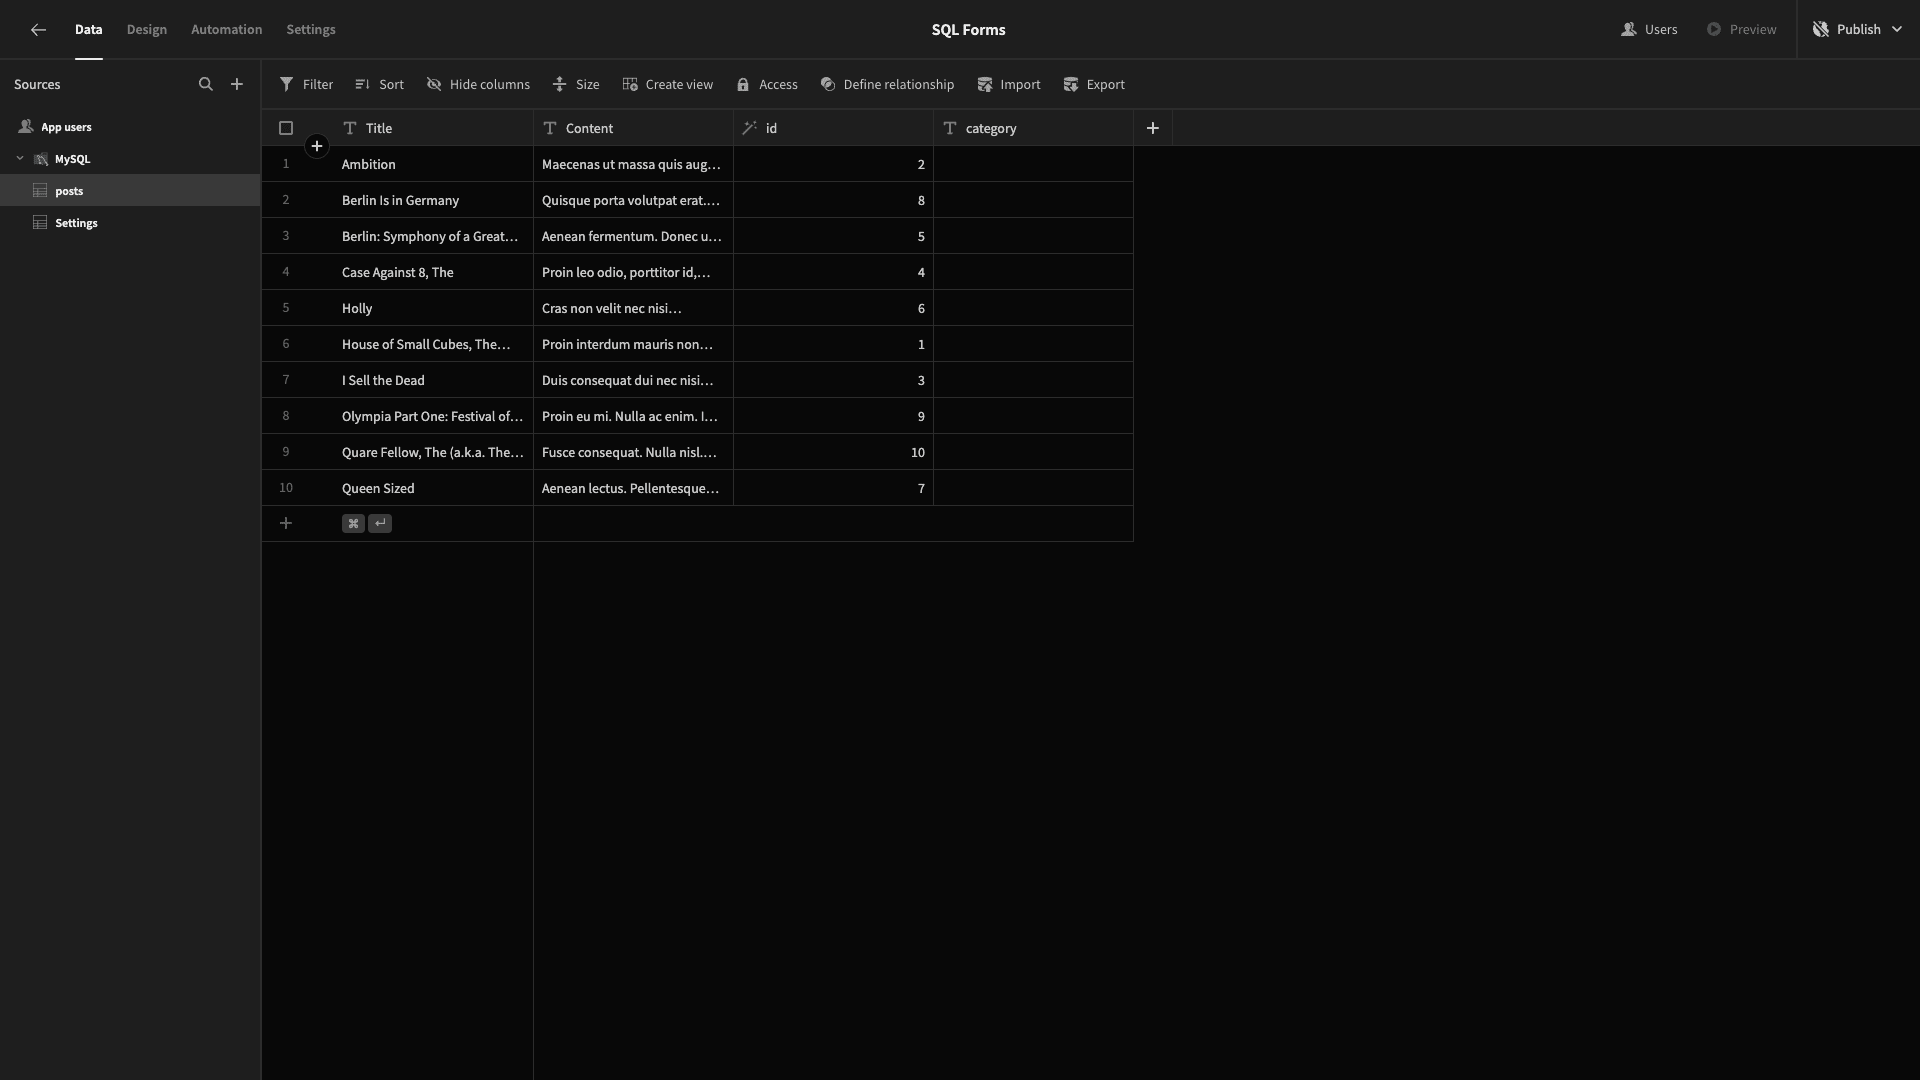
But, that’s not an experience we can roll out to users.
Let’s start building some SQL forms.
2. Autogenerate CRUD screens
We’ll start by building our two CRUD screens. In Budibase, we can autogenerate these for connected SQL databases or internal tables. Head over to the design tab and we’ll be prompted with three options.
We can create a screen from scratch - or we can generate a table or grid screen.
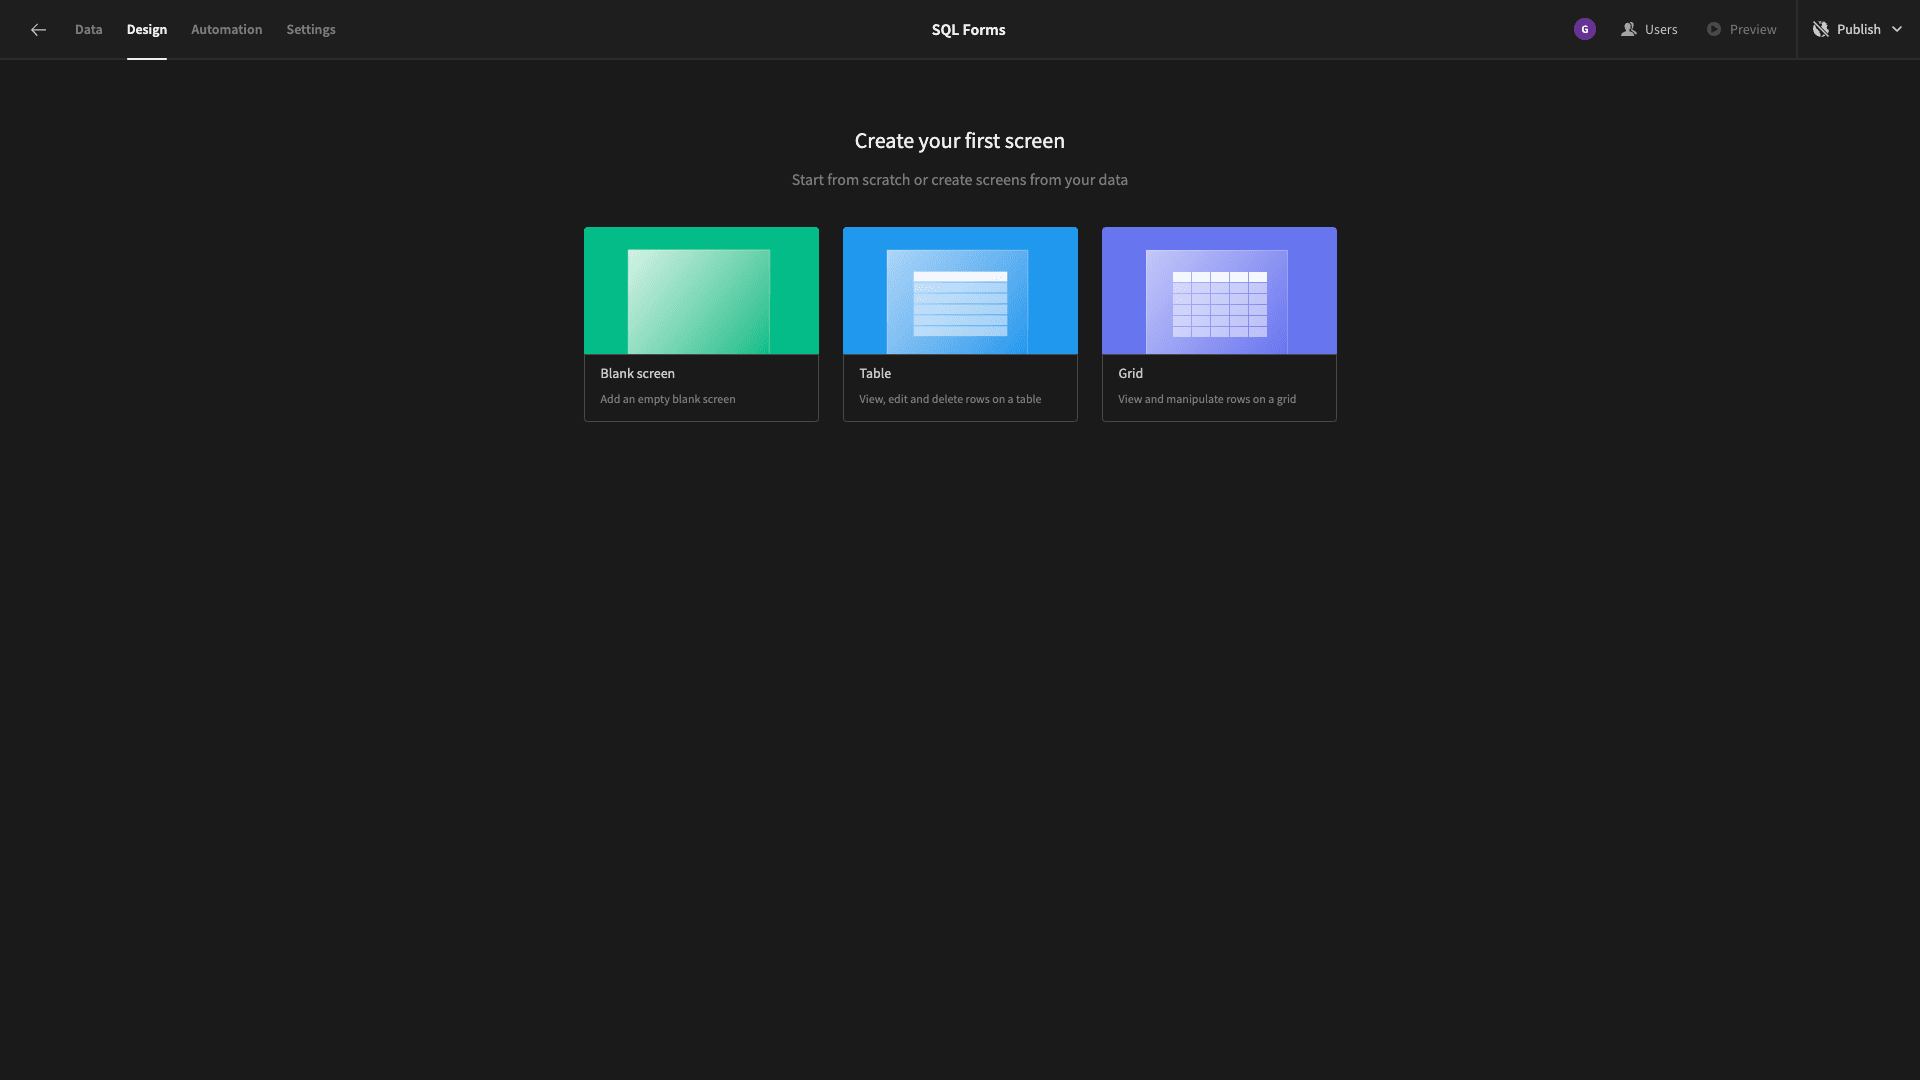
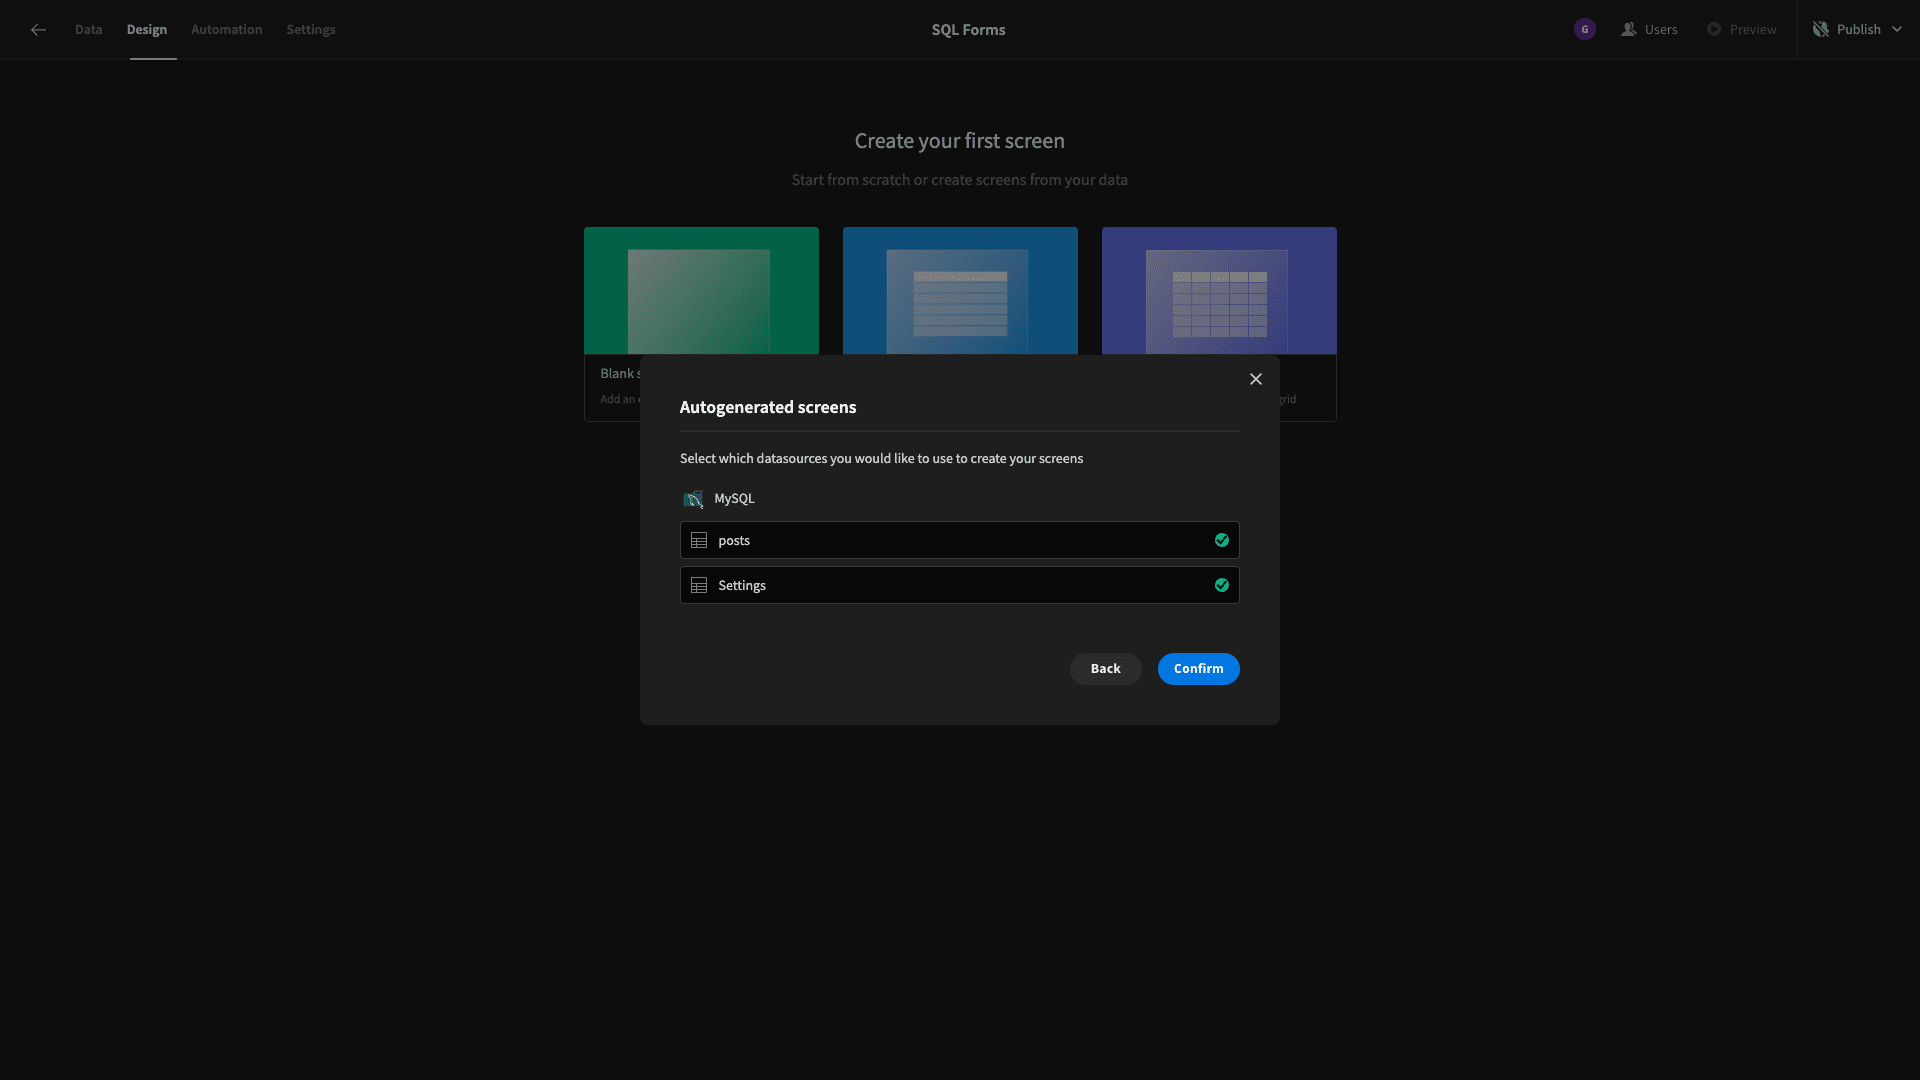
We’re choosing table. Then, we’re prompted to select which of our connected data sources we’d like to generate a CRUD screen for. We’ve selected both:
Here’s what we have so far:
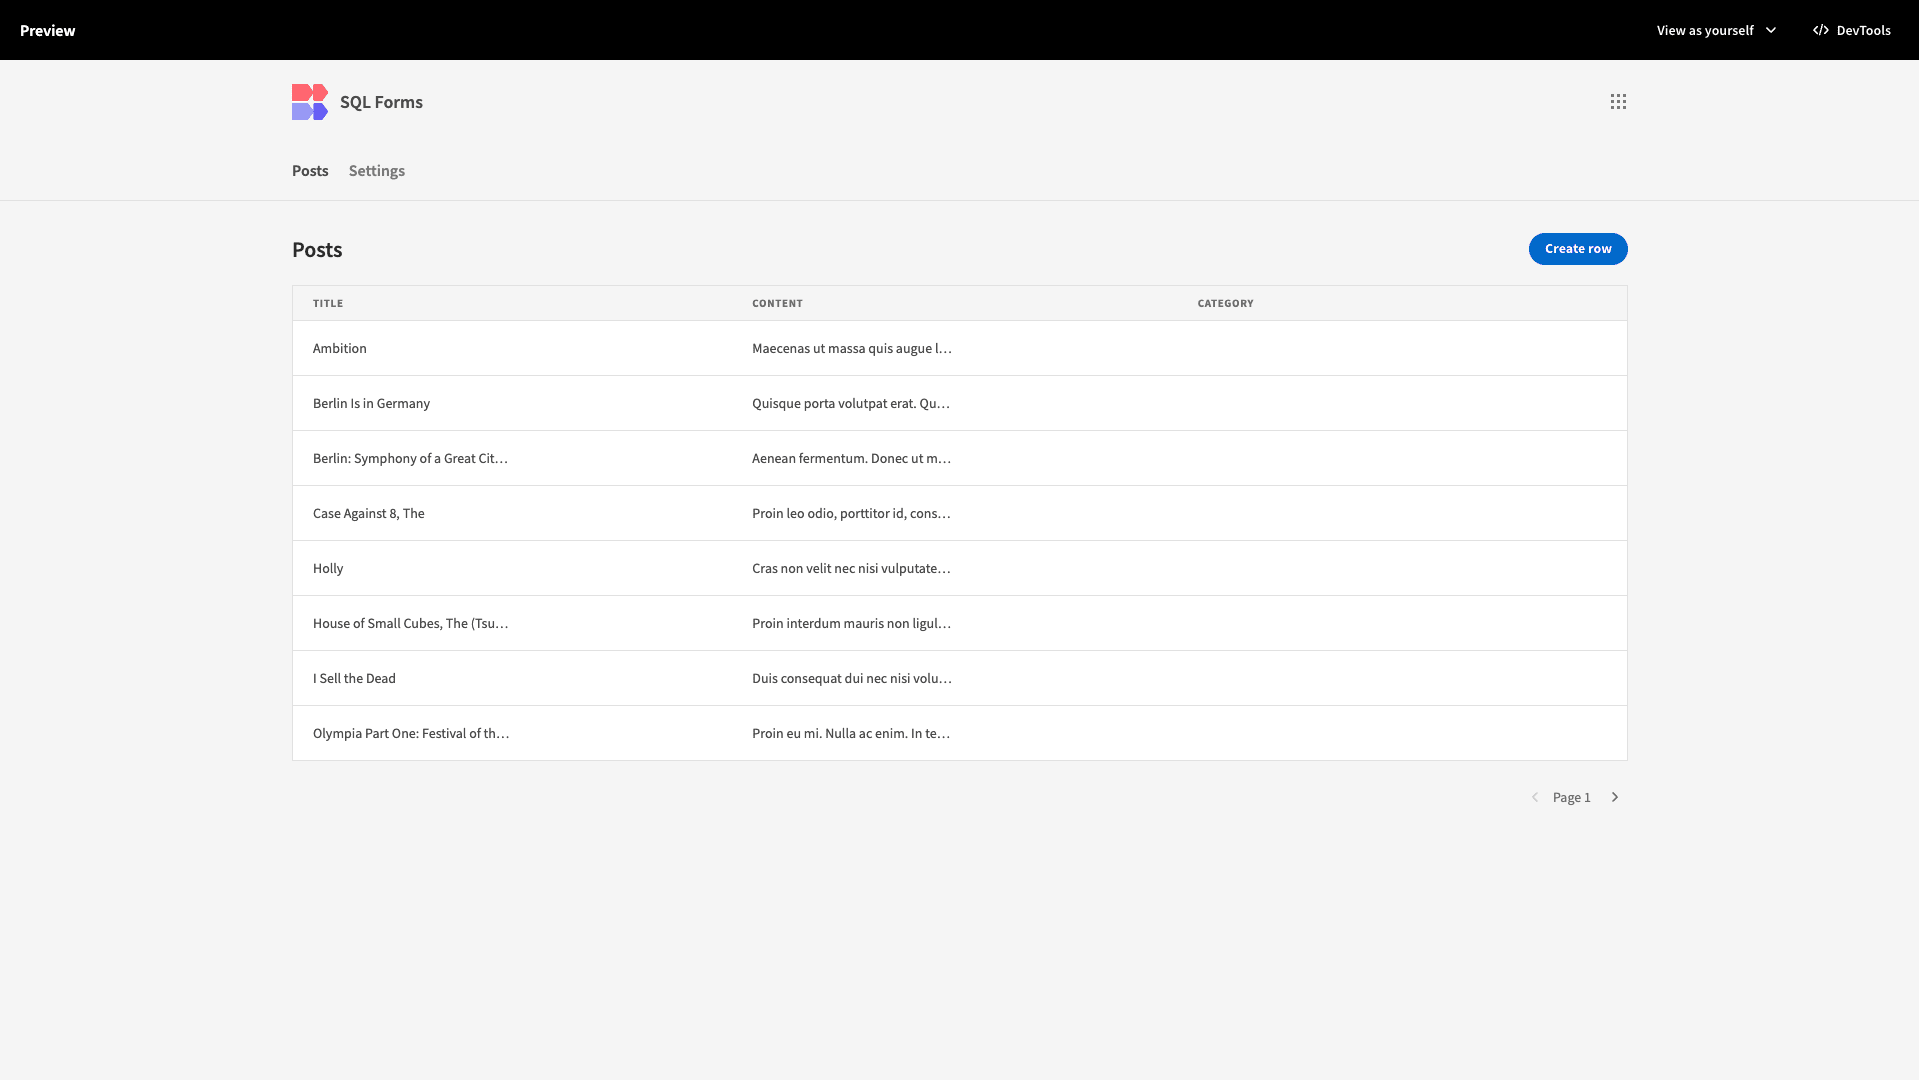
We can view all of the records in our table, click on any row to access an update form, or use the Create row button to add a new entry.
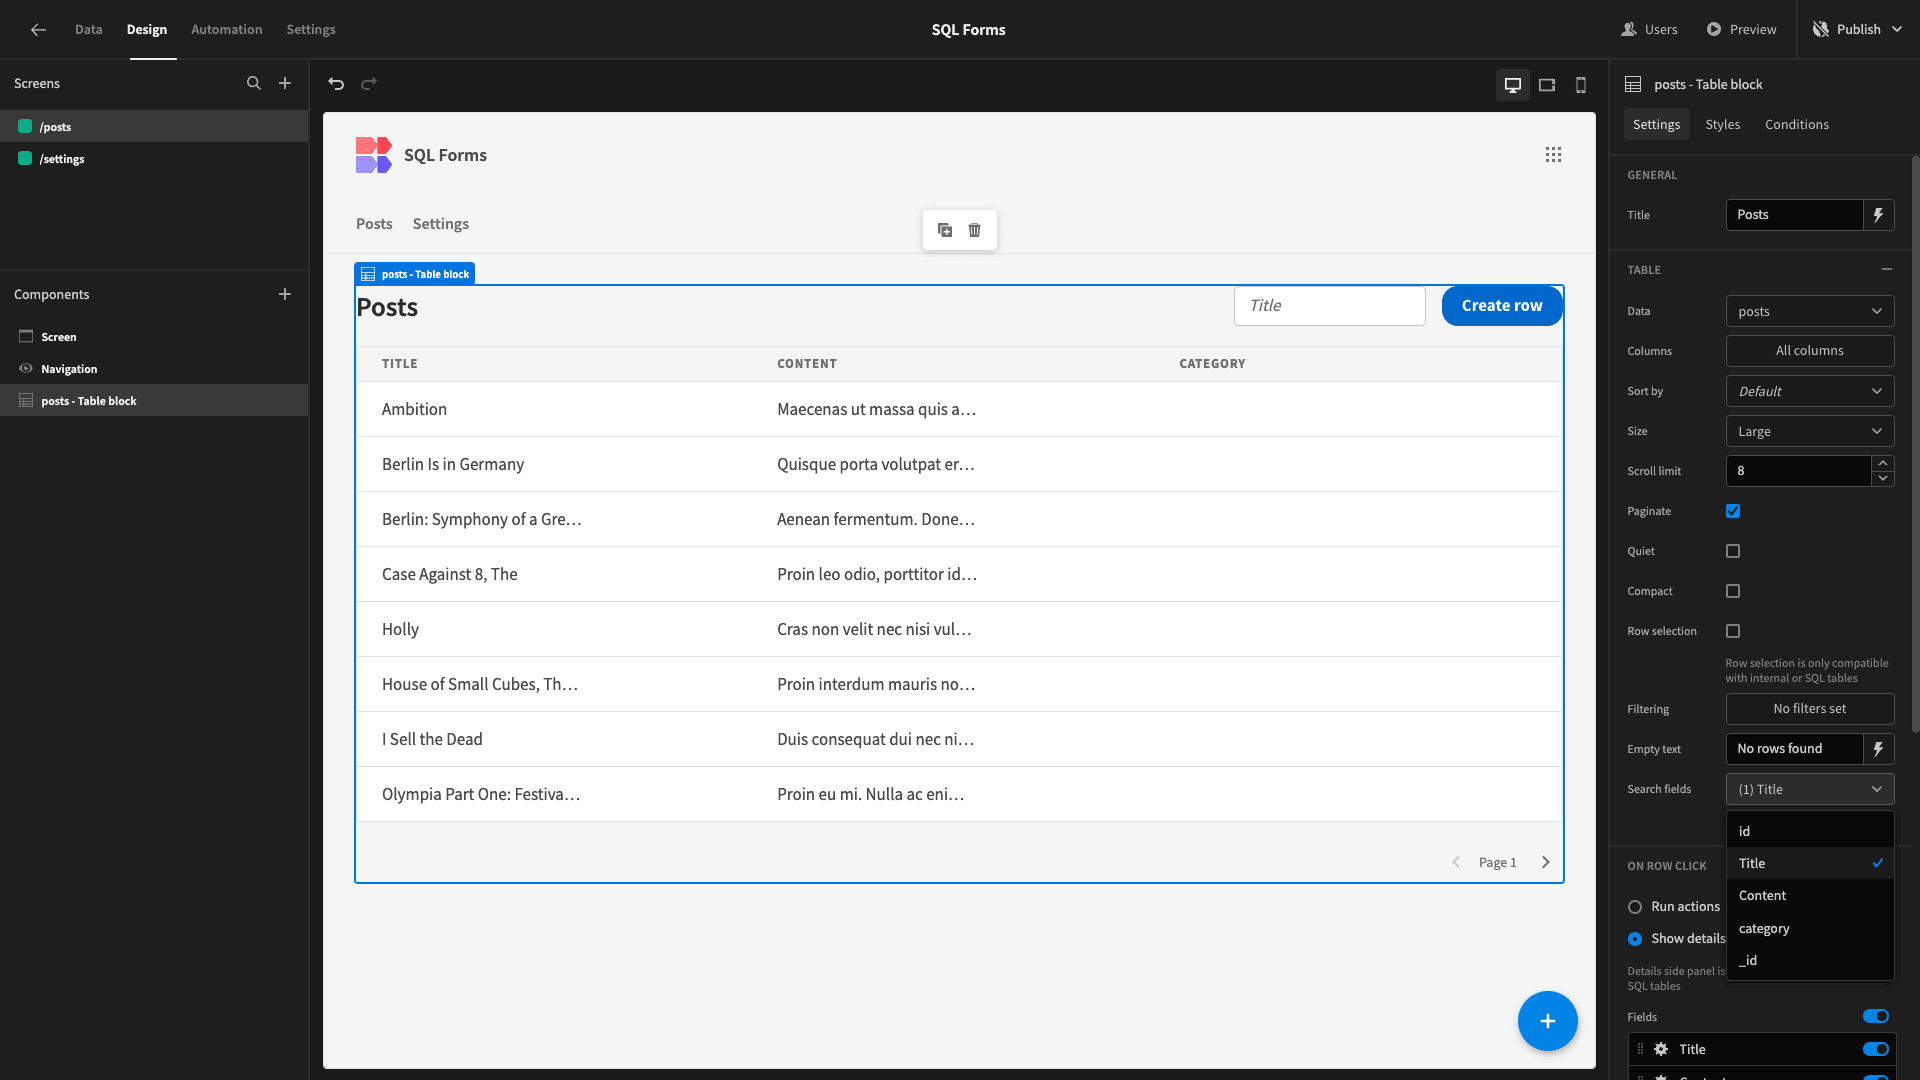
We can also add form fields for searchability using the search fields dropdown:
3. Build a custom create form
We’re going to leave our update form as it is. But, we’re going to completely replace our form for creating a new row. At present, clicking through to this opens up a side panel on each of our CRUD screens:
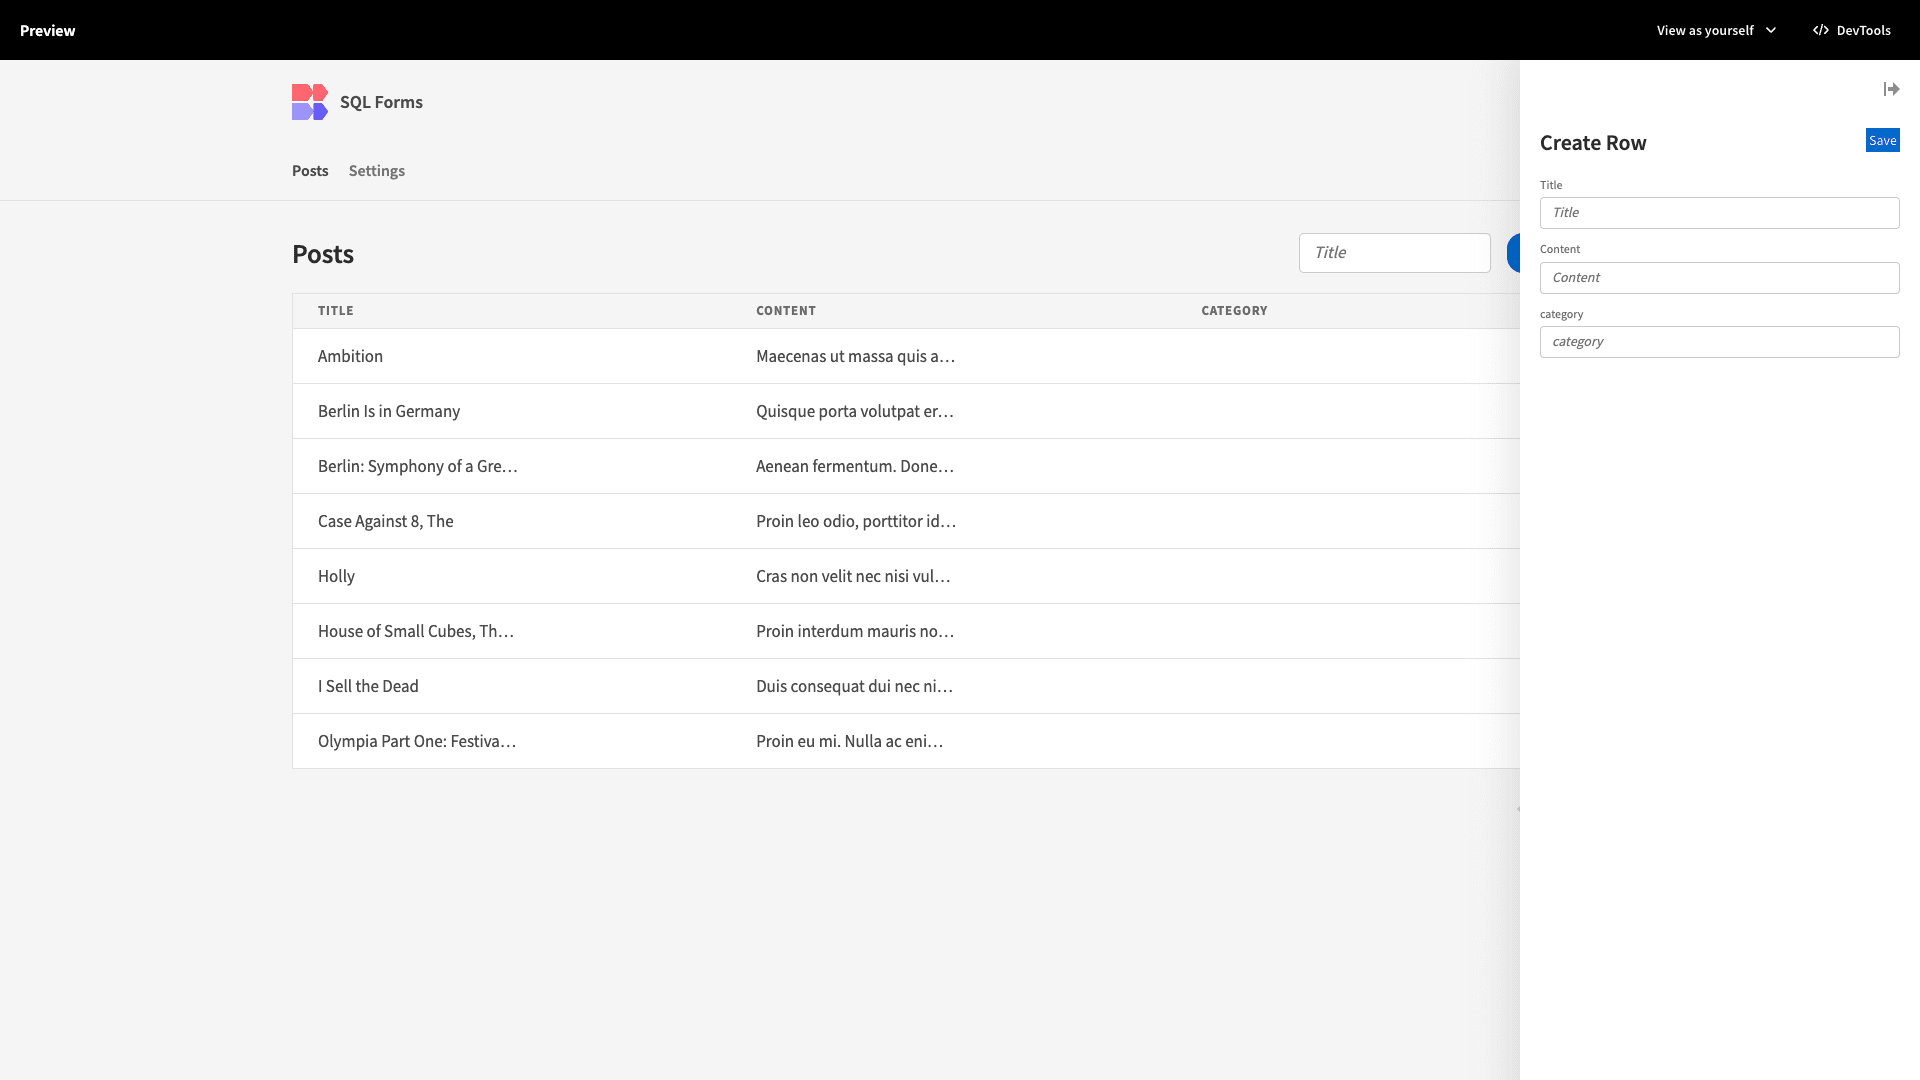
Naturally, this isn’t a great experience for writing a blog post. Instead, we want a multi-step form on its own dedicated screen.
But, the first thing we’re going to do is adjust our data model slightly. Remember, we’re using MySQL. All of our fields are stored in our database as TEXT fields.
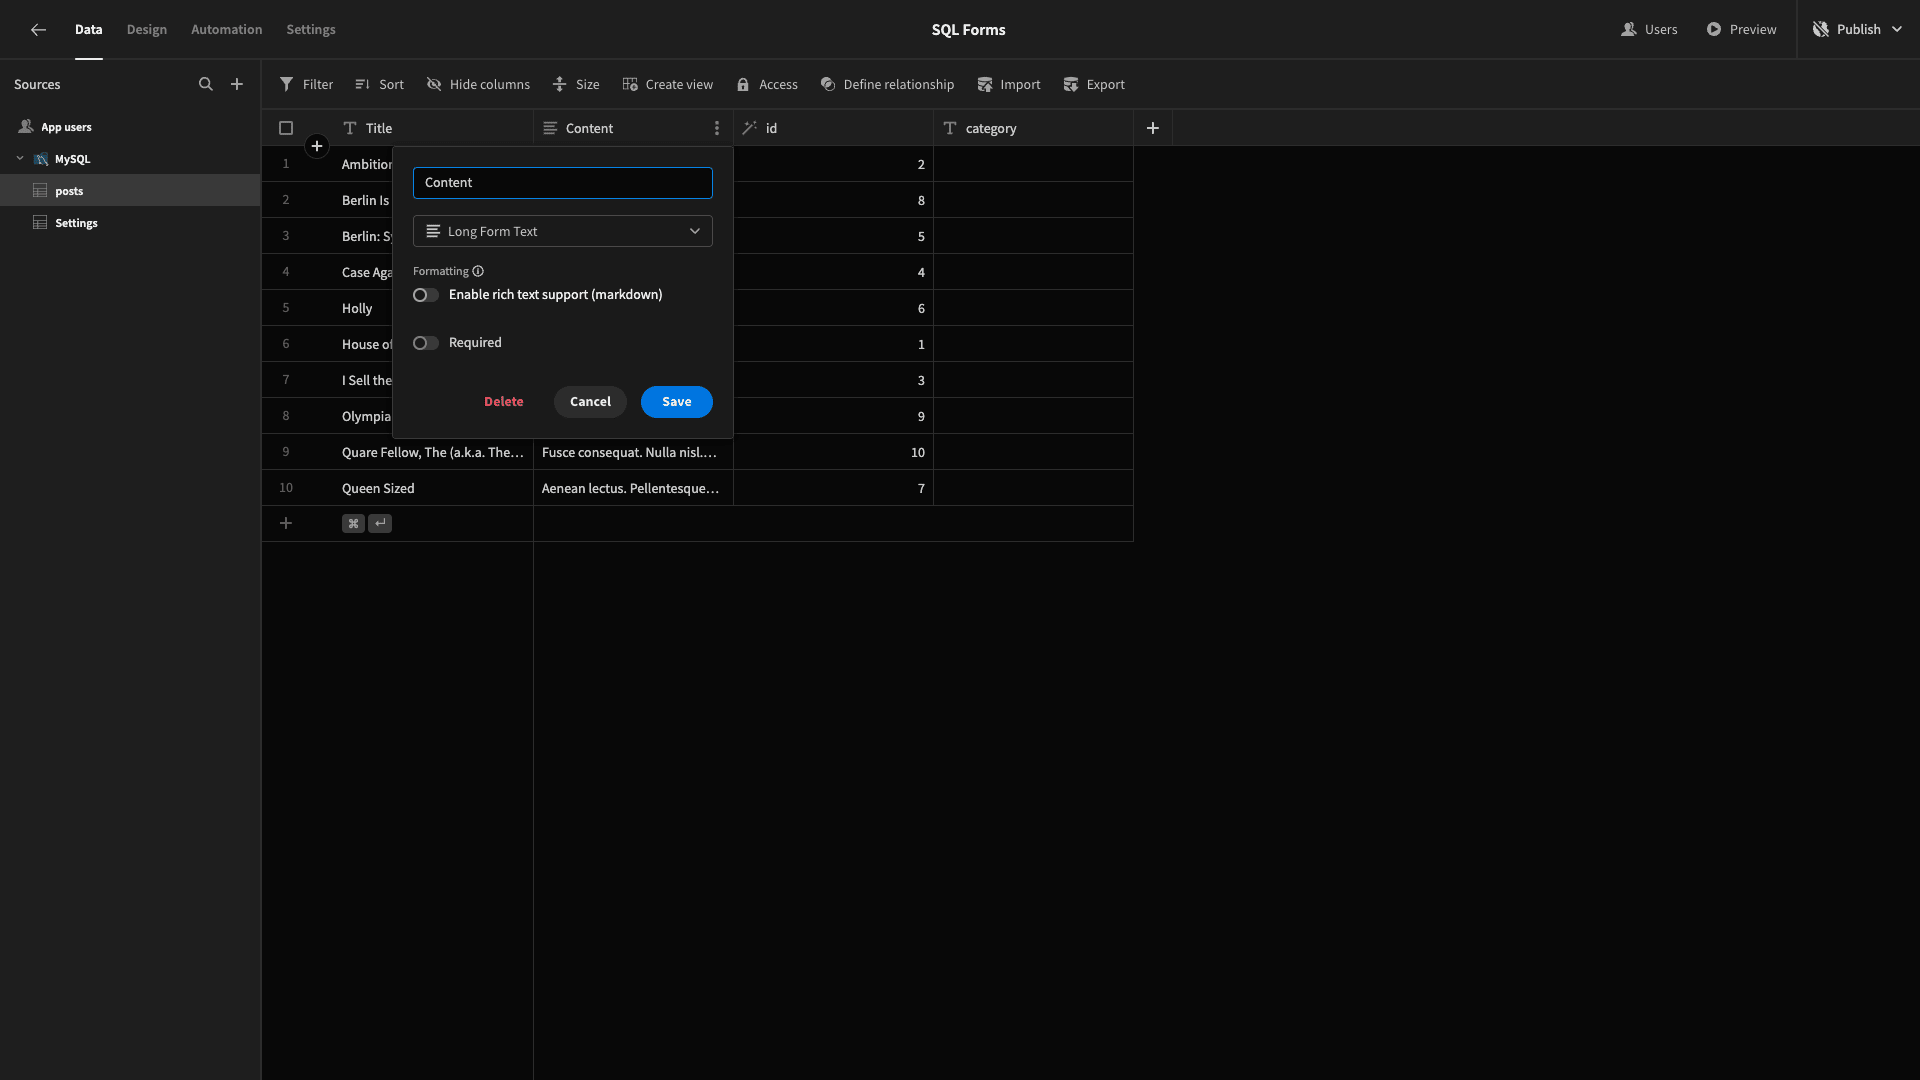
But, we want to tell Budibase that the content attribute is a long-form text field. This will allow us to use slightly different front-end elements when we generate our new form.
We can access this dropdown by hitting edit alongside any field in the data tab:
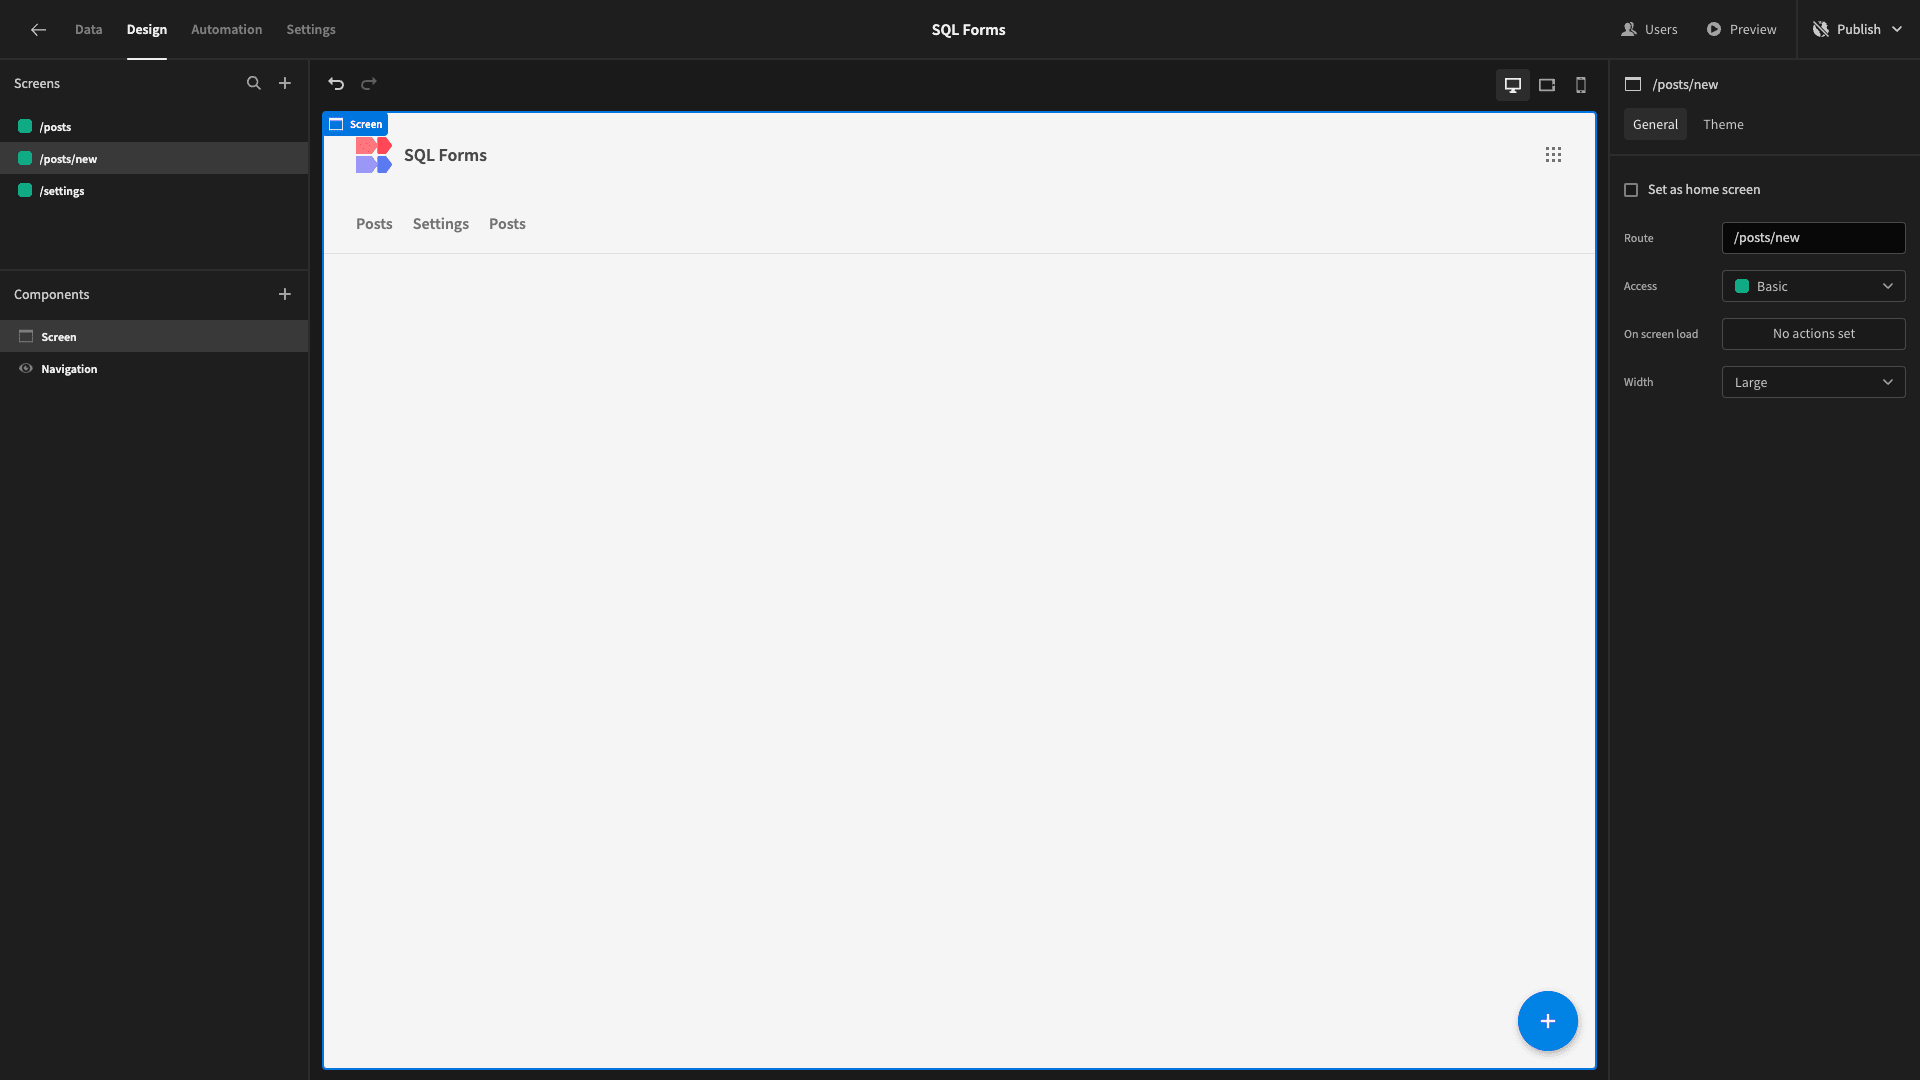
Now, head back to the design tab, and we’ll create a new blank screen with its URL slug set to /posts/new.
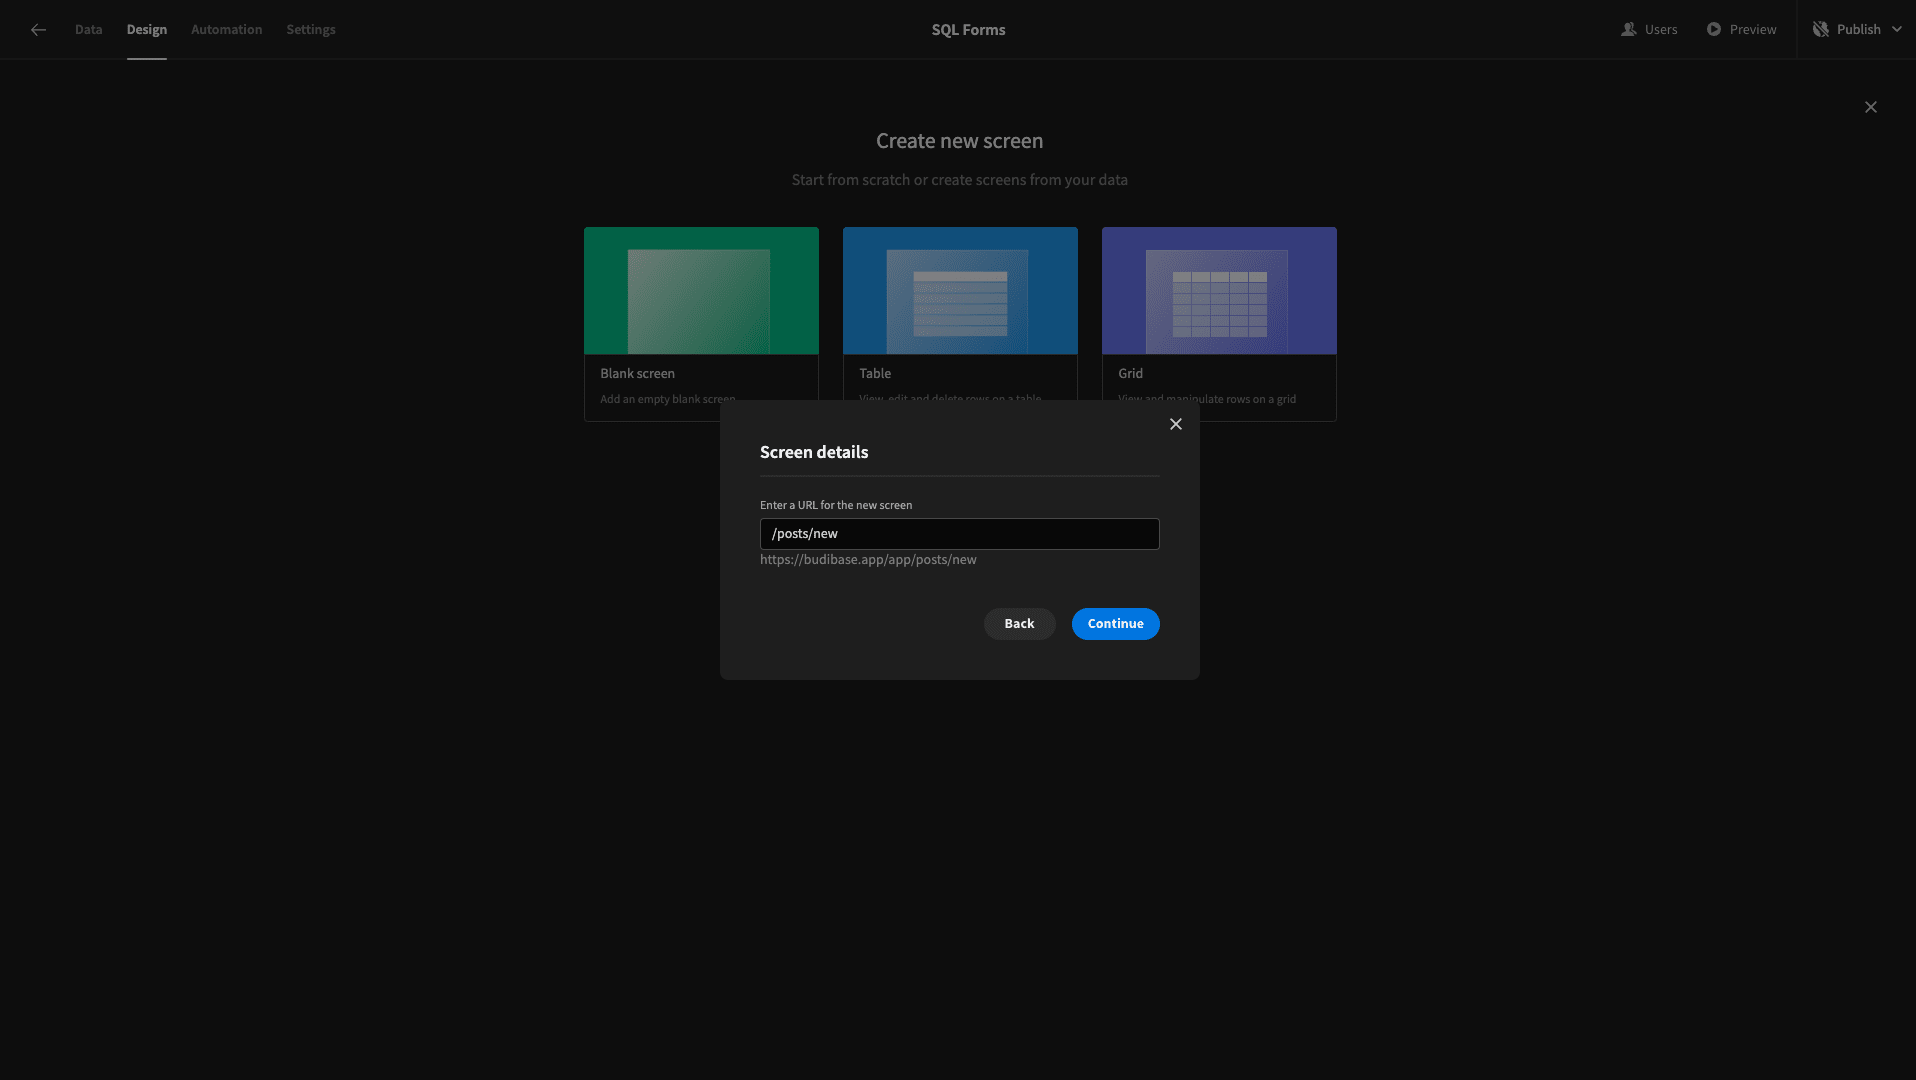
Here’s what this will look like:
We want a multi-step form with two steps. The first will let the user choose a title for their post. The second will allow them to input their content, choose a category, and save the new blog article to the database.
We’ll start by adding a multi-step form block. As the name suggests, this creates a multi-step form for whichever data source we point it at:
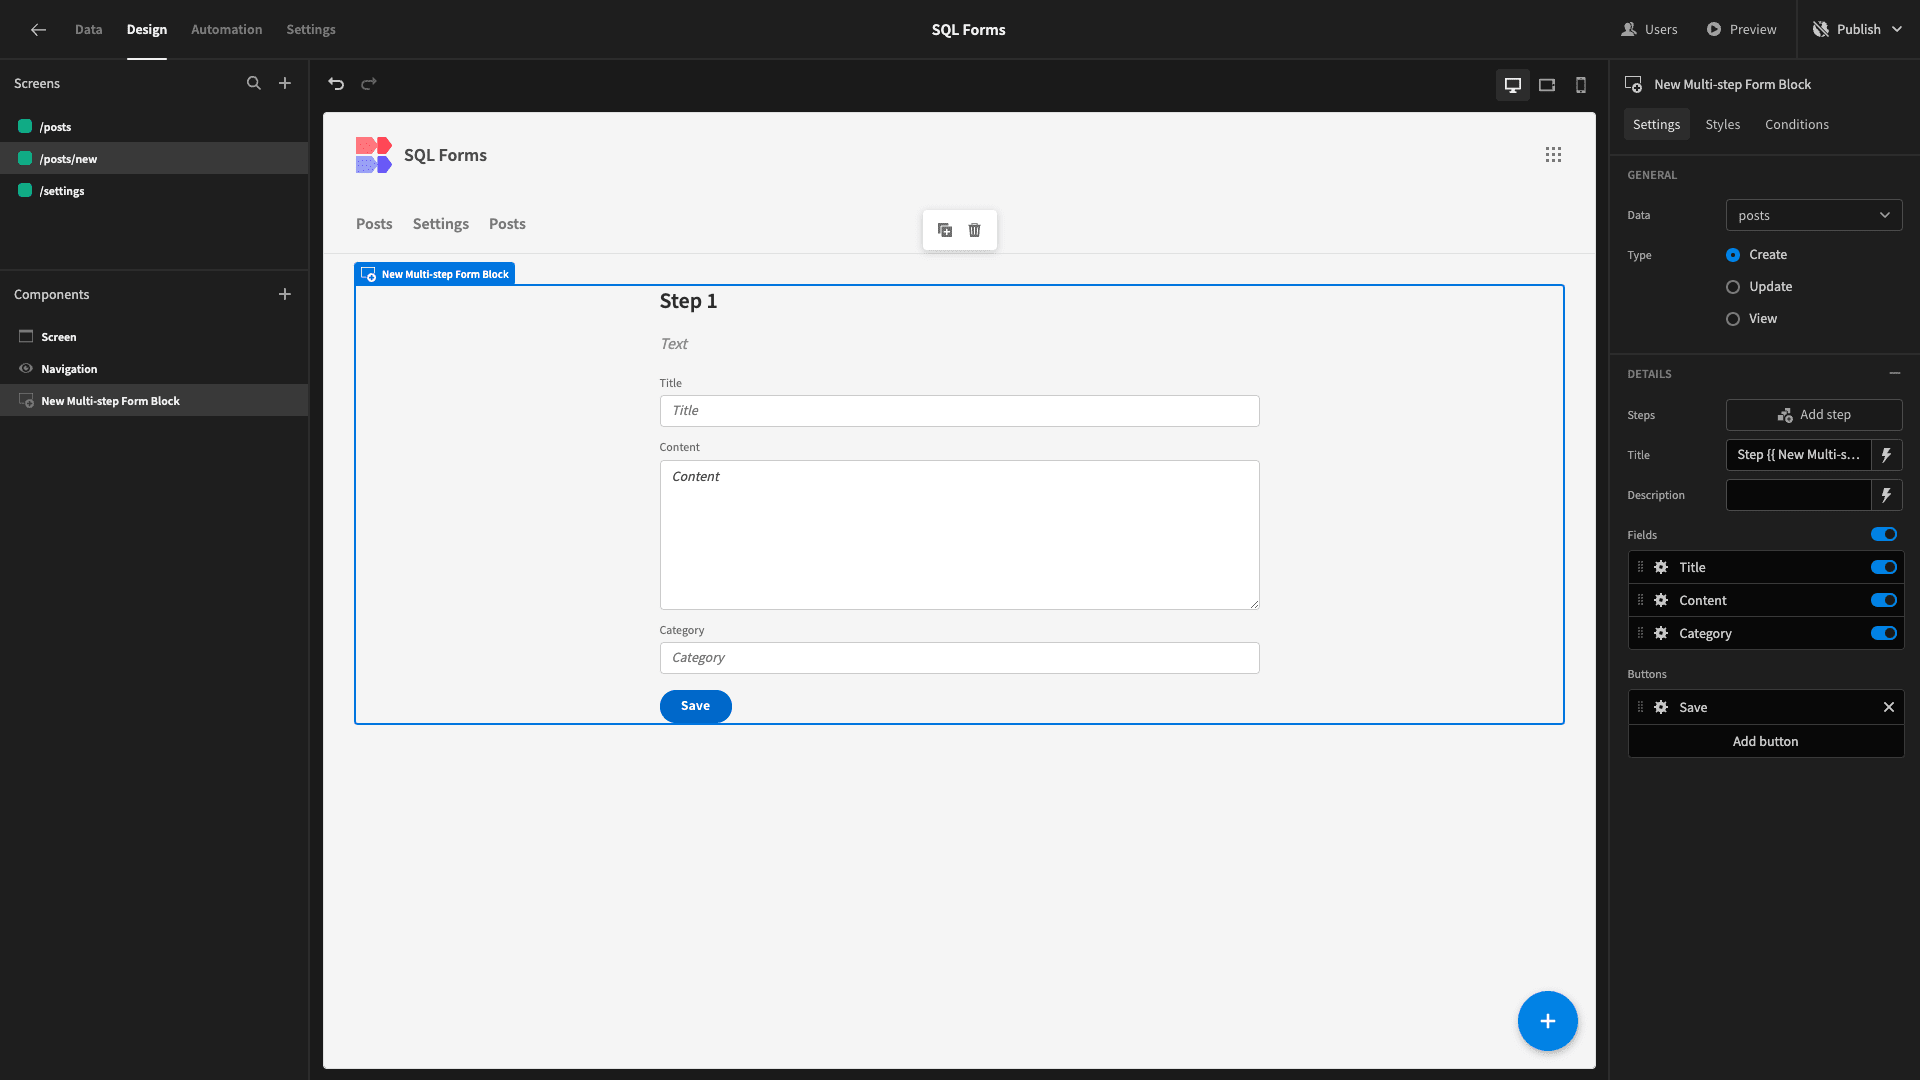
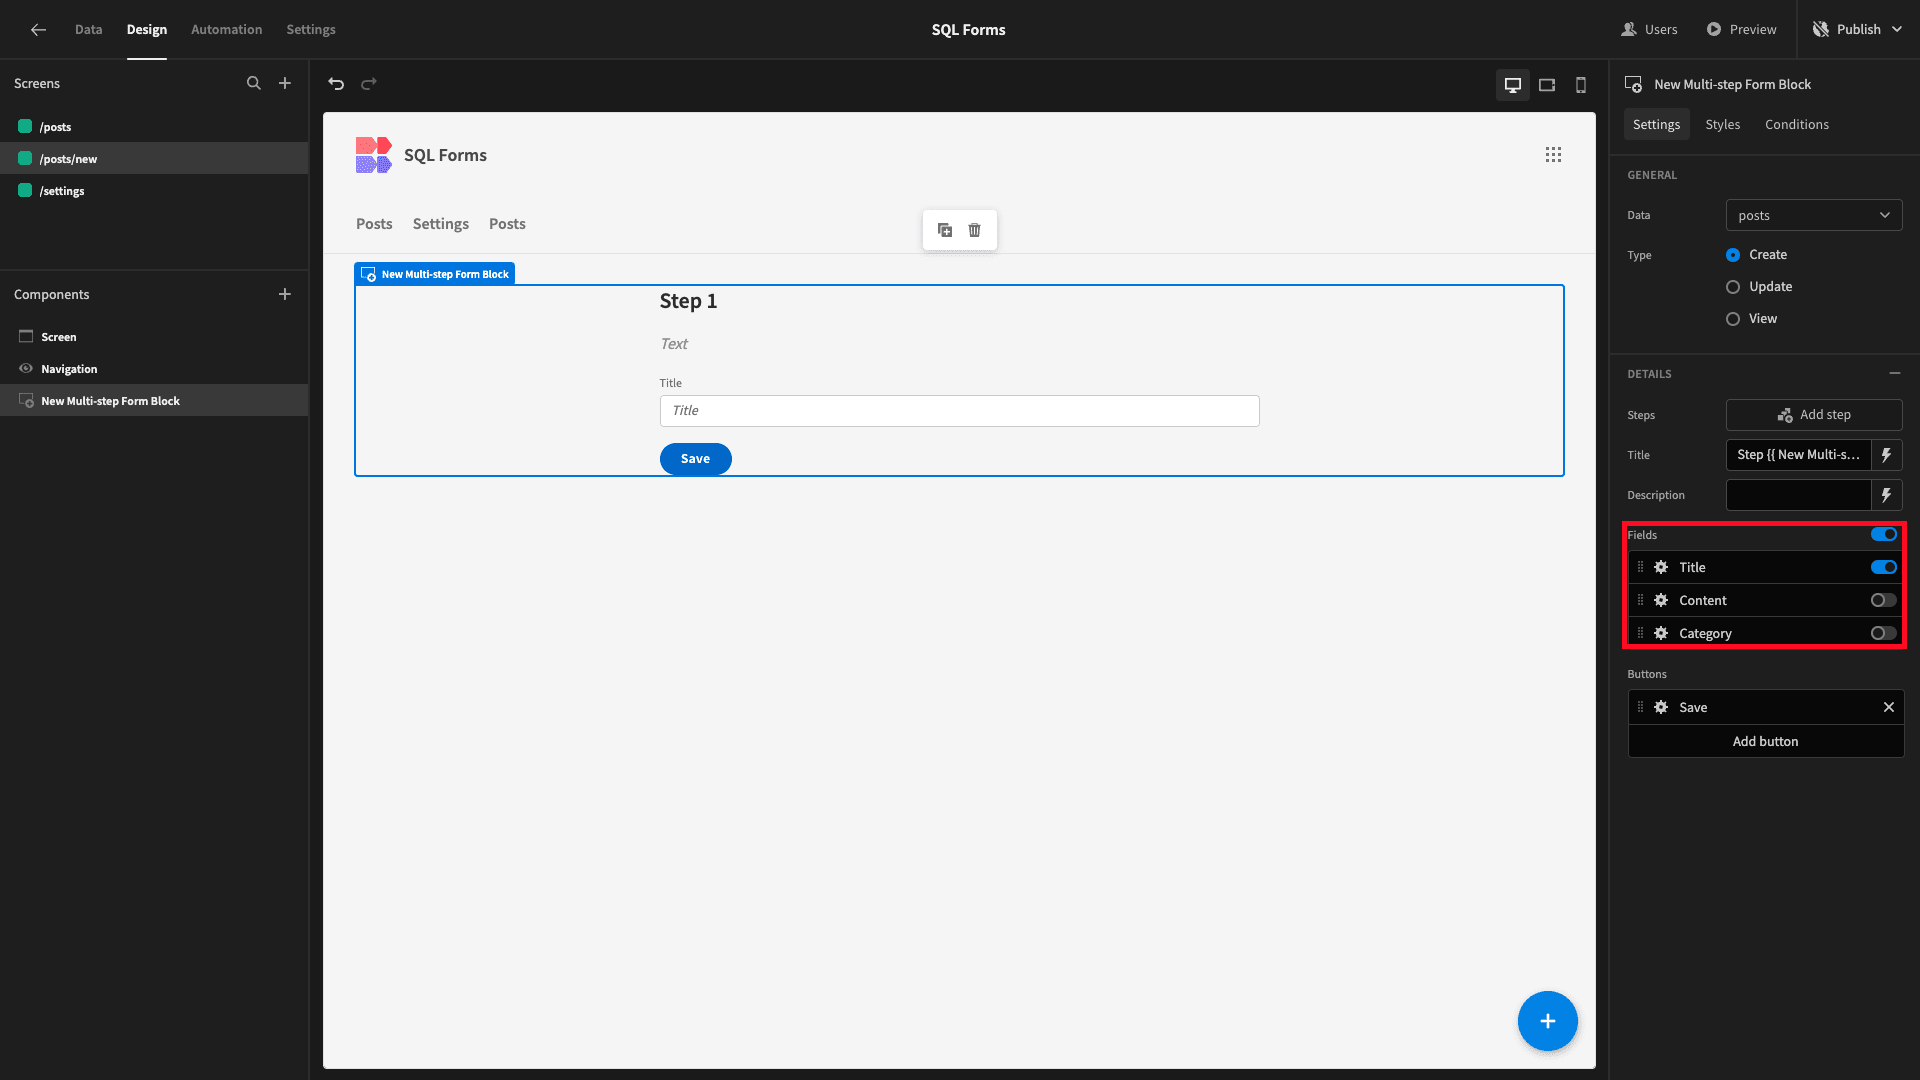
All we have to do is configure this to look how we want. The first thing we’ll do is configure which fields we want to display on each step. So, for step one, we’ll simply deselect Content and Category:
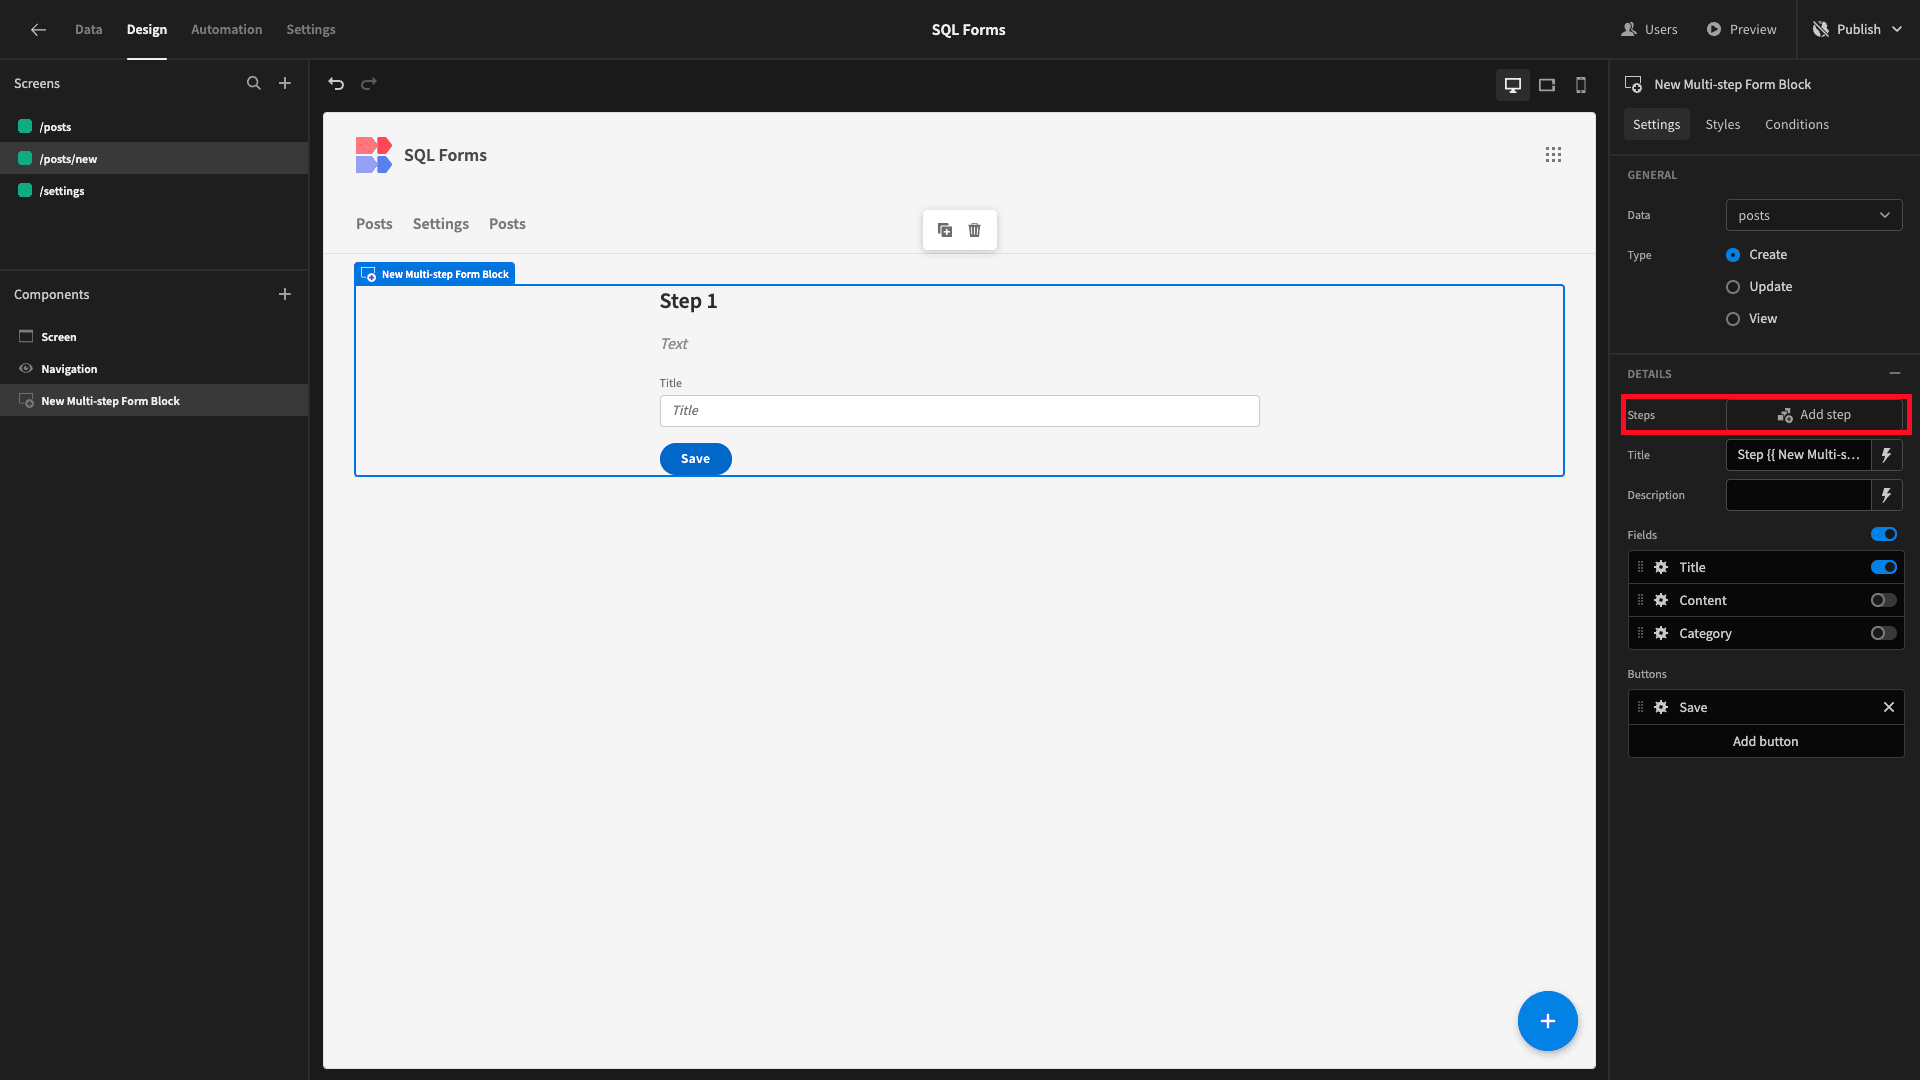
Then we’ll hit add step to create a second step:
This time, we’ll select our other two fields:

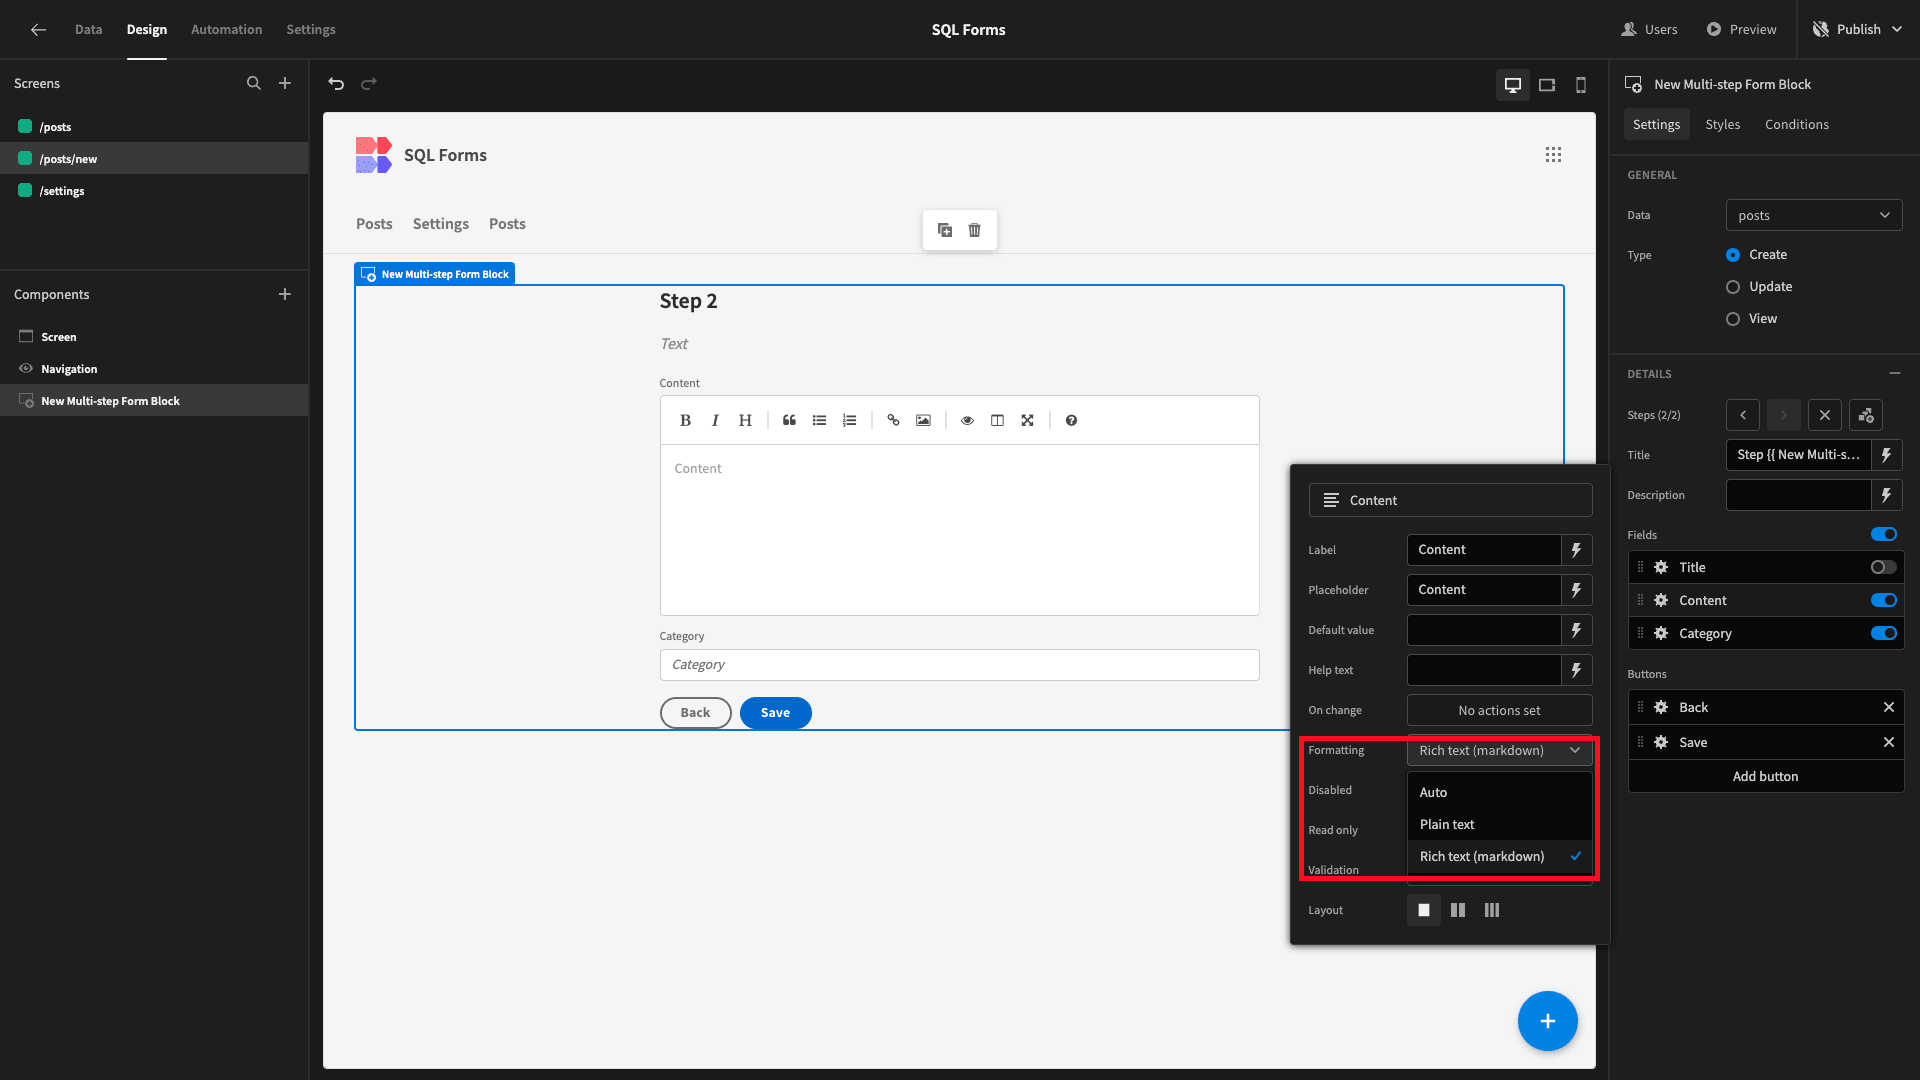
We’re going to make a few more tweaks for a better user experience. Our form is going to be used to create blog posts, so we want to give users the option to add markdown rather than just plain text for the body of their posts.
We can enable this under the settings menu for our Content field:
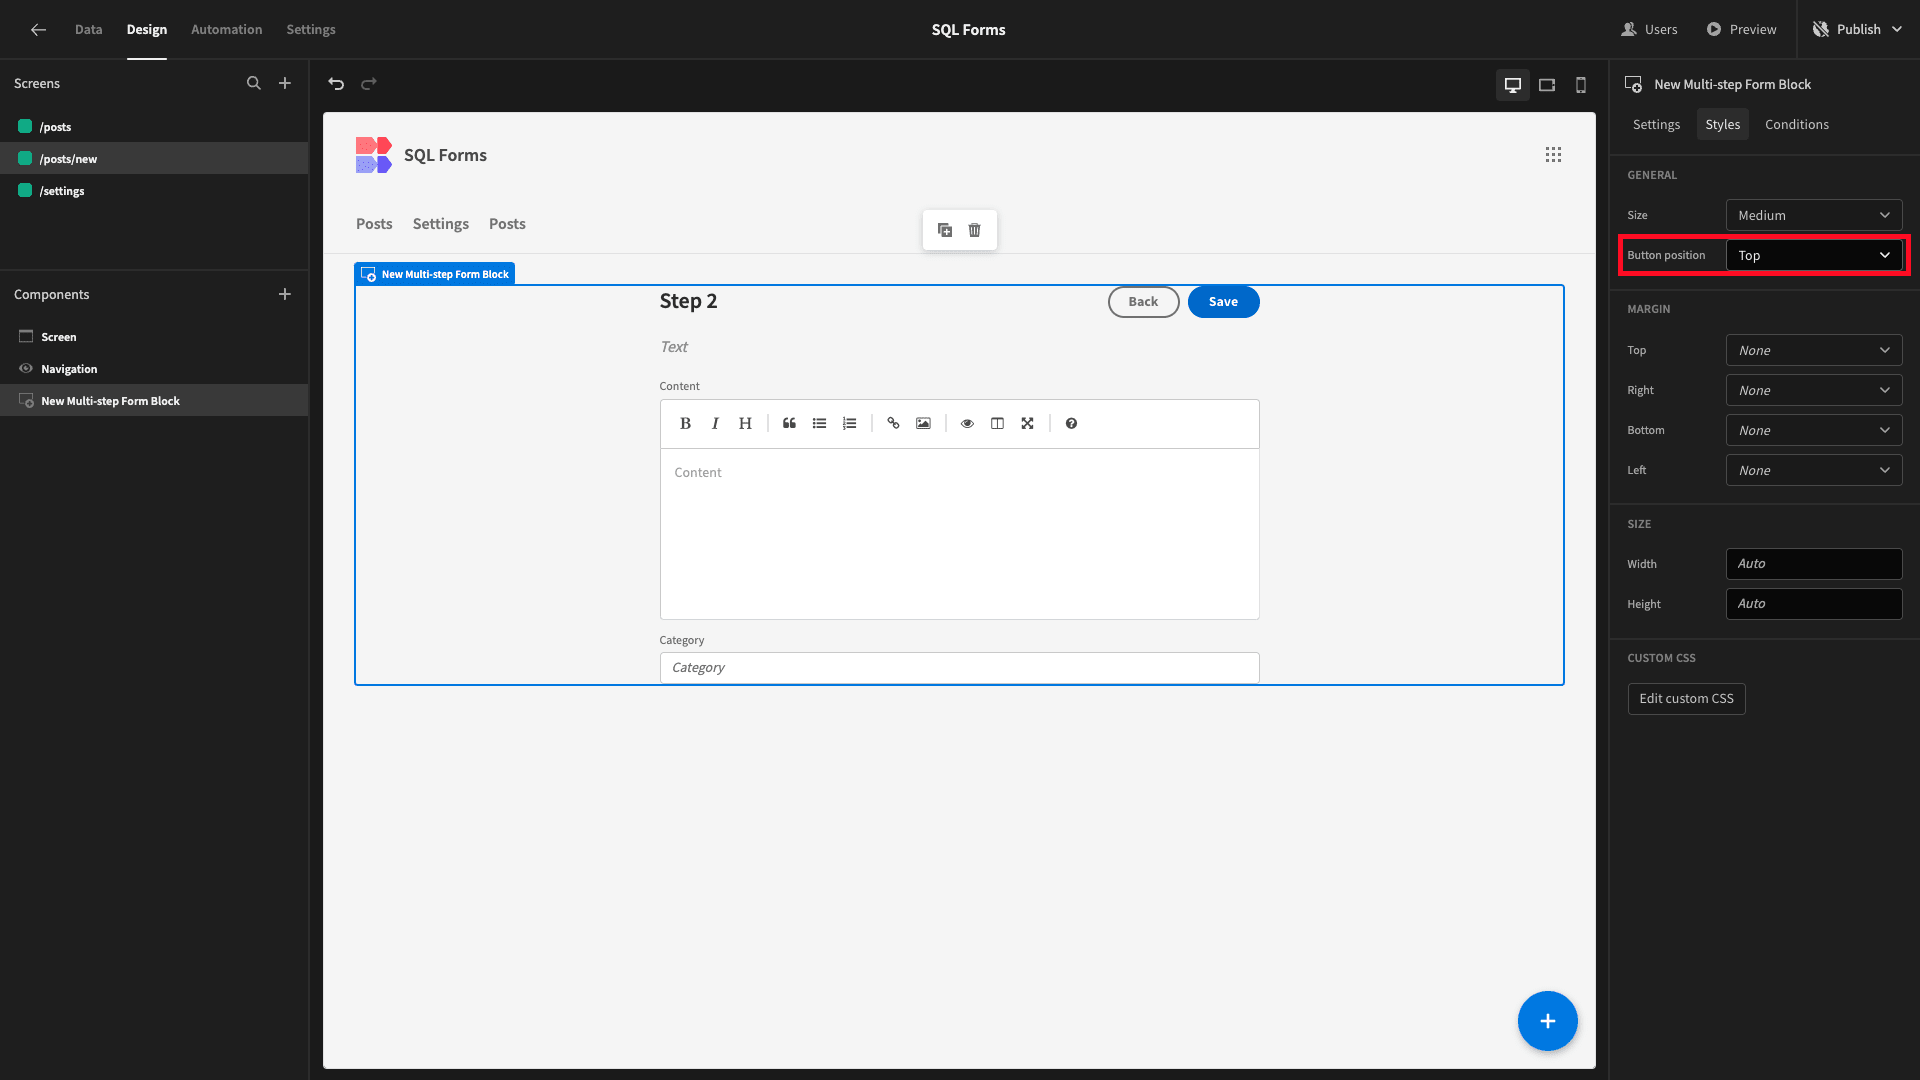
We’d also like our buttons to appear in-line with the step titles, rather than below the fold. So, under styles, we’ll set button position to top:
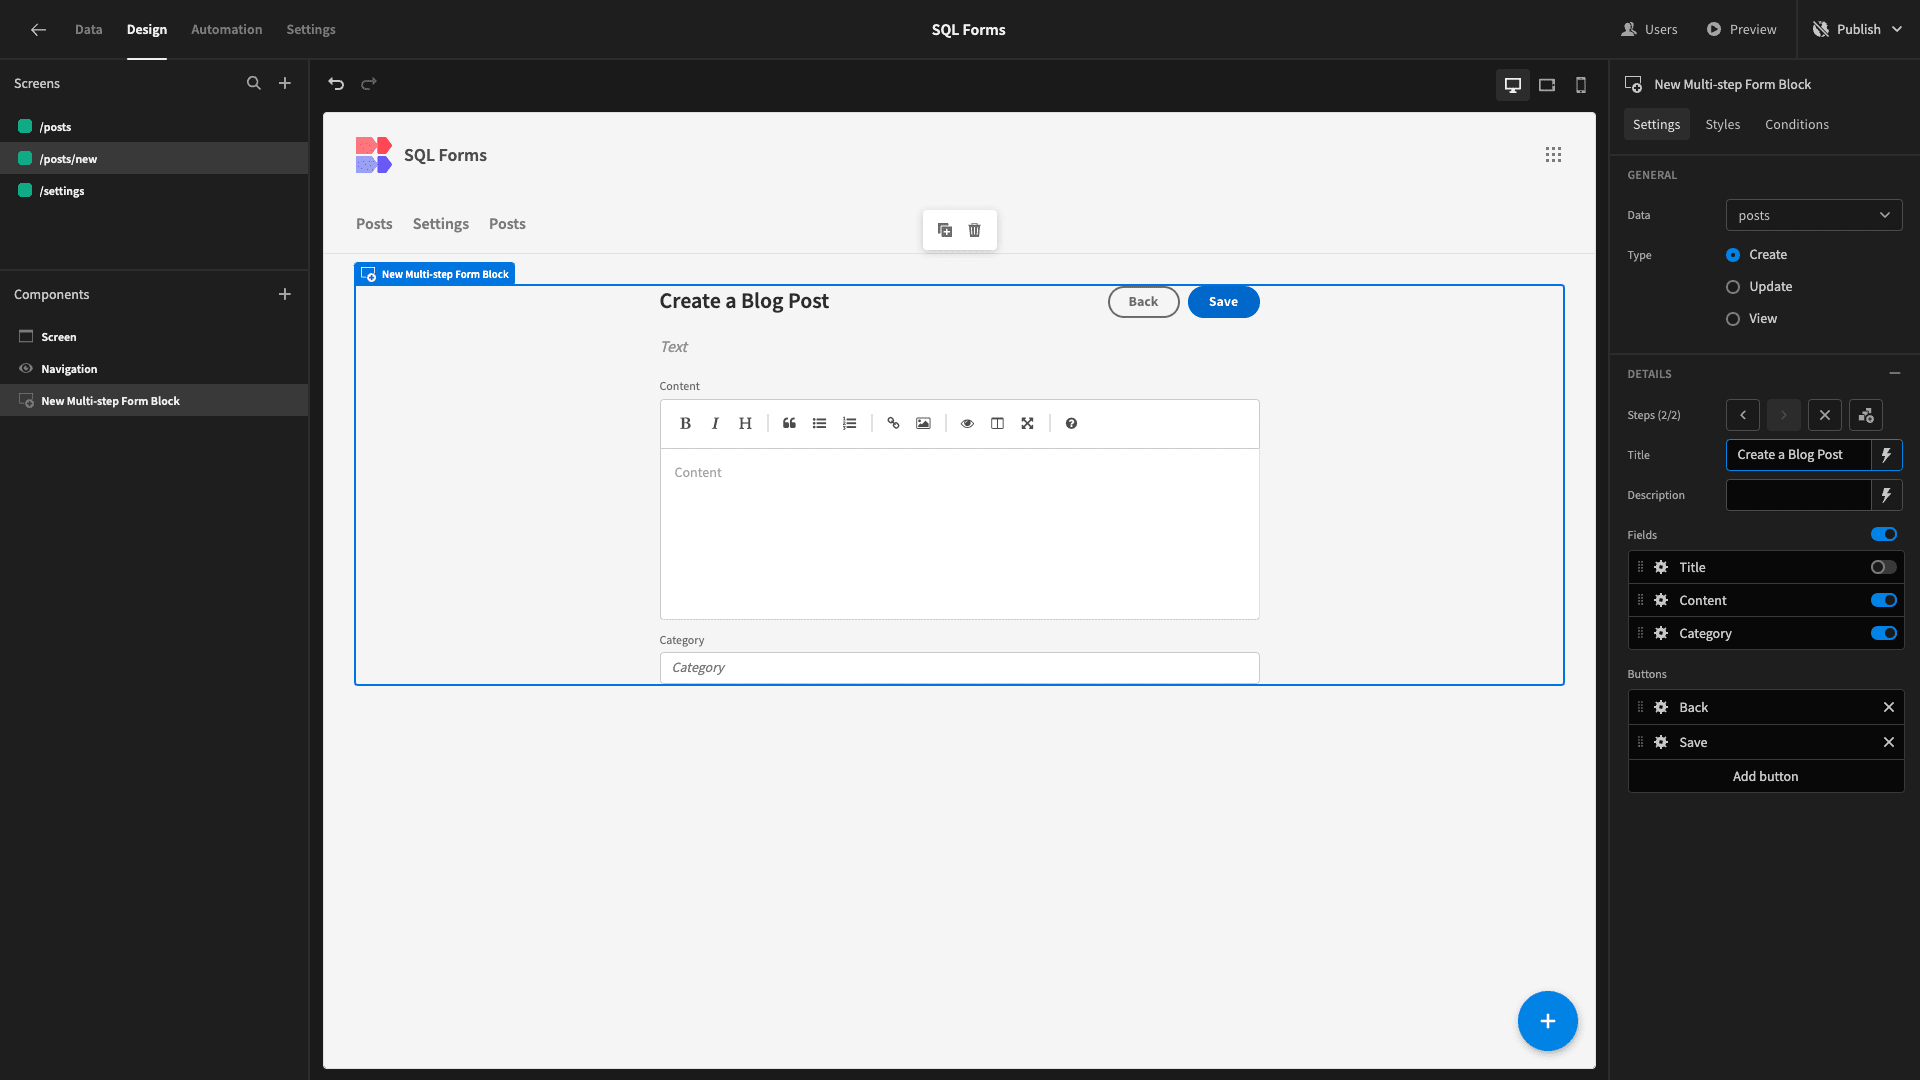
And lastly, we want to give our forms a more descriptive title text, so we’ll set the title attribute on both form steps to Create a Blog Post:
Budibase stands apart from traditional form builders for the power to add custom logic. For instance, we can easily add our own validation rules to any form field.
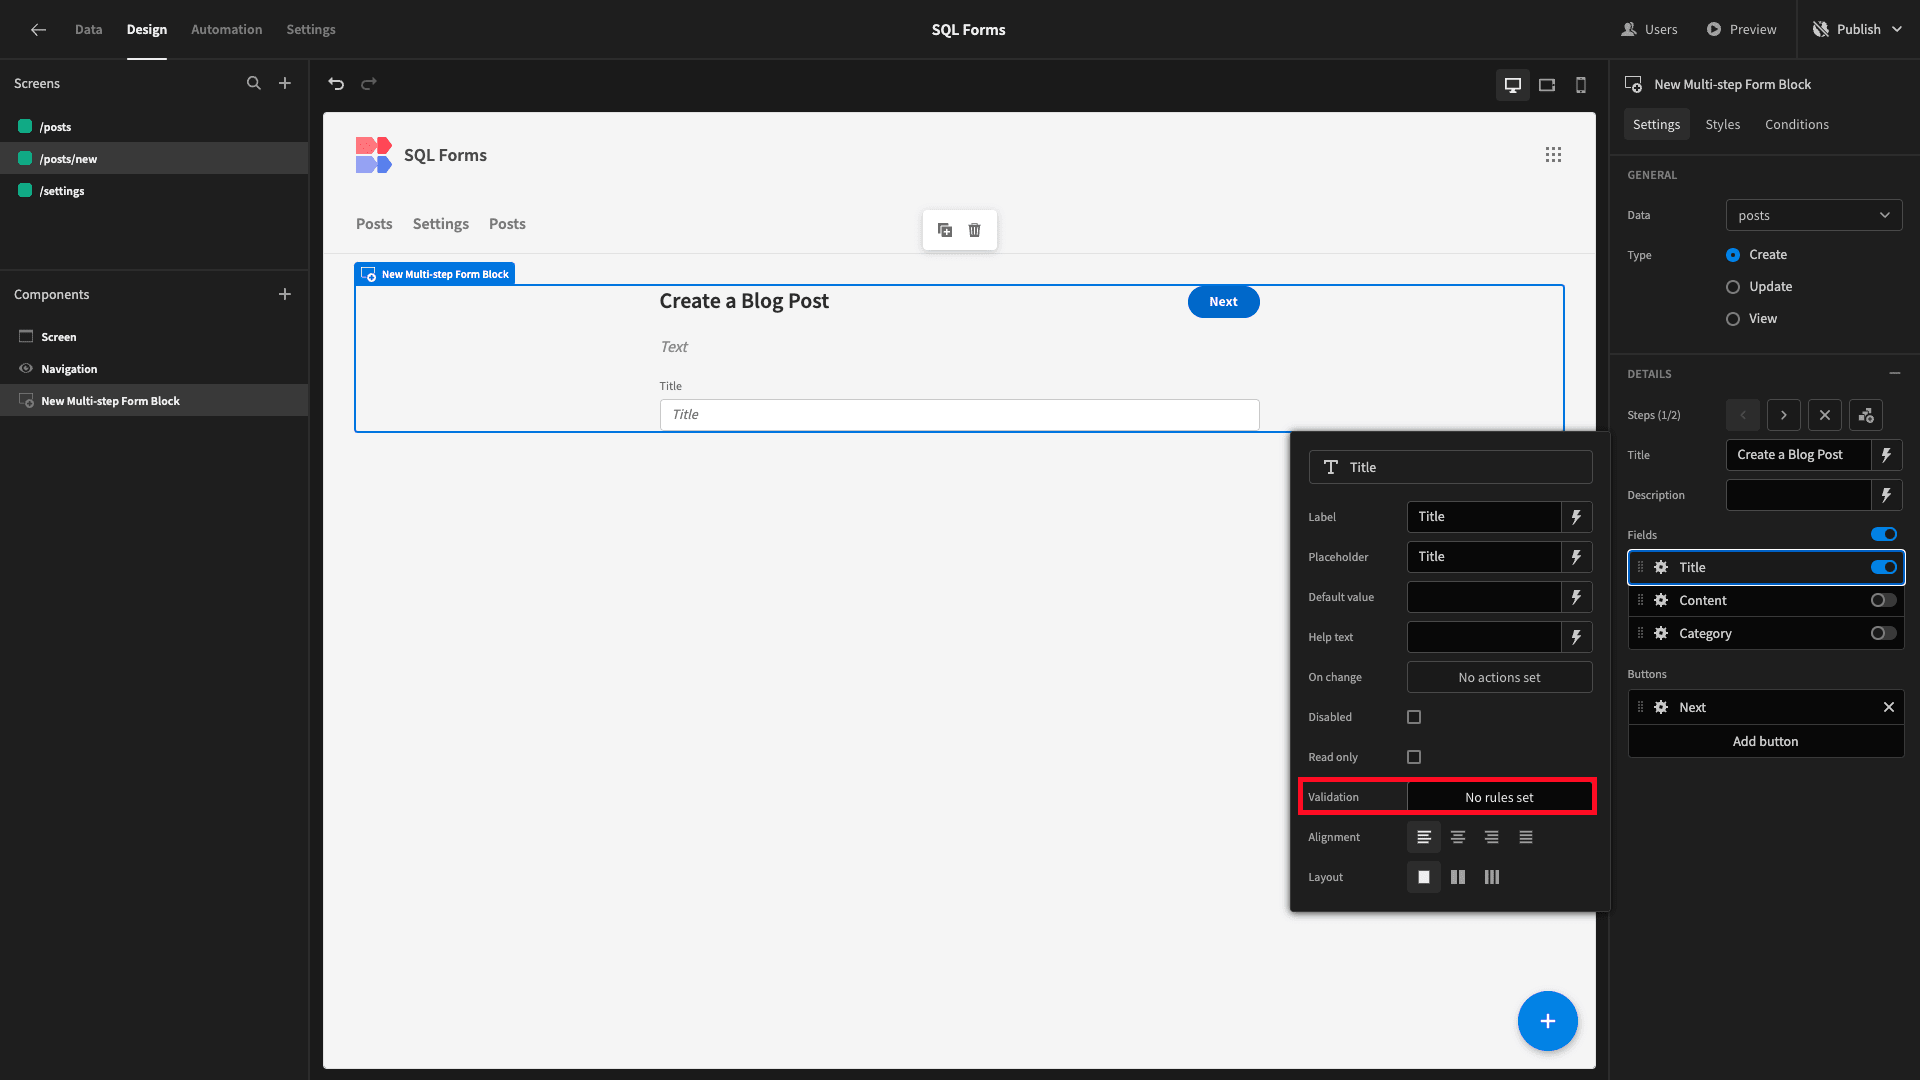
This lets us configure custom rules for the information that users can submit within a given field. For example, we might want our titles to be under a certain character count so that they display properly on our blog.
Under the validation rules drawer, we can set our constraint, reference value, and custom error message:
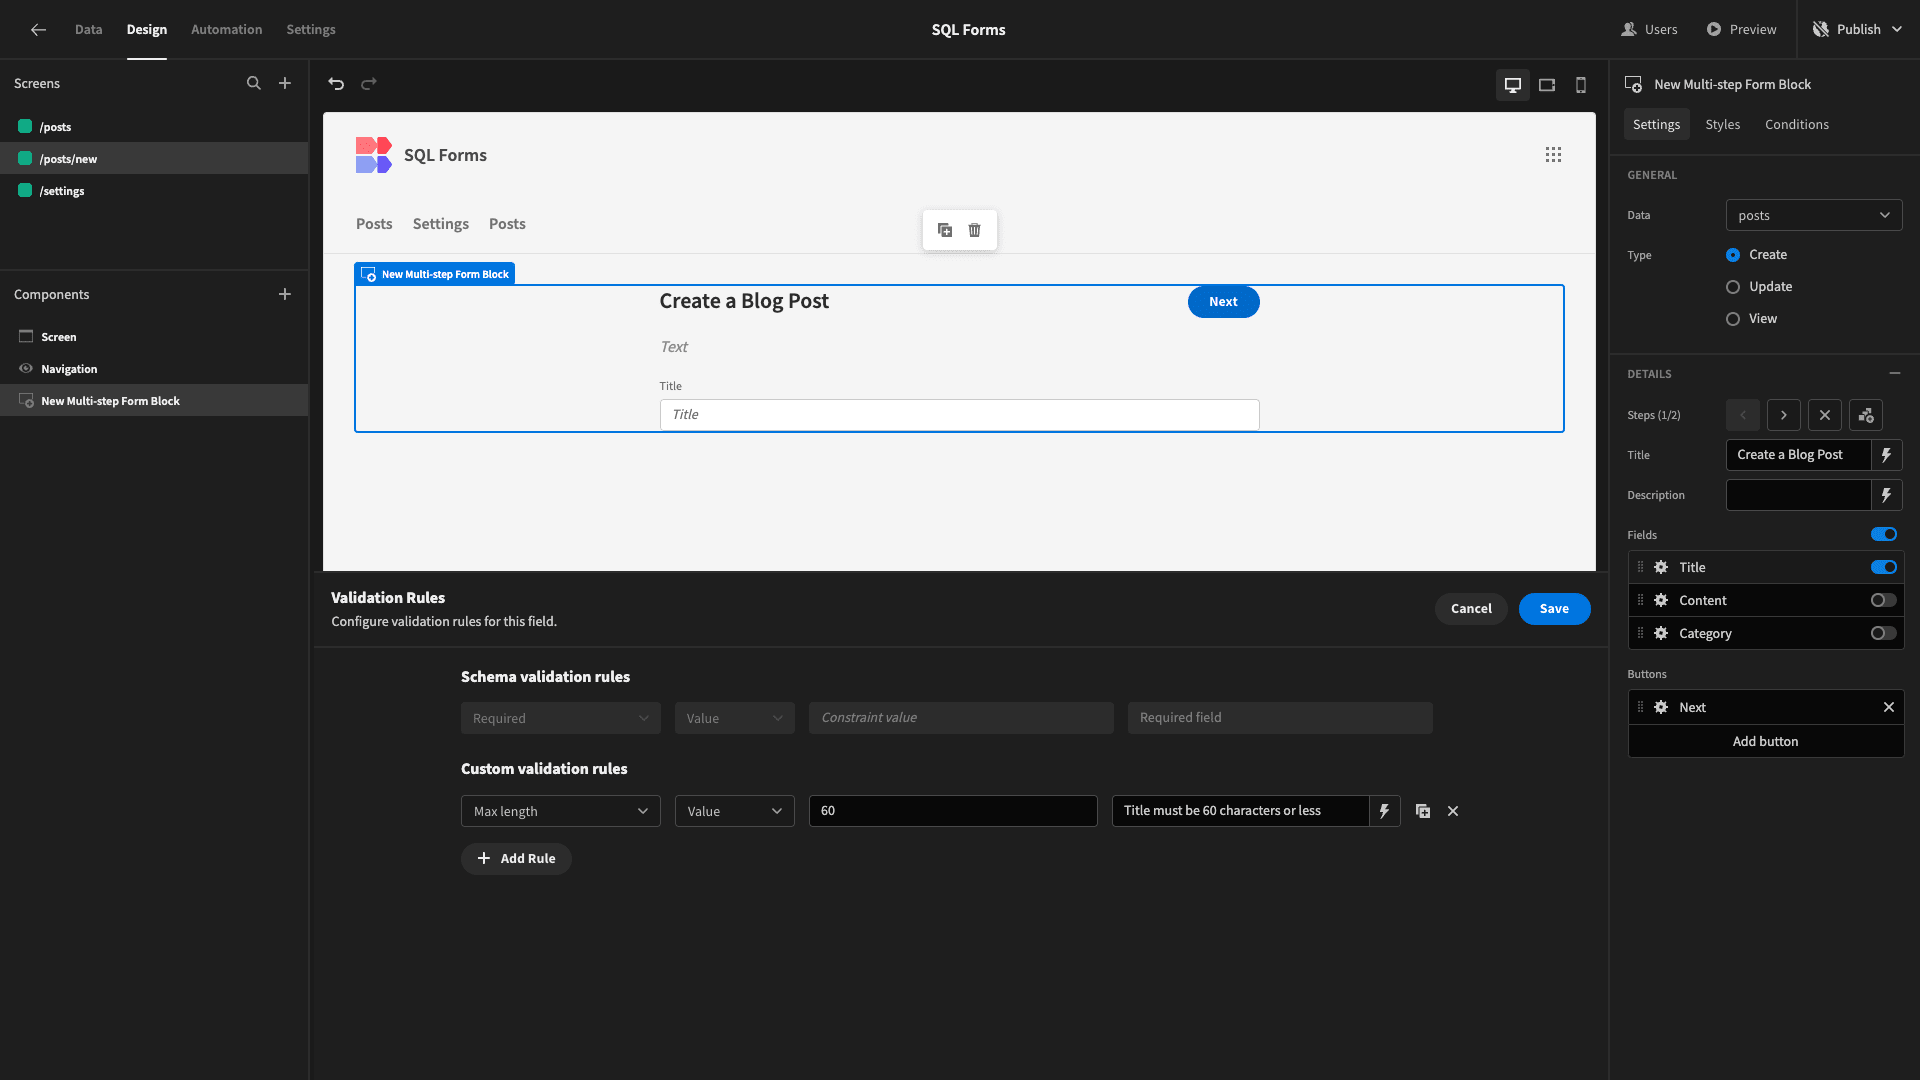
The save button for our multi-step form block already contains an action to validate the submission. Any rules we set on individual fields will be applied without us needing to alter this.
The last thing we’re going to do is make a few additional UX and design changes. First, we want users to access our new form using the Create new button on our Posts CRUD screen. When they make a submission, we also want to navigate them back to the main Posts page.
We can achieve this with button actions. On the save button, we’ll add an extra action to navigate to the /posts screen:
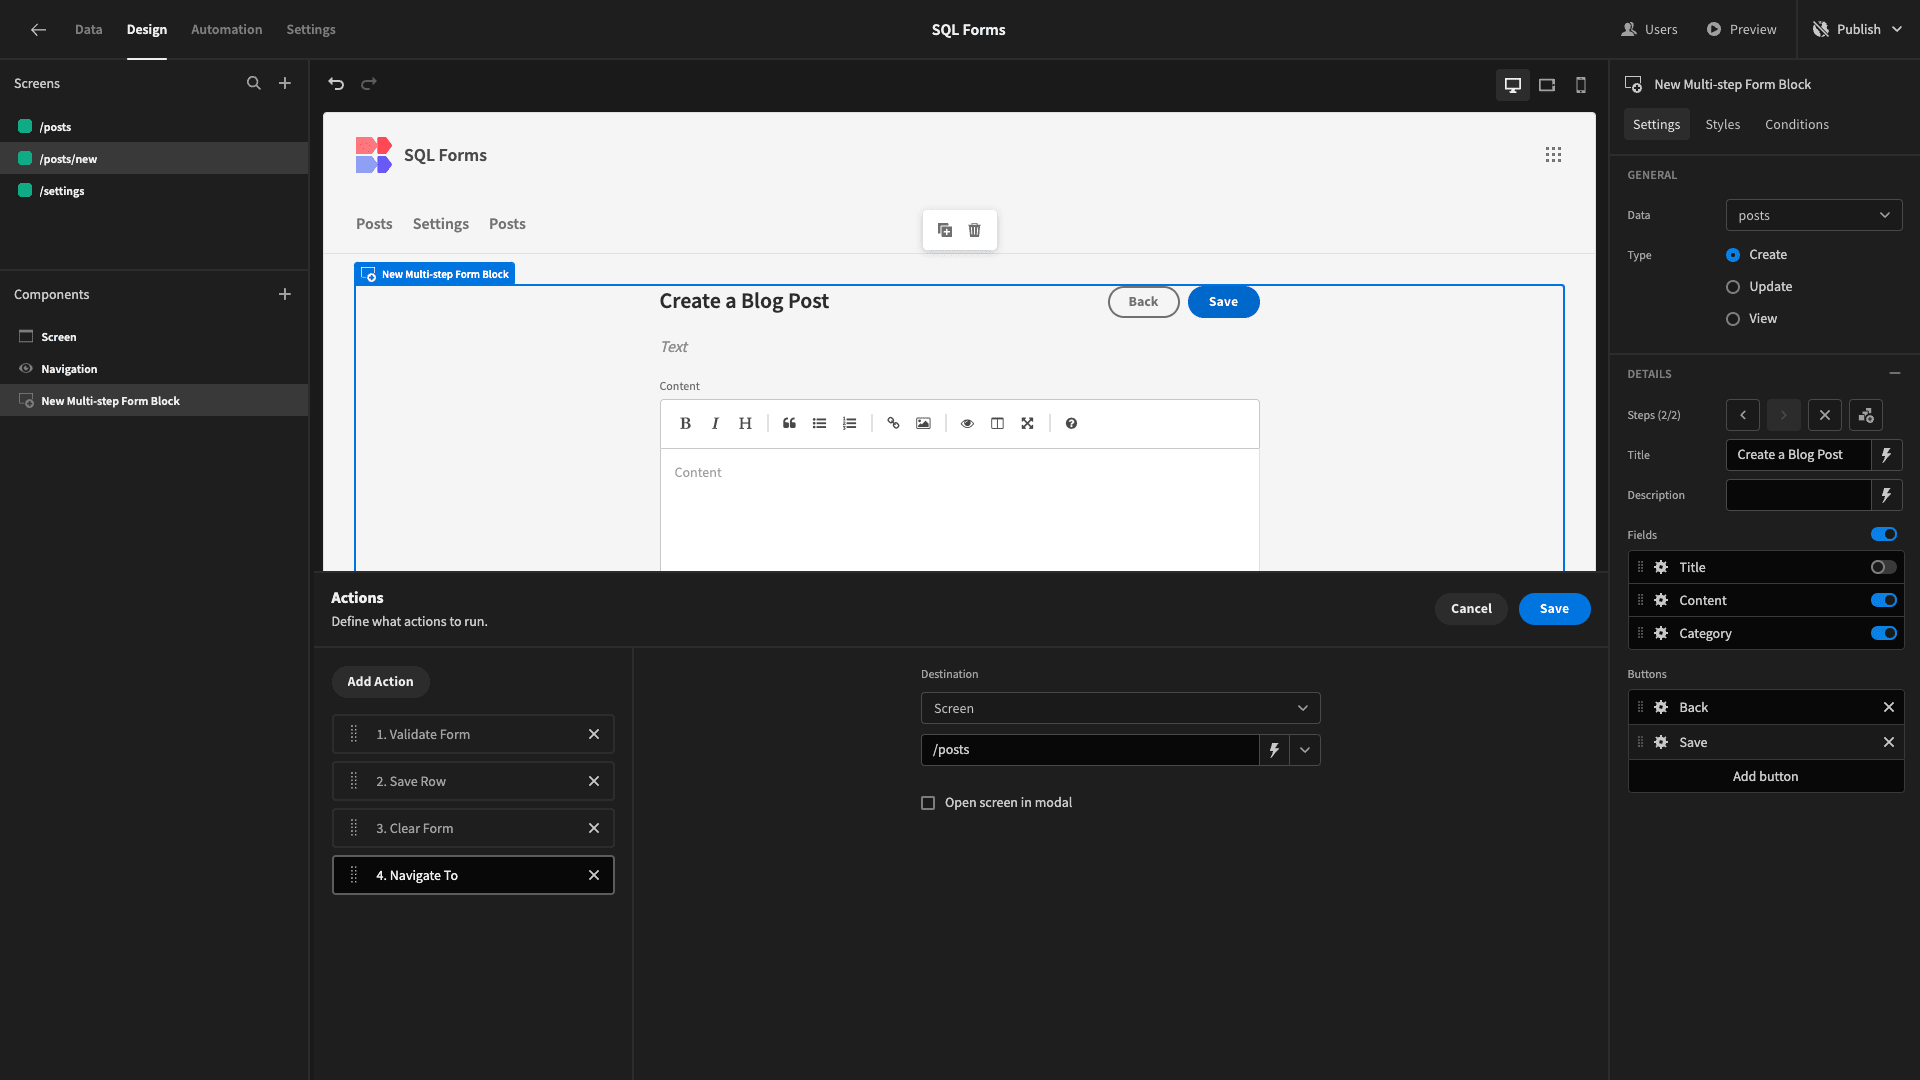
Similarly, under the create new button on the Posts page, we’ll remove all of the existing actions, and replace this with one to navigate to /posts/new.
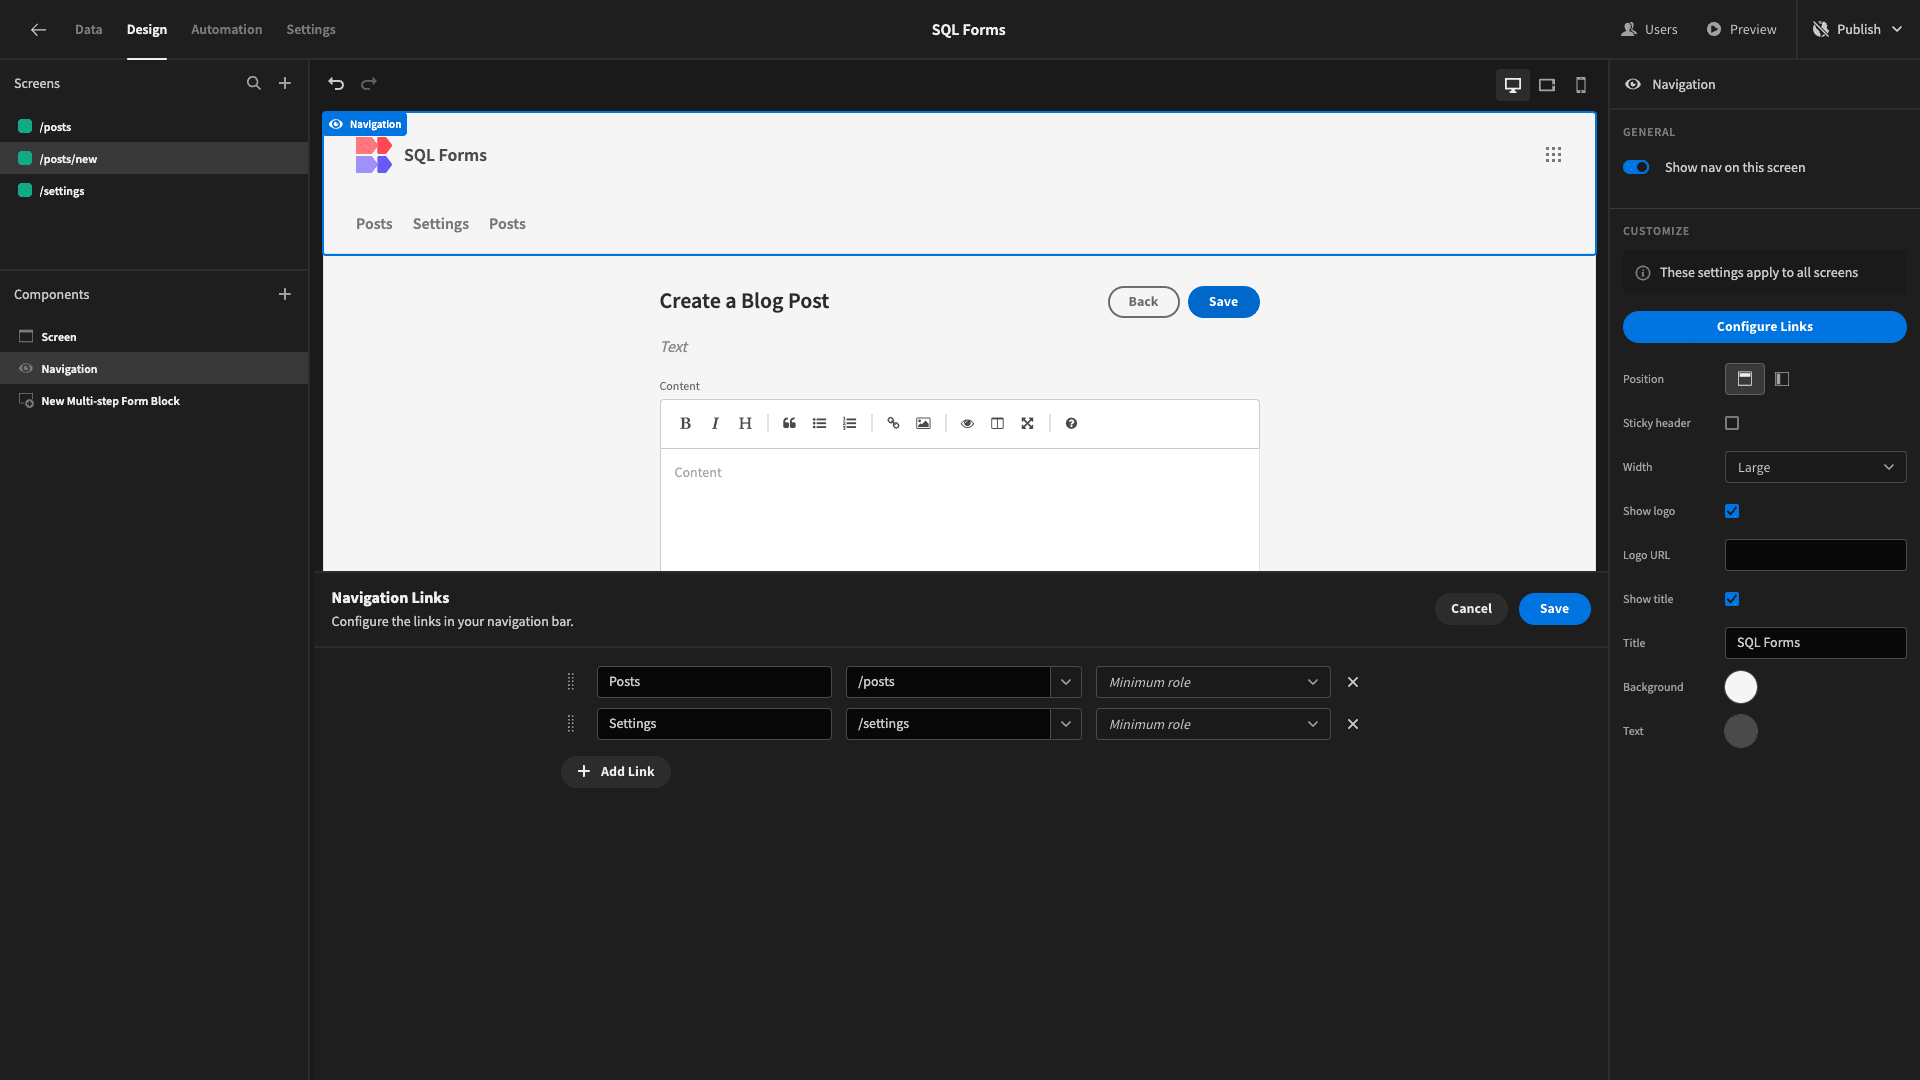
Then under navigation and configure links, we’ll remove the /posts/new from our nav menu:
Finally, we’ll alter the theme of our entire application under Screen and Theme. We have a choice of several built-in themes, but we’re going for Darkest:
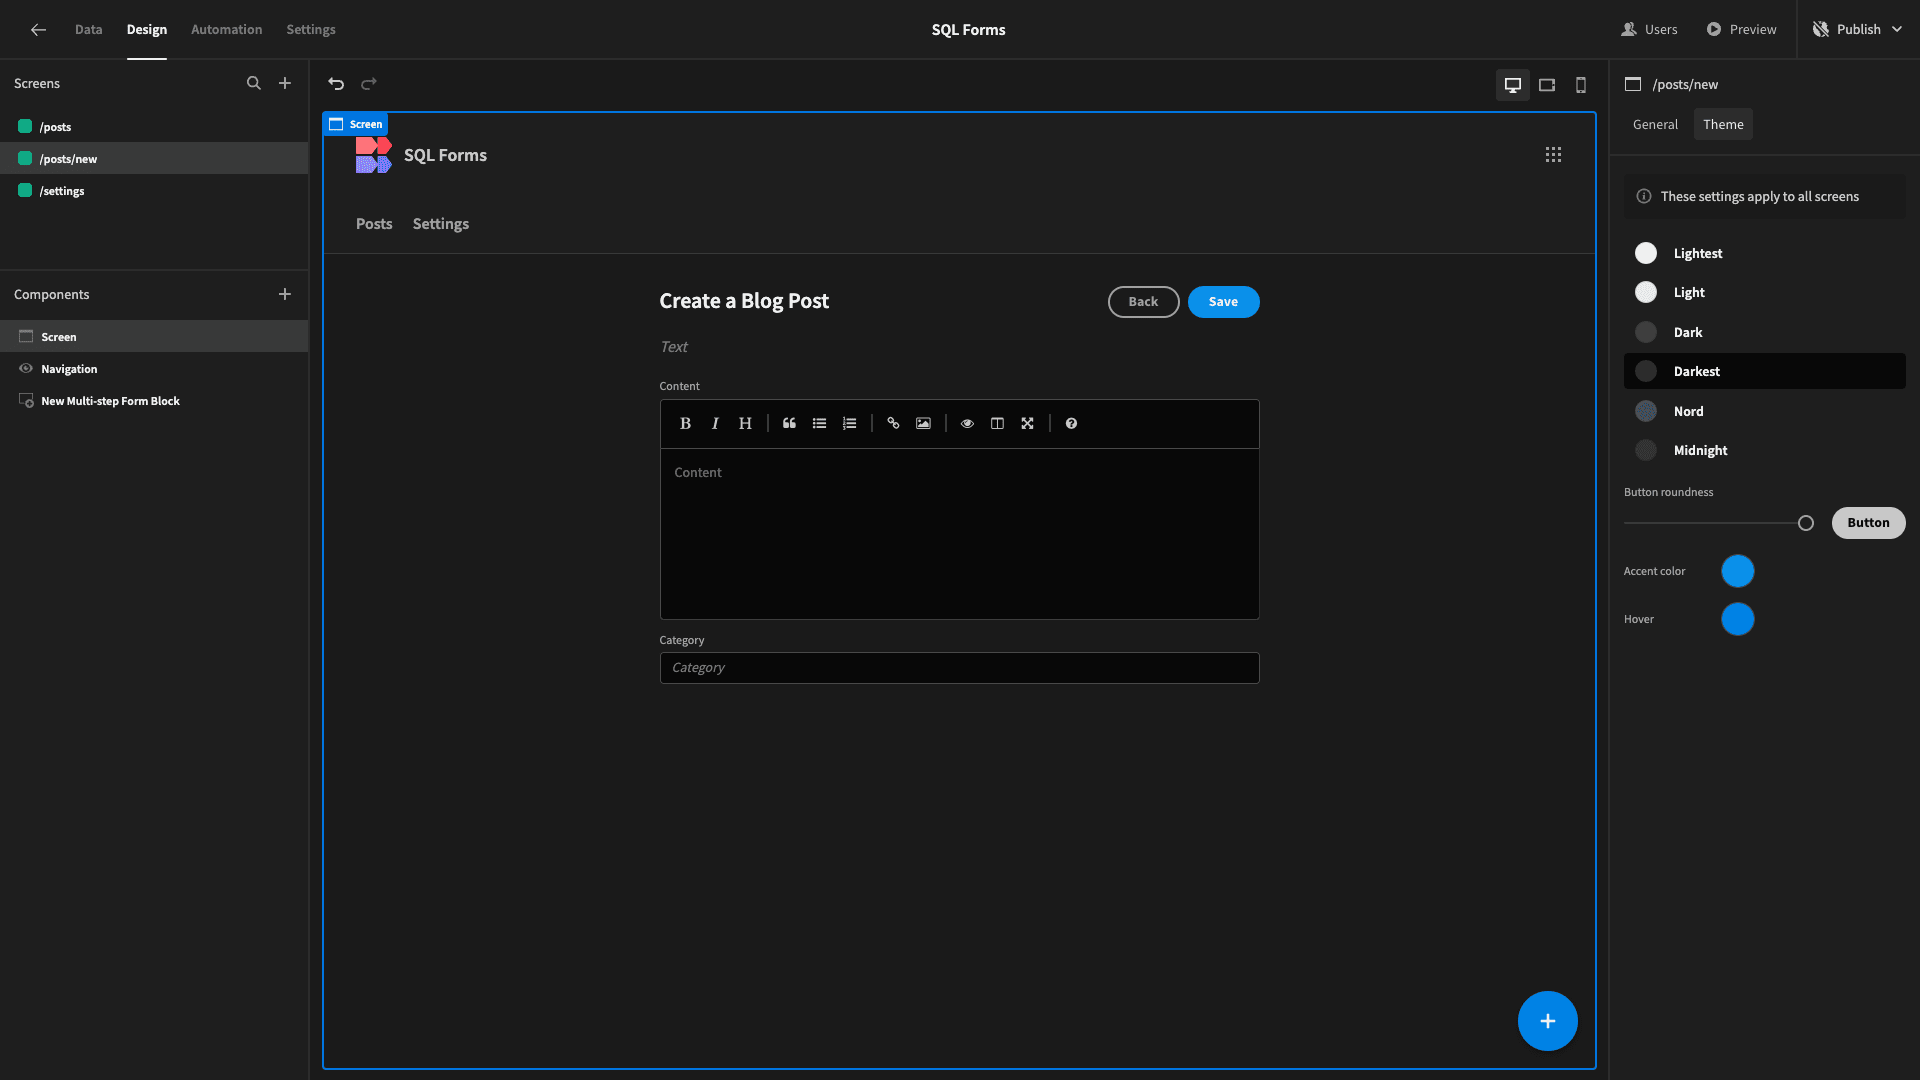
When we’re ready, we can hit Publish and share our live app with our team.
Build secure, advanced forms with Budibase
Budibase is the open-source, low-code platform that turns data into action. IT teams across all industries choose our platform to build secure, advanced forms on top of all sorts of existing data sources.
We offer dedicated connectors for SQL and NoSQL databases, optional self-hosting, flexible design tools, front-end scripting, intuitive automations, role-based access control, free SSO, and much, much more.
Take a look at our forms page to learn more.
Sign up to Budibase today to start building performant forms in a fraction of the time.