How to Build an Availability Form
Availability forms are a key part of all kinds of processes - including employee scheduling, resource allocation, booking requests, and more.
The trouble is that - compared to other kinds of forms - the data model you’ll typically need to handle availability can be fairly complex.
Traditional form builder tools are rarely up to the task.
On the other hand, countless teams handle availability using dated tools - like spreadsheets or even pen and paper.
Today, we’re checking out how Budibase empowers teams to build advanced forms on top of just about any data source.
By the end, we’ll have a fully custom availability form - complete with programmatically assigned values, a looping UI, and more - all built using our secure low-code platform.
But first.
What is an availability form?
An availability form is a UI that’s used for inputting data relating to when a particular resource or other entity is free. This could be an employee, a physical location, a piece of equipment, or just about anything else.
The goal is to enable users to quickly input the required information, which can then be stored in a secure, accessible format.
In other words, we want to capture the data we need in a way that it can easily be used within follow-on workflows.
Typically, we’re dealing with two clusters of information - the resource in question and when it’s available.
But, this second part is what makes things a little more complicated than most other data collection forms. Since availability can vary greatly from week to week, we need to provide a great deal of flexibility for users.
One way to do this is by leveraging looping forms - to allow several submissions to be created at once.
So…
What are we building?
We’re building a flexible, looping availability form on top of an external MySQL database. However, there are going to be a few key differences between our user-facing form schema and the back-end data model.
More specifically, since our form will loop and allow several submissions at a time, we want to minimize the number of user inputs required for even a single submission. So, we’ll be making heavy use of contextual bindings and auto-populating fields.
We’ll also extensively use Budibase’s built-in conditionality rules in order to create a form that’s flexible, efficient, and easy to use.
Our example is going to be specifically focused on employee availability, but we could just as easily apply the same ideas to any other kind of resource, facility, or asset. We’ll even provide the queries needed to create a database table just like ours so you can build along.
Let’s jump right into it.
How to build an availability form in 5 steps
If you haven’t already, sign up below for a free Budibase account.
1. Connecting to our database
We’ll start by creating a new Budibase application, choosing the option to start from scratch. When we do this, we’ll be prompted to choose a name and URL for our app. We’re calling ours Availability Form.

Next, we need to choose which sort of data we’d like to connect our form to. Budibase offers a built-in low-code database, as well as direct connectors for SQL and NoSQL tools, REST APIs, Google Sheets, Airtable, and more.
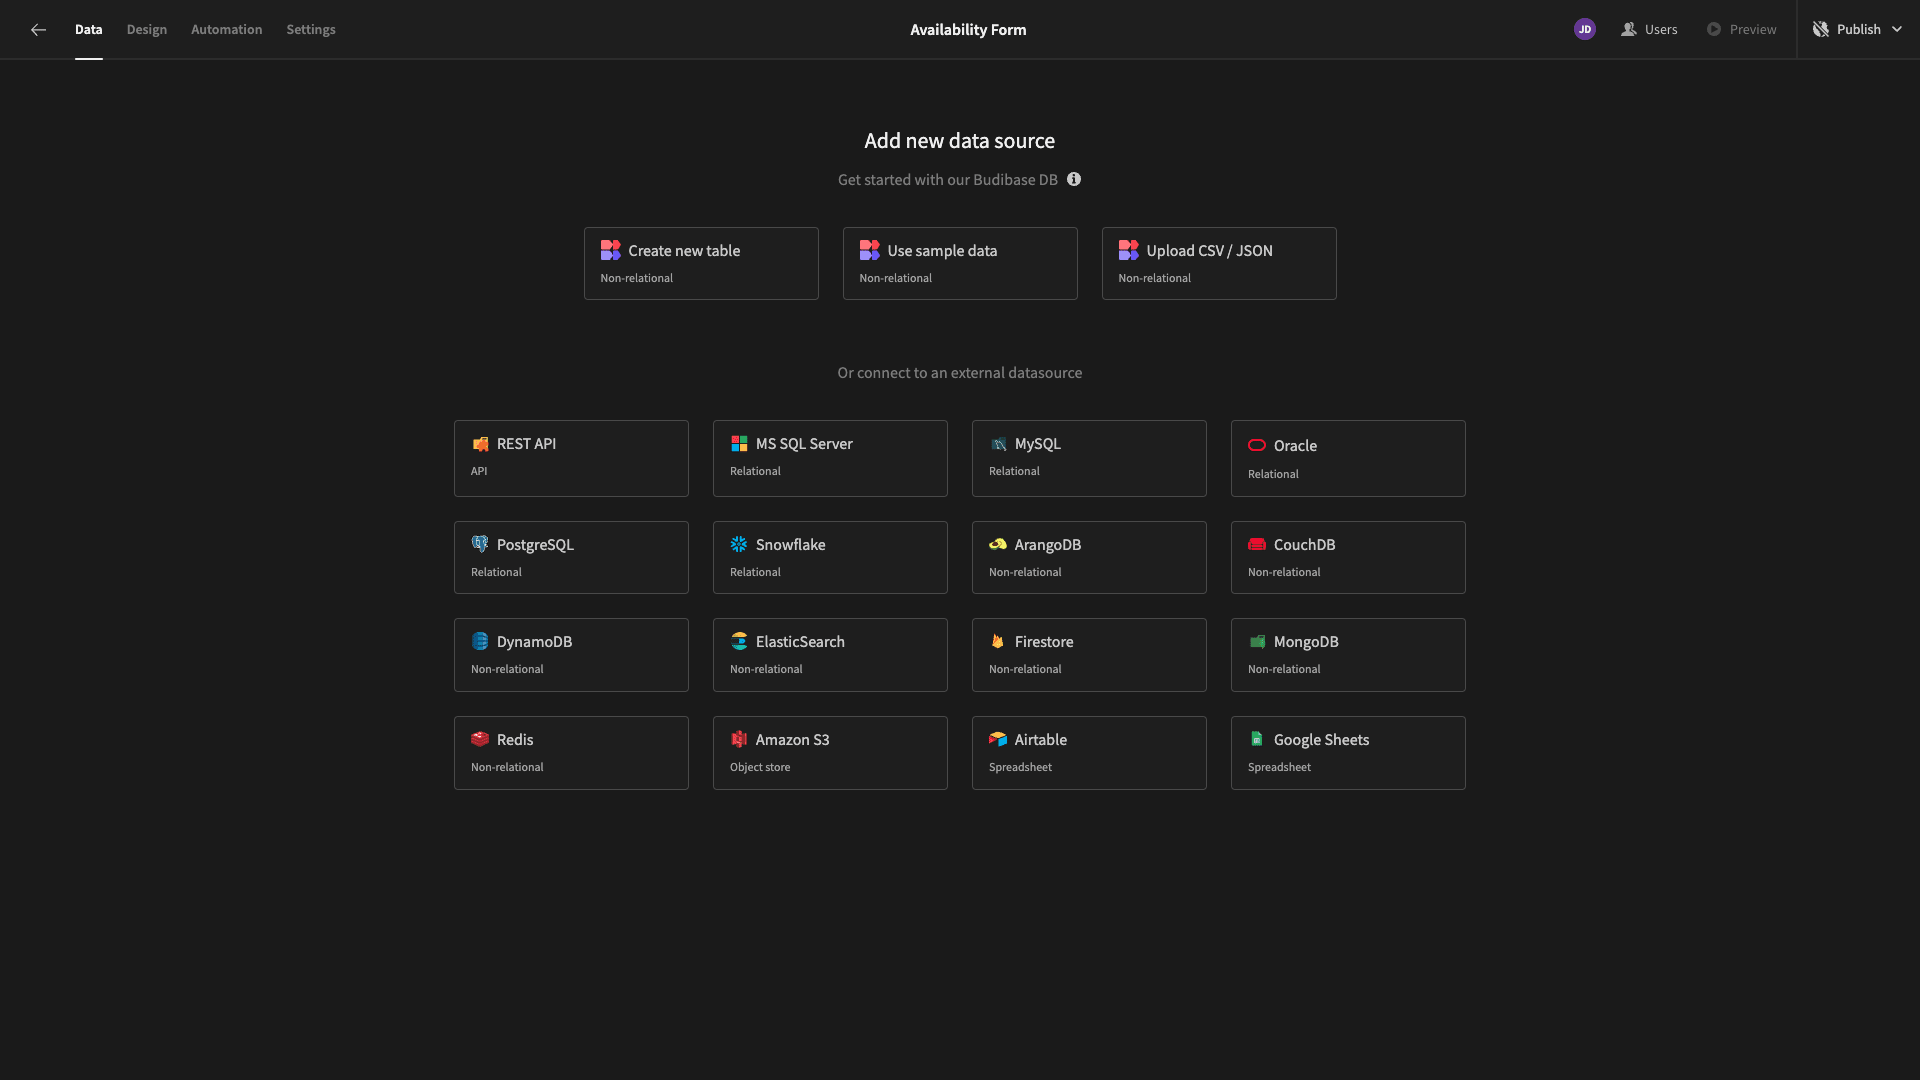
We can even create custom data sources using Budibase’s dedicated CLI tools.
However, today, we’re using MySQL. When we choose this option, we’re prompted to input our configuration details.
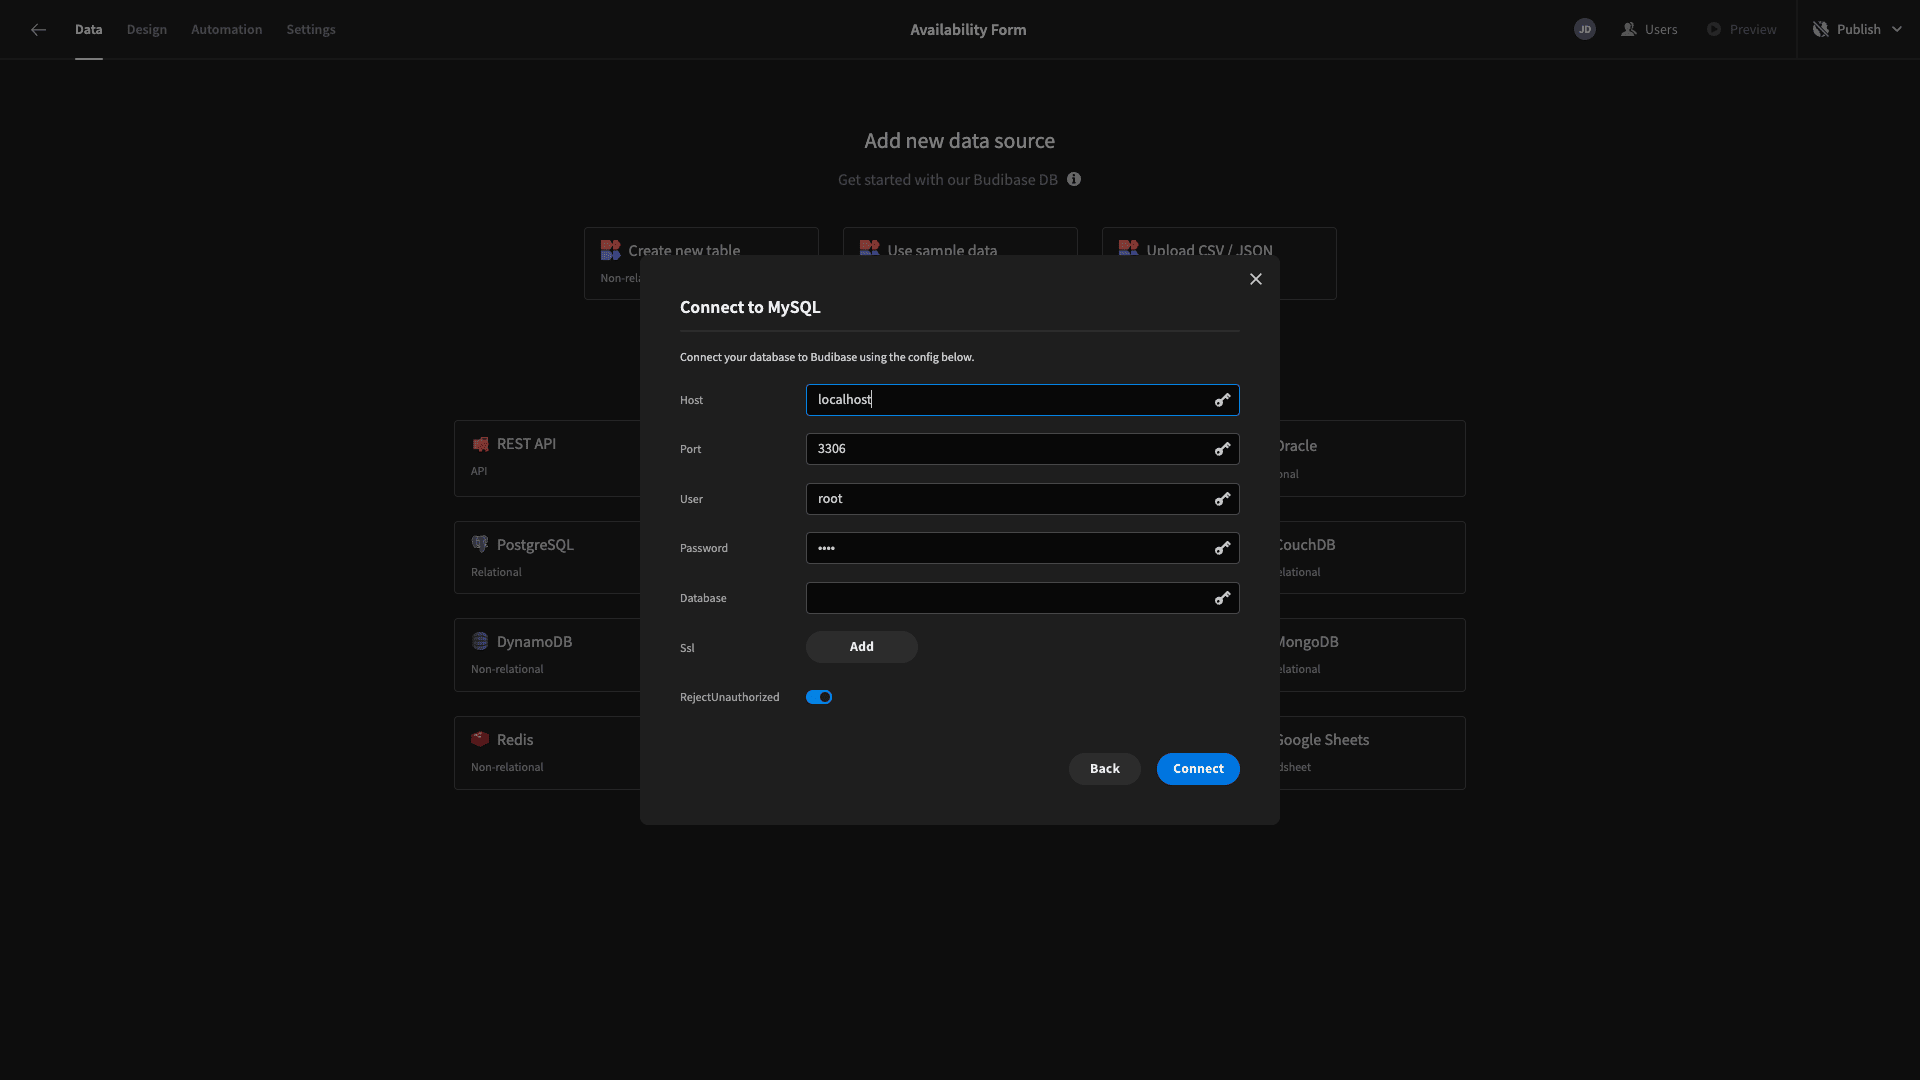
We can input these manually or use saved values stored with Budibase’s secure environment variables.
We’re then given the option to select which tables within our database we’d like to fetch, pulling them into Budibase.

Our database only has a single table called employee_availability, which we’re fetching.
If you’d like to build along with this tutorial, you can use the following MySQL query to copy our schema in your own database.
 1CREATE TABLE employee_availability (
 2
 3  availability_id INT AUTO_INCREMENT PRIMARY KEY,
 4
 5  first_name VARCHAR(255),
 6
 7  last_name VARCHAR(255),
 8
 9  week_number INT,
10
11  day_of_week ENUM('Sunday', 'Monday', 'Tuesday', 'Wednesday', 'Thursday', 'Friday', 'Saturday'),
12
13  start_time TIME,
14
15  end_time TIME,
16
17  UNIQUE KEY unique_availability (first_name, last_name, week_number, day_of_week, start_time, end_time)
18
19);
And you can add some dummy data with this query.
 1INSERT INTO employee_availability (first_name, last_name, week_number, day_of_week, start_time, end_time)
 2
 3VALUES
 4
 5  -- Employee 1 (John Doe)
 6
 7  ('John', 'Doe', 1, 'Monday', '09:00', '17:00'),
 8
 9  ('John', 'Doe', 1, 'Tuesday', '09:00', '17:00'),
10
11  ('John', 'Doe', 1, 'Wednesday', '09:00', '17:00'),
12
13  ('John', 'Doe', 1, 'Thursday', '09:00', '17:00'),
14
15  ('John', 'Doe', 1, 'Friday', '09:00', '17:00'),
16
17  -- Employee 2 (Jane Smith)
18
19  ('Jane', 'Smith', 1, 'Monday', '10:30', '18:30'),
20
21  ('Jane', 'Smith', 1, 'Tuesday', '10:30', '18:30'),
22
23  ('Jane', 'Smith', 1, 'Wednesday', '10:30', '18:30'),
24
25  ('Jane', 'Smith', 1, 'Thursday', '10:30', '18:30'),
26
27  ('Jane', 'Smith', 1, 'Friday', '10:30', '18:30'),
28
29  -- Employee 3 (Bob Johnson)
30
31  ('Bob', 'Johnson', 1, 'Monday', '08:00', '16:00'),
32
33  ('Bob', 'Johnson', 1, 'Tuesday', '08:00', '16:00'),
34
35  ('Bob', 'Johnson', 1, 'Wednesday', '08:00', '16:00'),
36
37  ('Bob', 'Johnson', 1, 'Thursday', '08:00', '16:00'),
38
39  ('Bob', 'Johnson', 1, 'Friday', '08:00', '16:00');
Here’s what our table looks like in Budibase’s Data section. We can use this spreadsheet-like interface to edit stored values or the schema itself.

It’s worth pausing for a second to think about how our data model works. Each row represents the hours that an employee is available on a given day. So, we’re storing their name, the numerical week, the day of the week, and the start and end time of when they’re available.
There’s also a unique id attribute that’s generated by our database.
Before we start building our availability form, we’re going to make one simple change to our table. That is, swapping the Type of the day_of_week attribute from Text to Options.

Then, we’ll input the days of the week as our available options.
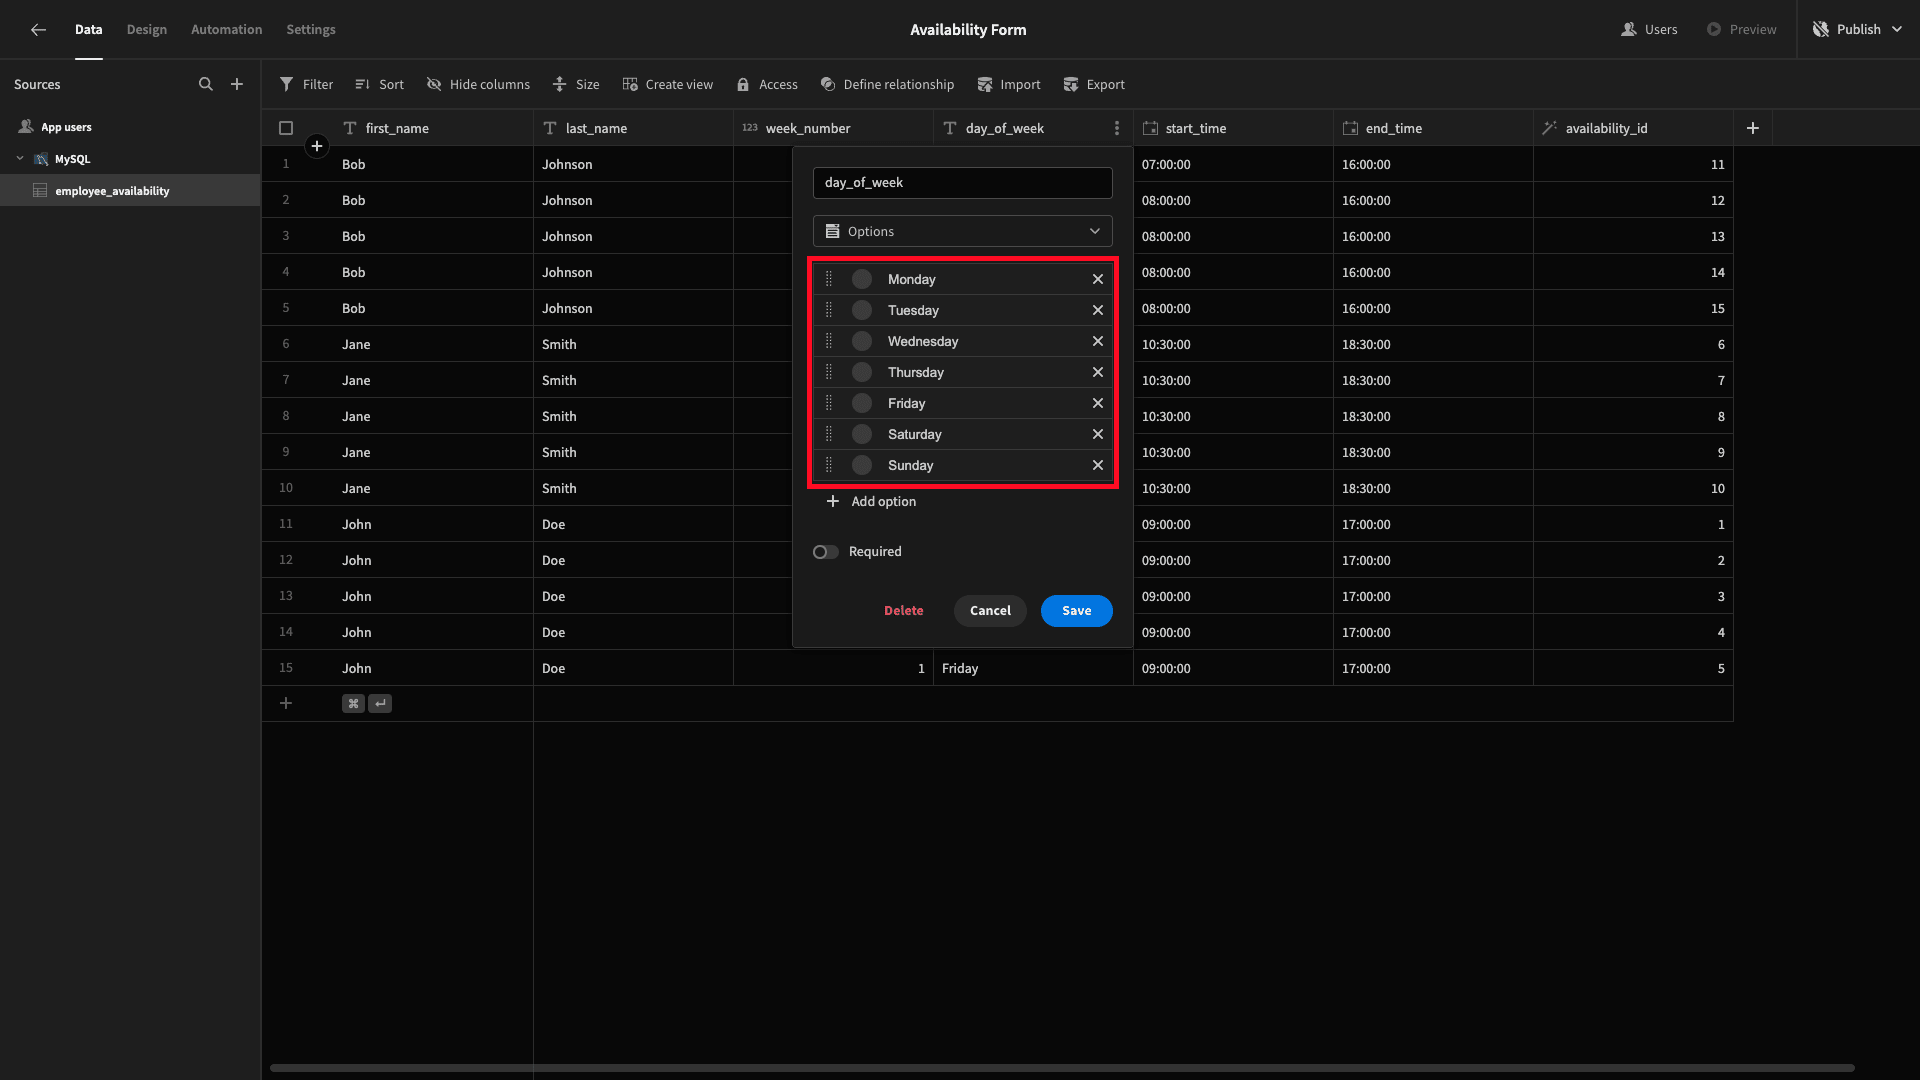
And that’s our data model ready to go.
2. Generating a form UI
Head over to the Design tab, and we can start building our availability form. We’re offered a few choices for how to create our first UI - including Budibase’s autogenerated layouts.
We’re choosing Blank Screen.
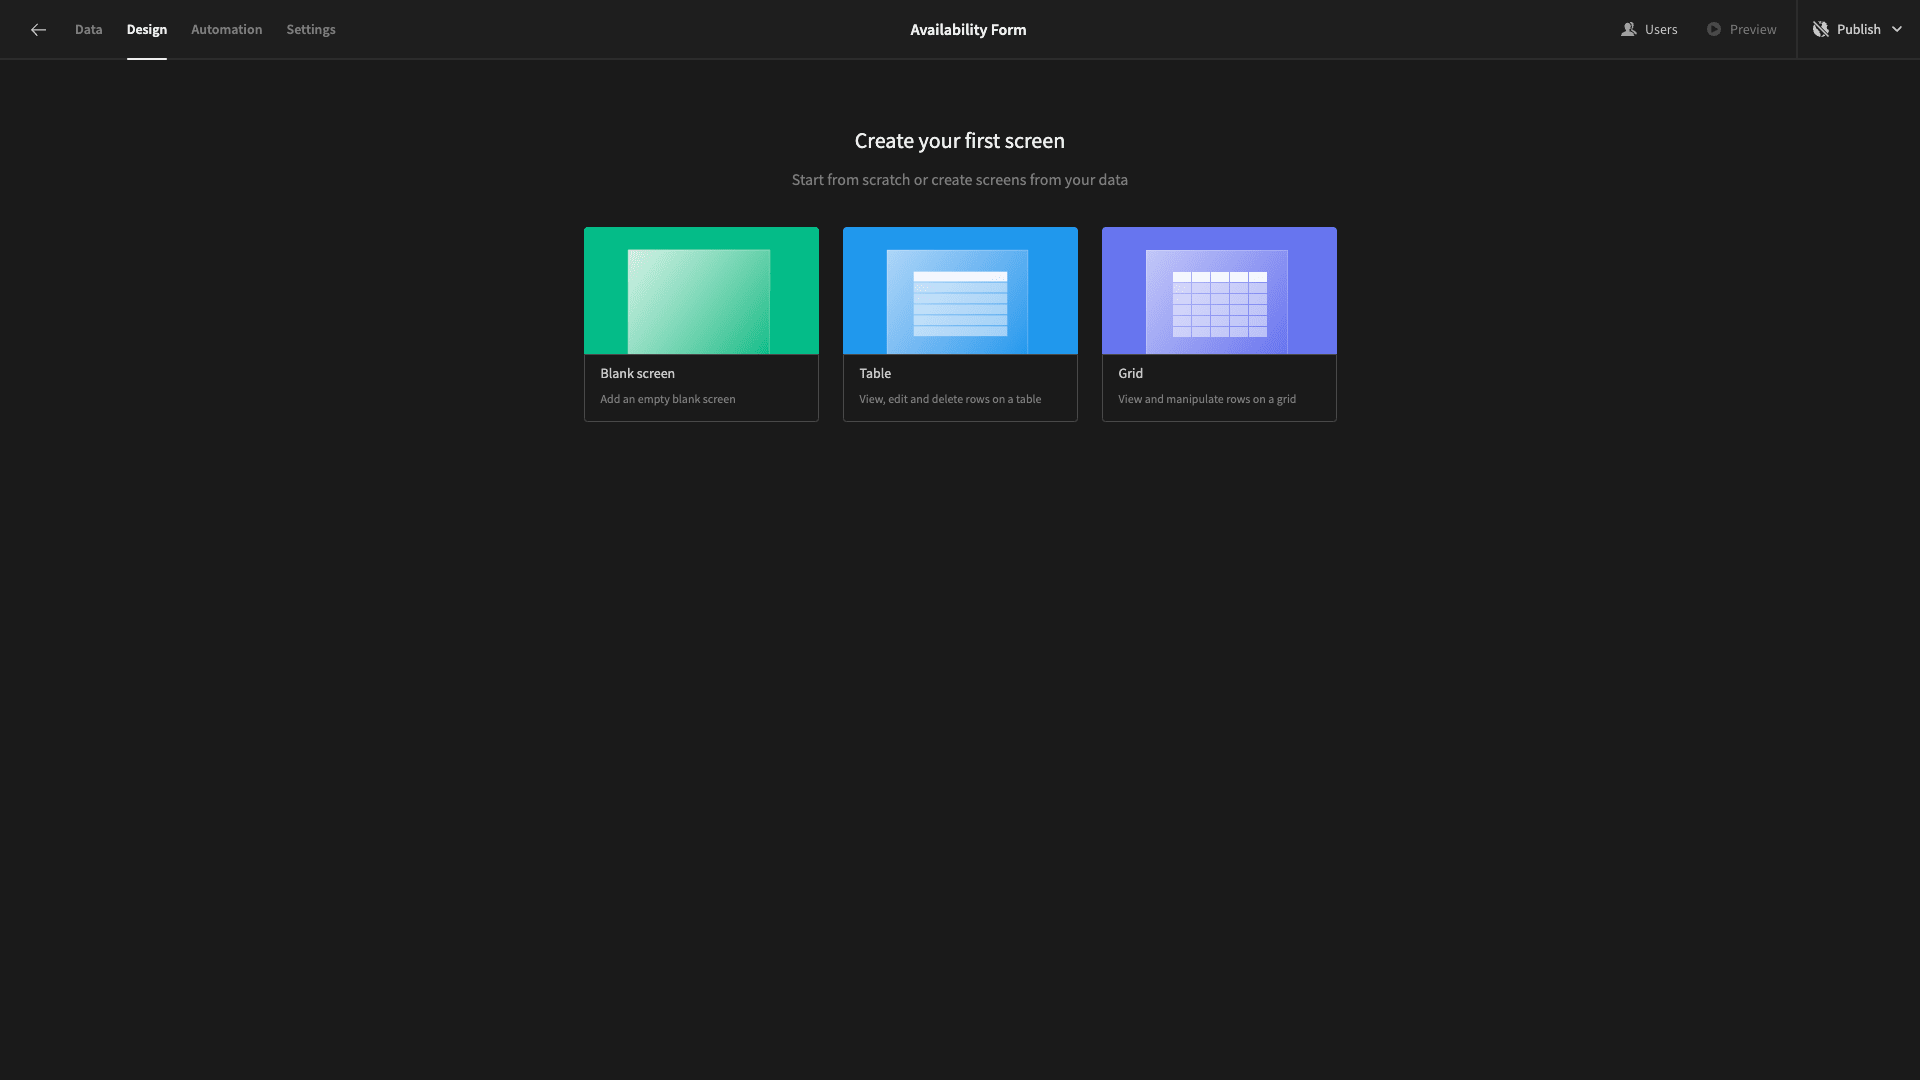
We need to choose a URL path for our new screen.
We’ll call ours /availability-form.
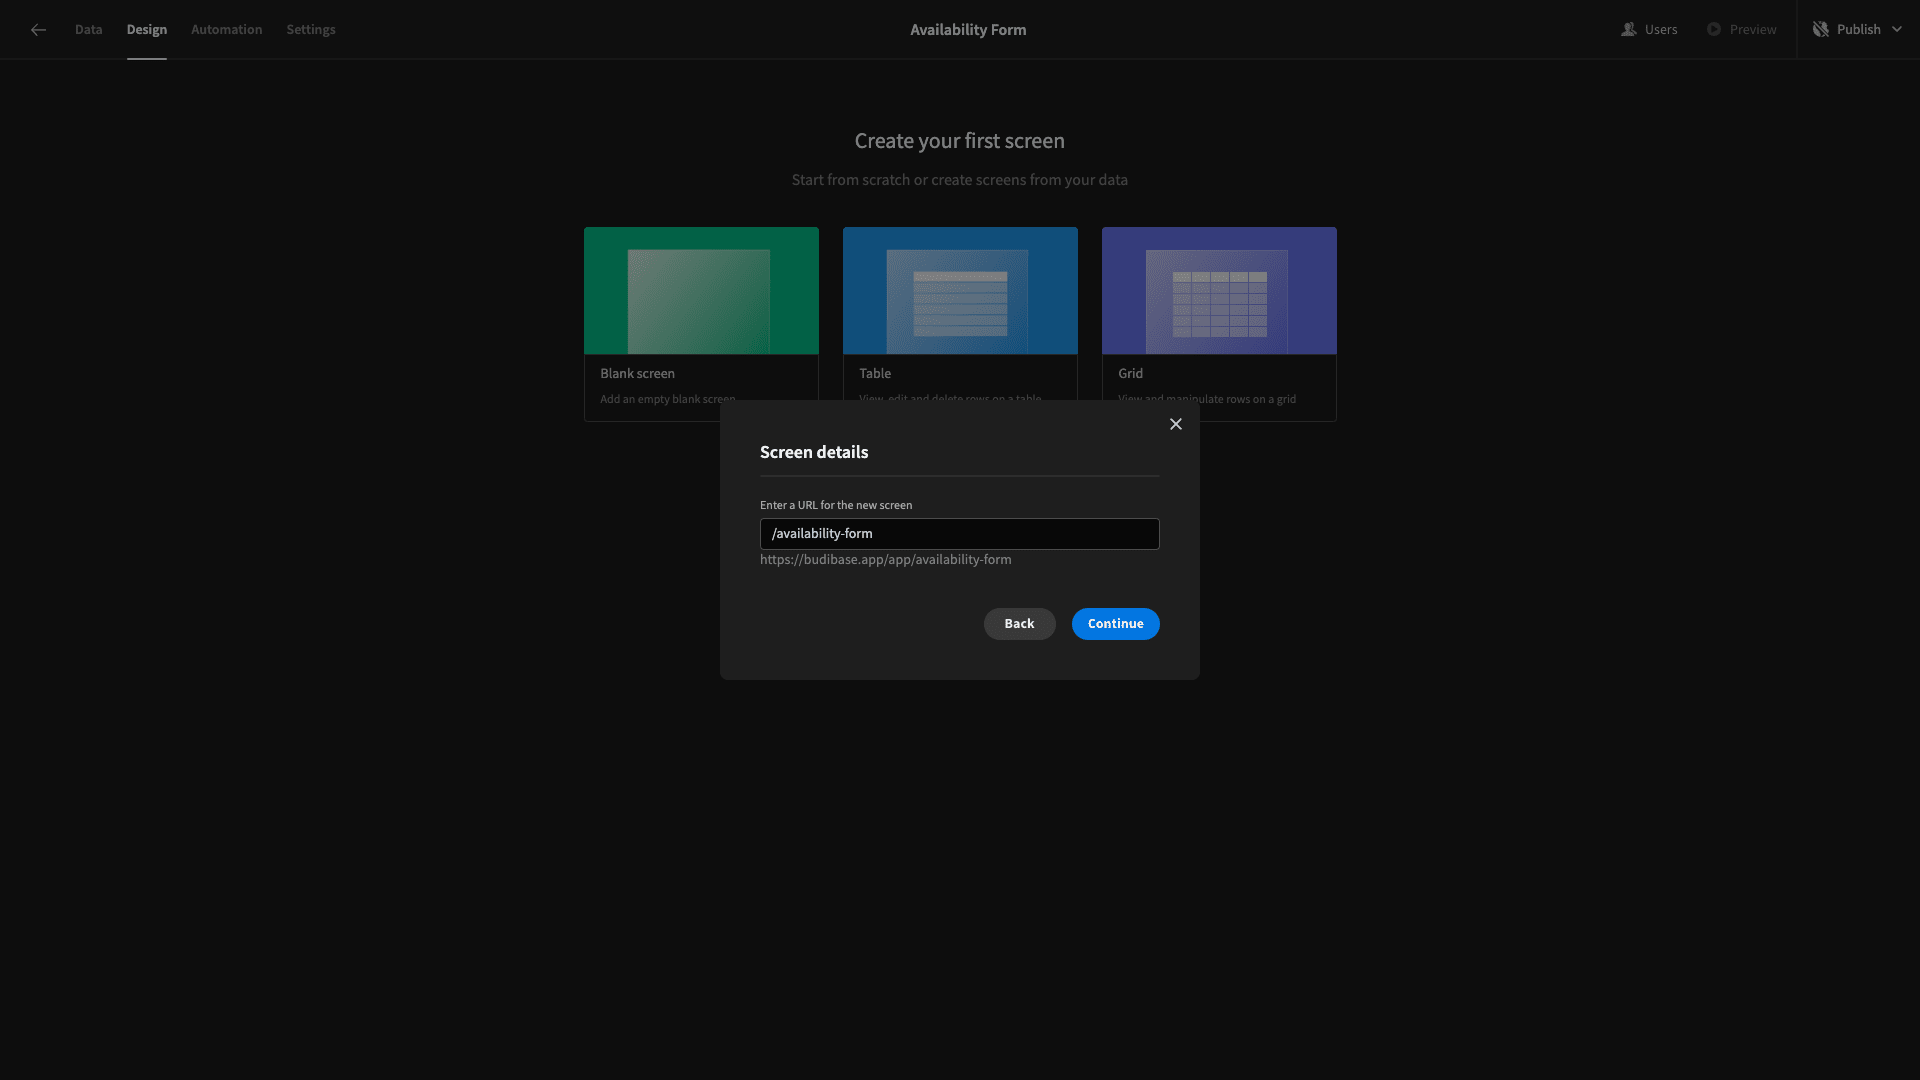
We can also select a minimum role required to access this screen within Budibase’s RBAC system, but we’re leaving this set to the default Basic option.

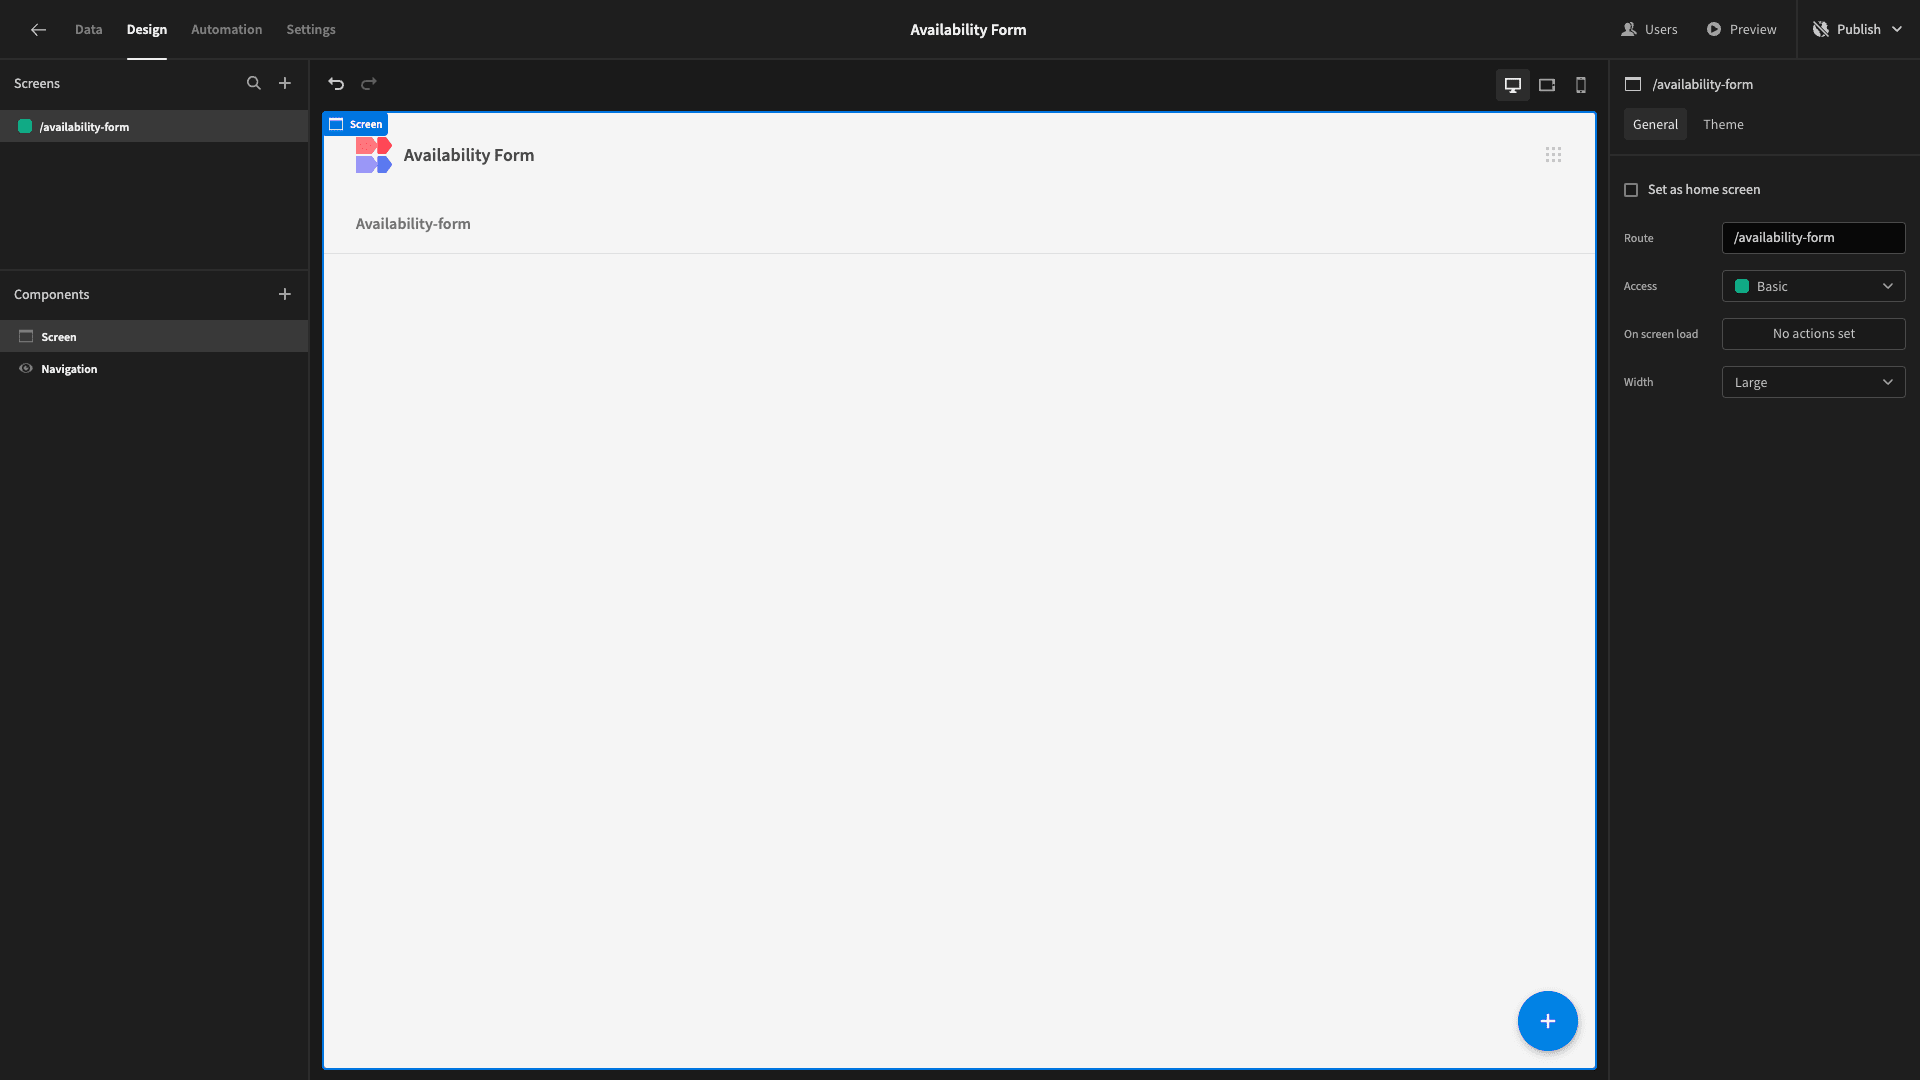
Here’s what our blank screen looks like.
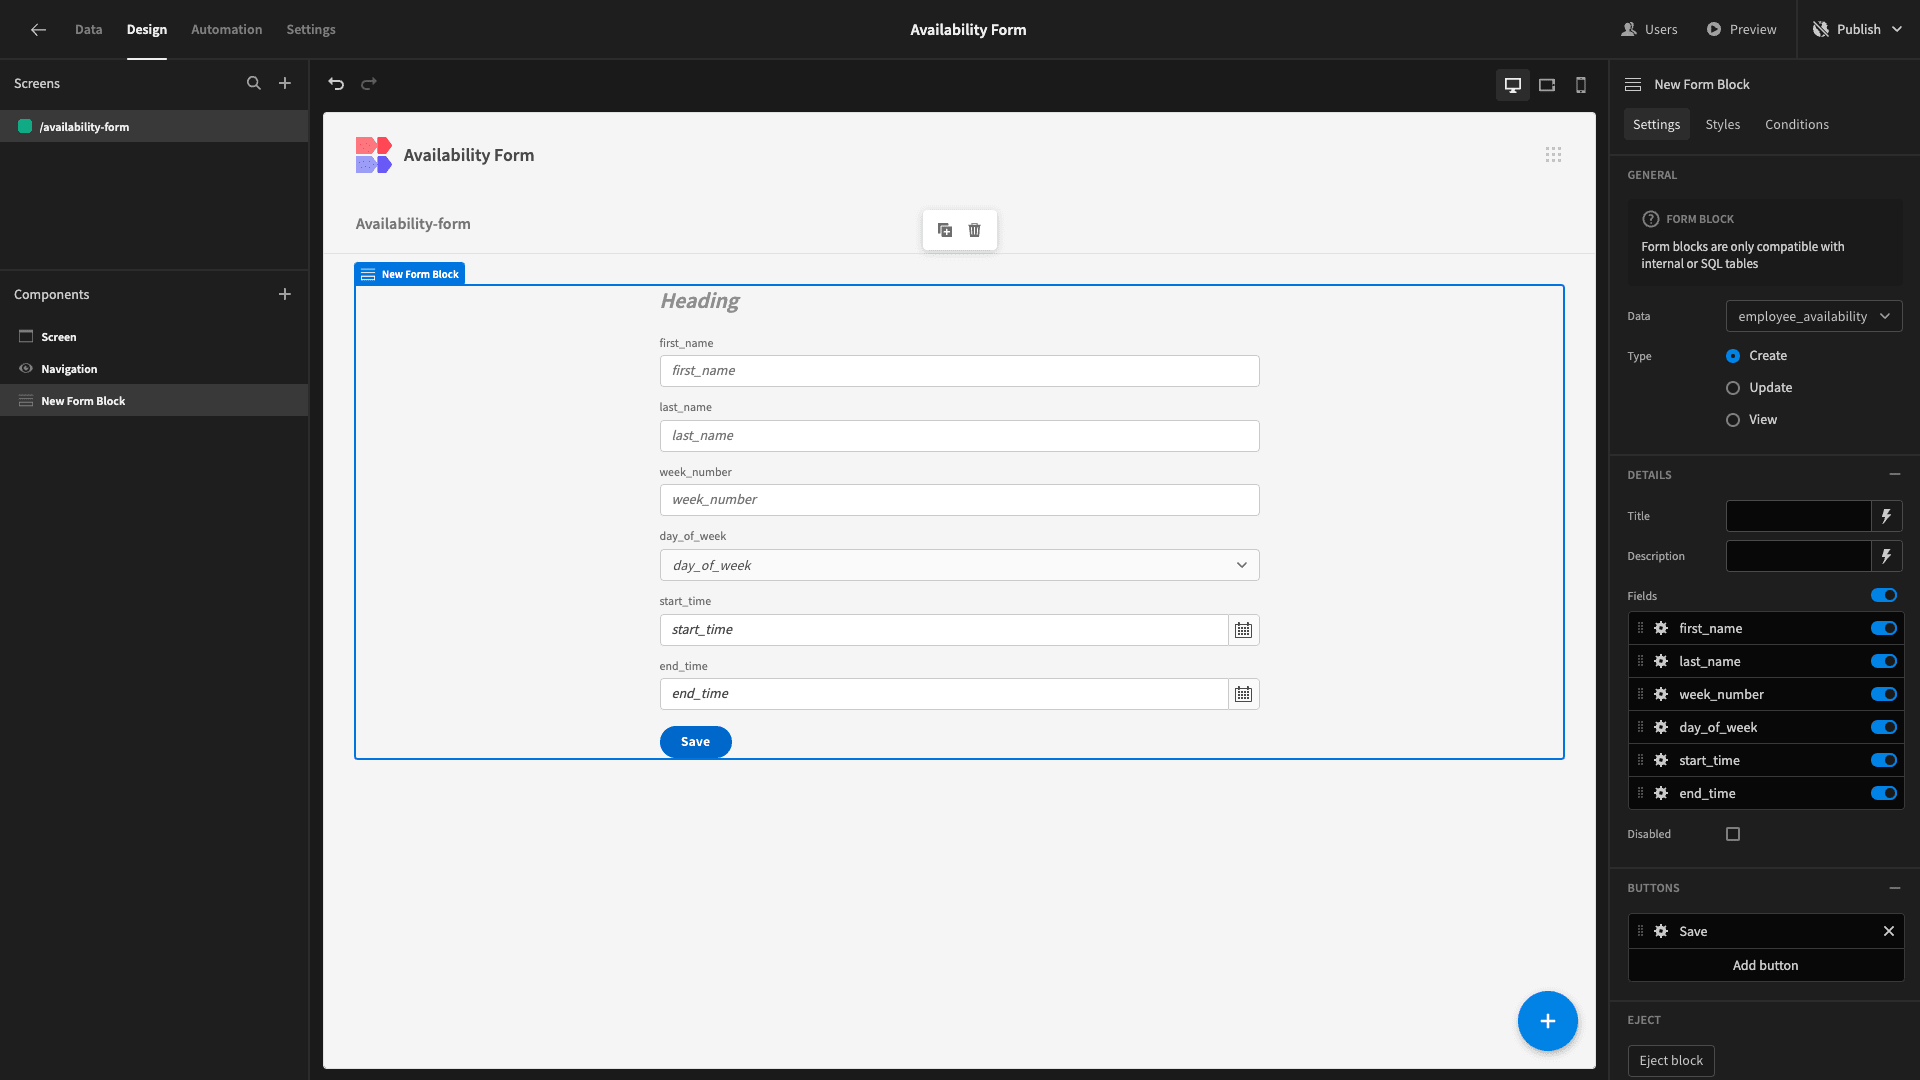
We’re going to start by adding a Form Block. This is a component that generates a working form UI, based on the data table we point it at.
We’ll be making some pretty extensive changes to this, but here’s what it looks like out of the box.
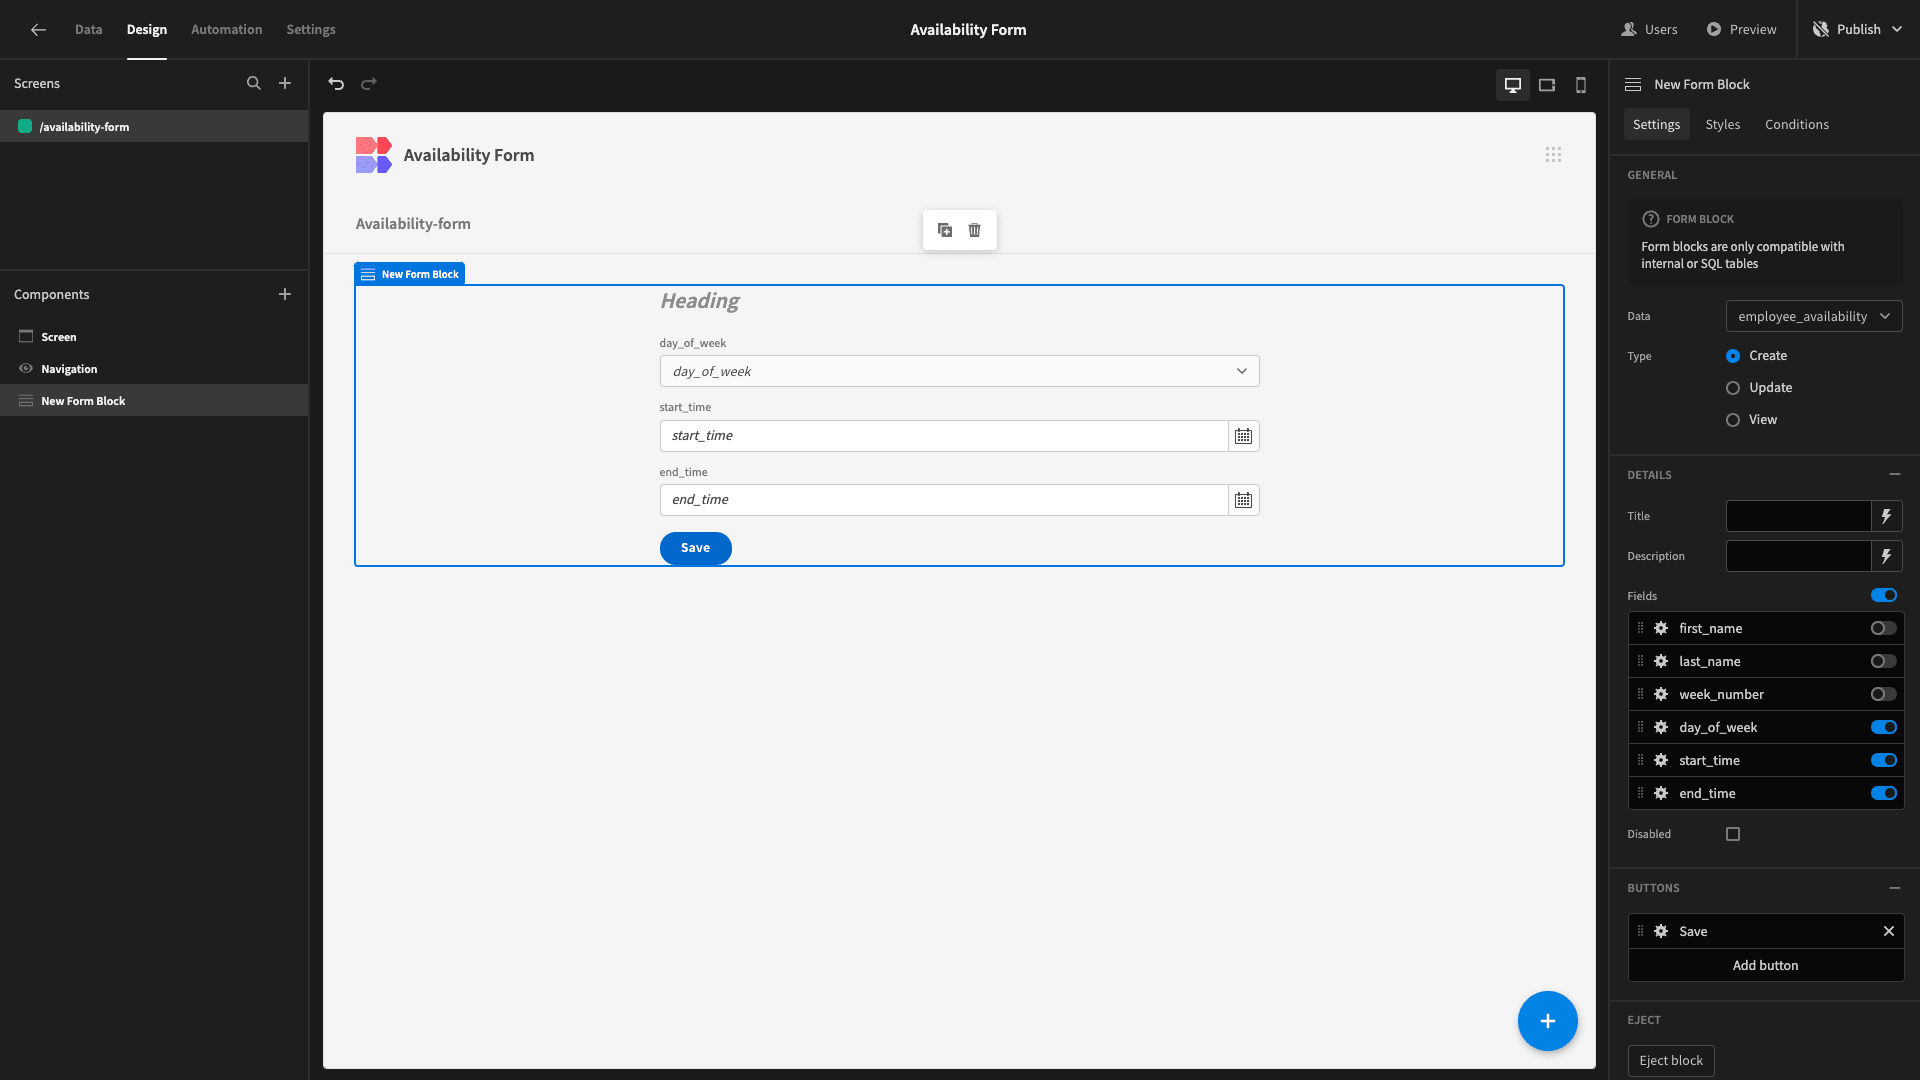
Eventually, our form will allow users to create several new rows in our data table all at once. For now, though, we just want to create the basic layout of a single row.
We don’t want to make users input their names or the current week for every single row, so we’re going to deselect these and remove them from our form.
We’ll add values for them systematically later.
To make it a bit clearer that the values will also be saved, we’re going to place them in our Title. This will also provide a more personalized user experience.
Start by opening the bindings drawer for the Title using the lightning bolt icon.
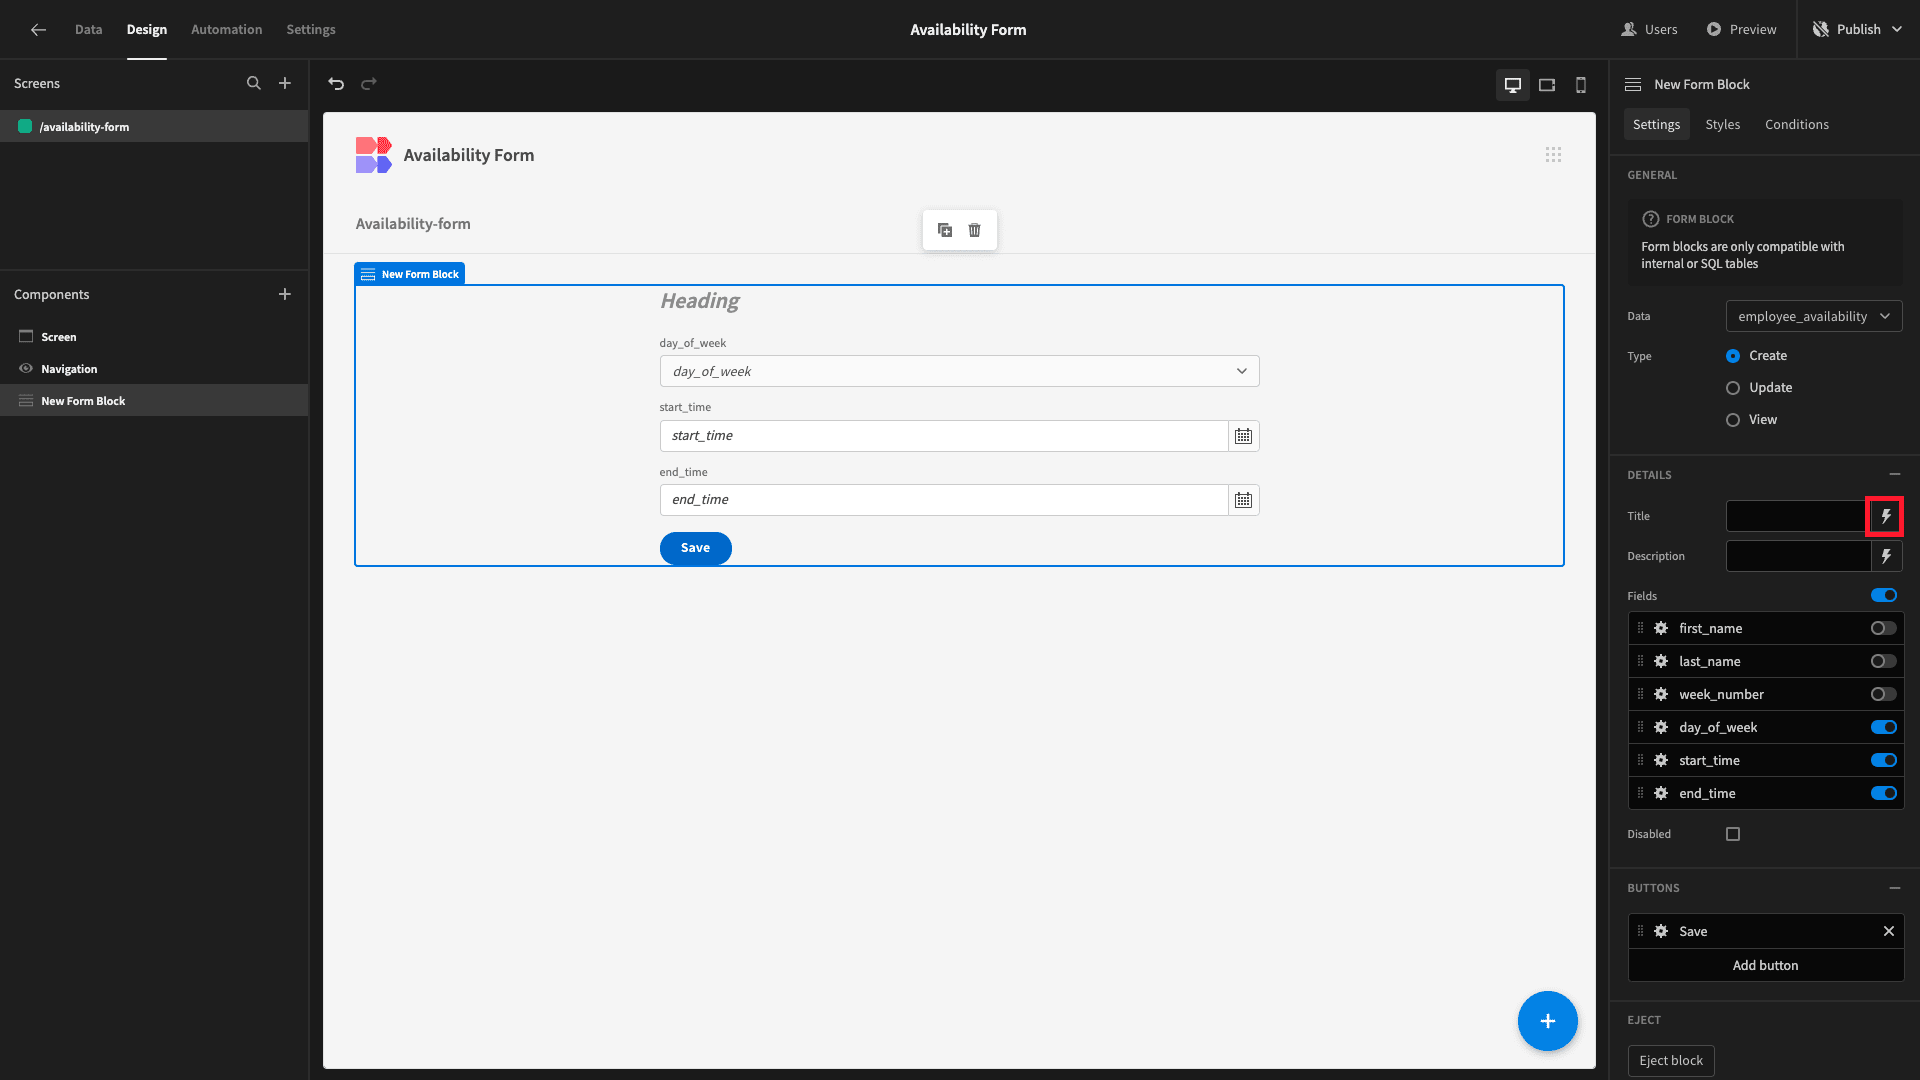
Here, we can use any values our form is exposed to as bindings within JavaScript or Handlebars expressions. To calculate the numerical week of the year, we need a bit of custom code, so we’ll open the JavaScript editor.

Basically, we want to display the current user’s name, followed by the current week. We can achieve this using the following piece of code.
 1// Declare a new constant for the current date.
 2
 3const now = new Date();
 4
 5// Calculate the current numerical week of the year, based on the current date.
 6
 7const currentWeek = Math.ceil(((now - new Date(now.getFullYear(), 0, 1)) / 86400000 + 1) / 7);
 8
 9// Returns the current user's full name along with the current numerical week.
10
11return $("Current User.firstName") + " " + $("Current User.lastName") + ": " + "Week " + currentWeek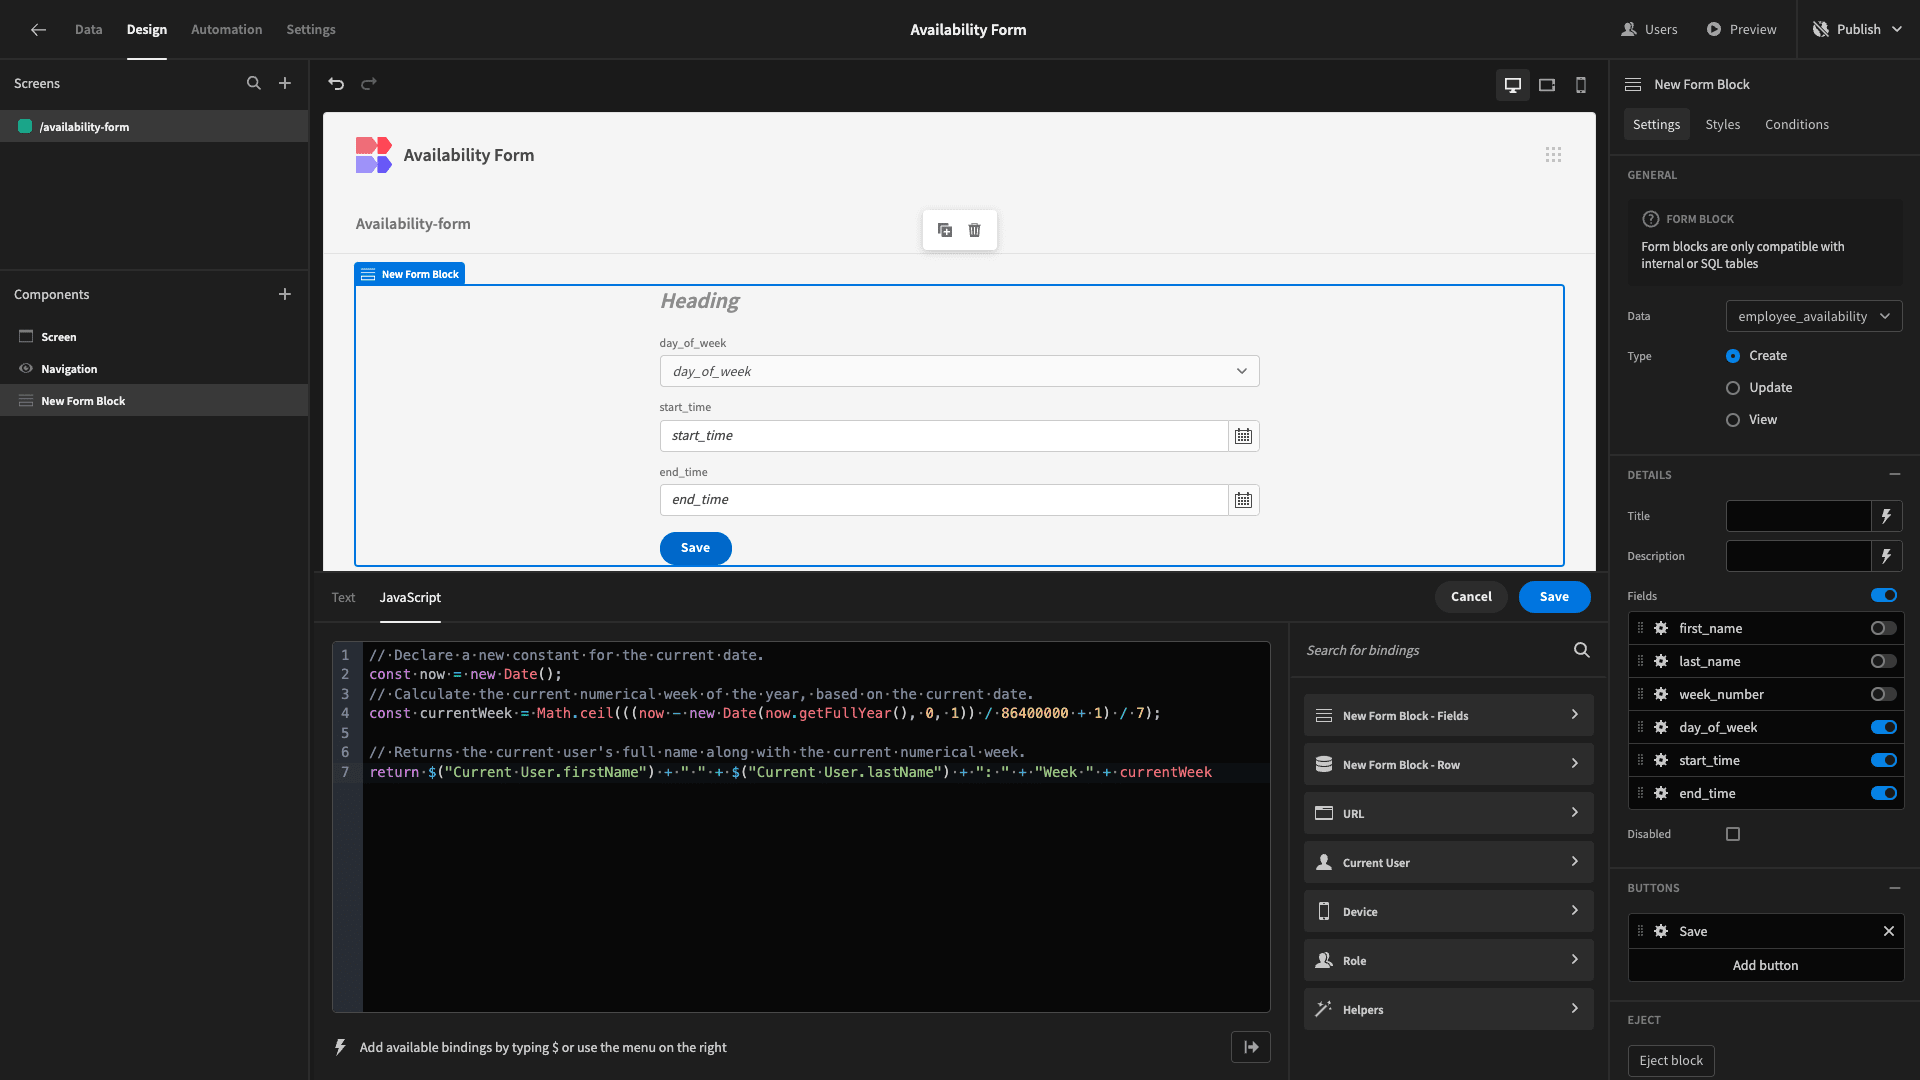
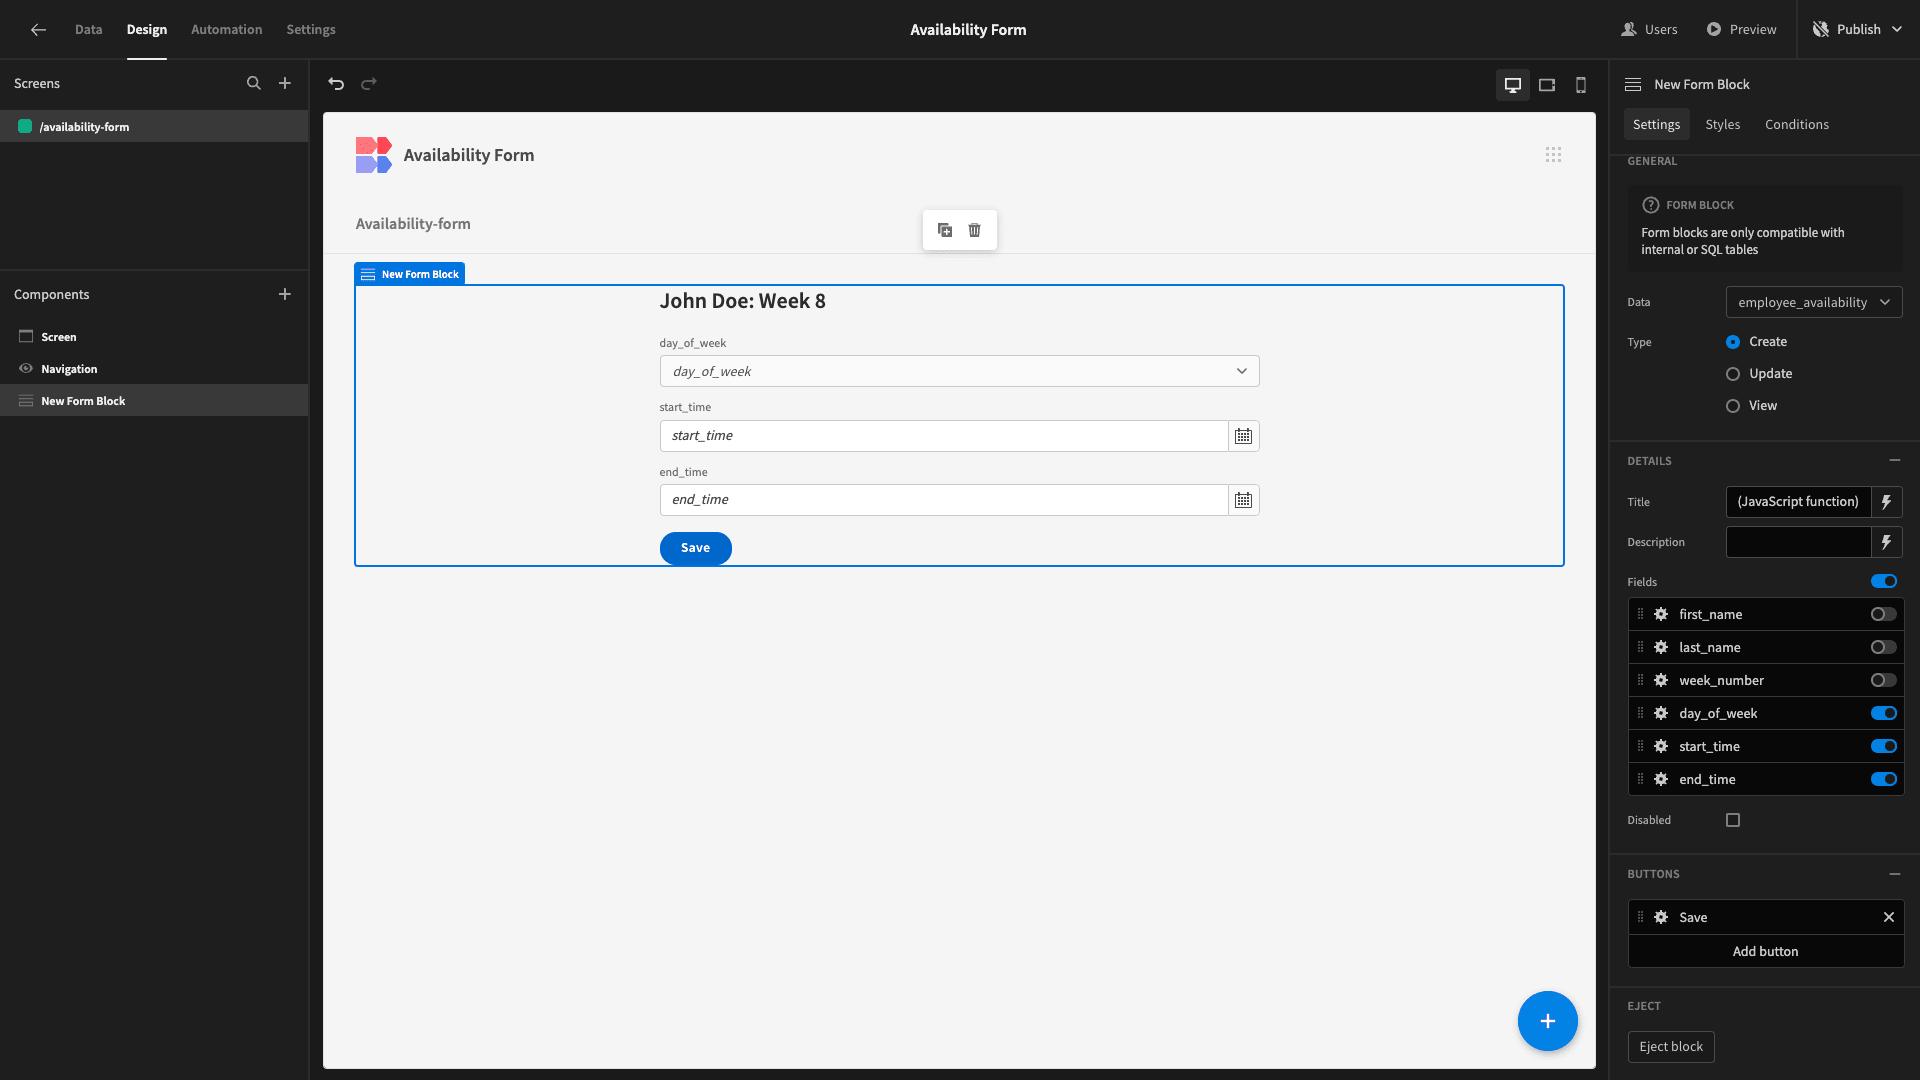
And here’s what our dynamic title will look like.
Next, we want to make a few changes to the underlying components that make up our Form Block.
To access these, we can hit Eject Block.

Our three form fields are nested inside a container. We want to set the direction of this to horizontal.
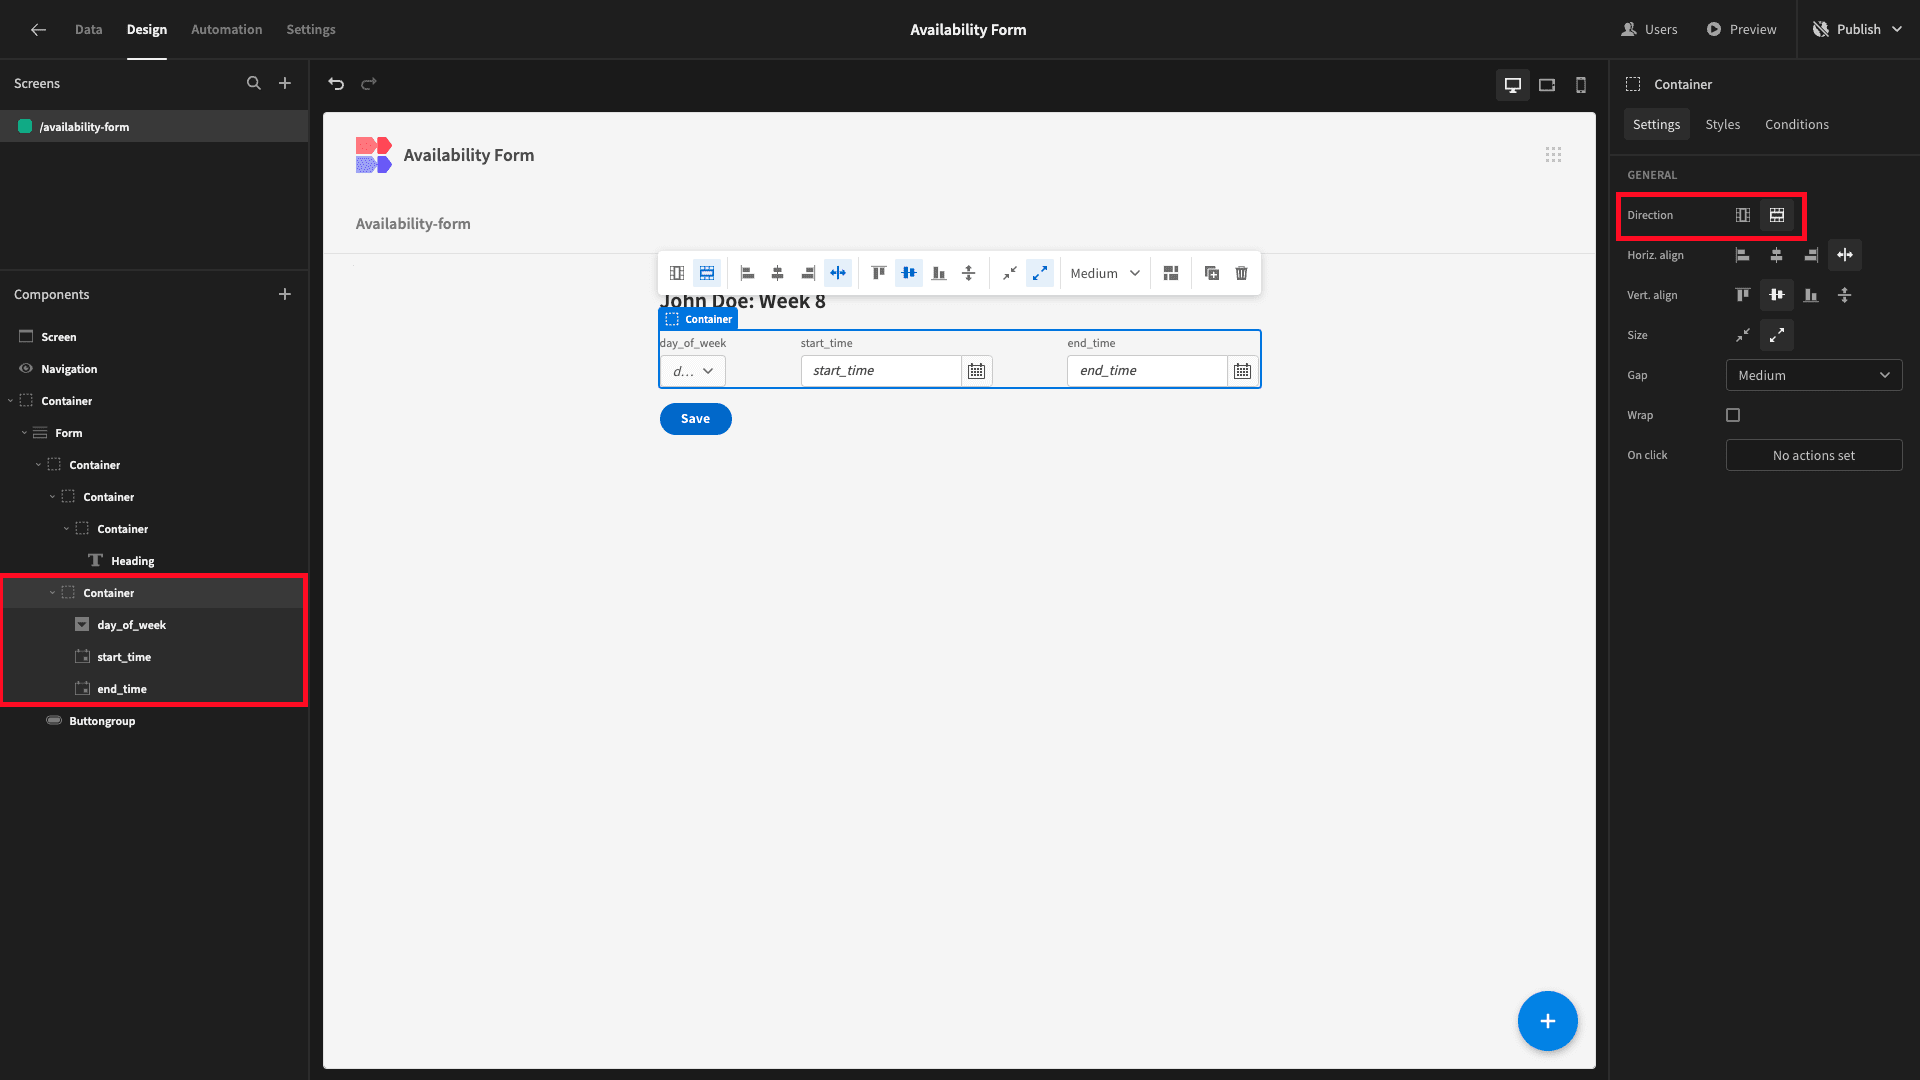
We’ll also give each field a custom width of 30%.

Lastly, we’re going to make a few changes to our Button Group component.
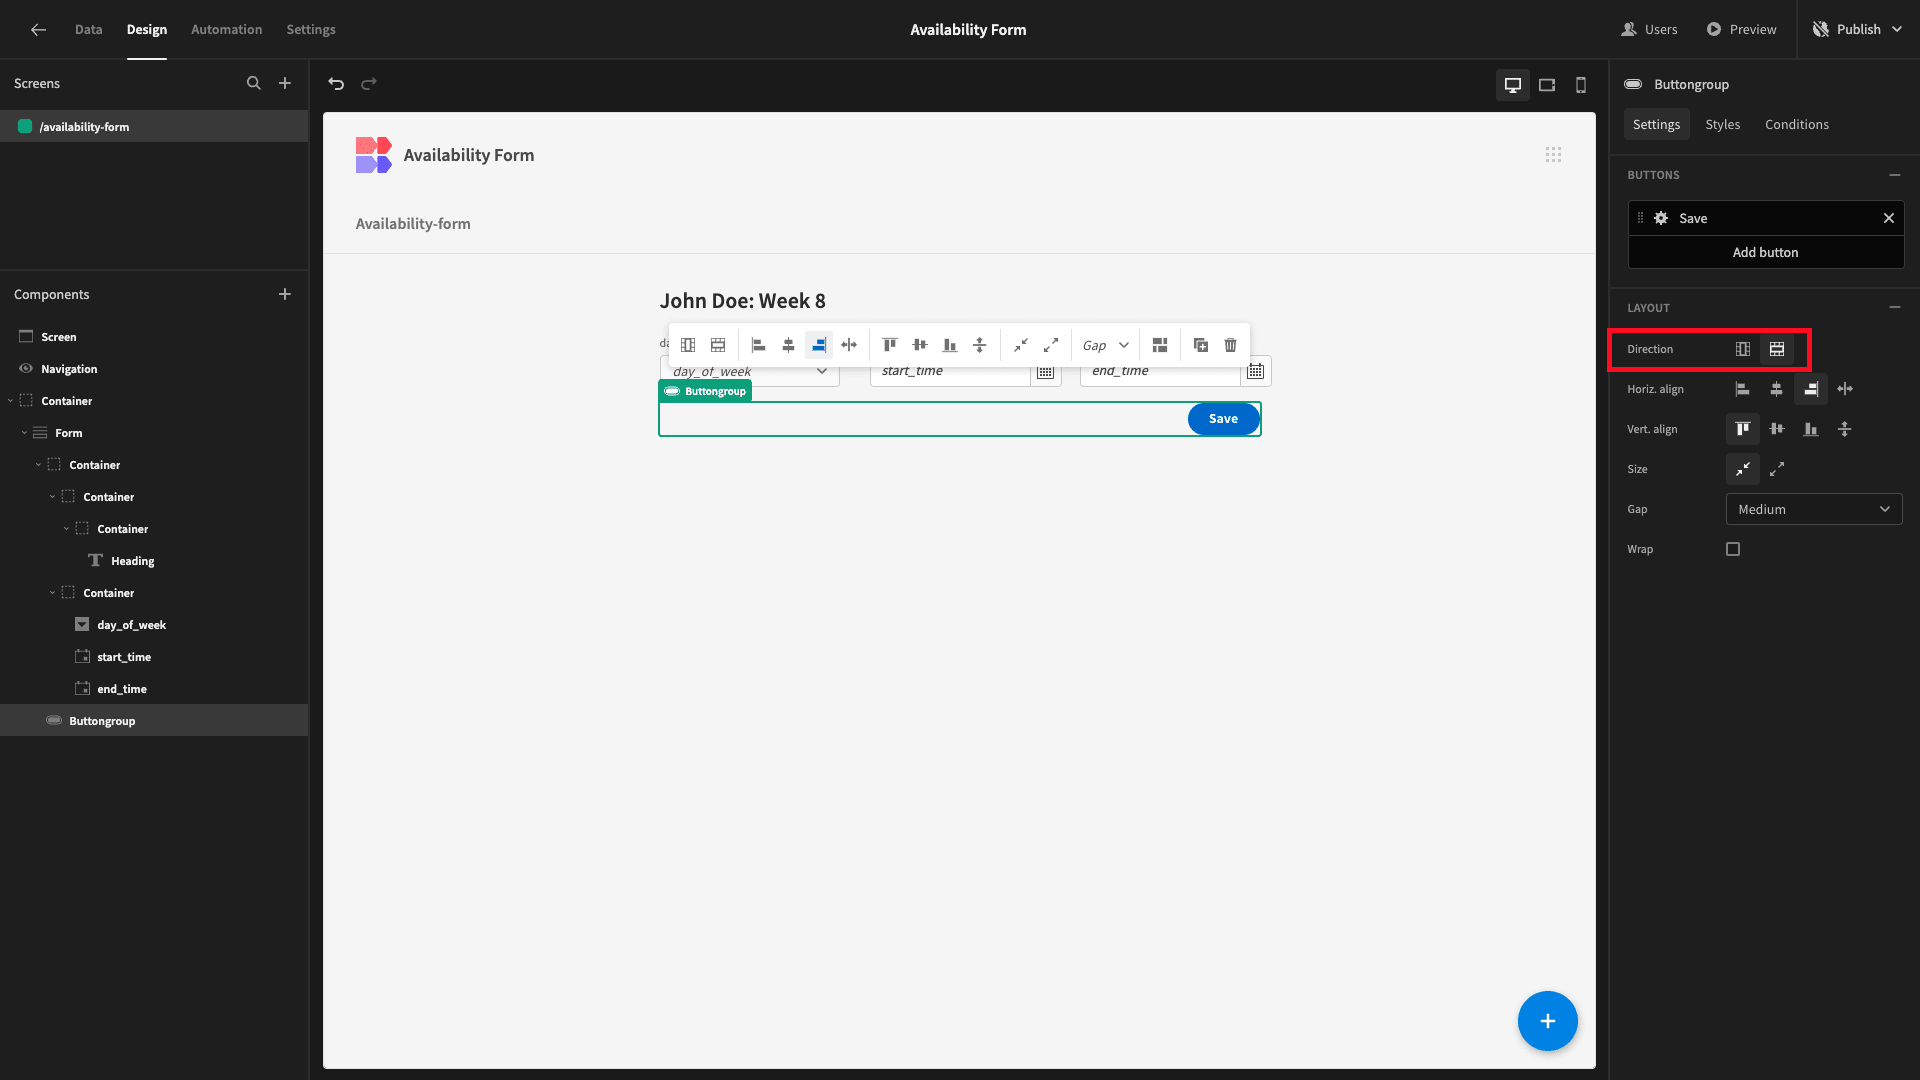
Firstly, we’ll right-align it.
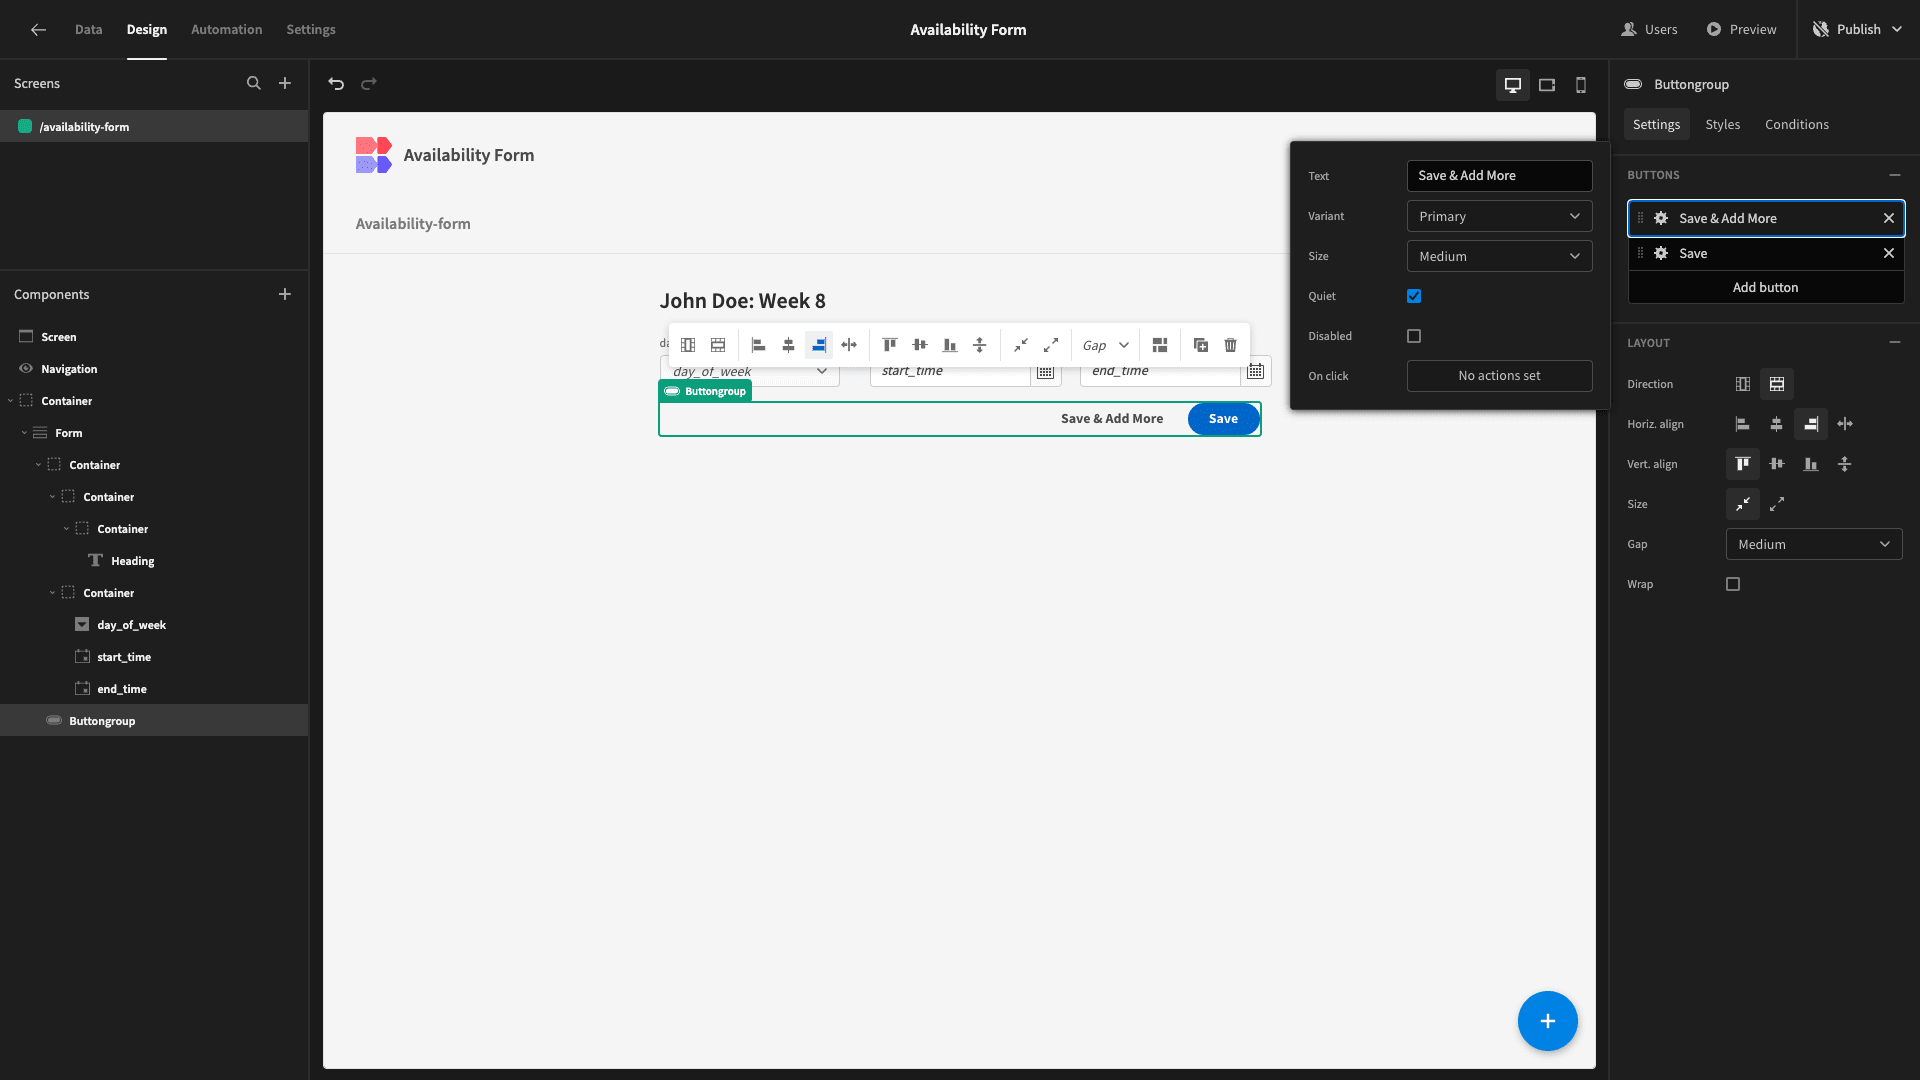
Then, we want to add a second button. We’ll set its text to ‘Save & Add More’ and select the Quiet option.
We’ll also need to define what this does by opening the Actions drawer.

For now, we’re adding two actions to validate our form and save a row to our employee_availability table.
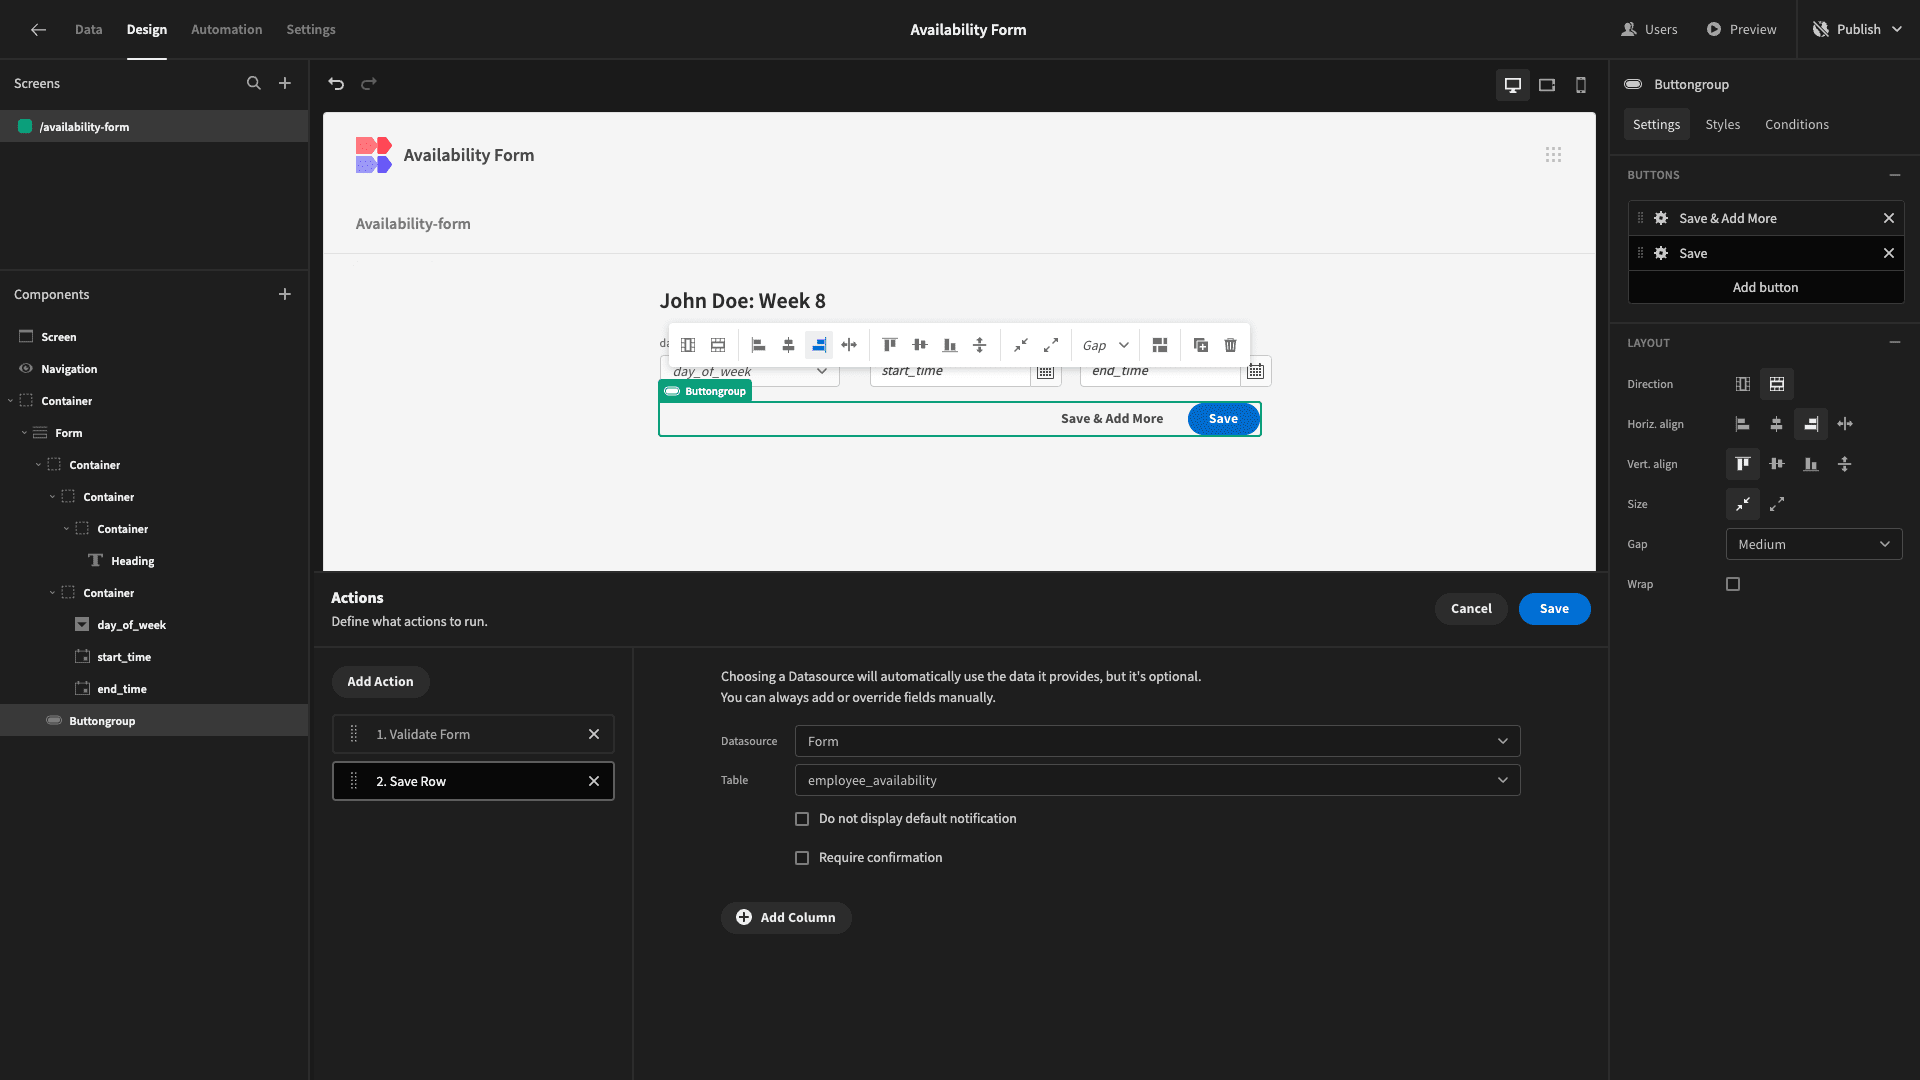
We’ll make a few more changes to this a little later.
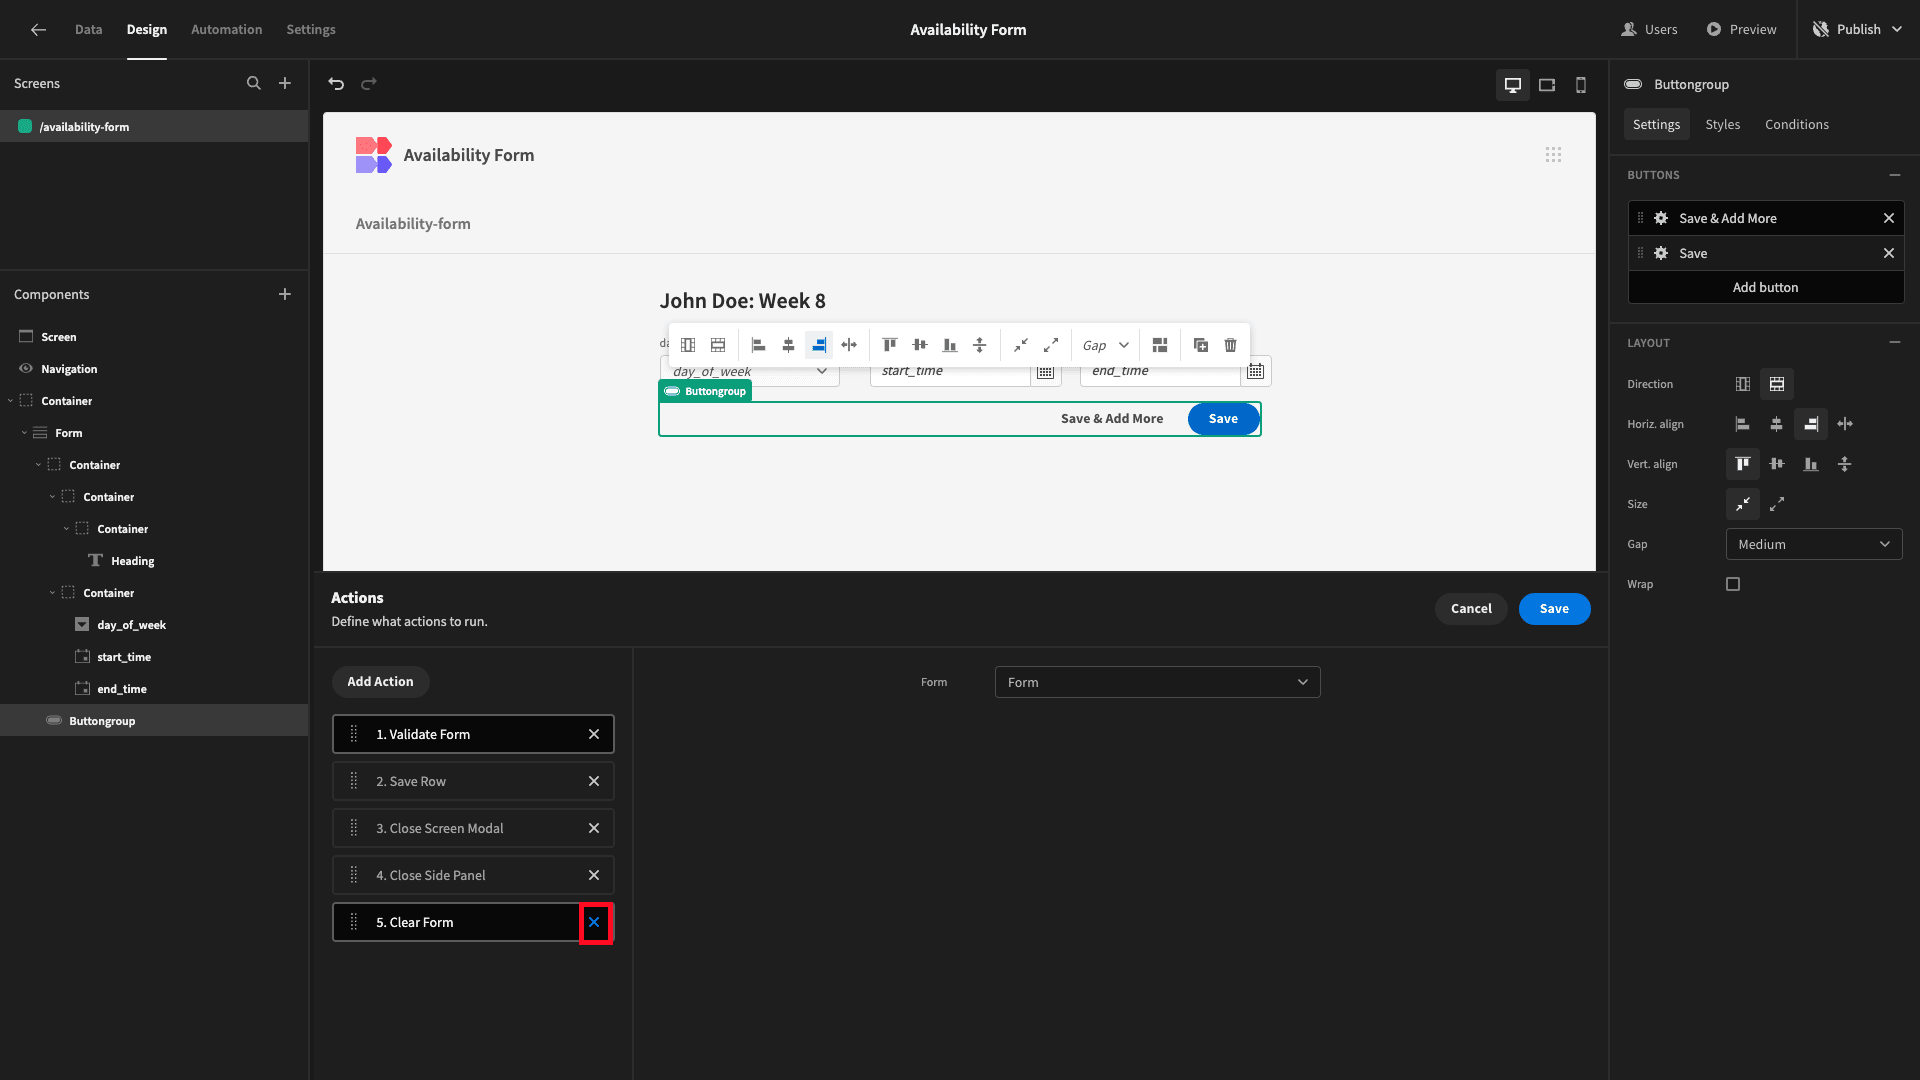
While we’re here, we should also open the Actions for our Save button - removing the Clear Form step.
That’s the basic layout of our single row completed.
3. Auto-populating values
Currently, our form only handles three of the attributes we need to create a record in our data table.
Our next step is to configure values for the remaining fields without requiring user inputs.
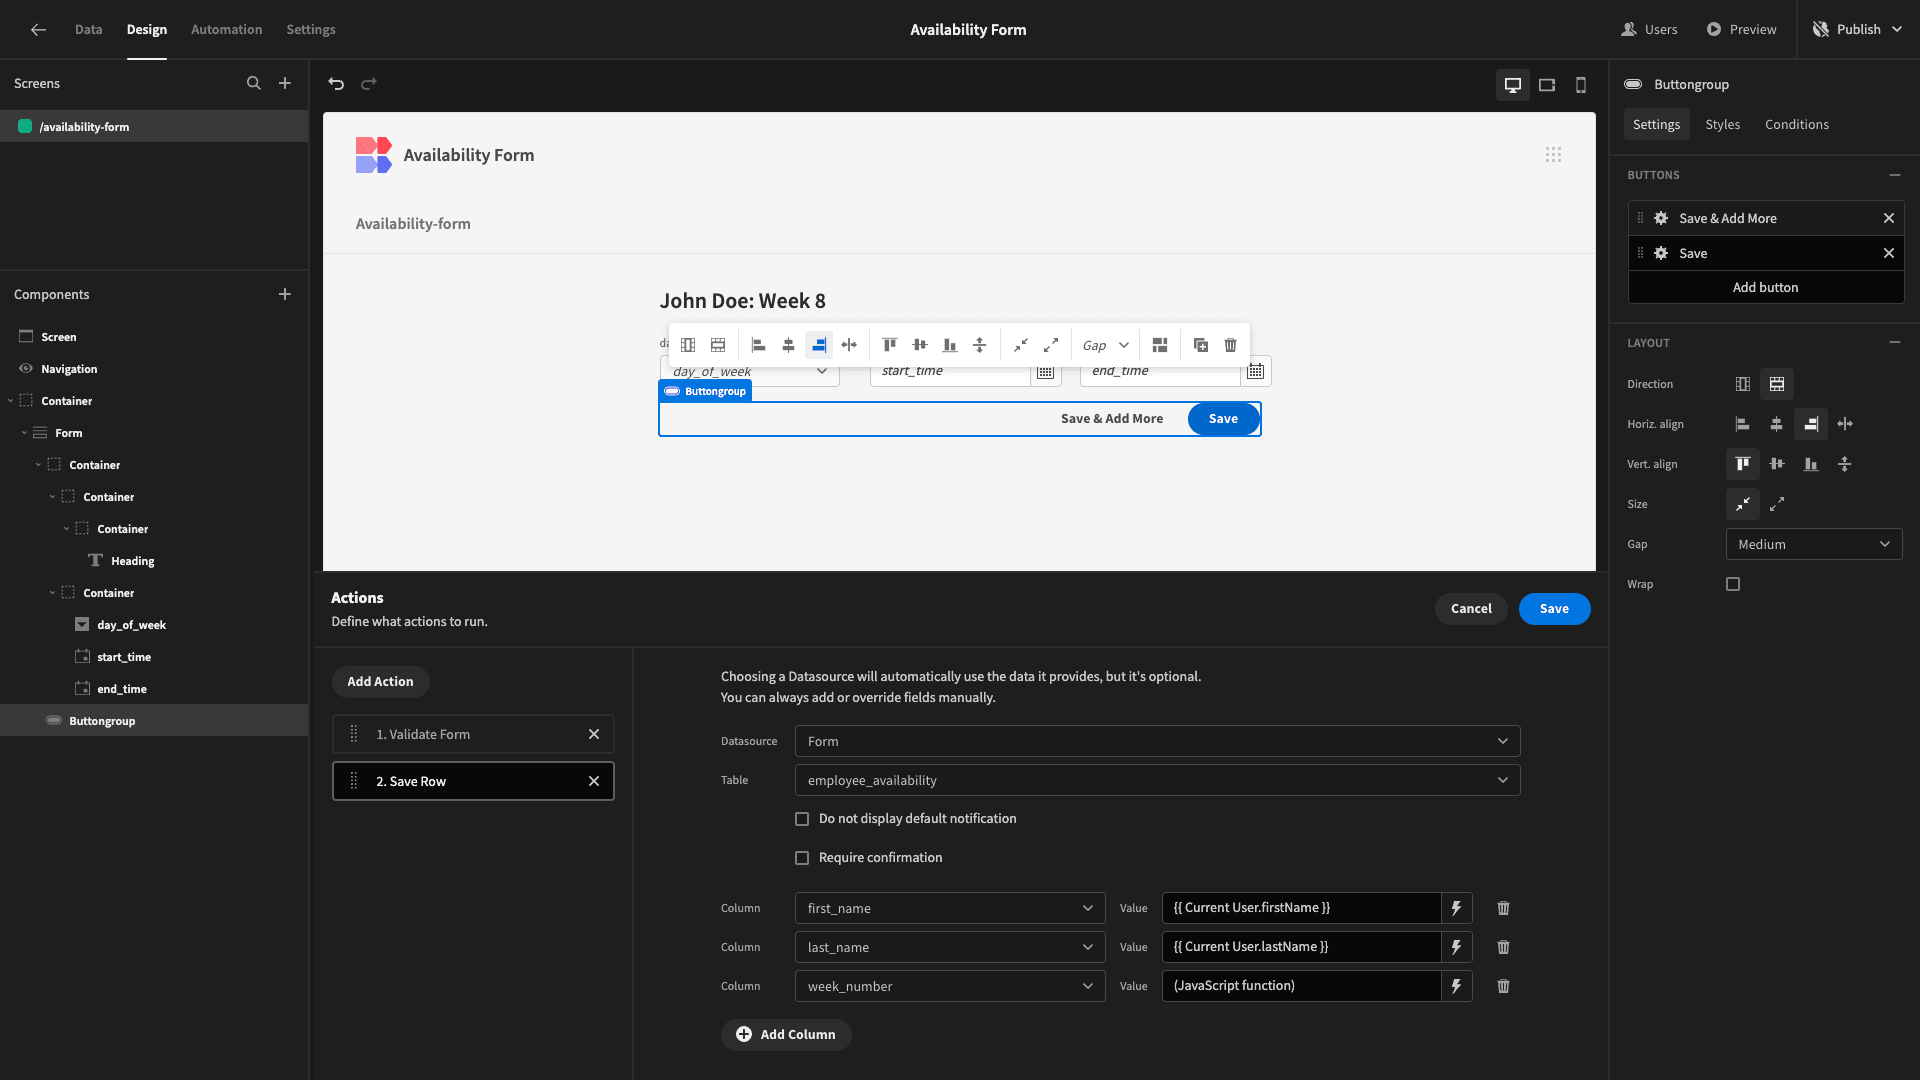
Within our Save Row actions, we have the option to add columns.

We’ll add the first_name attribute and then open the bindings drawer for its value.

We can then see all of the categories of values that we can populate here. We’re selecting Current User.

Then FirstName.
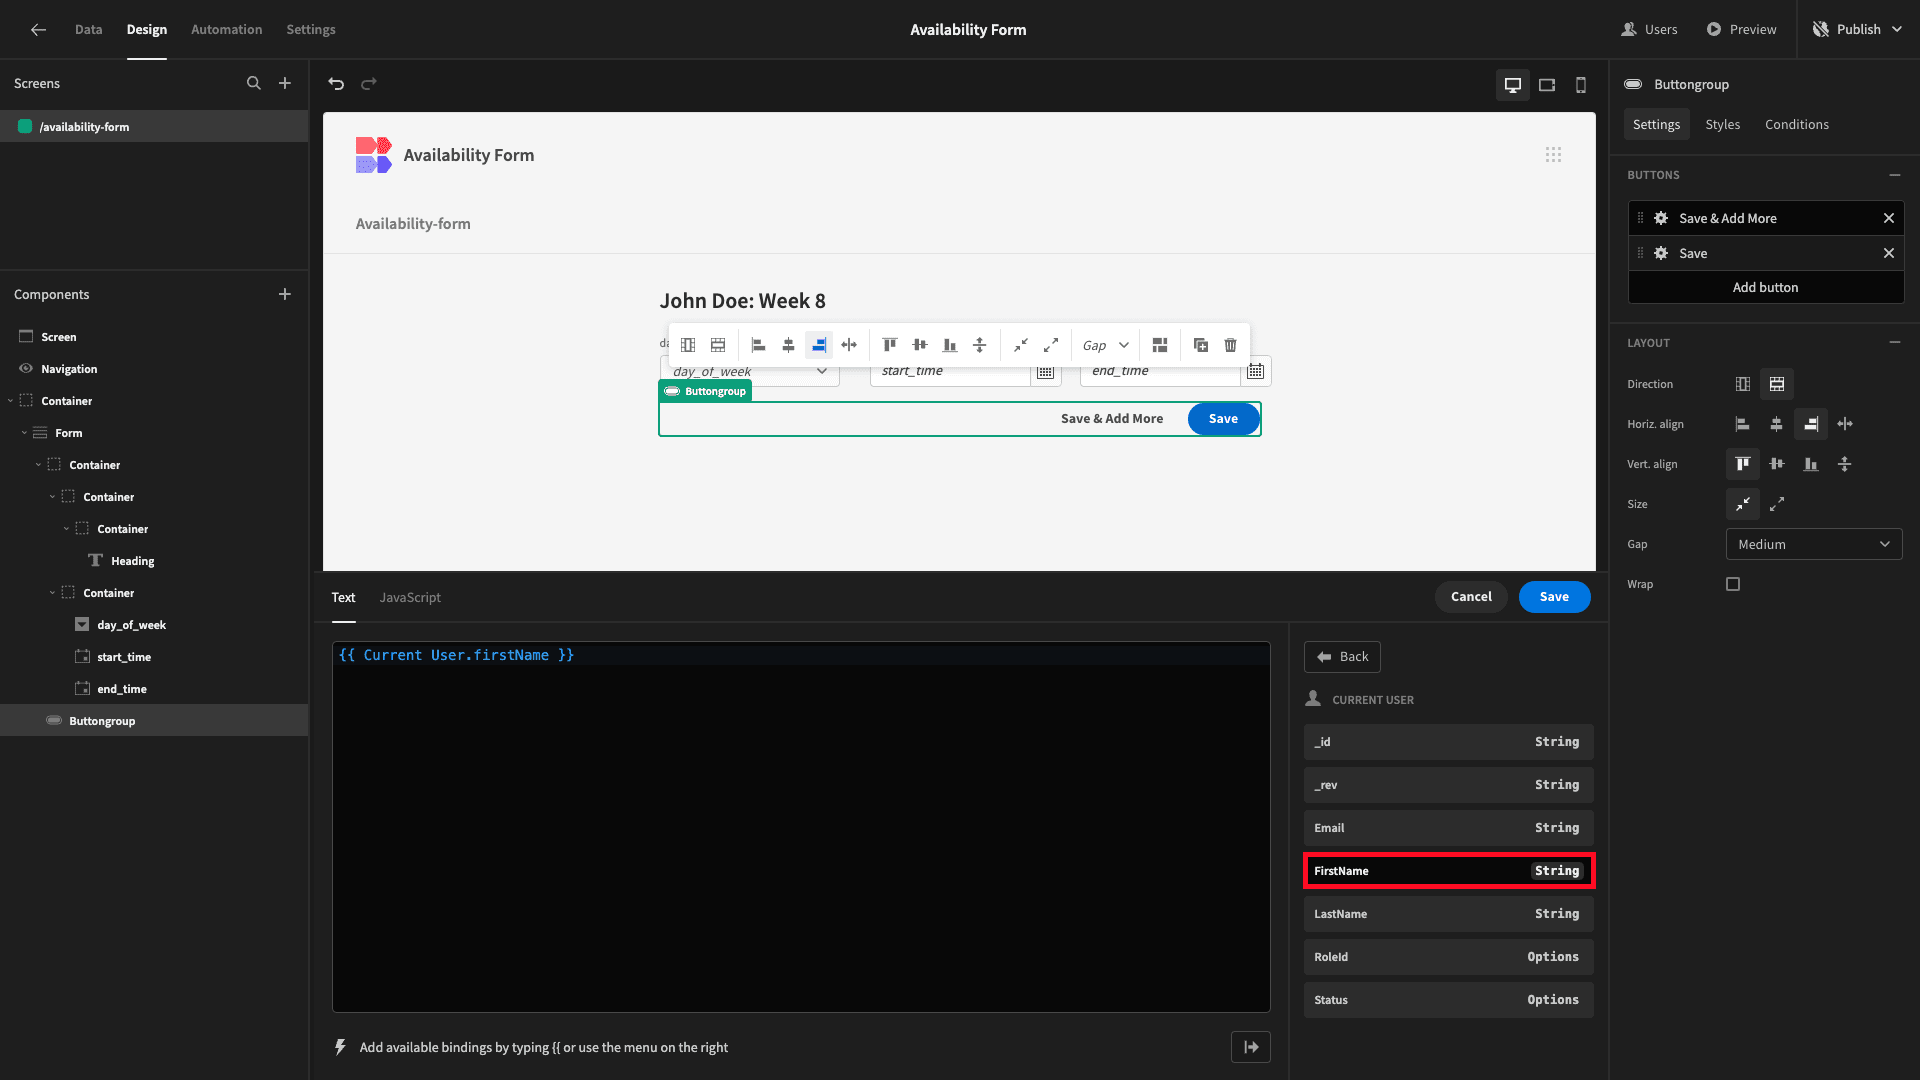
We’ll also repeat this process for our last_name attribute.

For our week_number attribute, we’re going to use the following JavaScript expression:
1const now = new Date();
2
3const currentWeek = Math.ceil(((now - new Date(now.getFullYear(), 0, 1)) / 86400000 + 1) / 7);
4
5return currentWeek
We’ll also repeat this step for our other button.
4. Adding looping and conditionality
Now, we’re adding the real power to our availability form. By the end, users will have the option of adding up to five rows at a time. To do this, we’ll be making extensive use of Budibase’s built-in conditional design tools.
Initializing states
Our conditionality rules are all going to based around states. These are key/value pairs that we can create and use in the background to manipulate our UI based on user actions.
We need two states:
- A numerical value called ‘row’, which will increment each time a user hits Save & Add More.
- A value called ‘break’, which we’ll set to true if a user hits the Save button.
The first thing we’ll do is add a screen-load action to create our row state.

We’re using an Update State action, setting the key to ‘row’ and the value to 1.

Next, we’ll add a similar action to our Save & Add More button, this time setting the value to 2.
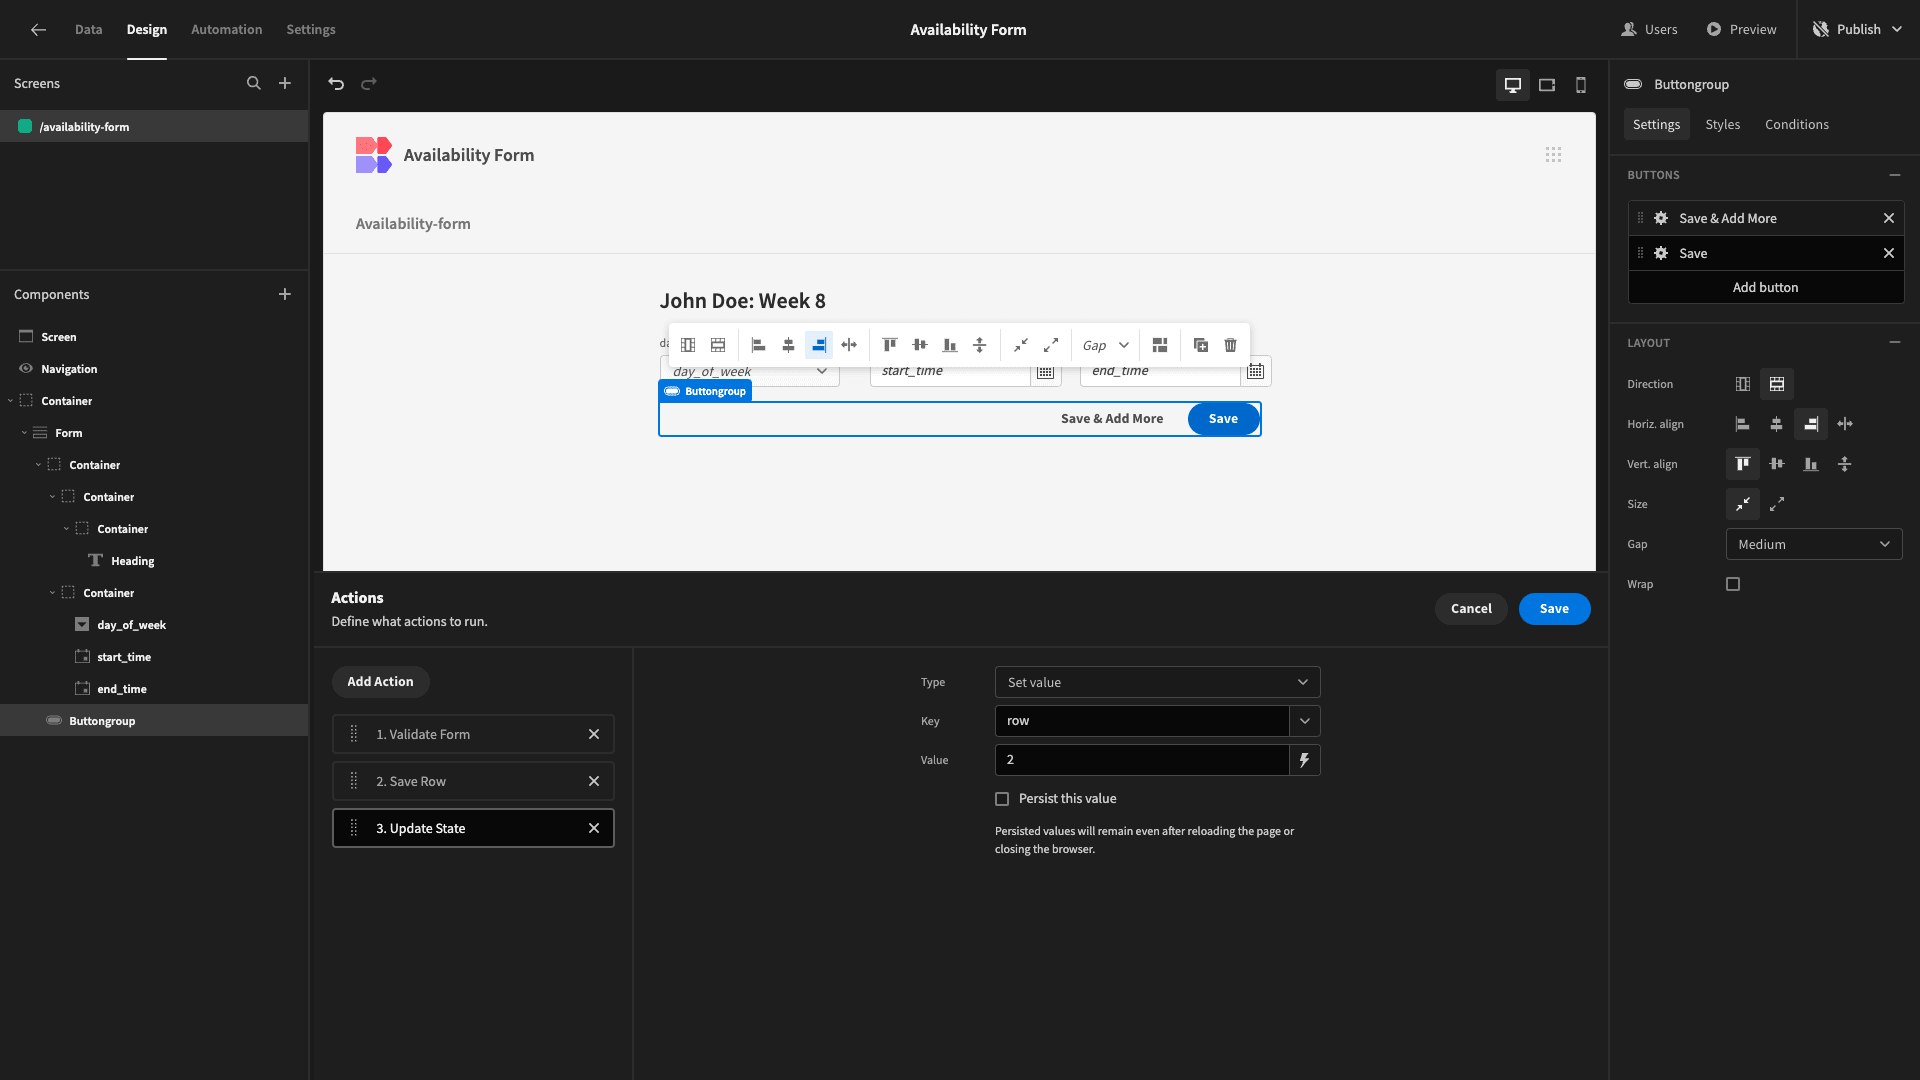
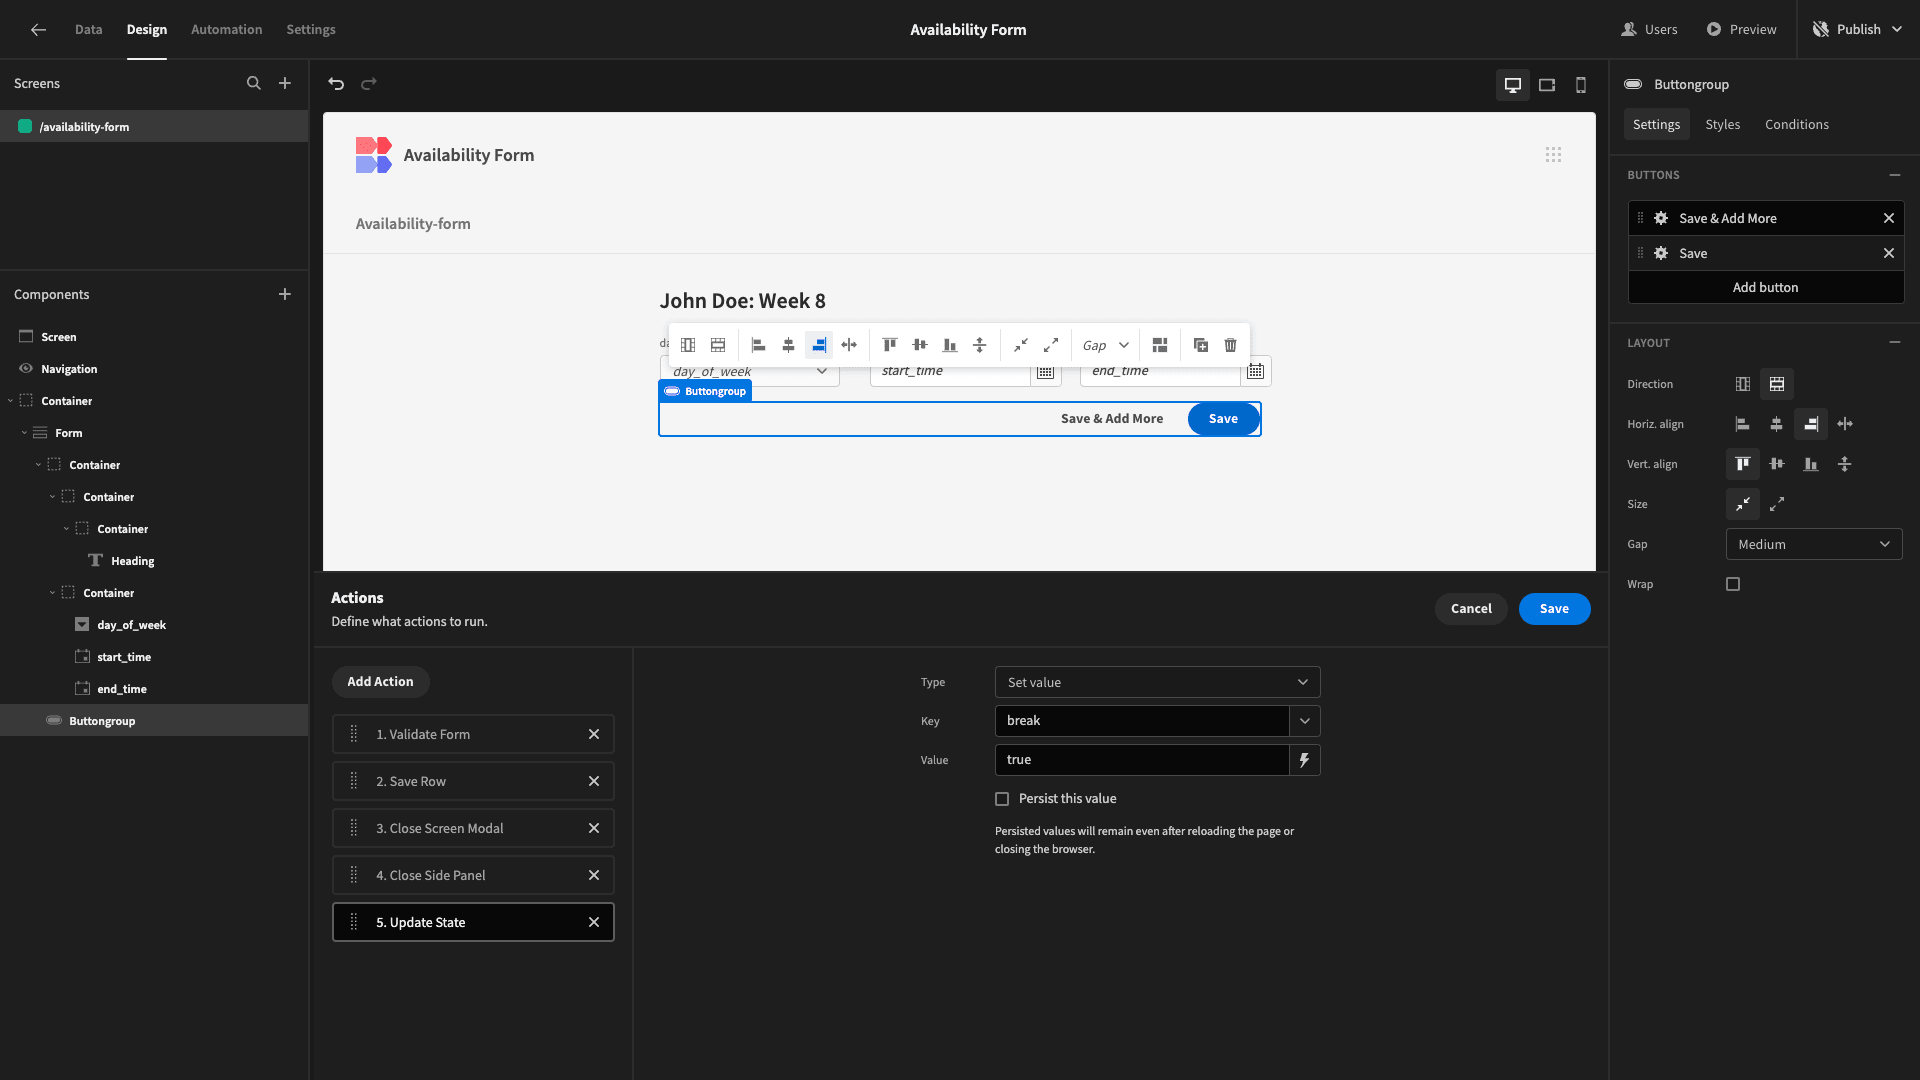
Lastly, we’ll add an Update State action to our save Button, this time using ‘break’ as our key and ‘true’ as our value.
Creating conditionality rules
Now, we need to define what we’re going to do when these states have different values assigned to them.
We want to create rules to do the following when our row state is incremented, or our break state evaluates to true:
- Disable the form fields for the current row.
- Hide our buttons.
For the successive rows, we’ll also add rules so that they’re only displayed if the row state reaches the relevant value.
We’ll start with our buttons since this is a little simpler.
Open the conditions drawer for the Button Group component.
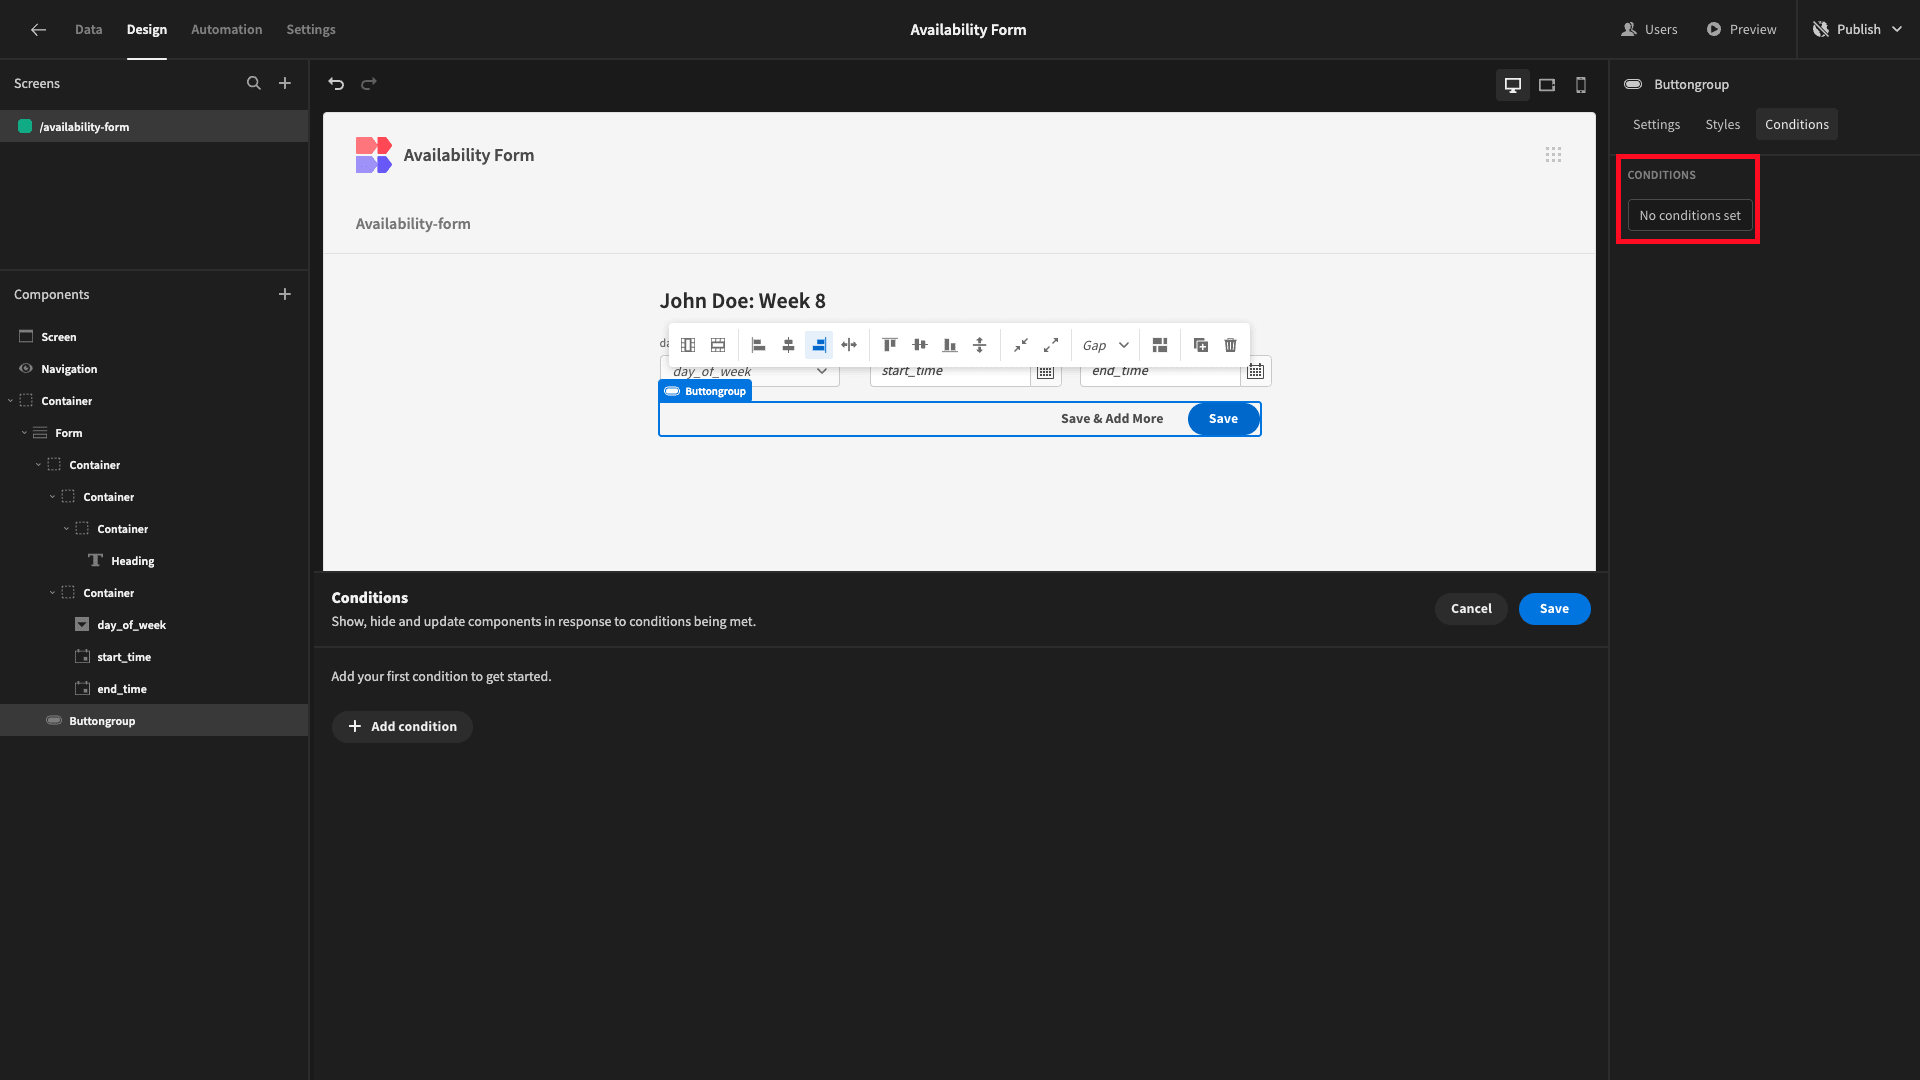
We want to add two rules here:
- Hide component if {{ state.row }} is greater than or equal to 2.
- Hide component if {{ state.break }} is equal to true.

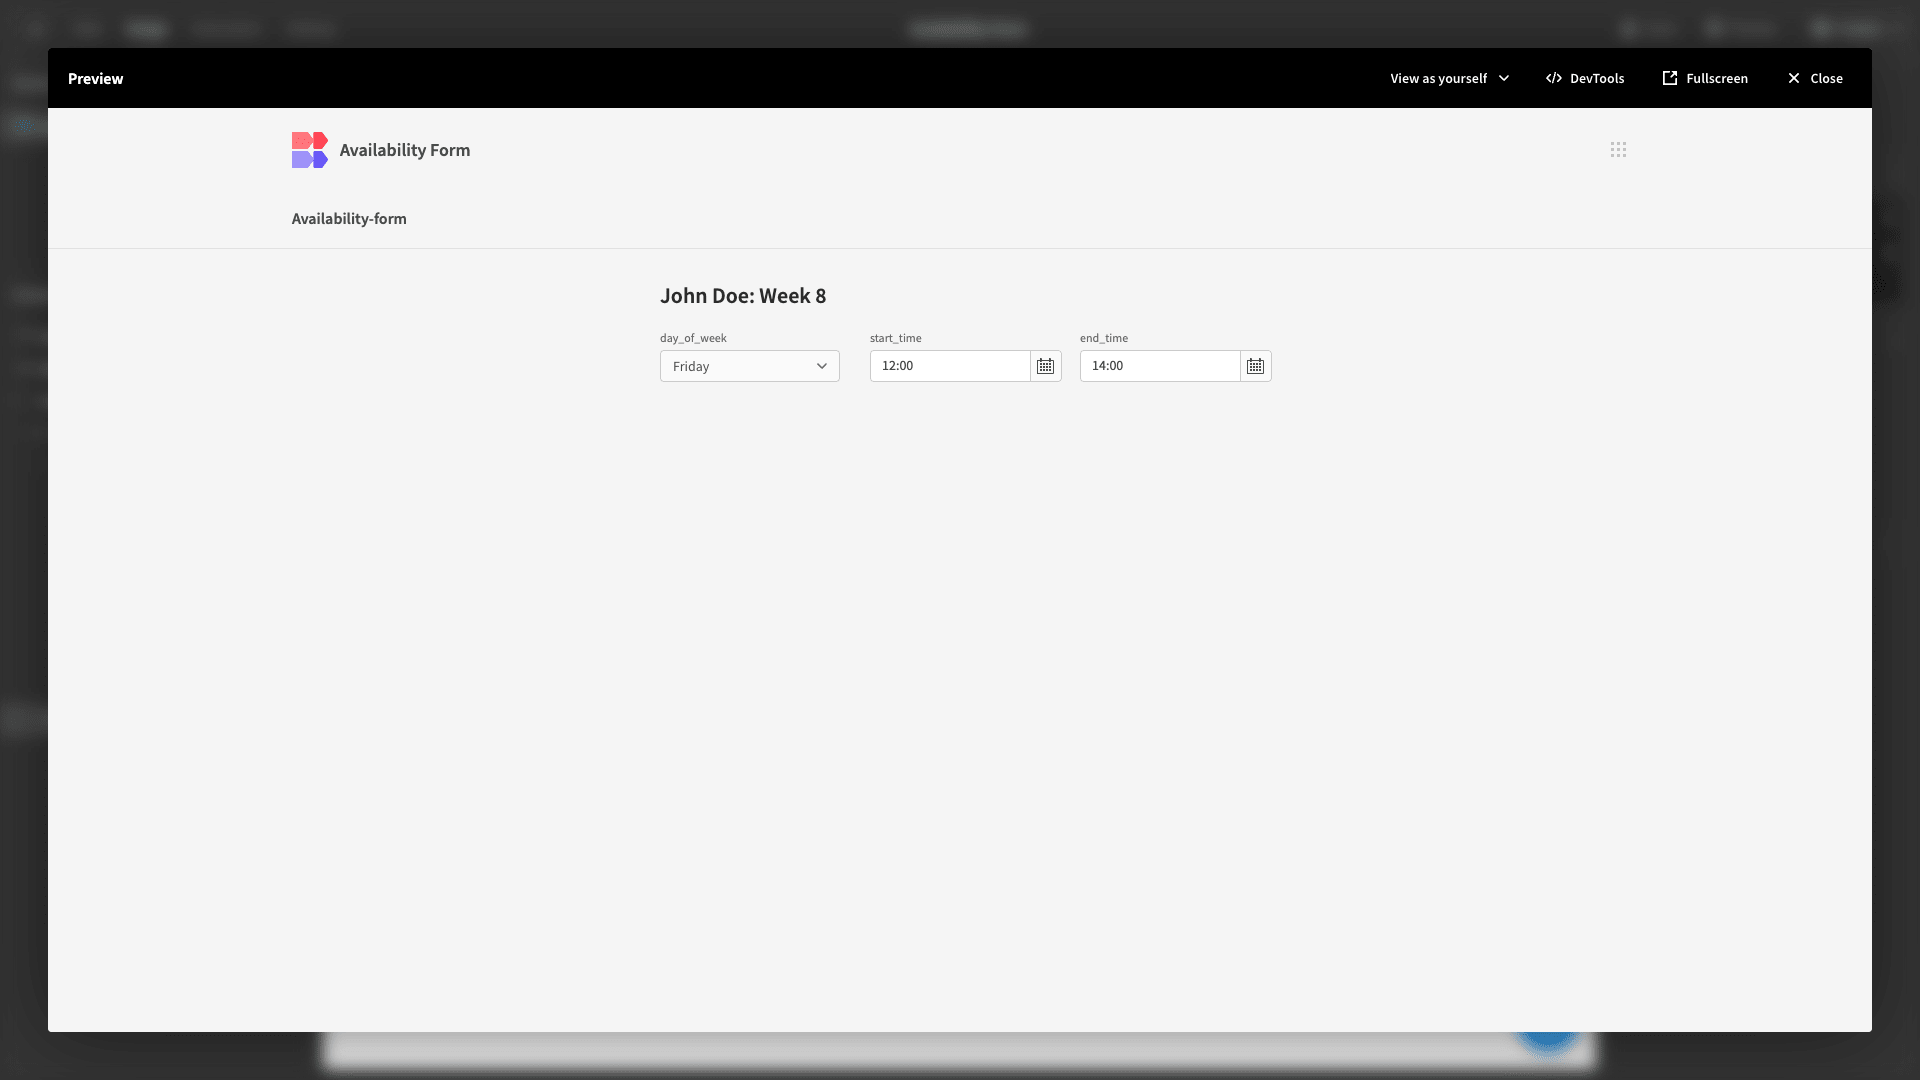
And we’ll test this by saving a row of dummy data using either of our buttons.
Next, we’ll need to apply two slightly different rules to each of our individual form fields.
These are:
- Update Setting - Disabled - to True if {{ state.row }} is greater than or equal to 2.
- Update Setting - Disabled - to True if {{ state.break }} equals true.
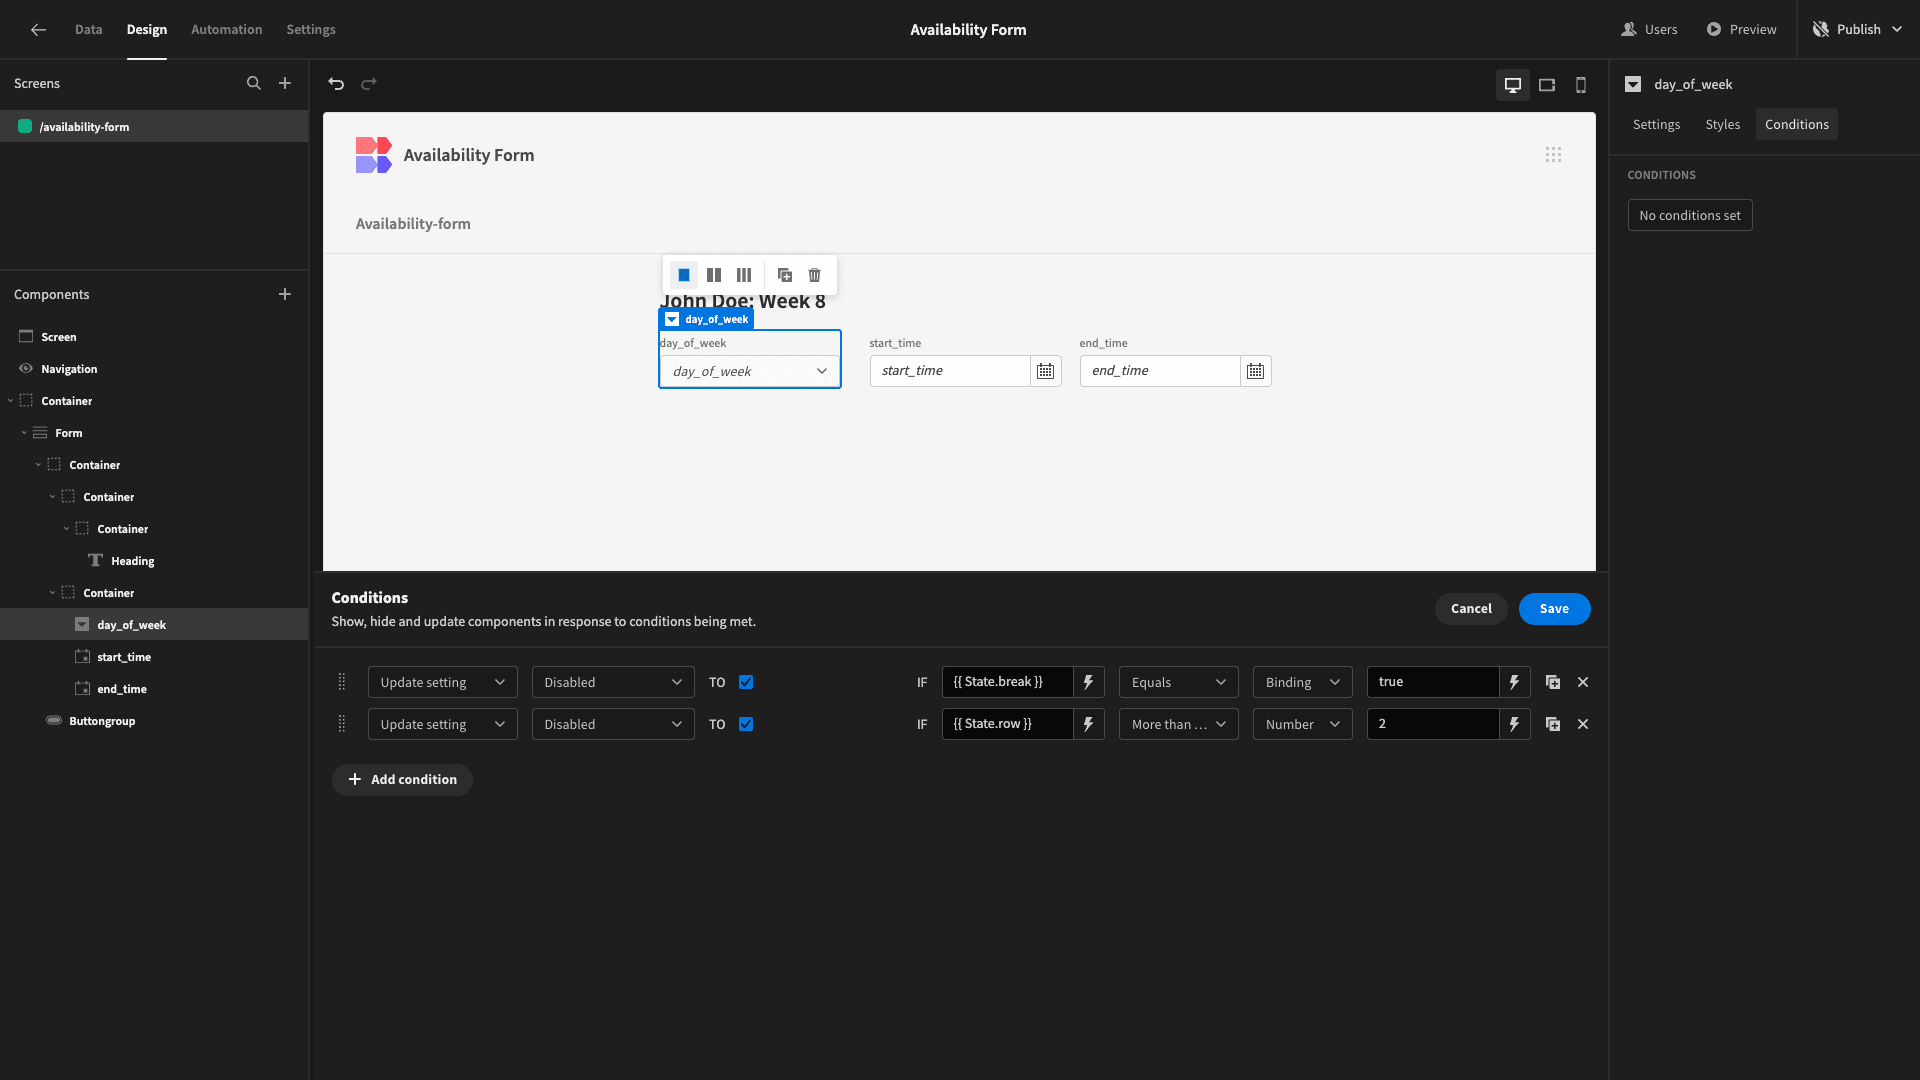
Once we’ve added these rules to all three fields, we can test them by adding a row with our availability form.

Adding our second row
Next, we’ll add a second row by duplicating our entire form. We’ll rename the new one Form 2, to make it easier to see what we’re doing.
We’re going to make three changes to this:
- Delete the Headline component.
- Add a condition so Form 2 is only shown if {{ state.row }} is greater than or equal to 2.
- Increment {{ state.row }} in all of our button actions and conditionality rules by 1.
Here’s our form with the headline removed.
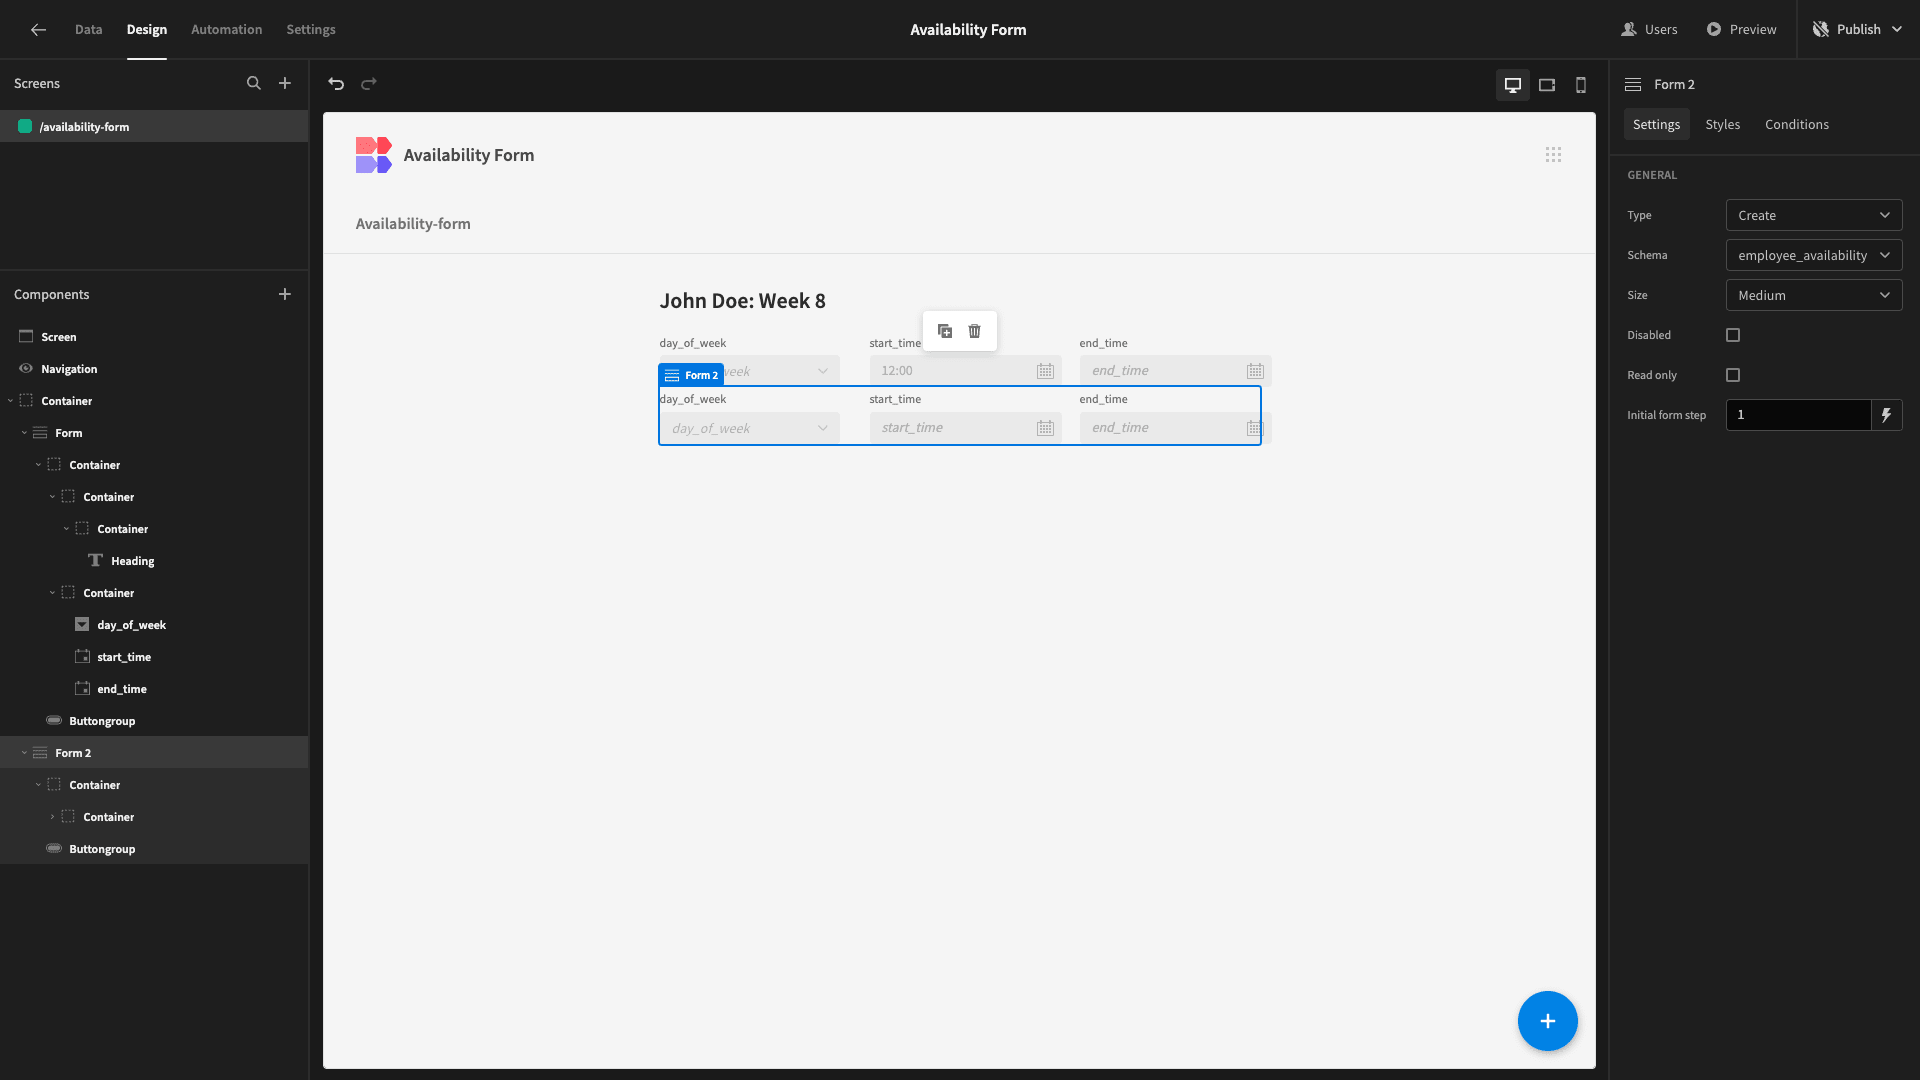
Note that our fields display as disabled in the Budibase builder because our row state is unassigned without the screen being loaded.
Next, we’ll add a condition to Form 2 so that it’s only shown if {{ state.row }} is more than or equal to 2.

And lastly, we’ll need to update all of our existing conditions and button actions, increasing the value of {{ state.row }} by one.
Here’s a reminder of all the places we need to do this:
- The Update State action for our Save button.
- The Update State action for our Save & Add More button.
- The Update Setting rules for each of our form fields.
- The Hide Component rules for our Button Group.
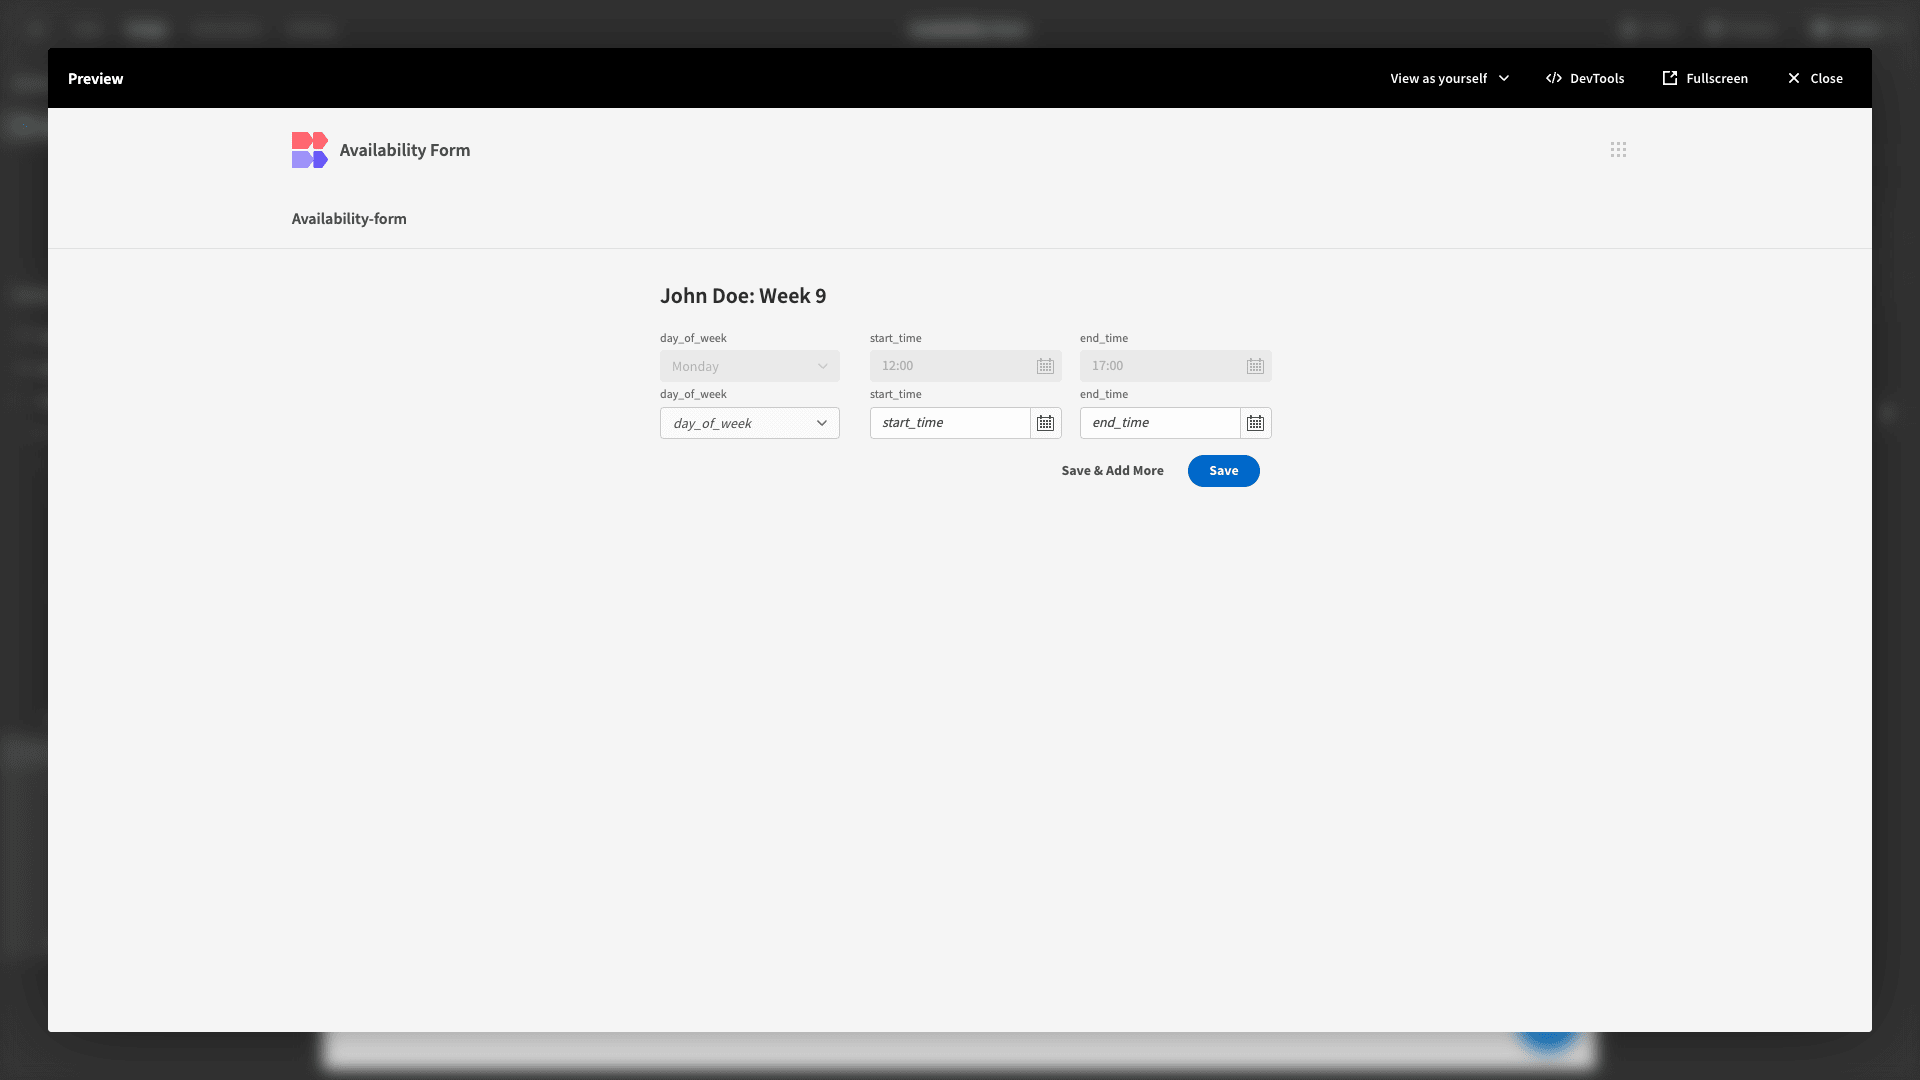
Here’s how our second row will look when we preview our app.
Adding the remaining duplicate rows
By the end, we want our users to have the option of adding up to five rows with our availability form.
So, we’ll need to repeat this process of duplicating our form and incrementing our row values three more times.
This is the same as the list of values we saw a second ago, with one addition:
- The Update State action for our Save button.
- The Update State action for our Save & Add More button.
- The Update Setting rules for each of our form fields.
- The Hide Component rule for our Button Group.
- The Show Component rule for our Form itself.
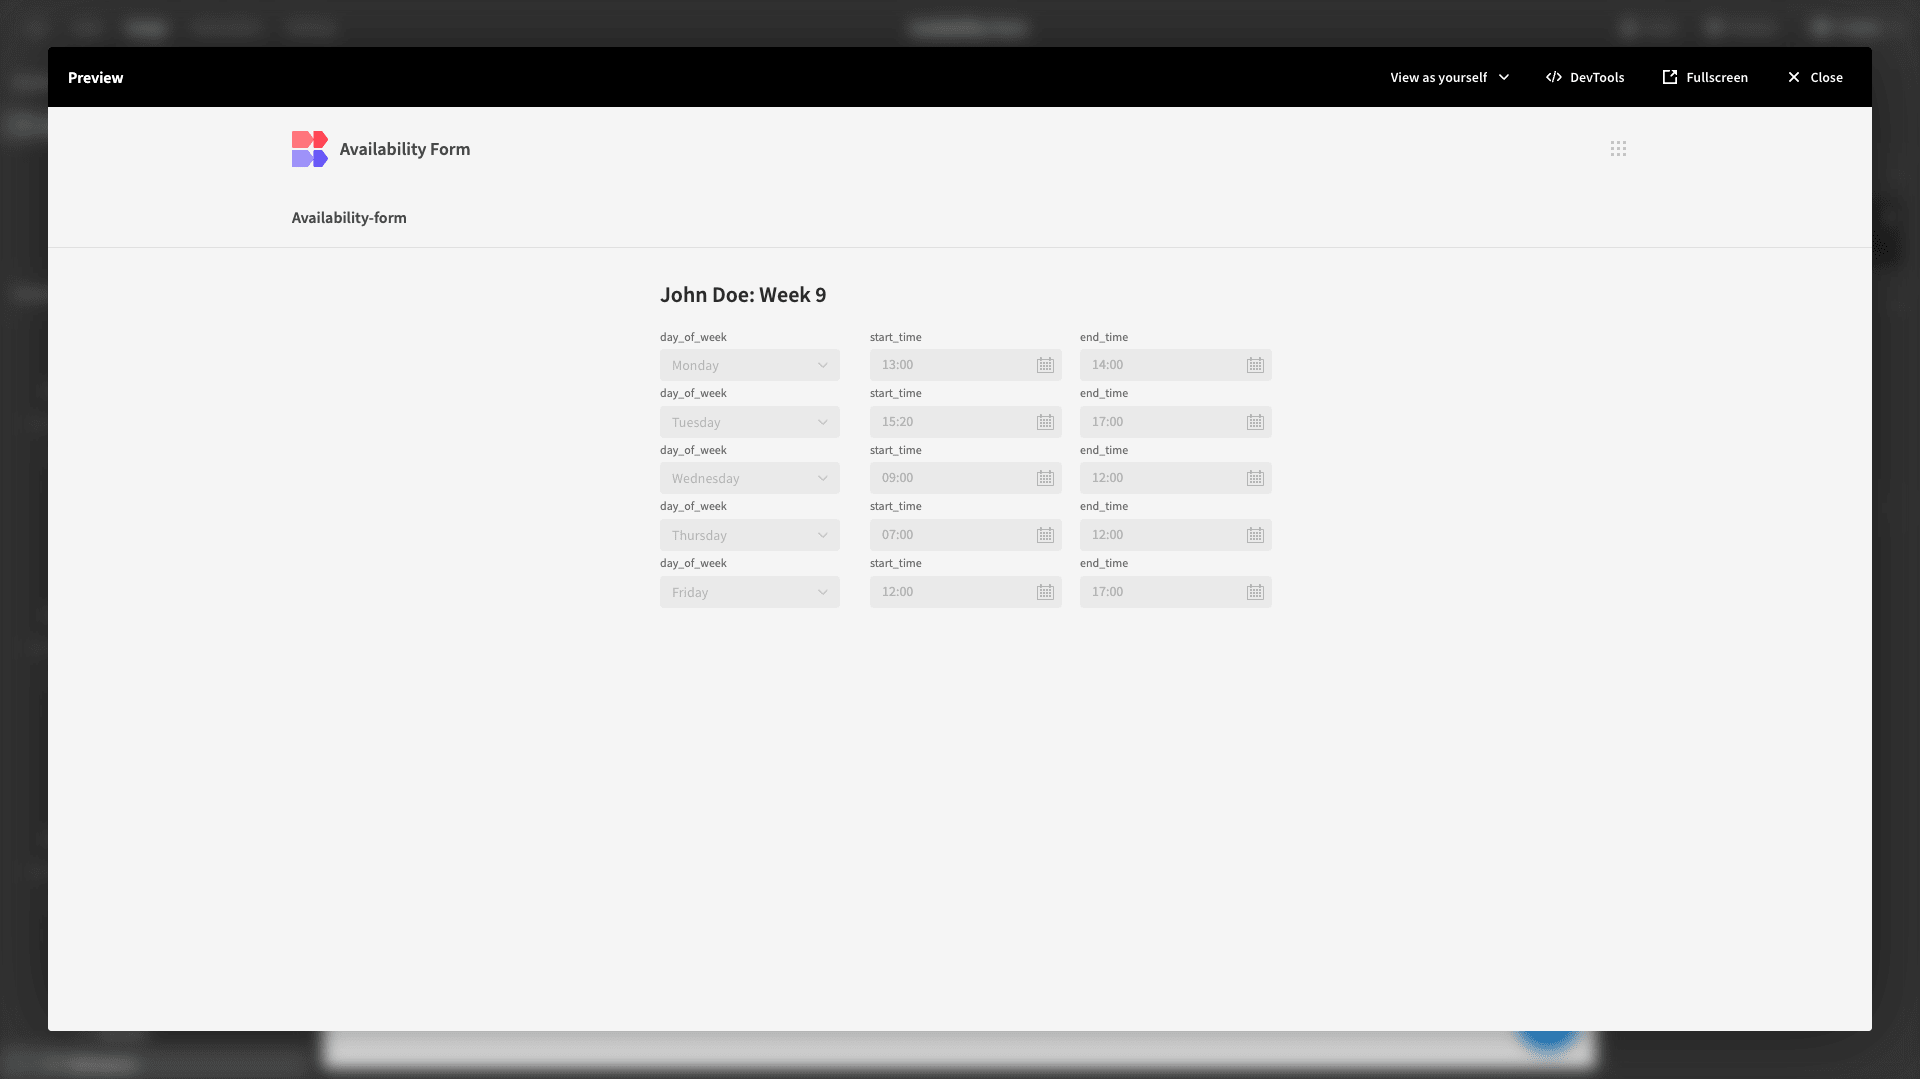
By the end, we should have this.

For our fifth row, we’ll make one final change.
That is, the maximum number of rows users can add at a time is five. Therefore, we don’t need the Save & Add More button. We’ll remove this using the X icon alongside its entry in the Button Group component.
Since our remaining Save button contains an Update State action to set the Break state to true, our form fields will still be disabled, and our Button Group will be hidden when a user completes the fifth row.
5. Design tweaks and publishing
Functionally, that’s our availability form finished. However, before we push it live for our users, we’re going to make a few final design tweaks.
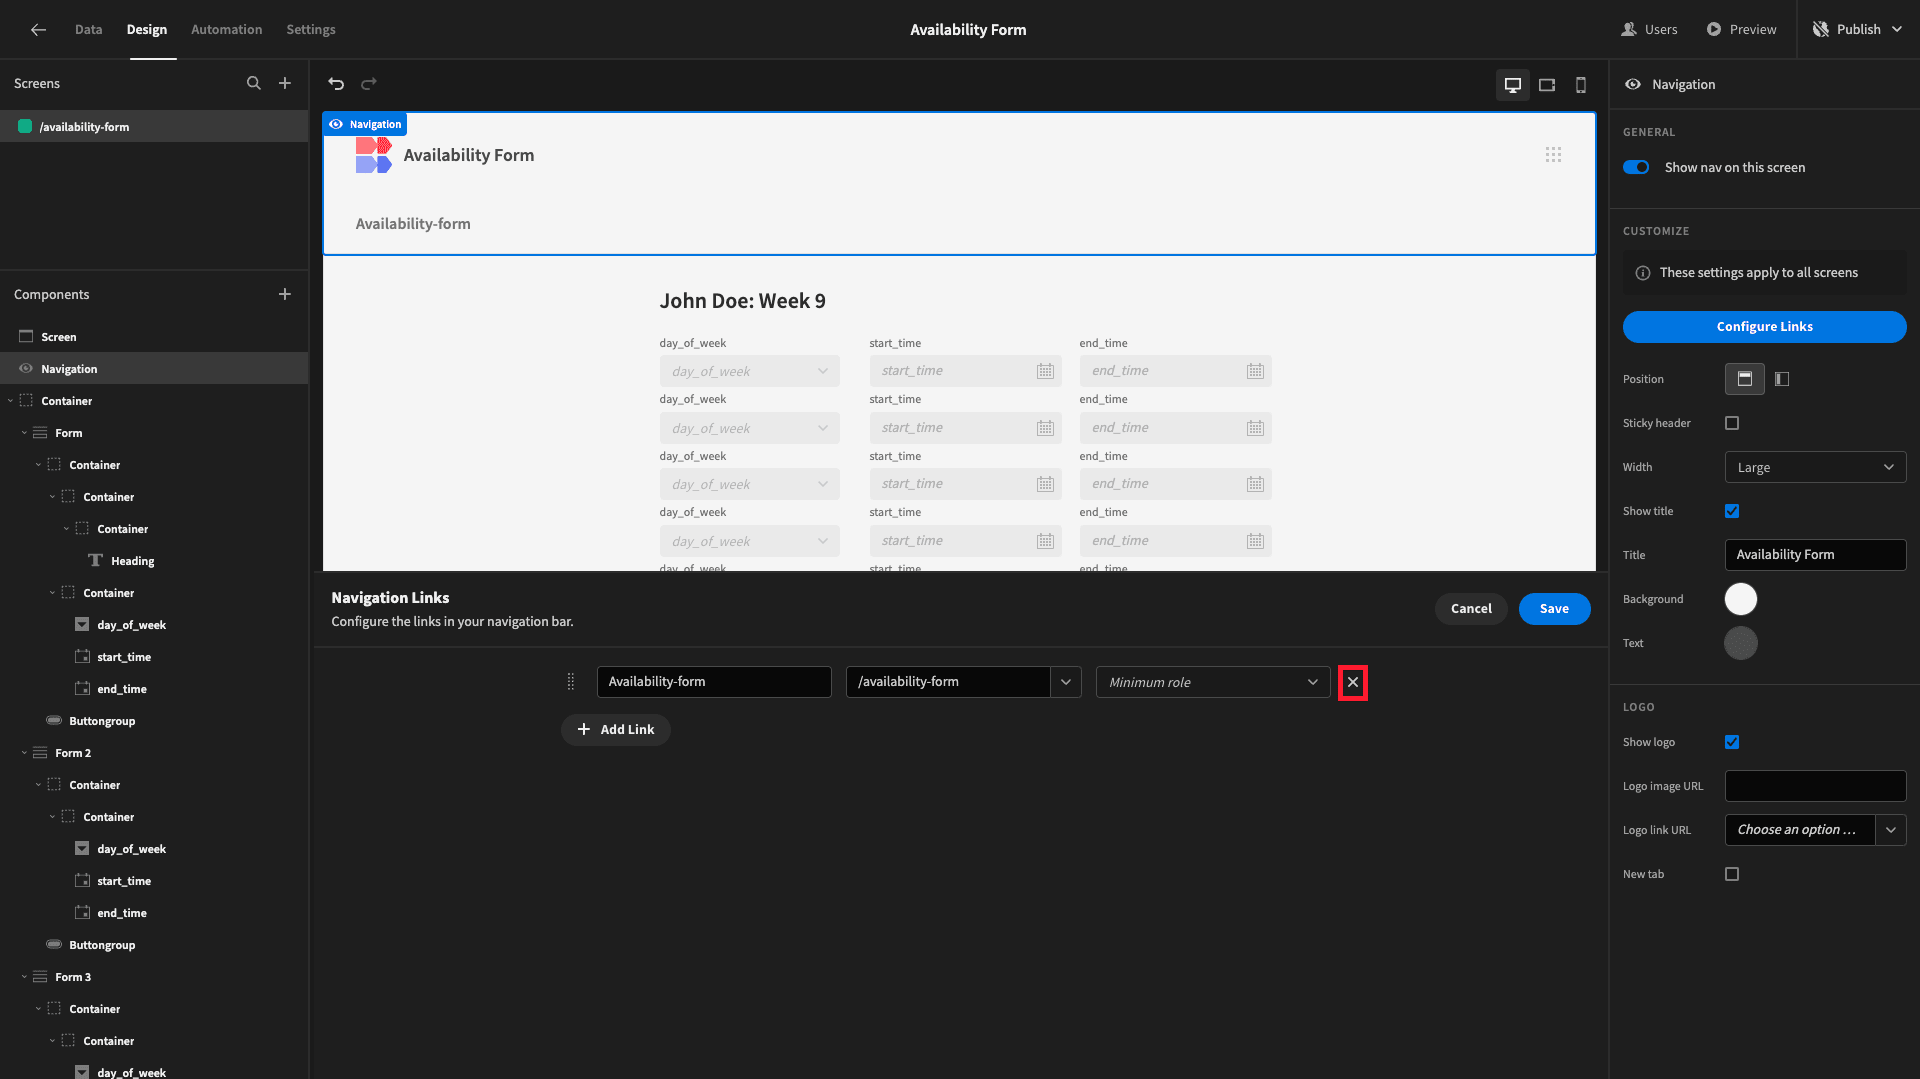
First of all, this is a single-screen app. Therefore, there’s no particular need for our navigation bar. Head to Navigation and hit Configure Links.

We’ll use the X icon to remove the link to our availability form from the nav bar.
Now, our UI is a little cleaner.

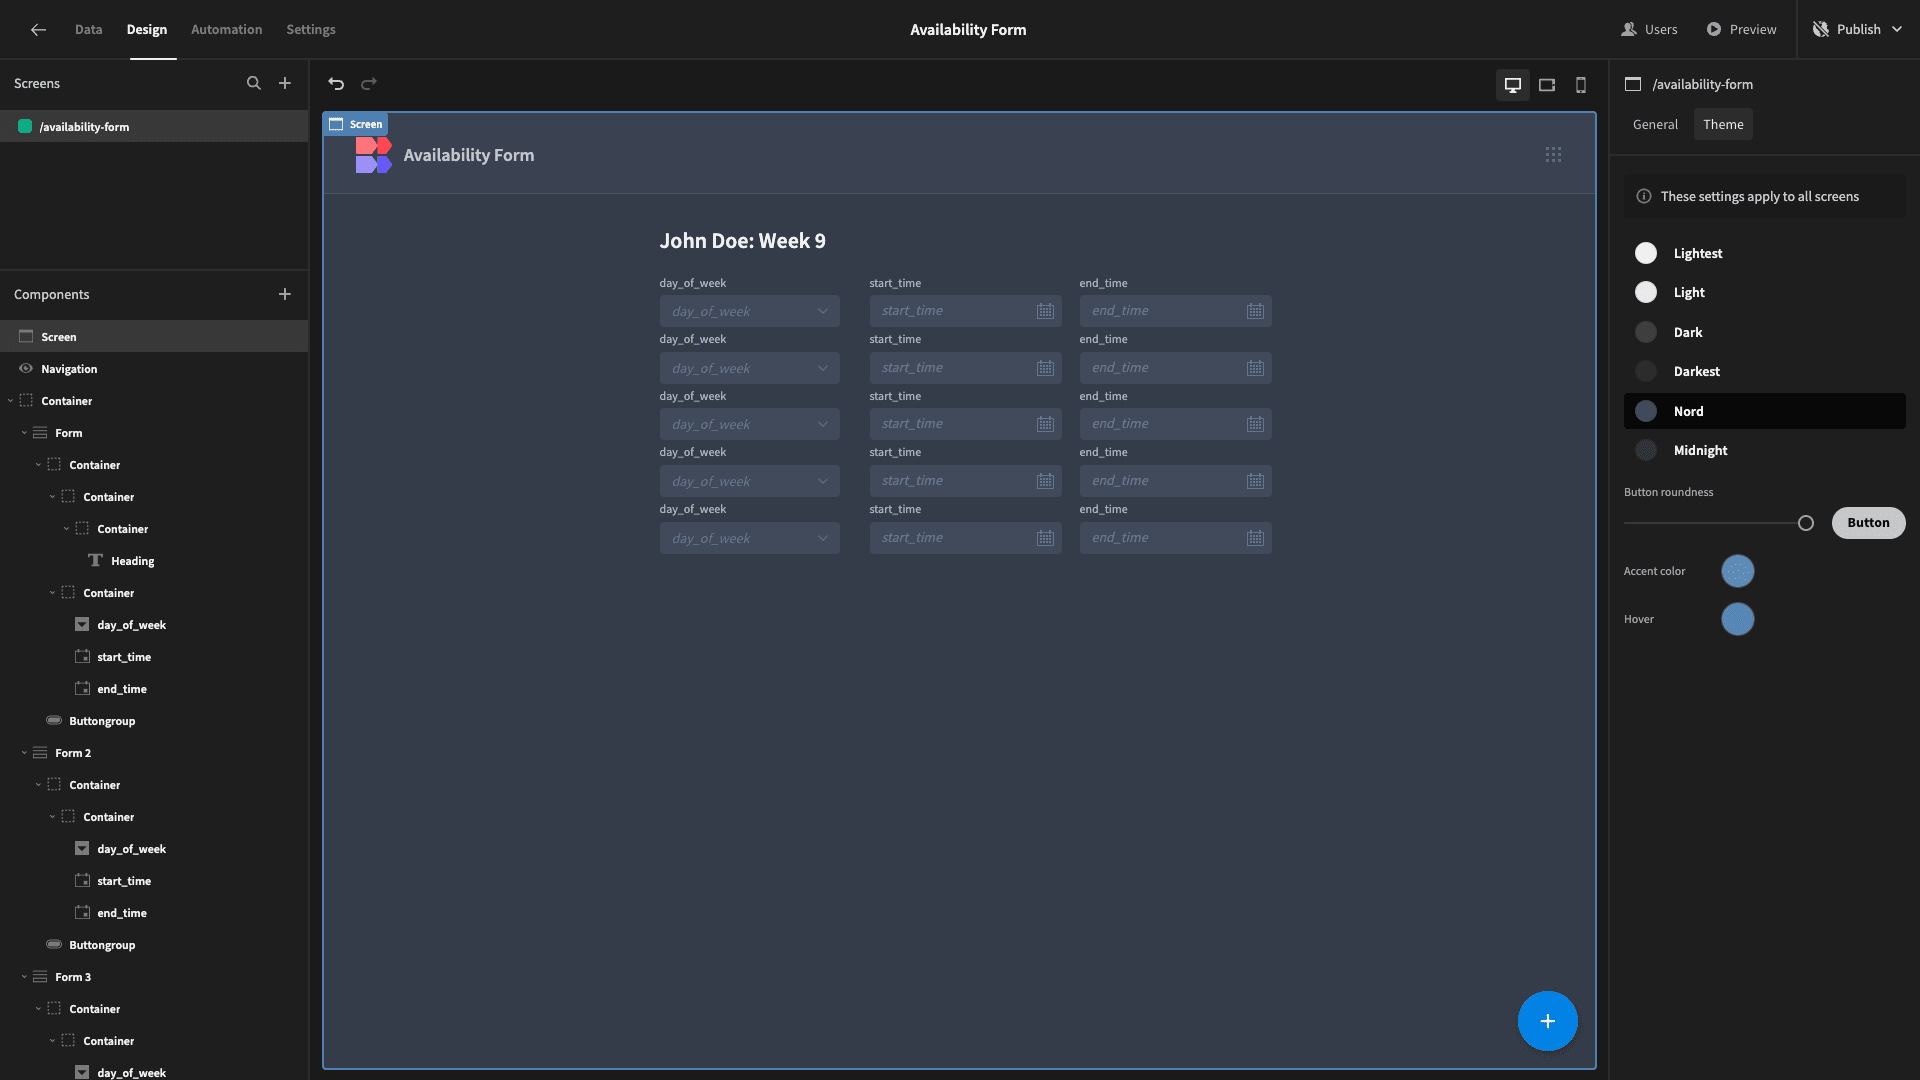
Lastly, under Screen, we can change the theme of our app. We have a few options here, but today, we’re going to go with Nord.
When we’re ready, we can hit Publish to push our app live.
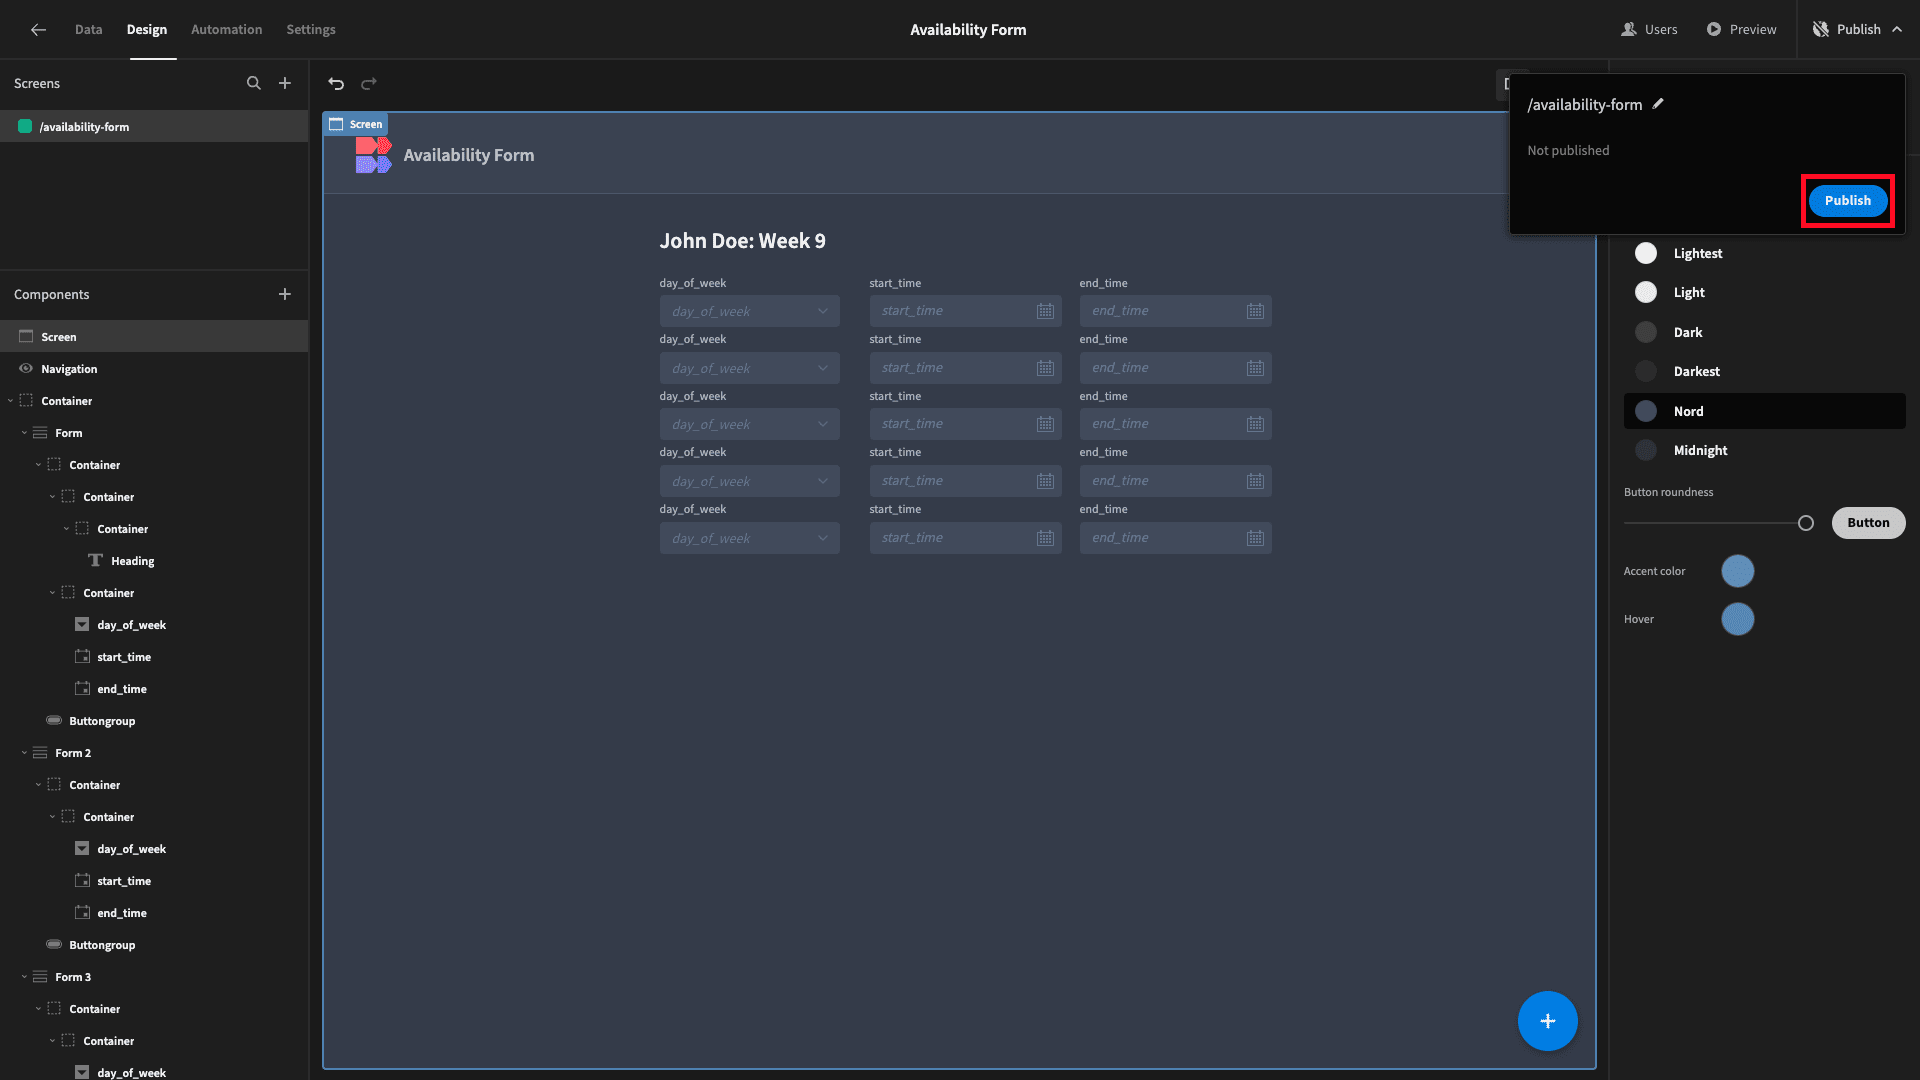
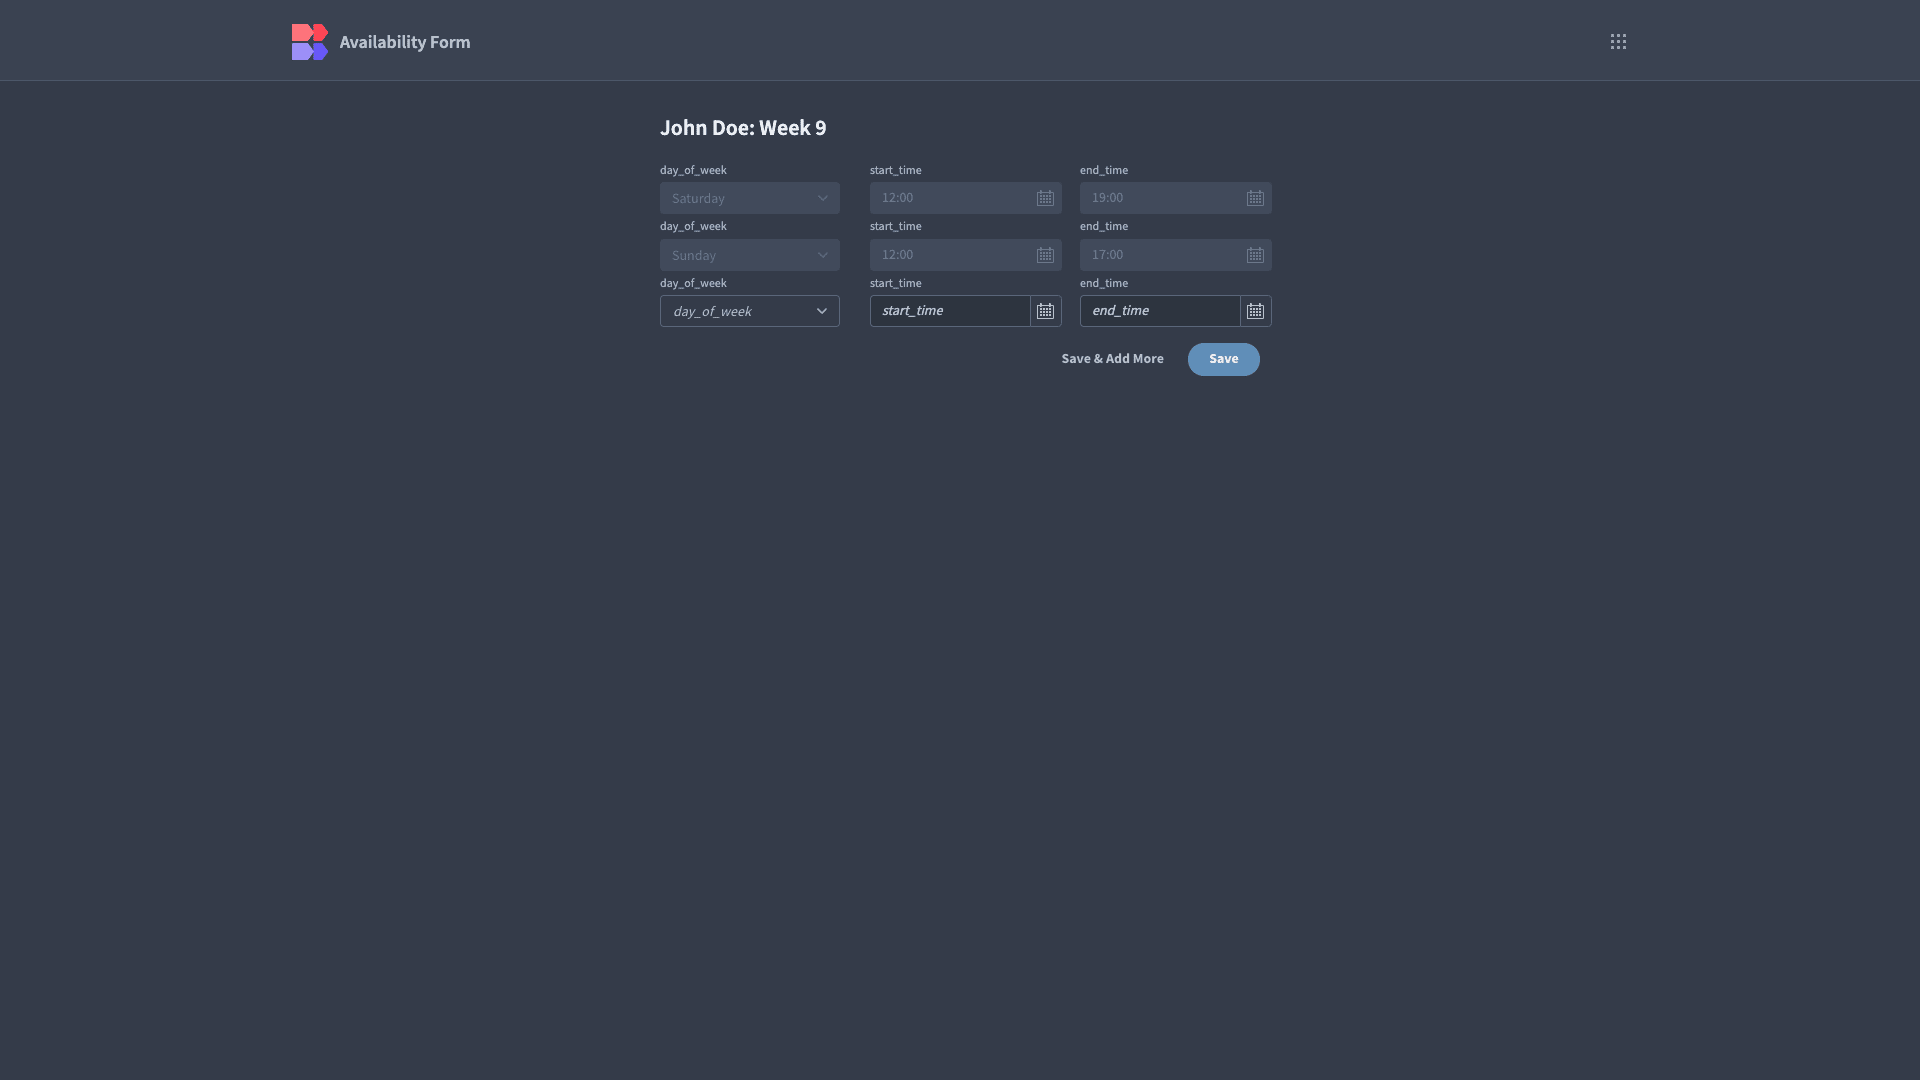
Here’s a reminder of how our completed availability form looks.
Budibase is the fast, easy way to build advanced forms on top of any data source. To learn more about our open-source, low-code platform, check out our forms page .