How to Build an Employee Complaint Form
Handling employee complaints is a delicate process. We’re faced with the dual challenges of gathering accurate information in a fair and transparent manner - while also securely handling potentially very sensitive data.
A vast number of companies manage this using dated tools - like spreadsheets or even pen and paper.
This approach fails on both fronts.
Today, we’re checking out how custom web forms a more effective solution to this problem.
We’ll see how Budibase provides a fast, flexible way to build advanced forms on top of just about any data source.
Specifically, we’re building an employee complaint form that will replace an existing spreadsheet by pulling it into our internal low-code database - enabling us to achieve a much more secure, efficient experience for submitting complaints.
Even better, we won’t need to write a single line of custom code.
So…
What is an employee complaint form?
An employee complaint form is a simple UI that allows users to submit details of any workplace grievances in a defined, consistent format.
The goal is to gather the information we need to make an informed, unbiased decision about how to respond to the complaint in question.
Of course, follow-on processes and eventual outcomes can vary greatly.
Therefore, an effective complaint form must do the following:
- Guide colleagues through the process of submitting the required data.
- Providing appropriate colleagues with access to complaint data without compromising security.
- Integrating with relevant workflow tools.
- Establishing a robust paper trail for employee grievances.
- Improving company culture around openness and accountability.
What are we building?
We’re building an advanced multi-step employee complaint form on top of BudibaseDB, our internal low-code database - starting by importing an existing spreadsheet table to create our form schema.
On top of this, we’ll be adding several pieces of functionality that will enhance both user experiences and the quality of the data we’re’ gathering - including auto-populating fields and file uploads for supporting documents.
By the end, we’ll have a fully functional, custom complaint form - ready to ship to our colleagues across desktop and mobile devices.
The beauty of Budibase is that we can achieve this in a fraction of the time that we’d need for a custom development - with considerably more flexibility than a traditional form builder.
Let’s jump right in.
How to build an employee complaint form in 6 steps
If you haven’t already, sign up for a free Budibase account to start building as many forms as you’d like.
1. Setting up our data schema
We’ll start by creating a new Budibase application. We have a couple of options here, including using a pre-built template or importing an existing app dump.
But today, we’re starting from scratch.
The first thing we need to do is choose a name and URL path for our new app.
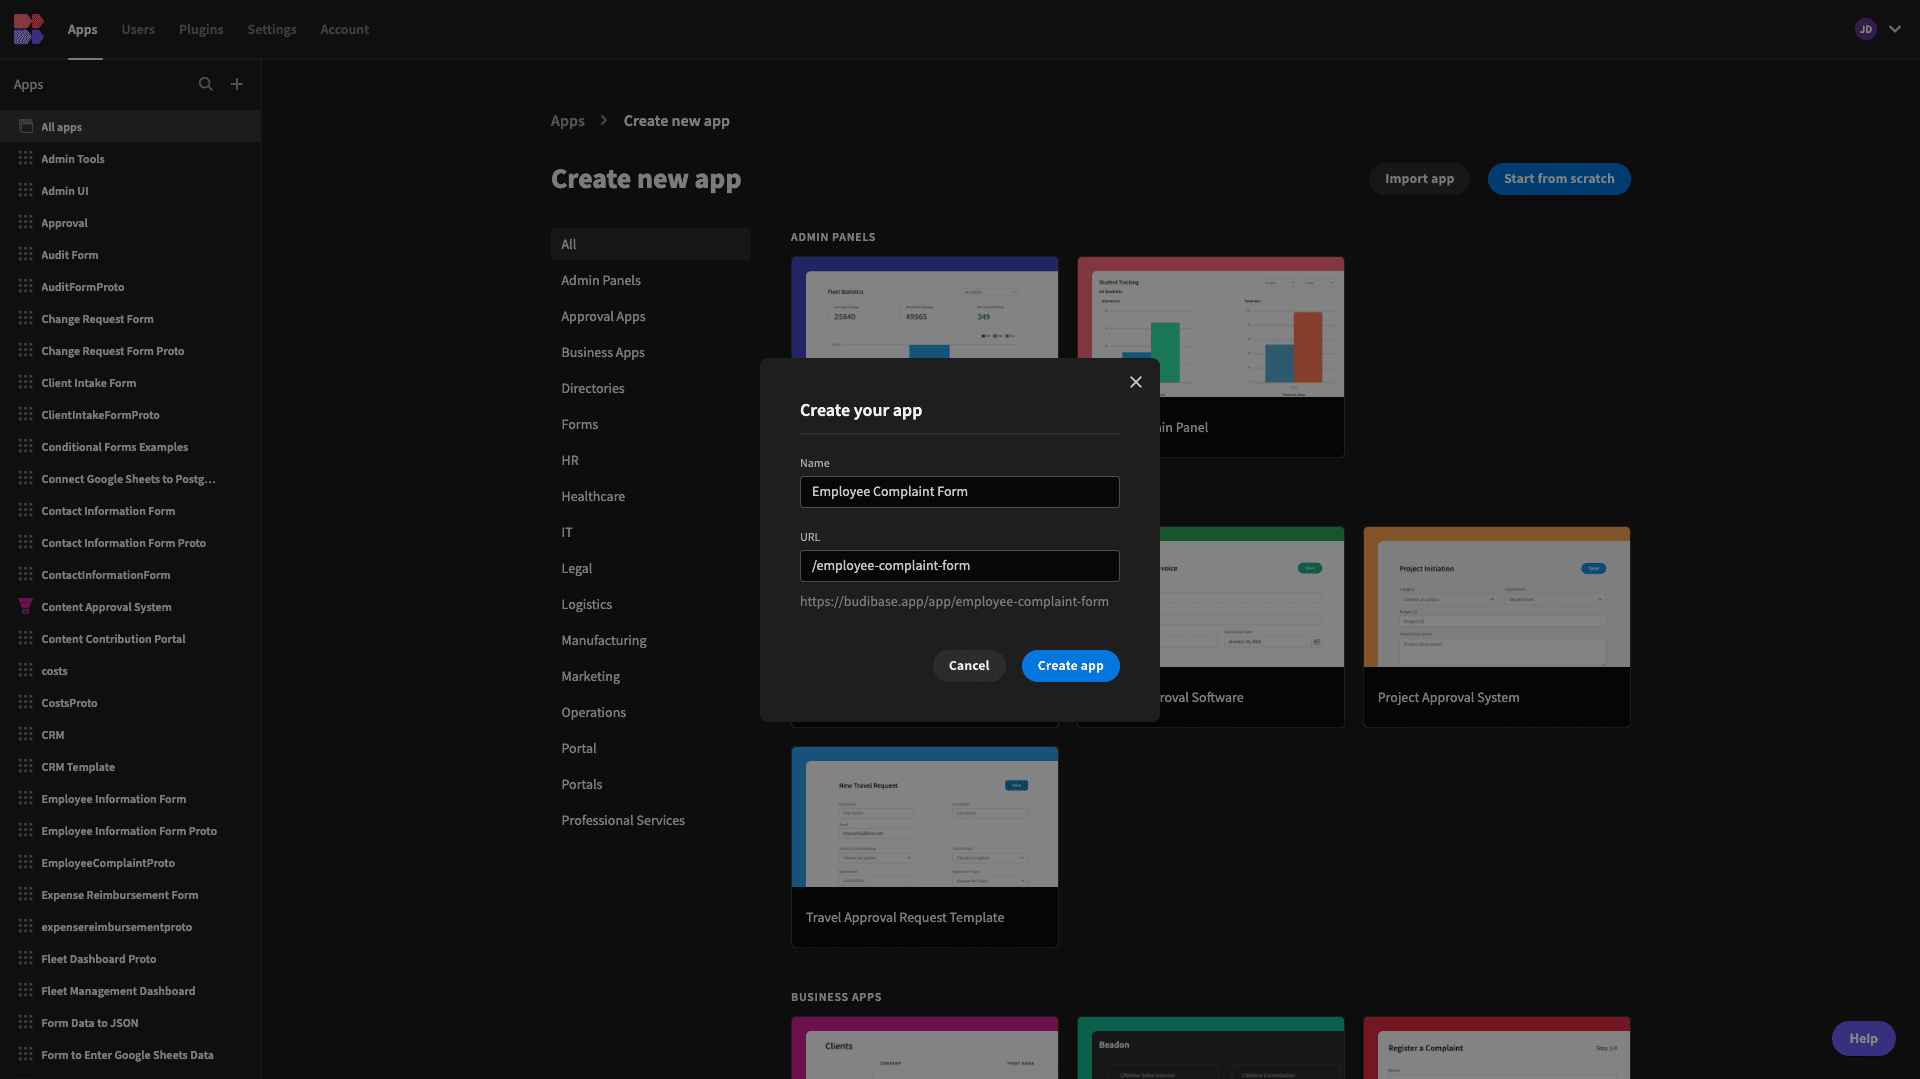
We’ll then be prompted to choose a data source to connect to our complaint form.
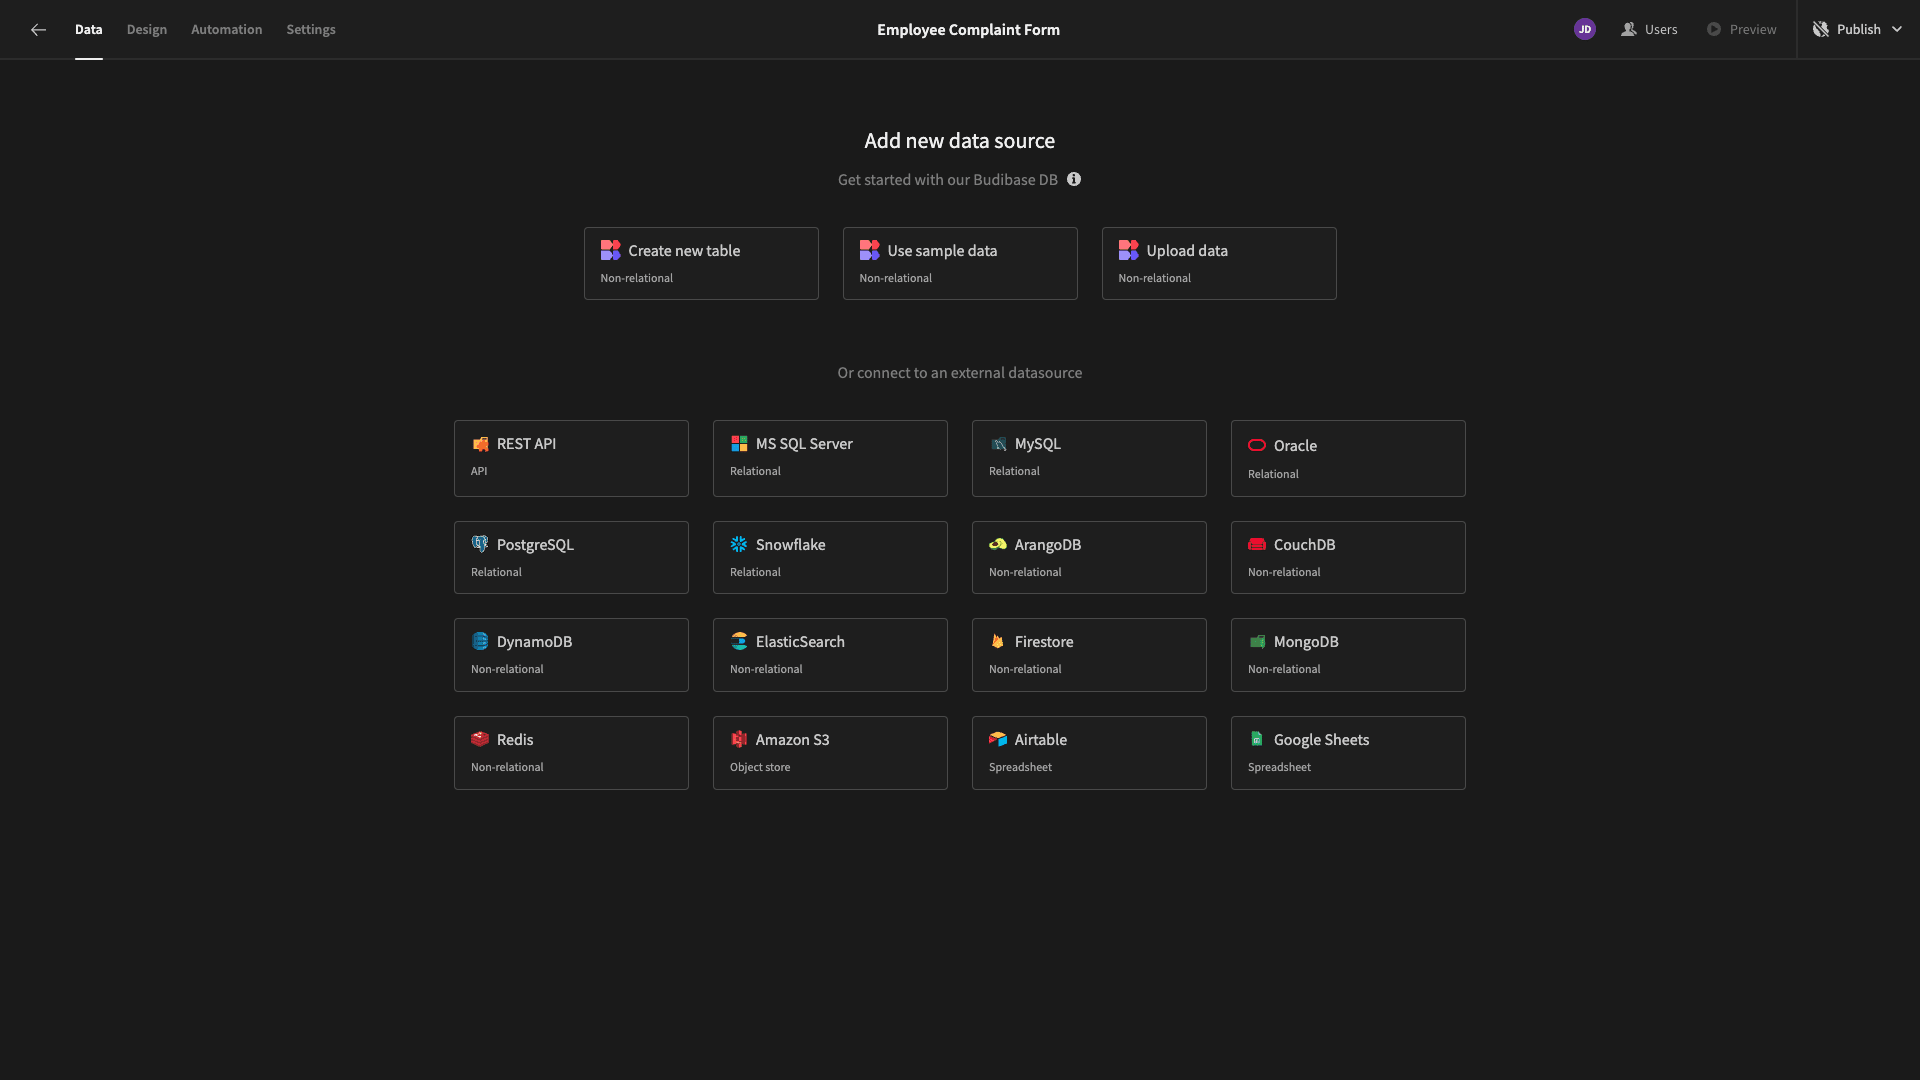
Budibase offers market-leading support for all kinds of data sources, including RDBMSs, NoSQL tools, REST APIs, Airtable, Google Sheets, and more.
However, today, we’re leveraging our built-in low-code database, BudibaseDB.
Specifically, we’re going to create our database table by uploading a CSV that replicates a pre-existing, spreadsheet-based complaints submission process.
So, we’re going to hit Upload Data. Then, we’re prompted to give our table a name and select the file we want to upload.
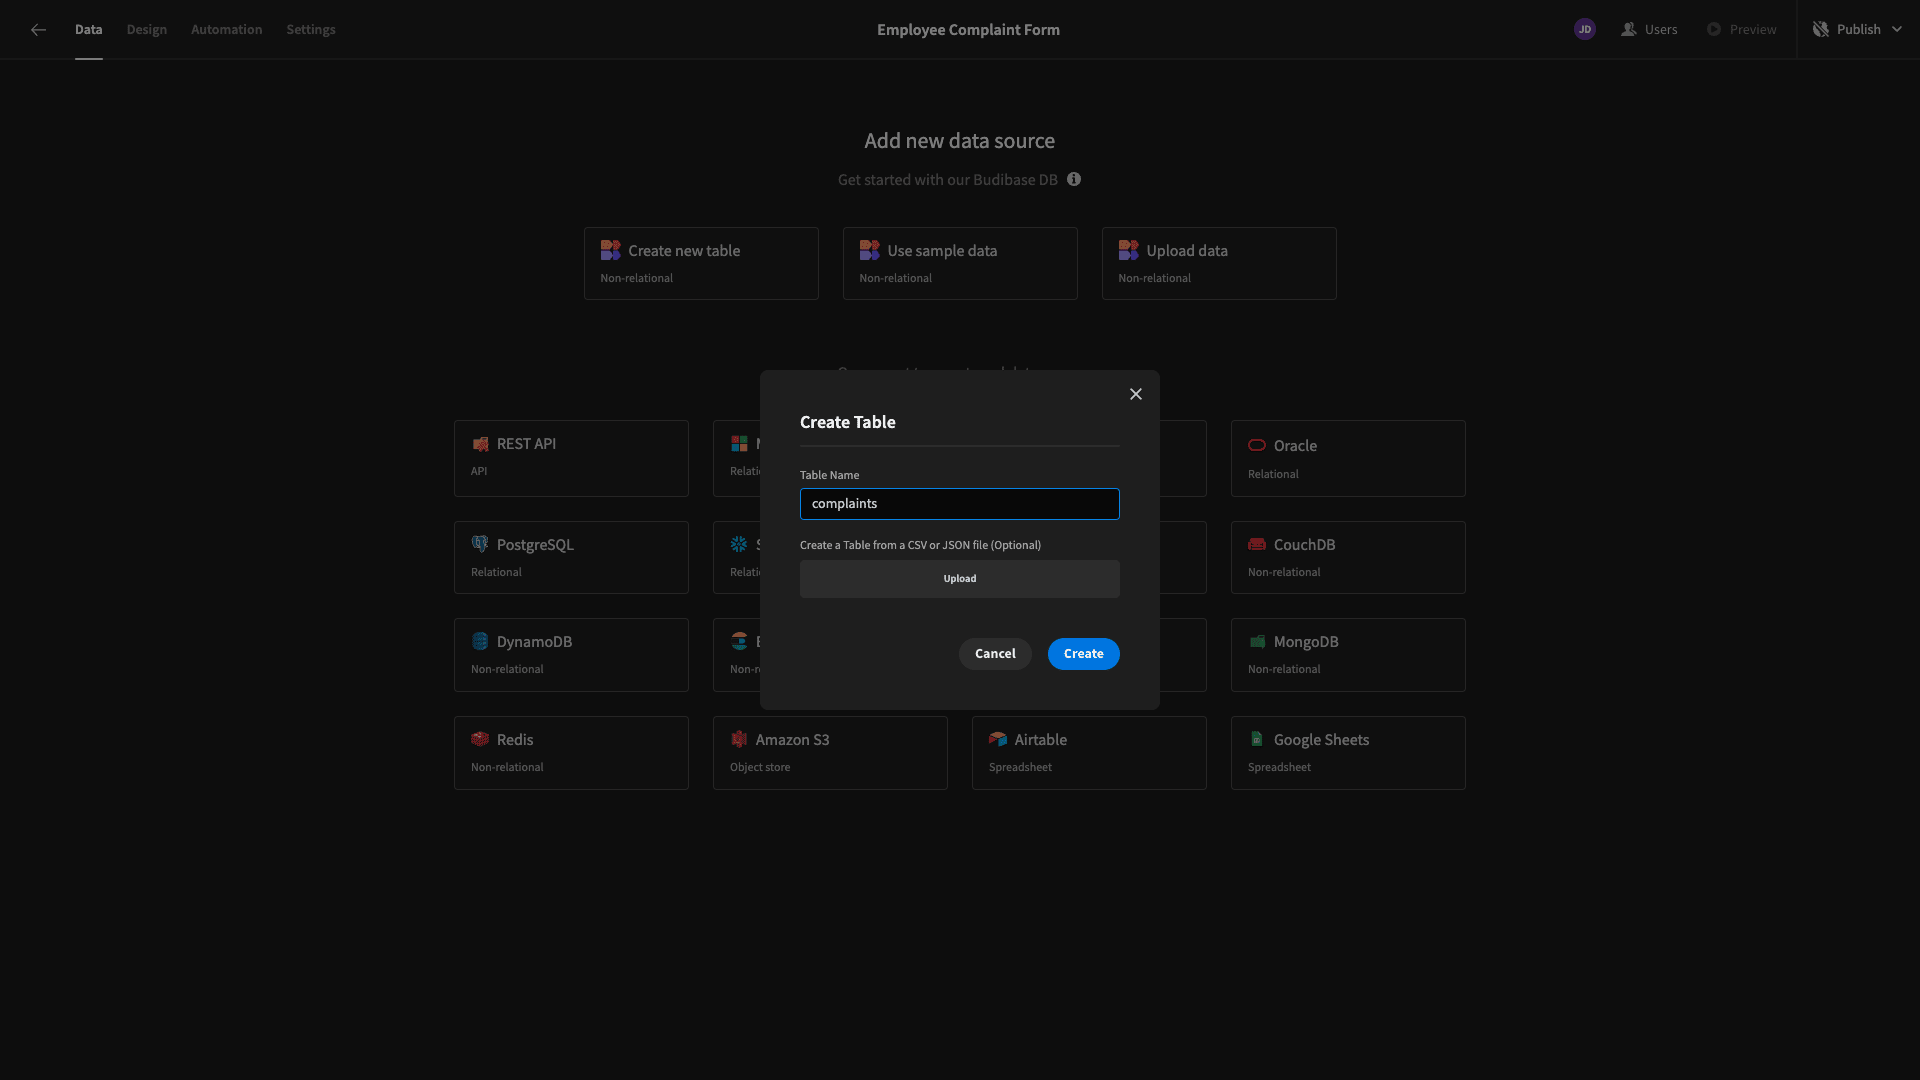
We’re then shown the schema of our CSV. Budibase will infer the data types for each column based on stored values, but we can update these before finalizing our table.
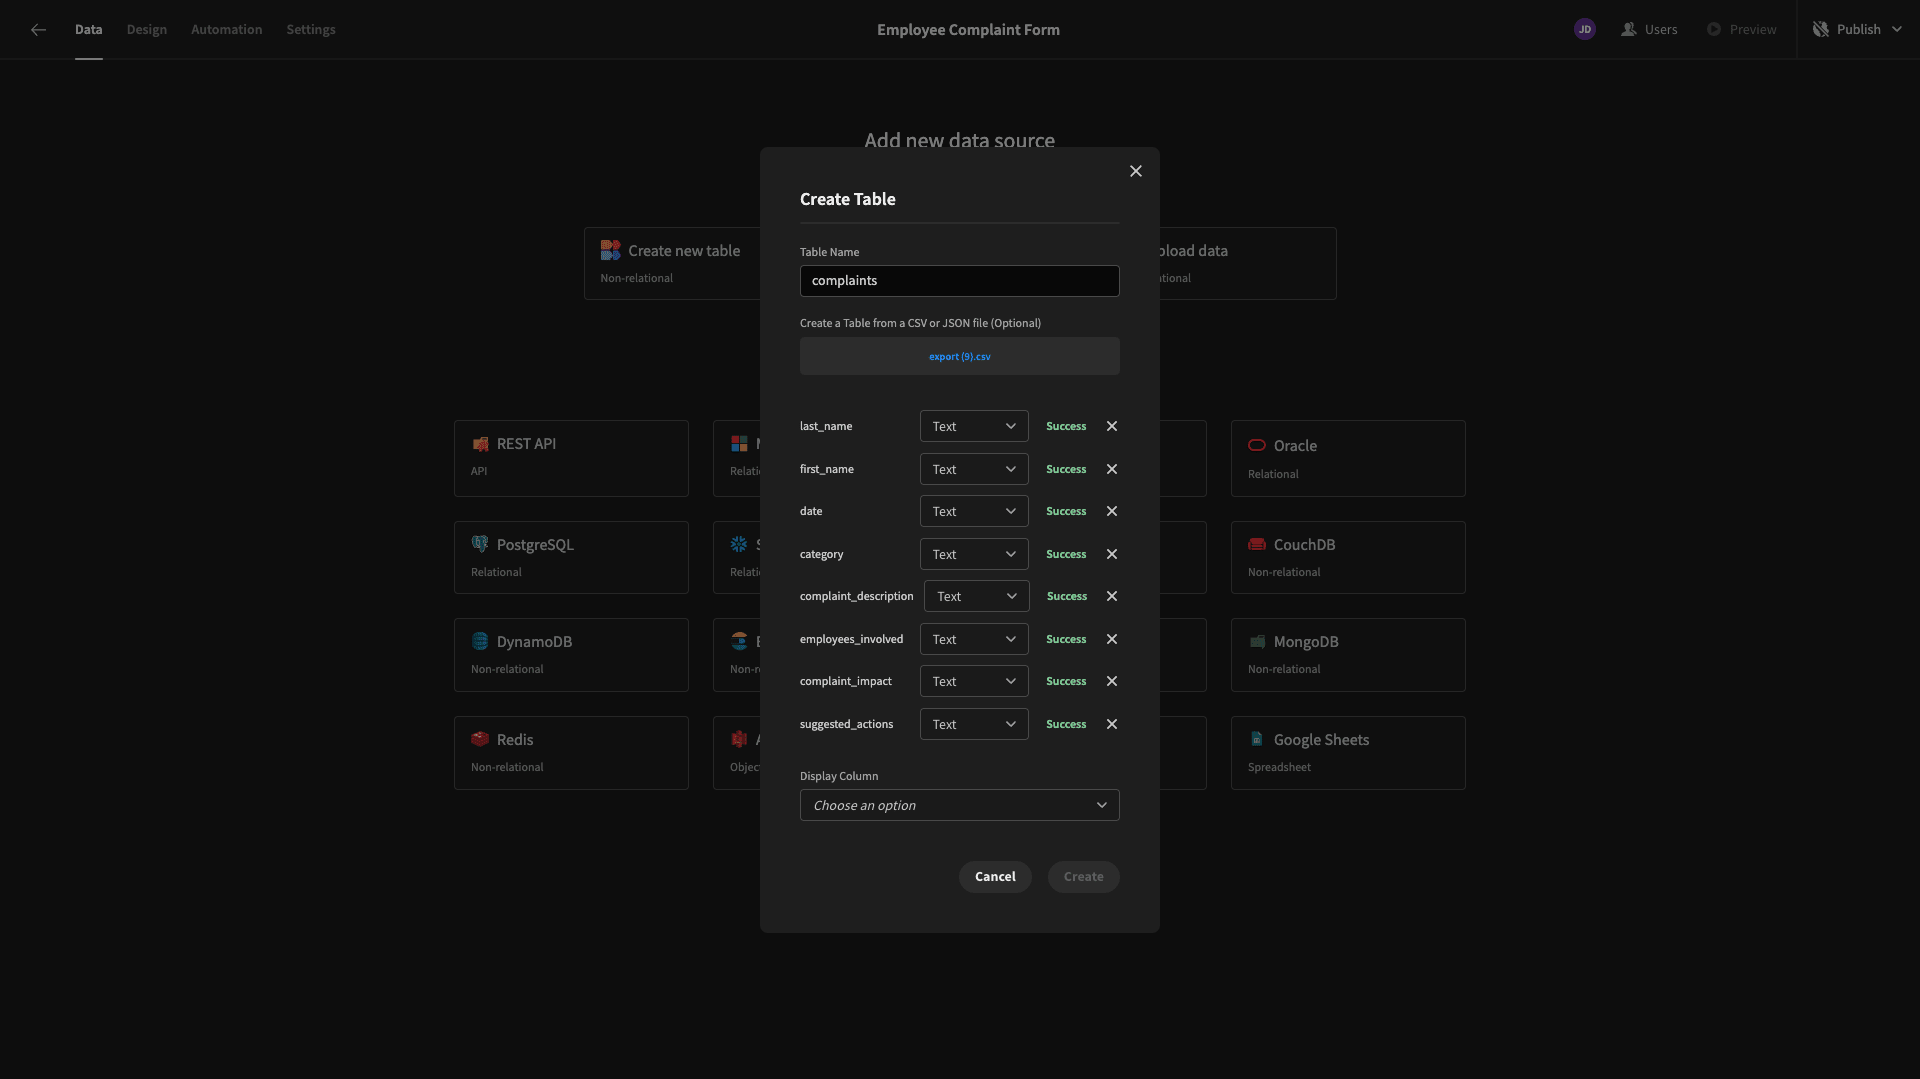
Our CSV has fields for the employee’s name, the date of the complaint, and a series of columns for storing responses to different questions about the incident in question.
These are:
- last_name,
- first_name,
- date,
- category,
- complaint_description,
- employees_involved,
- complaint_impact,
- suggested_actions.
We’ll start by changing the date attribute to the Date type and category to Options:
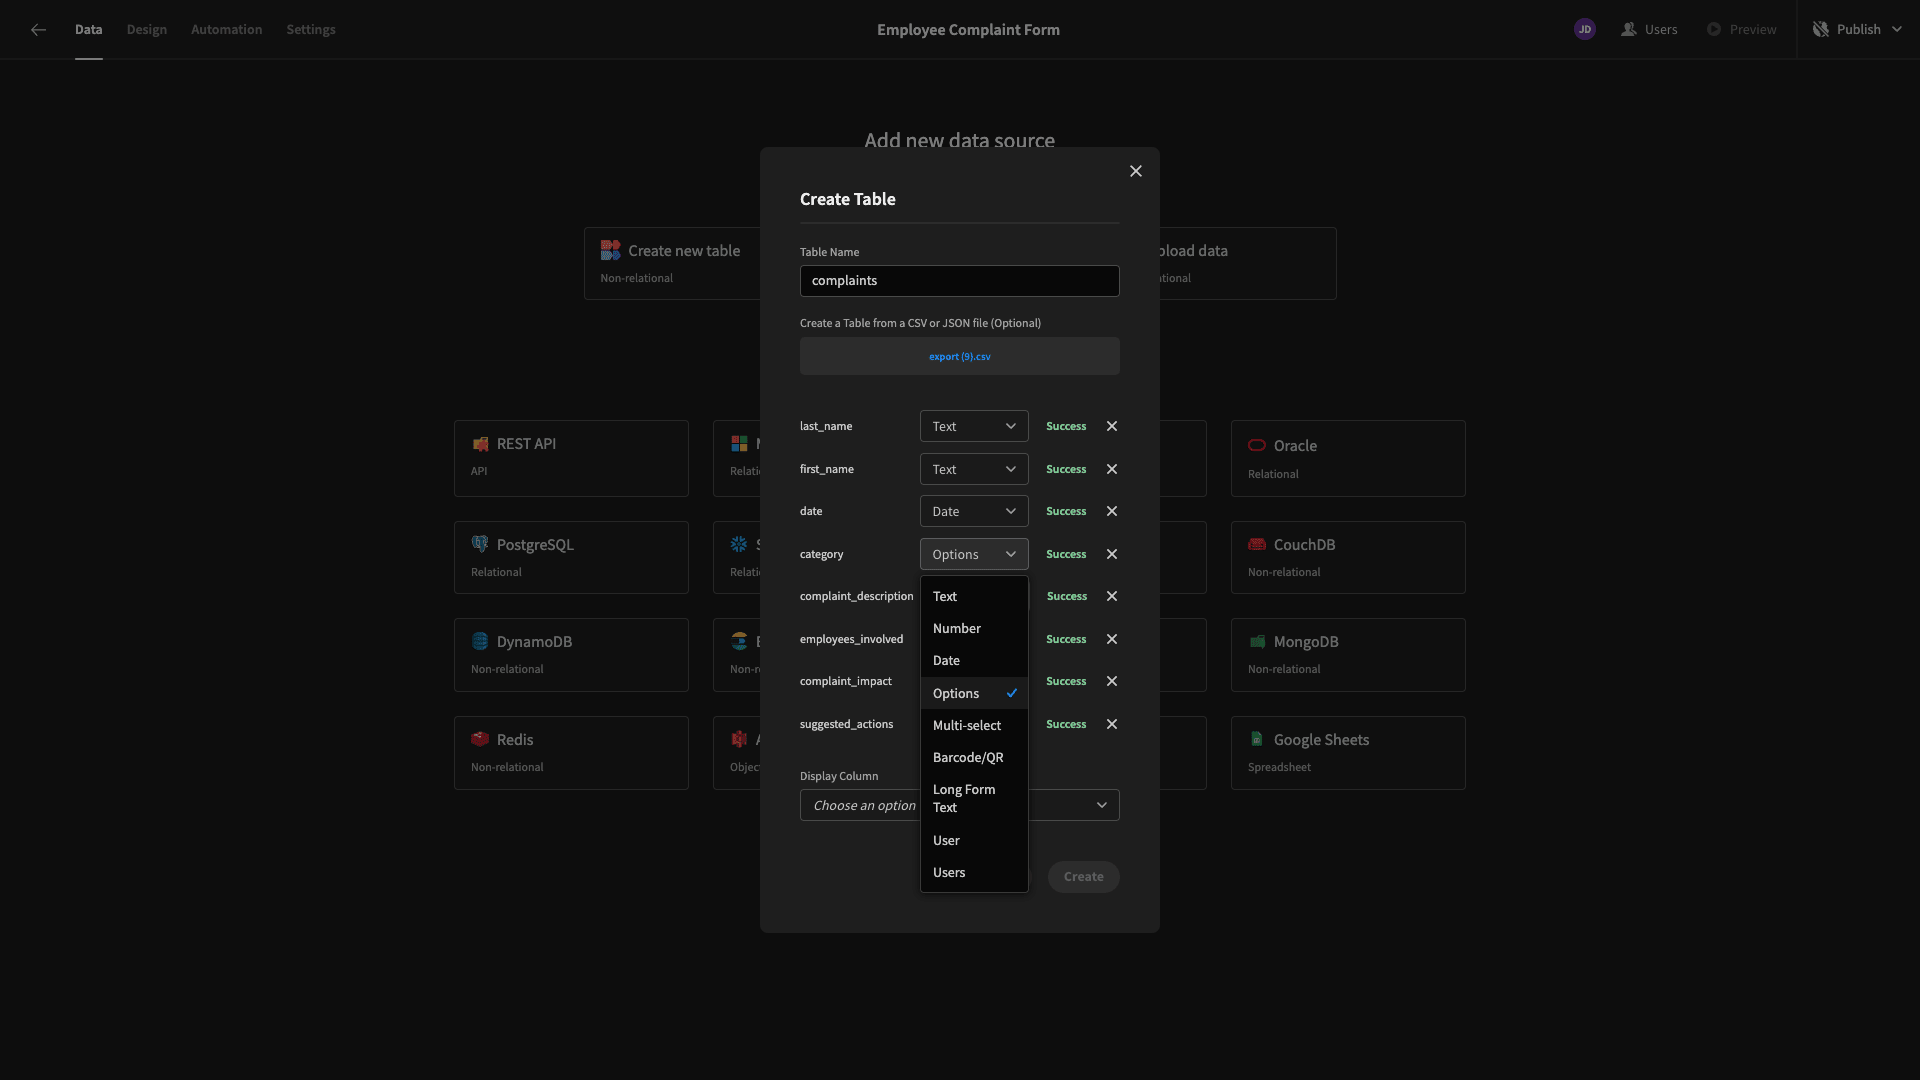
We’ll then change everything else except first_name and last_name to Long-Form Text Fields.
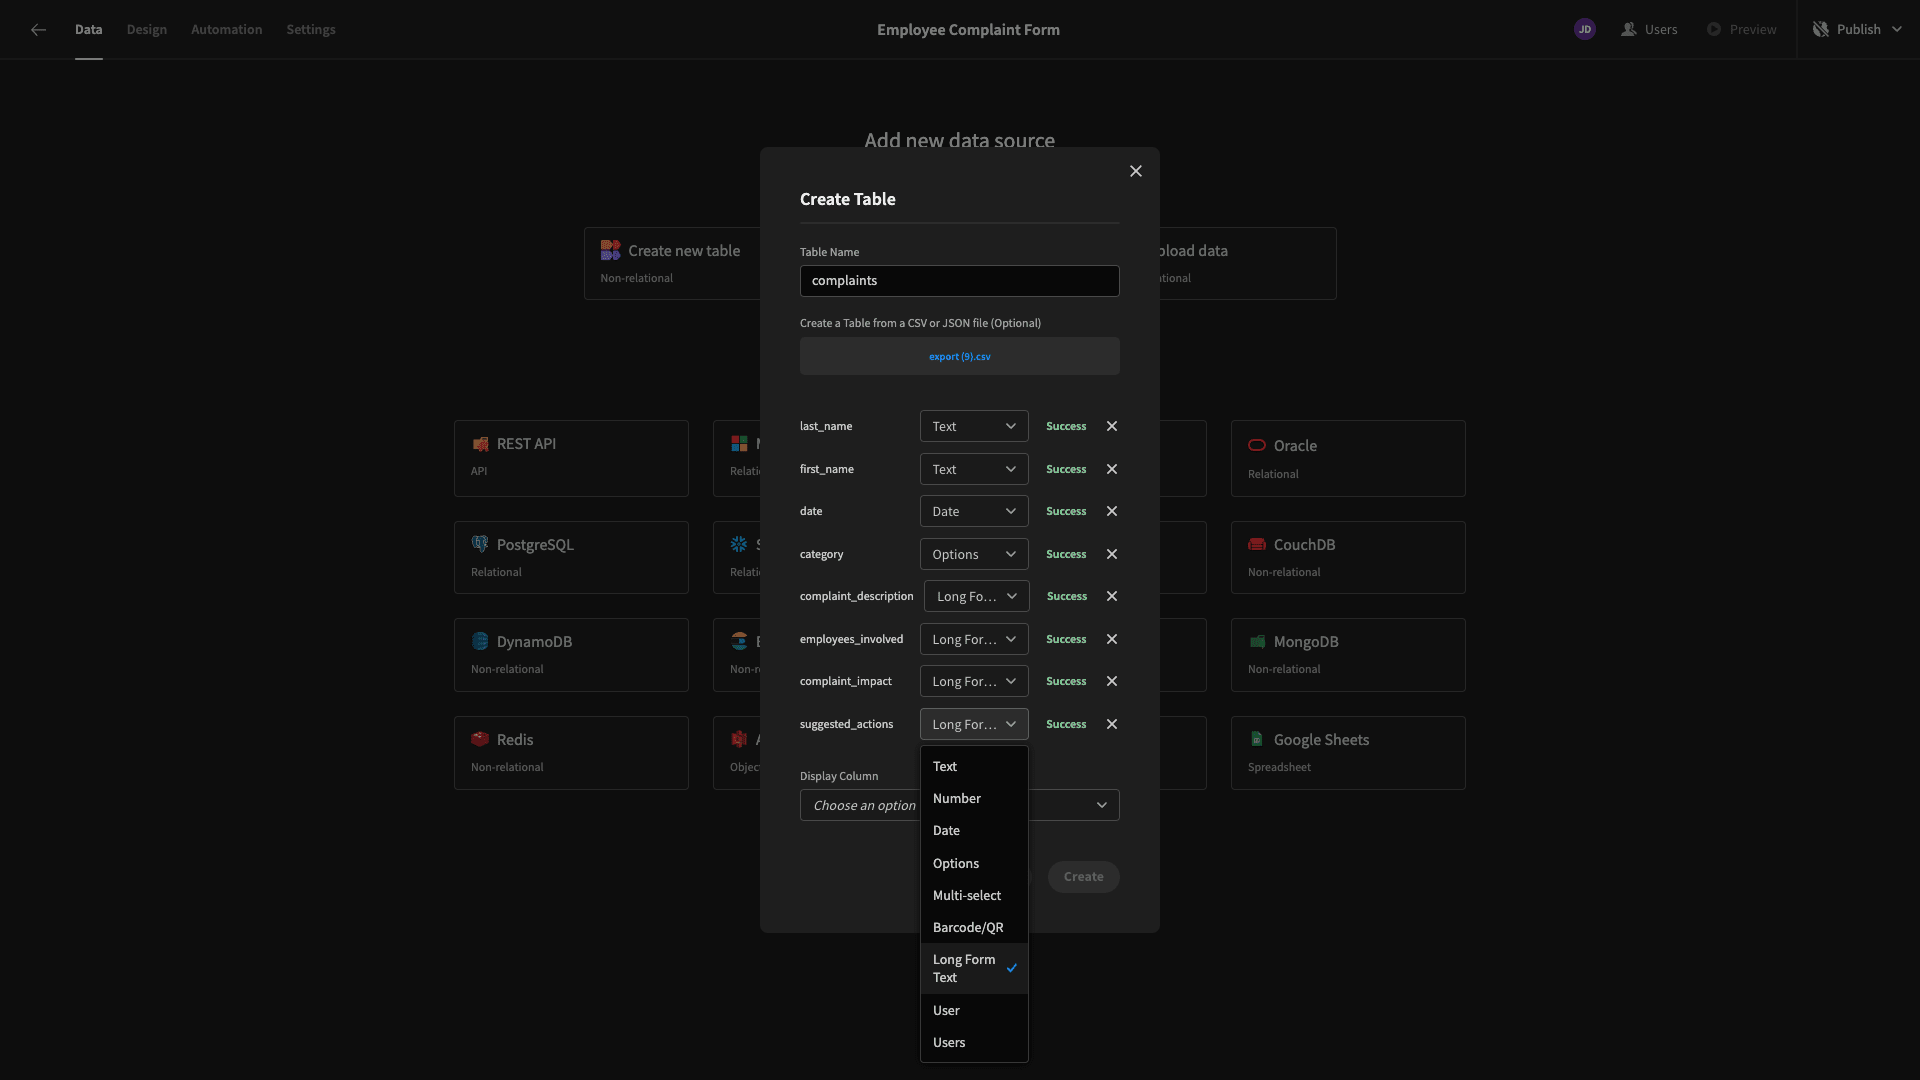
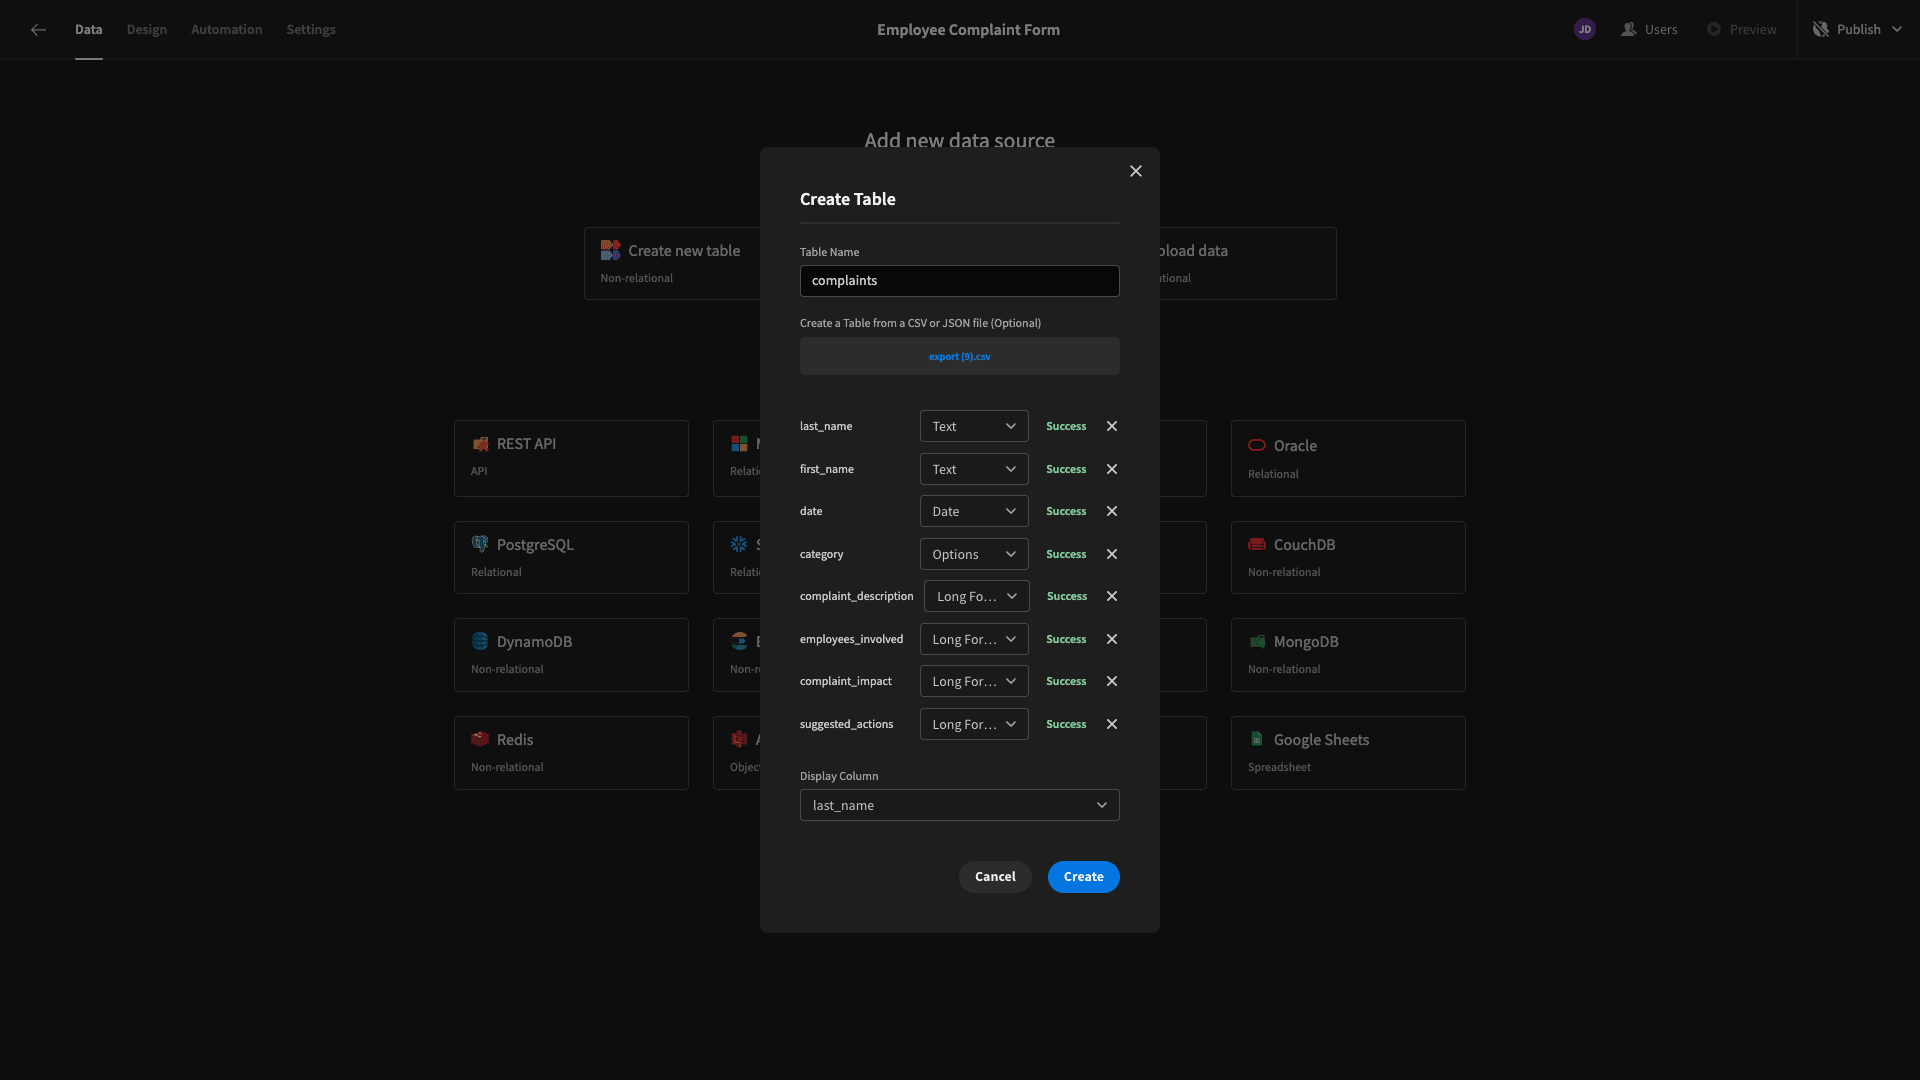
Lastly, we’ll set last_name as our Display Column and hit Create.
Here’s what our table looks like in the Data section of Budibase.
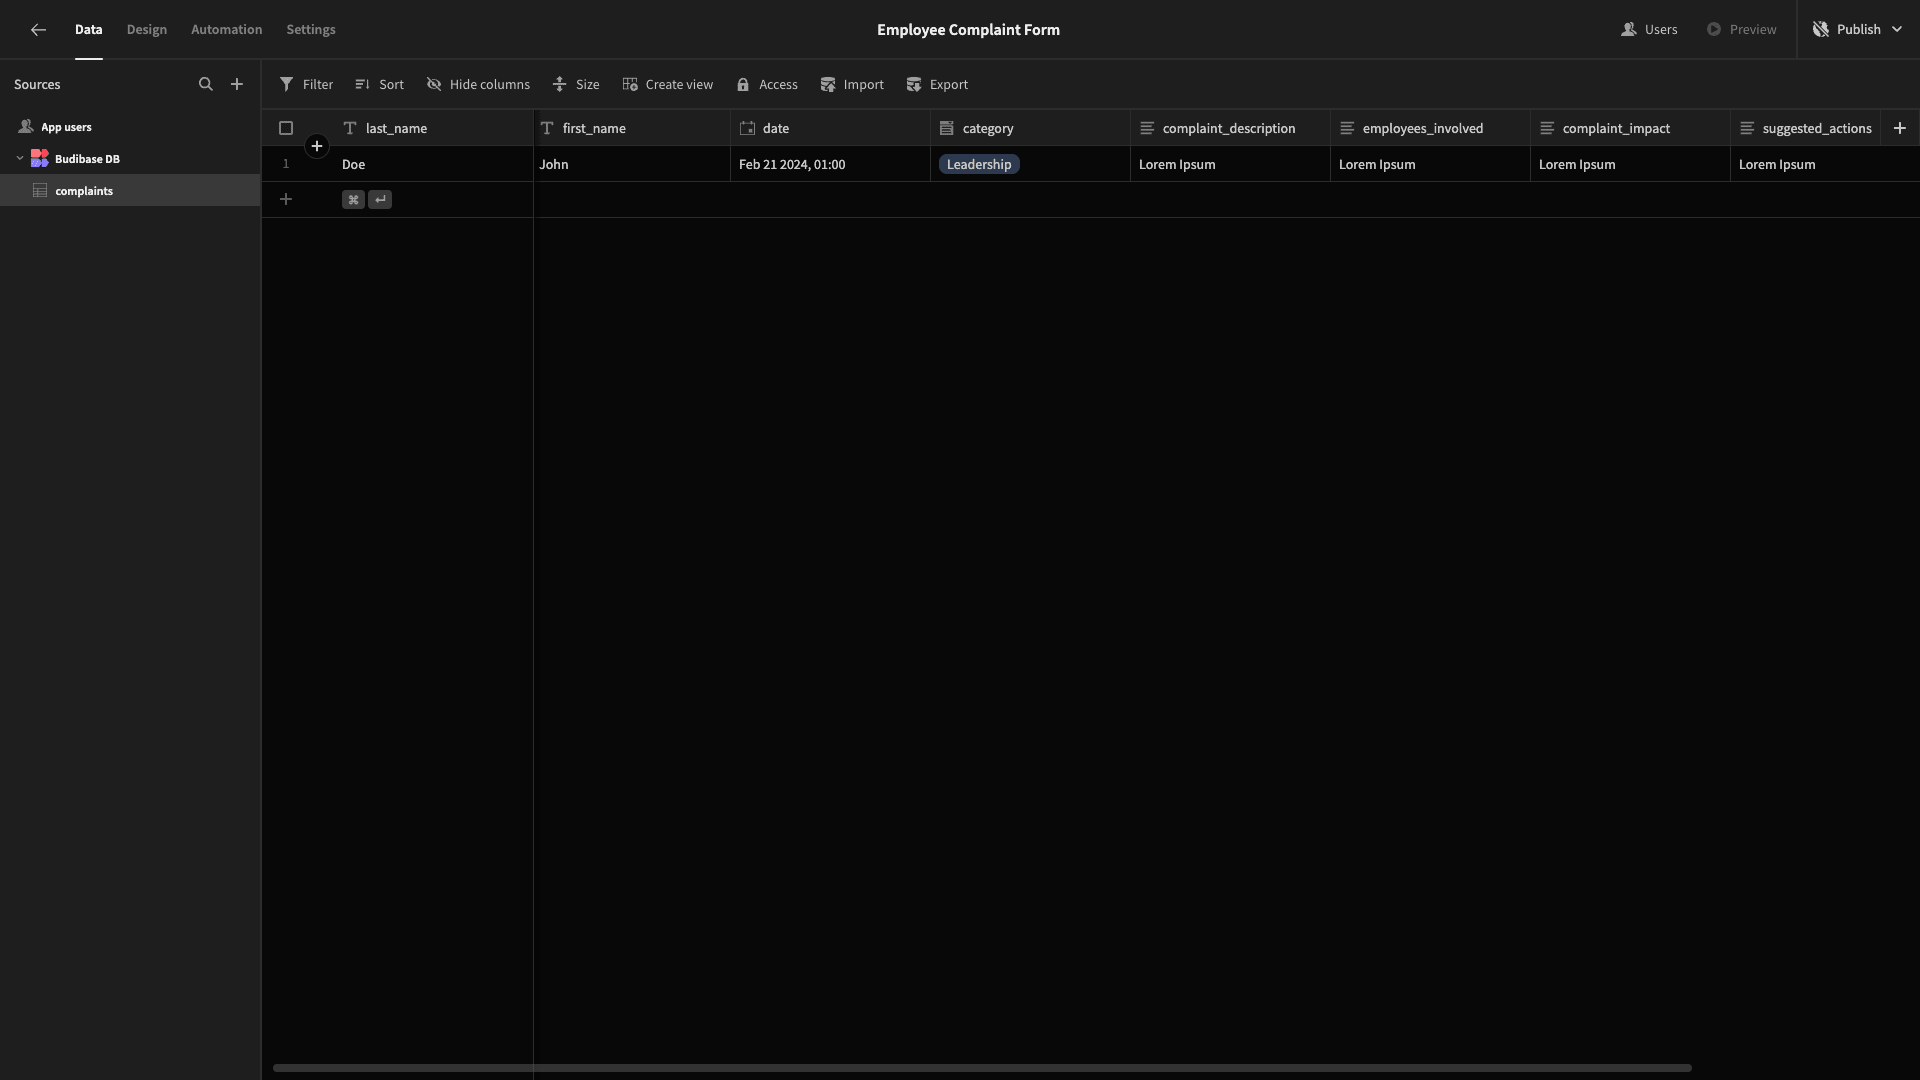
Budibase enables us to manipulate our database schema and stored values in a low-code, spreadsheet-like interface.
We’re going to make two simple changes to our data model before we start creating our employee complaint form.
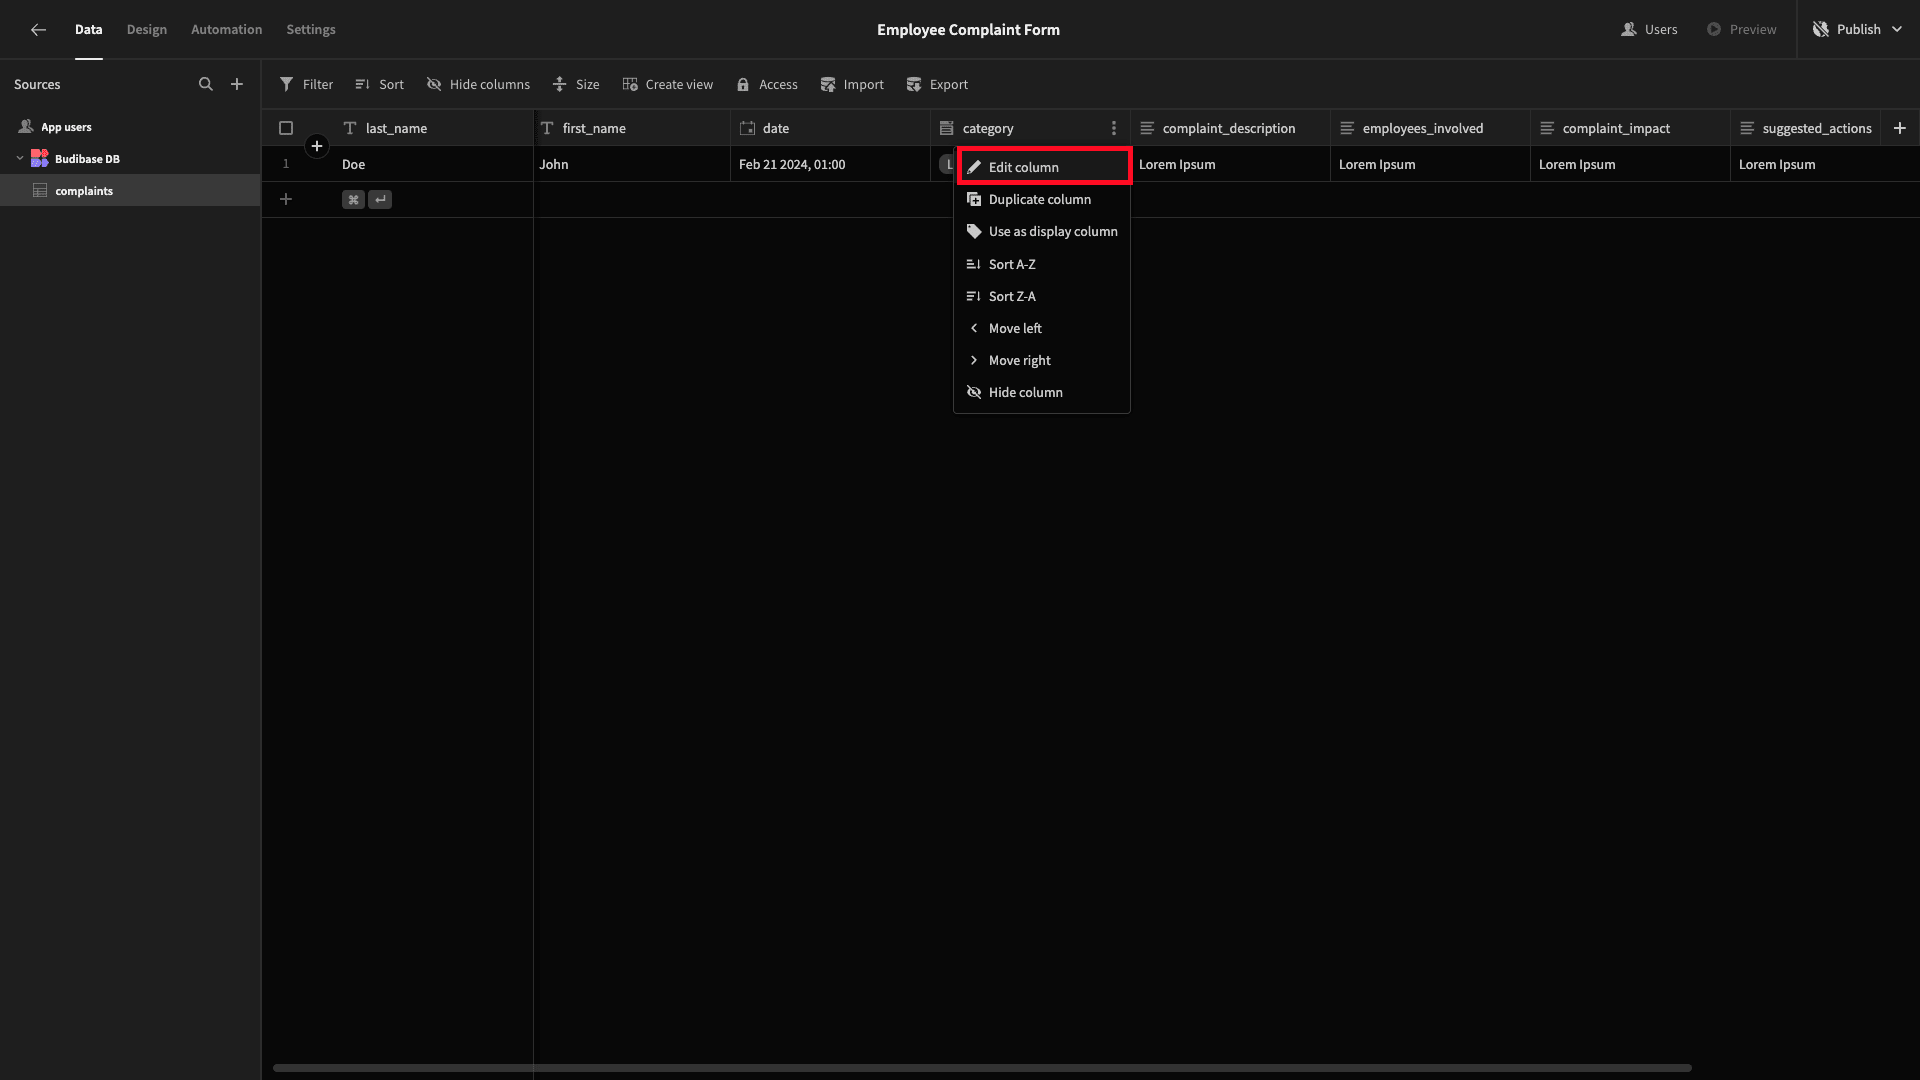
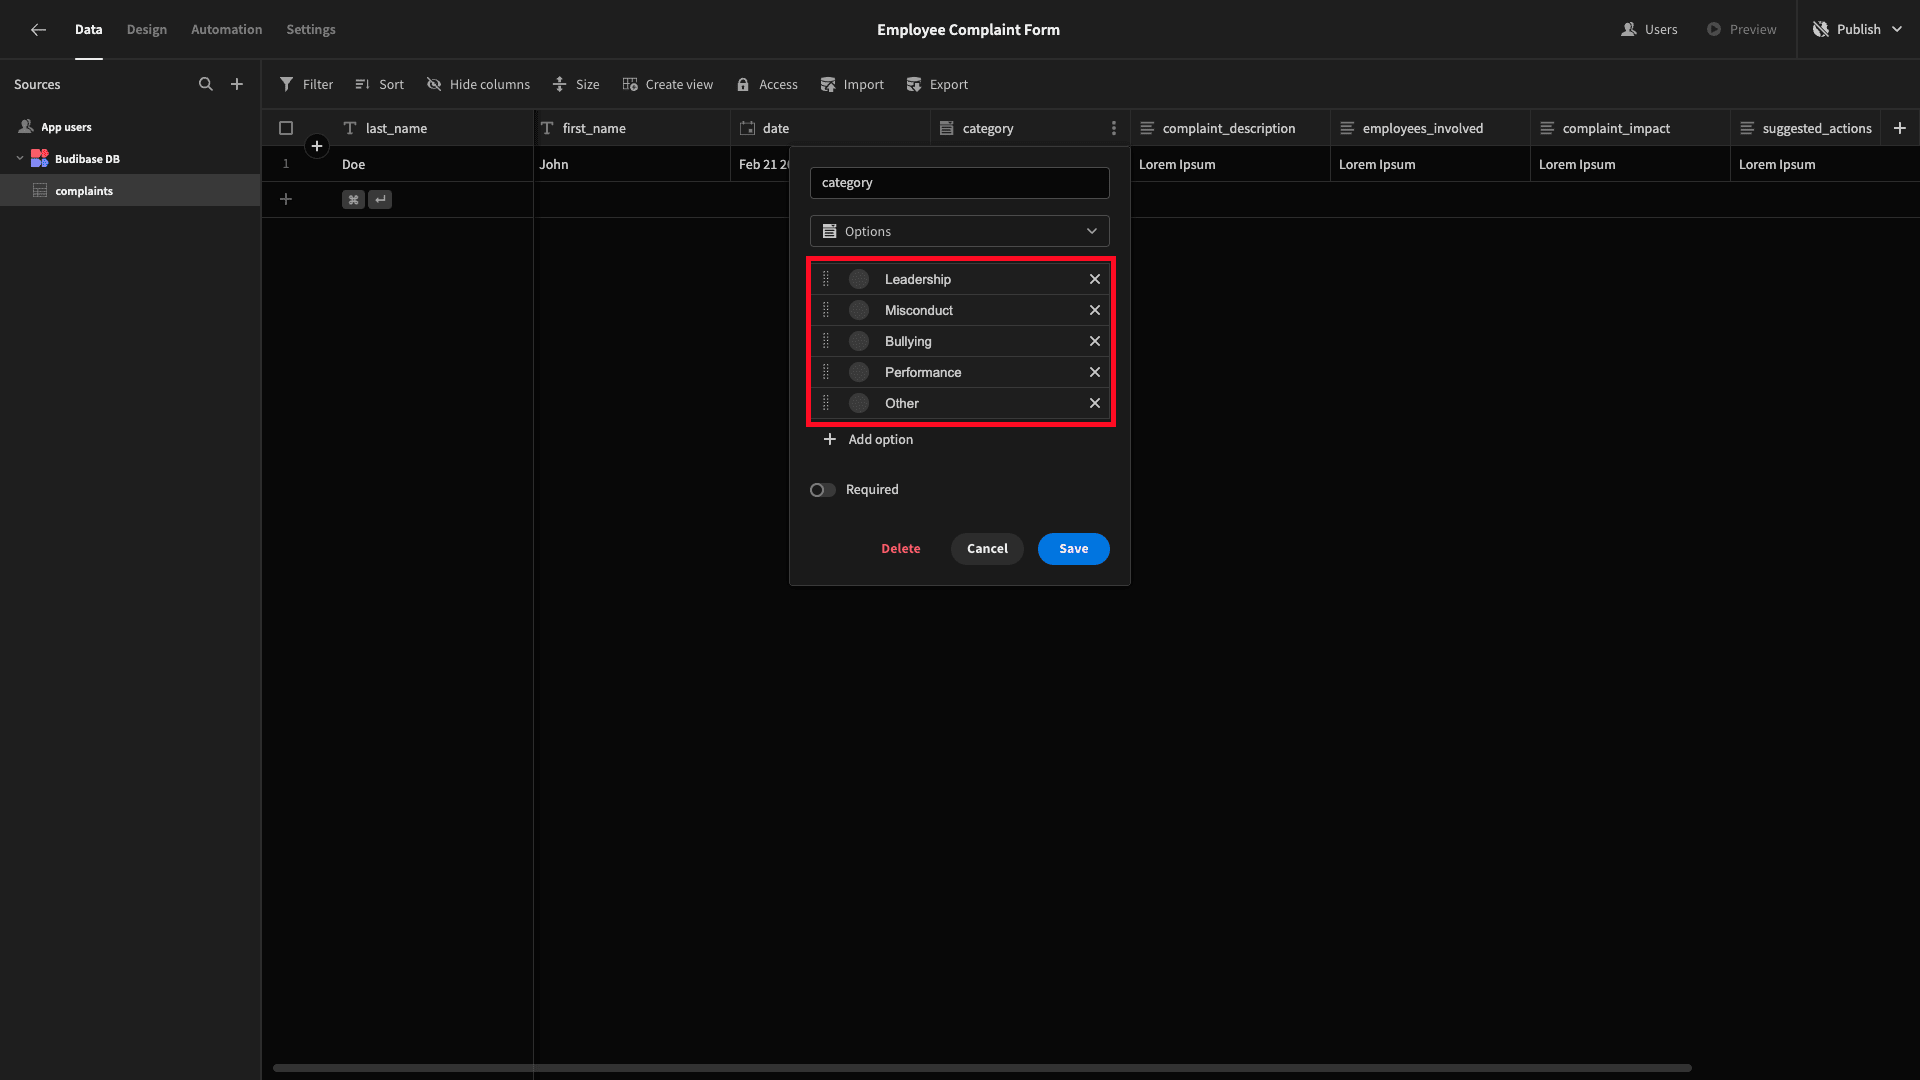
First, we selected the Options type for our category attribute. Budibase will infer these from the stored values we upload, but since our table only has one row, we’ll need to input the other possible options users can select.
We can do this by selecting Edit Column.
Here, we can input our options.
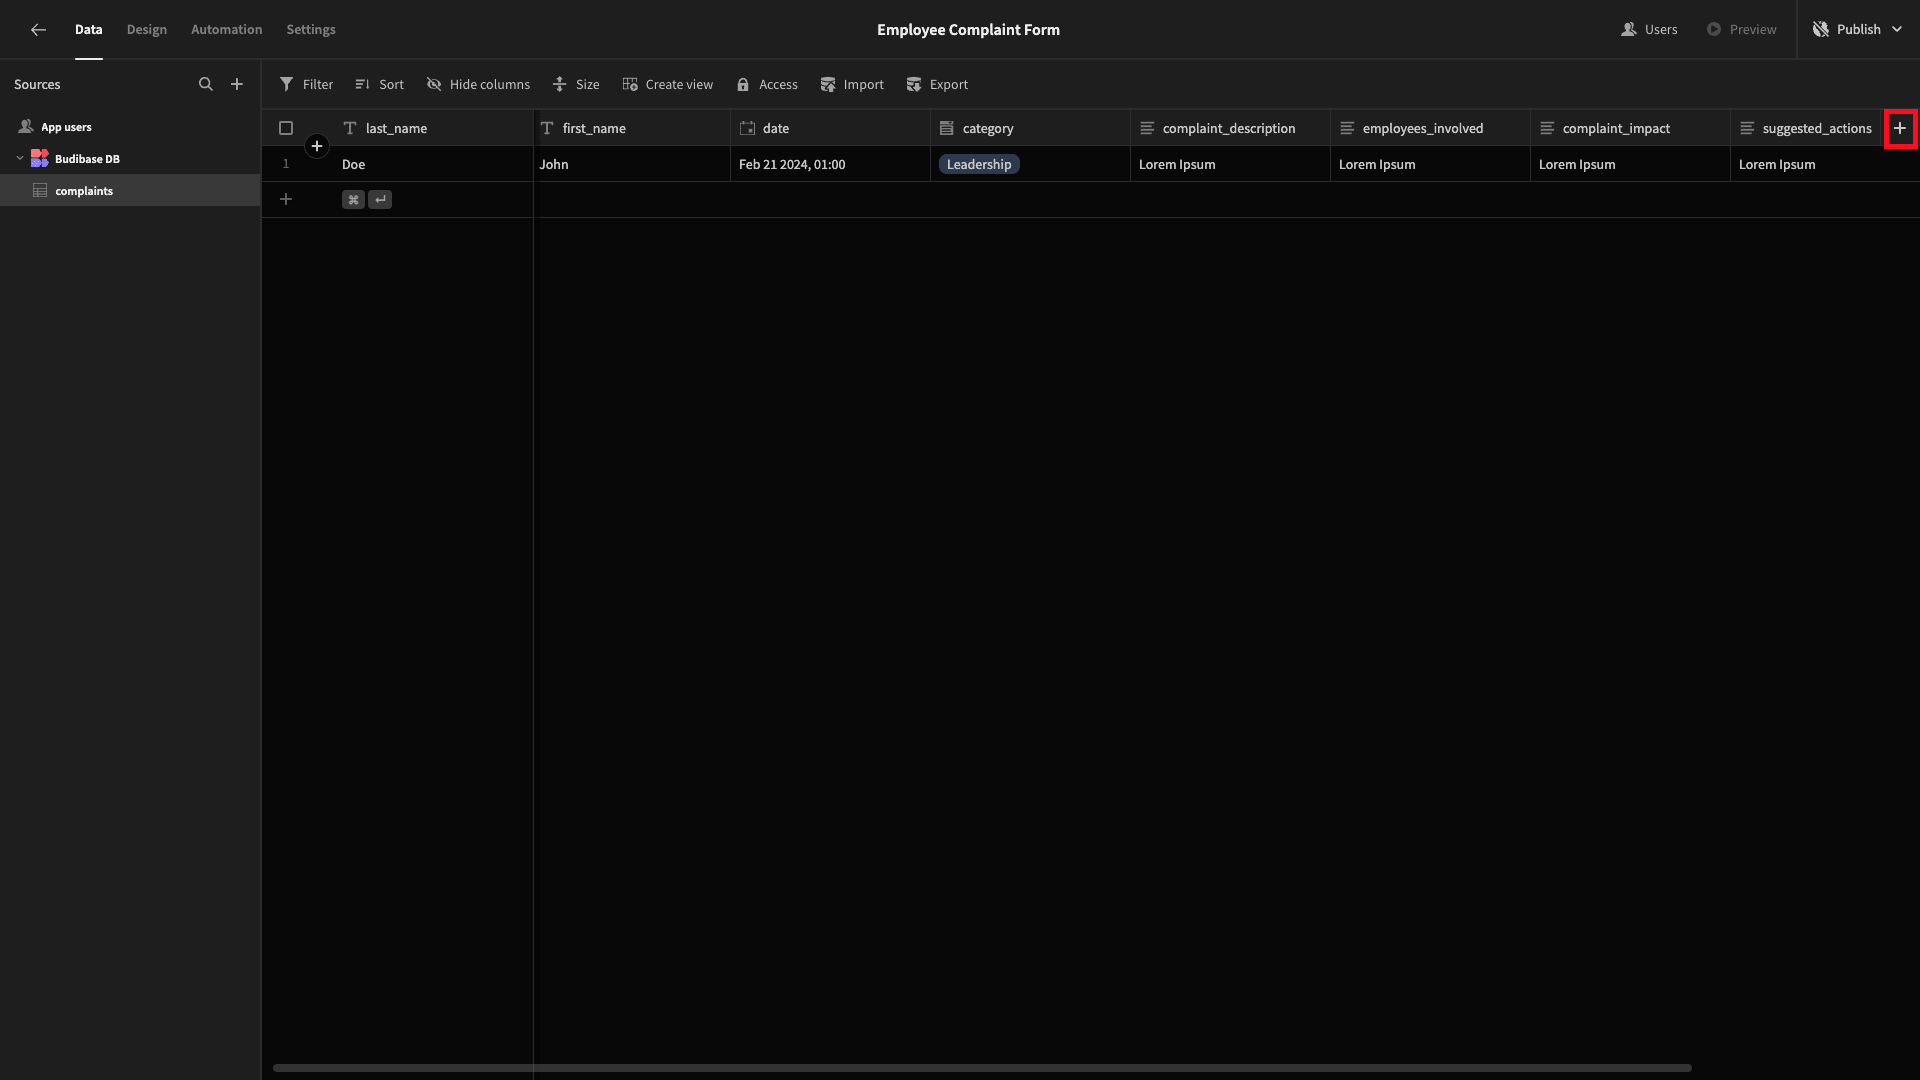
We also want to give our users the option to upload relevant supporting documents for their complaints.
So, we’ll need to add another column to store this.
Start by hitting the plus icon to create a new attribute.
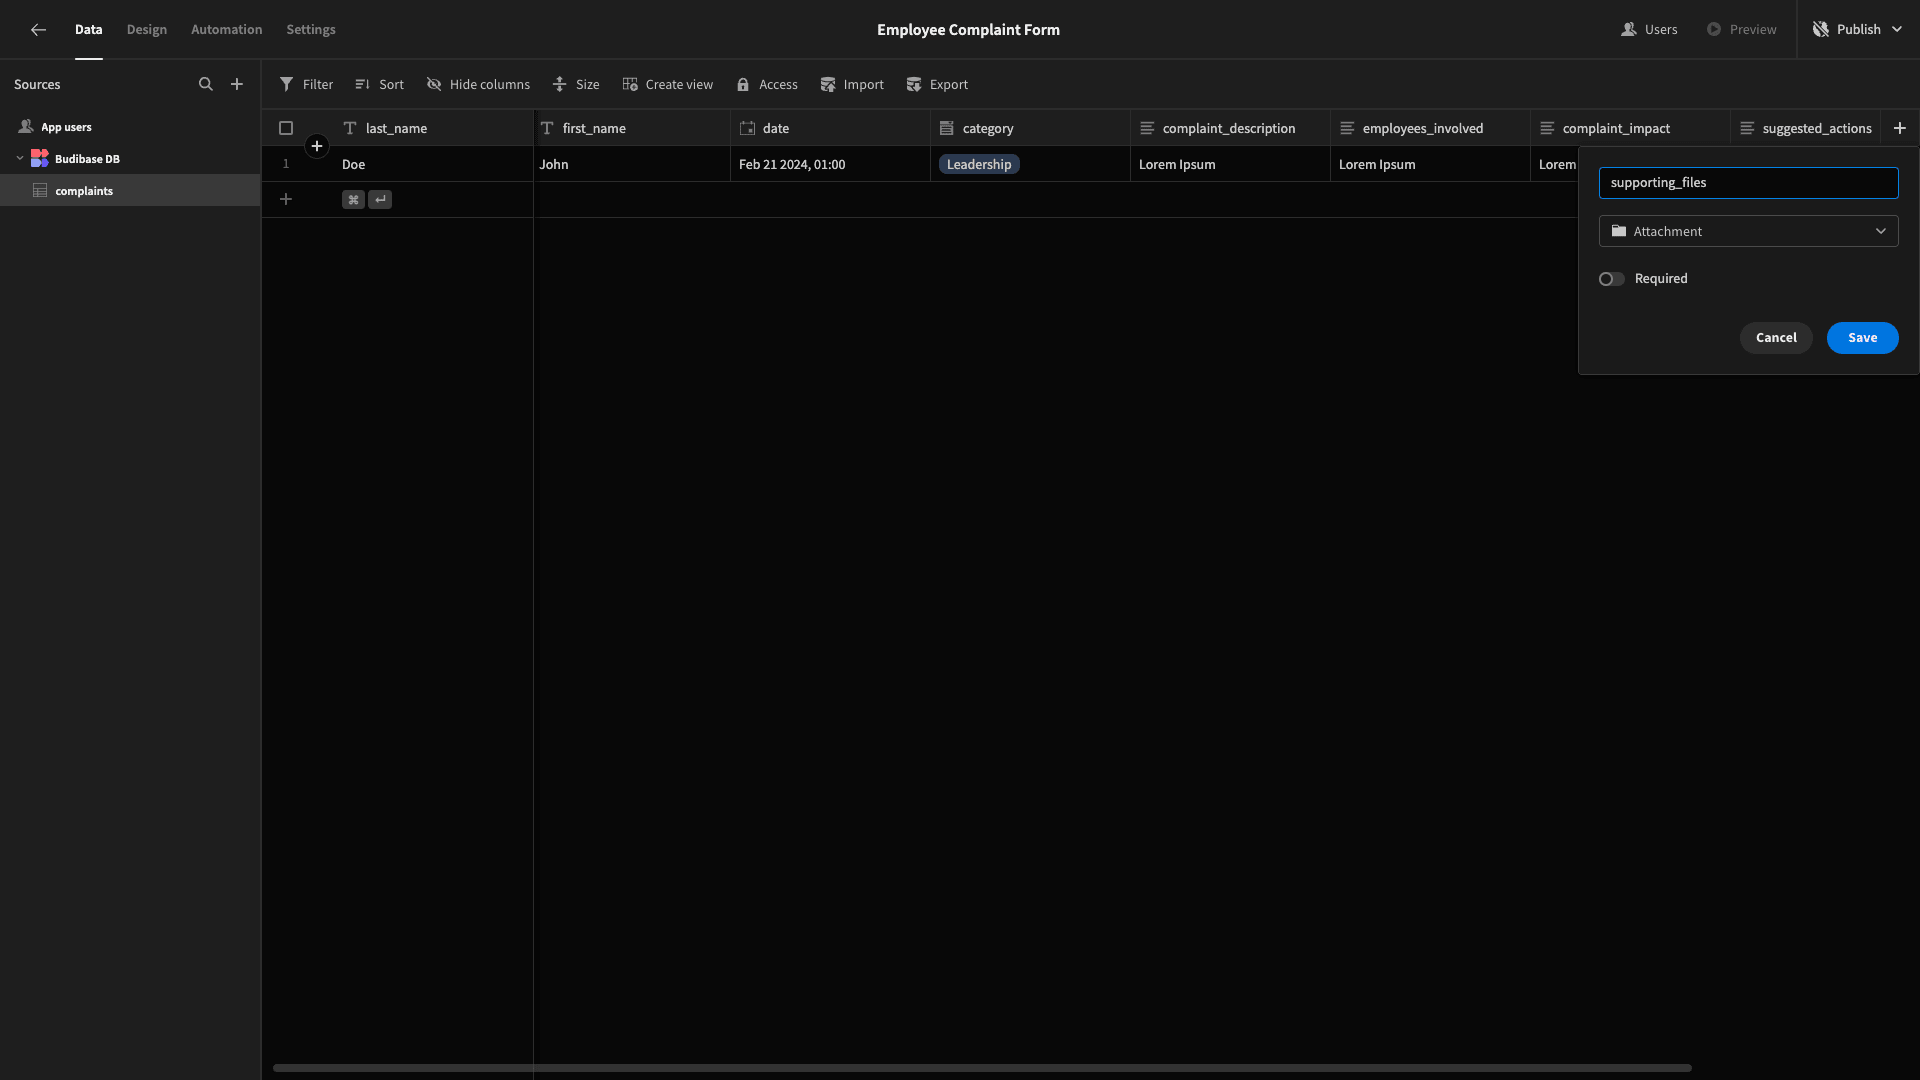
We’ll add an attachment field and call it supporting_files.
That’s our schema ready to go.
2. Creating a multi-step form
Now, we can start creating our employee complaint form itself. Start by heading over to the Design tab. We have a couple of options here for how we want to create our first screen - including auto-generated layouts.
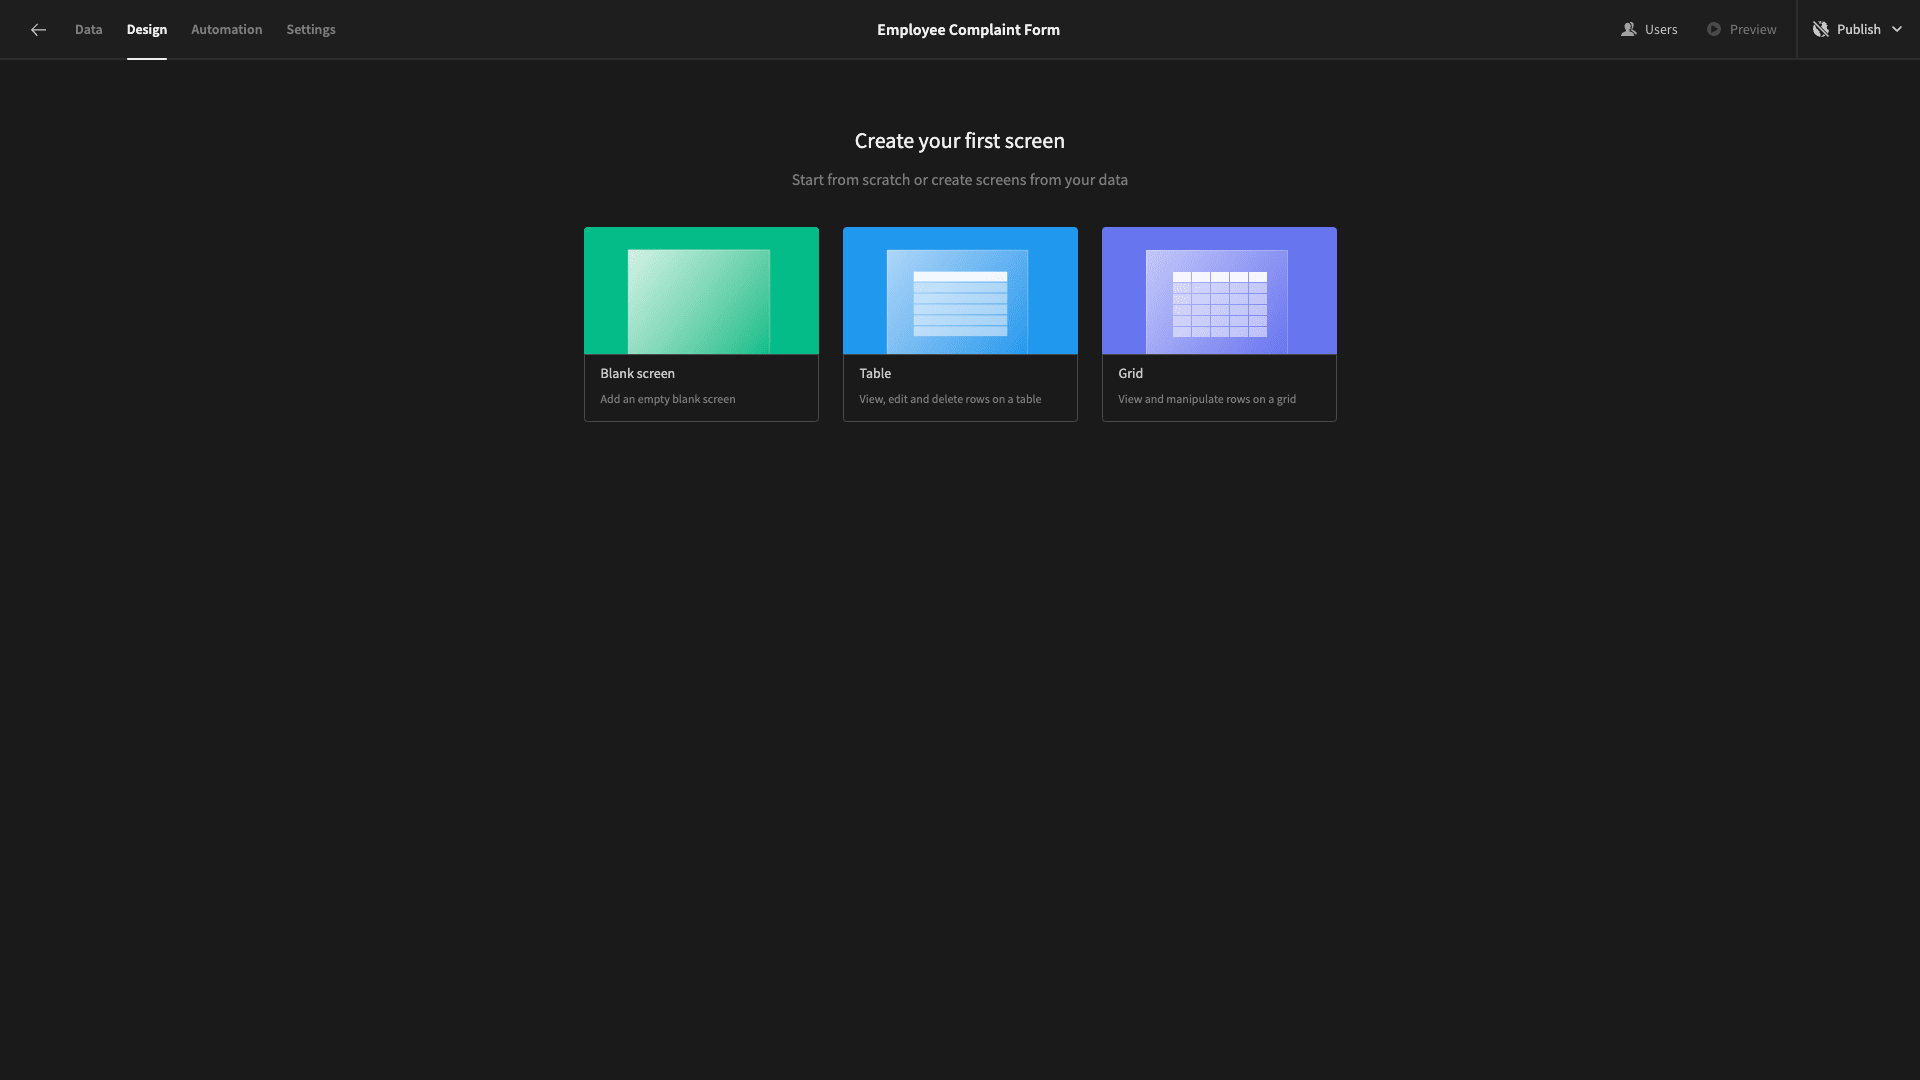
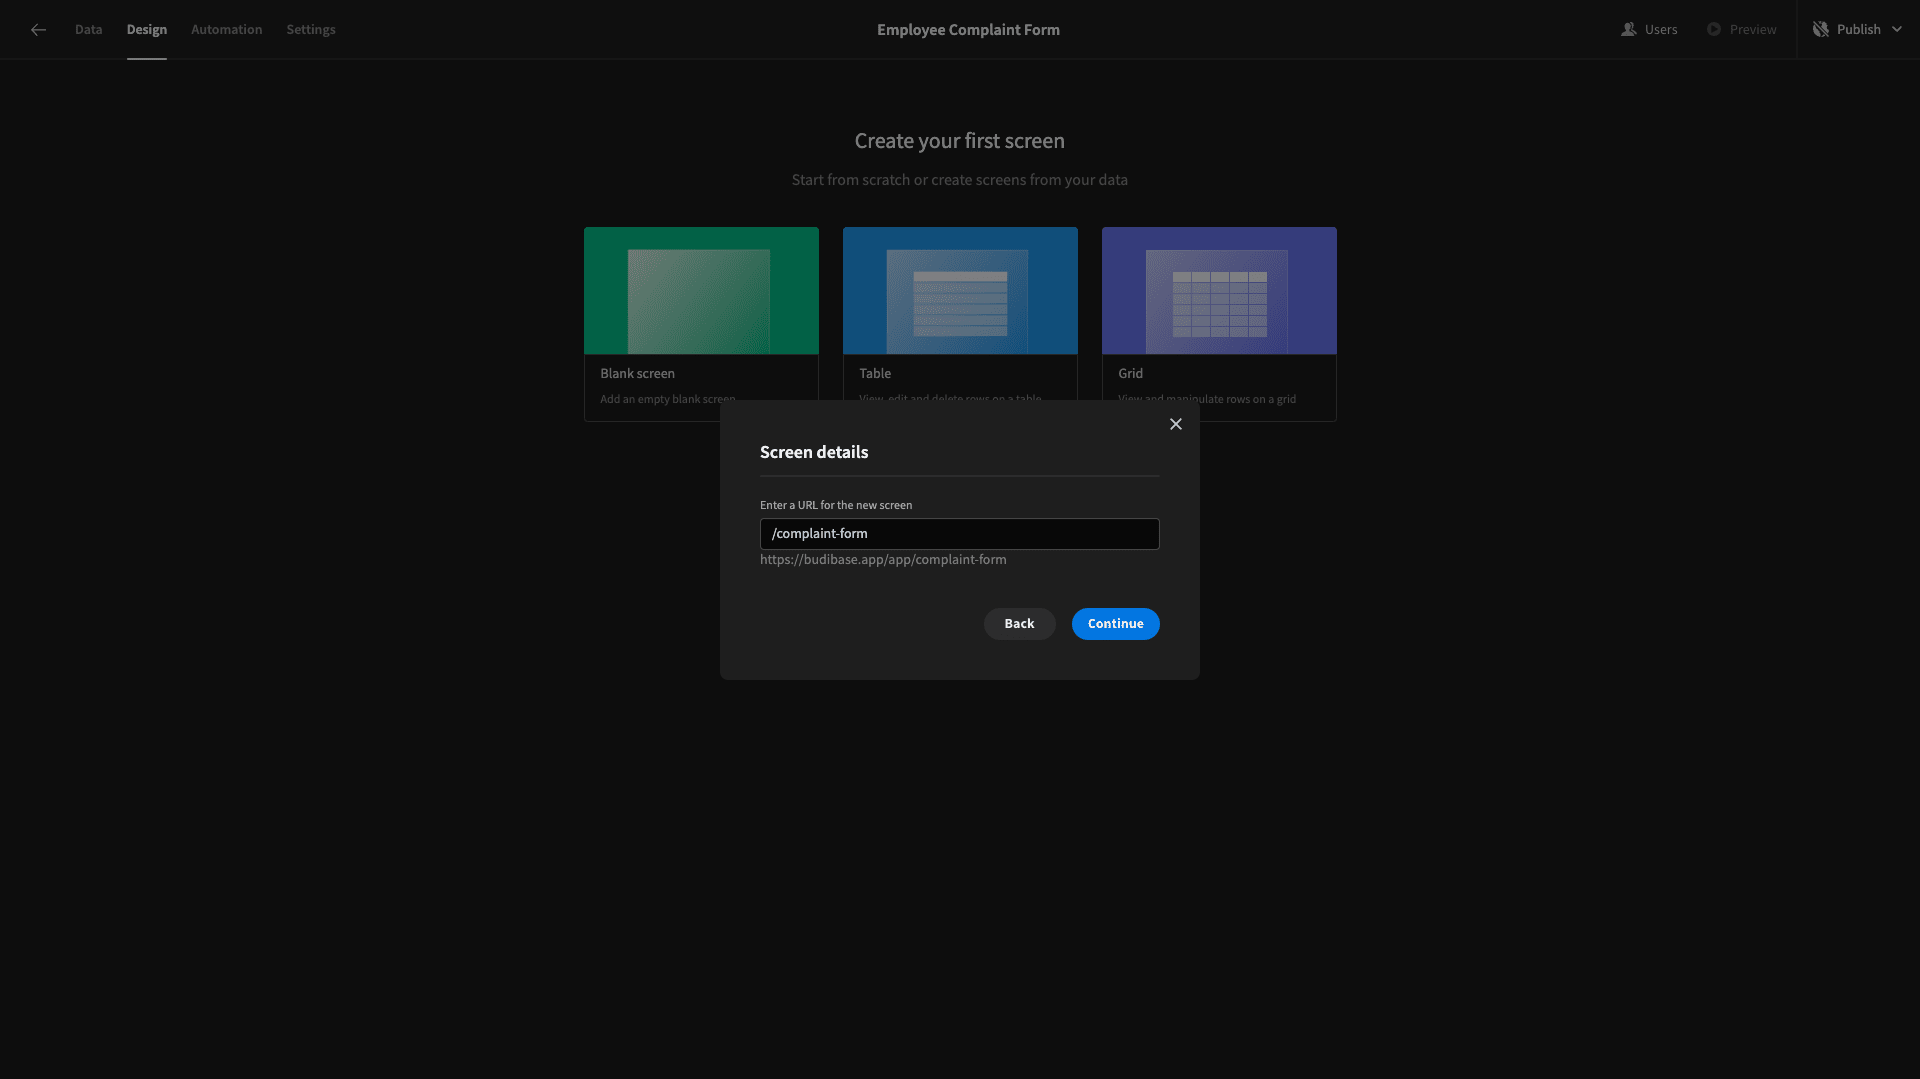
We’re then asked to choose a URL extension. This is going to be a single-screen app, so we can choose whatever we want.
Here’s what our blank screen will look like.
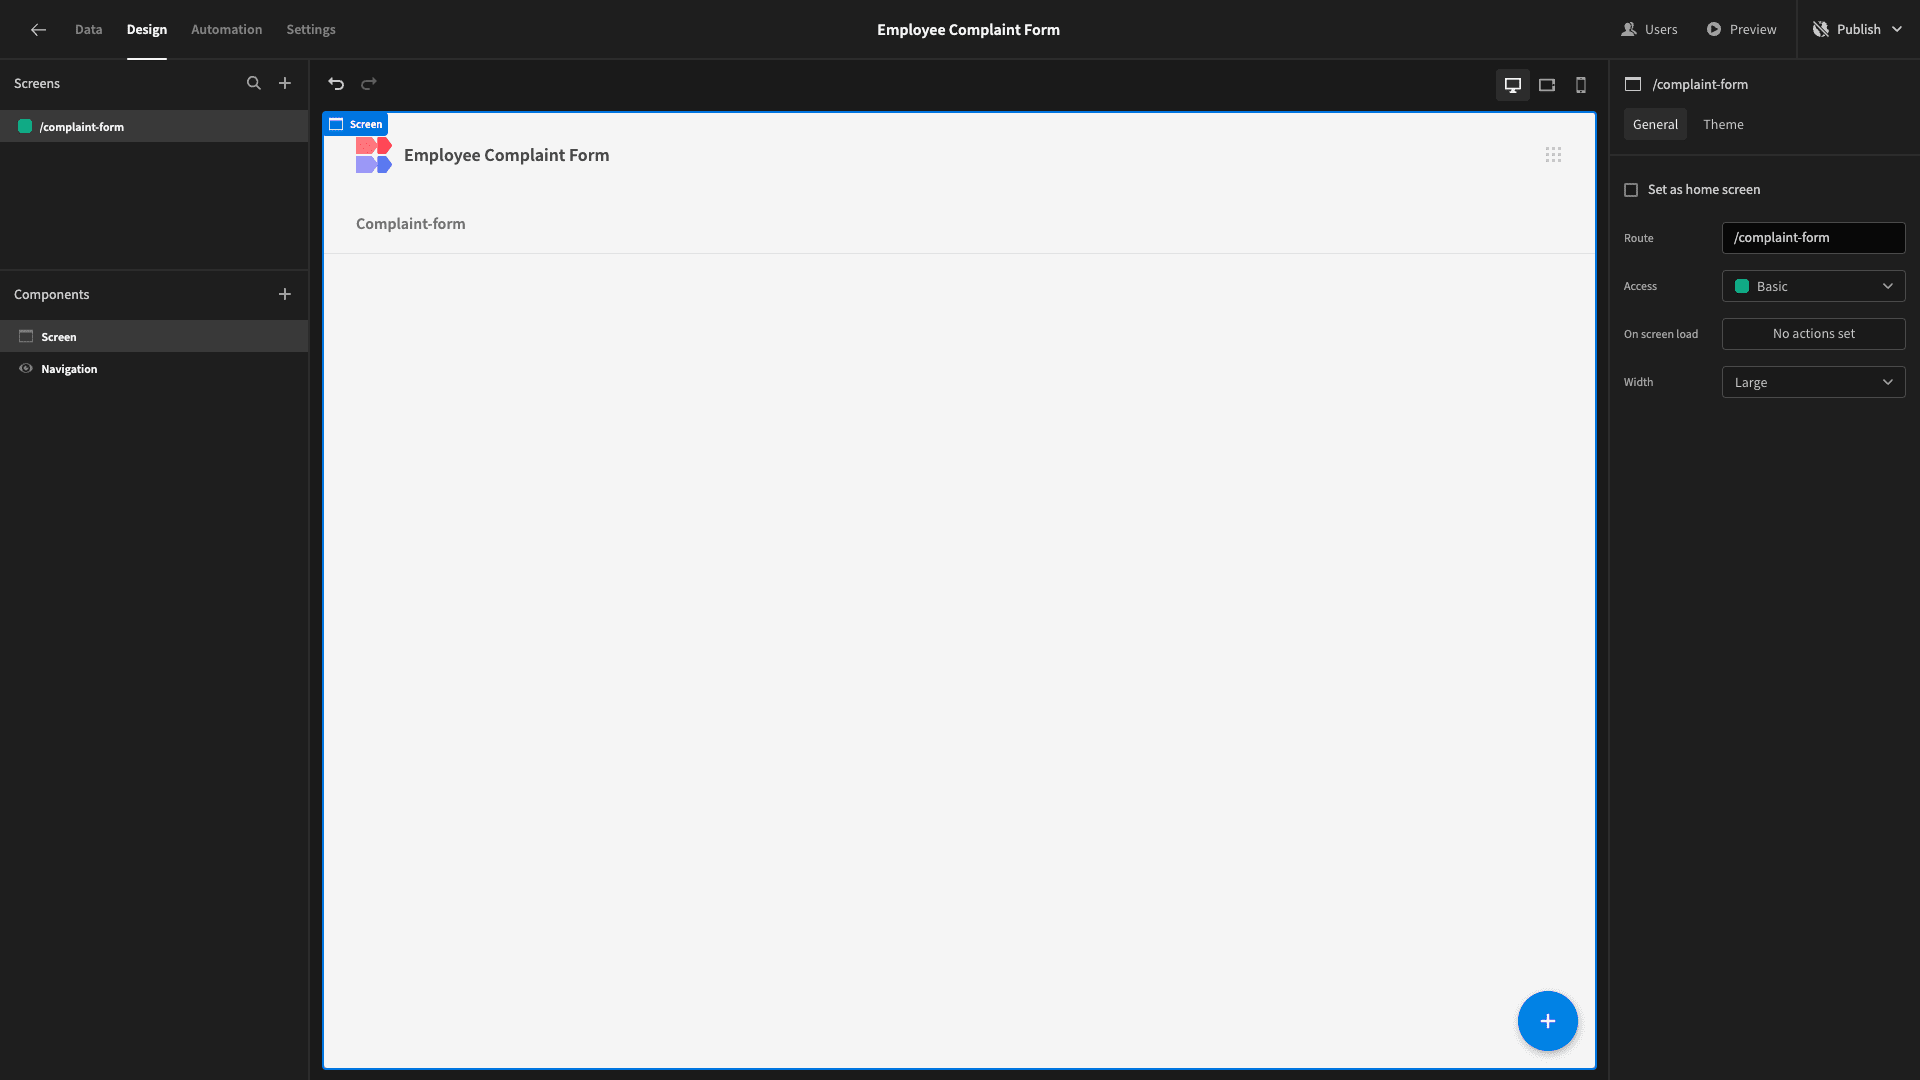
We’re going to start by adding a component called a Multi-Step Form Block. As the name suggests, this outputs a working multi-step form based on the database table we connect it to.
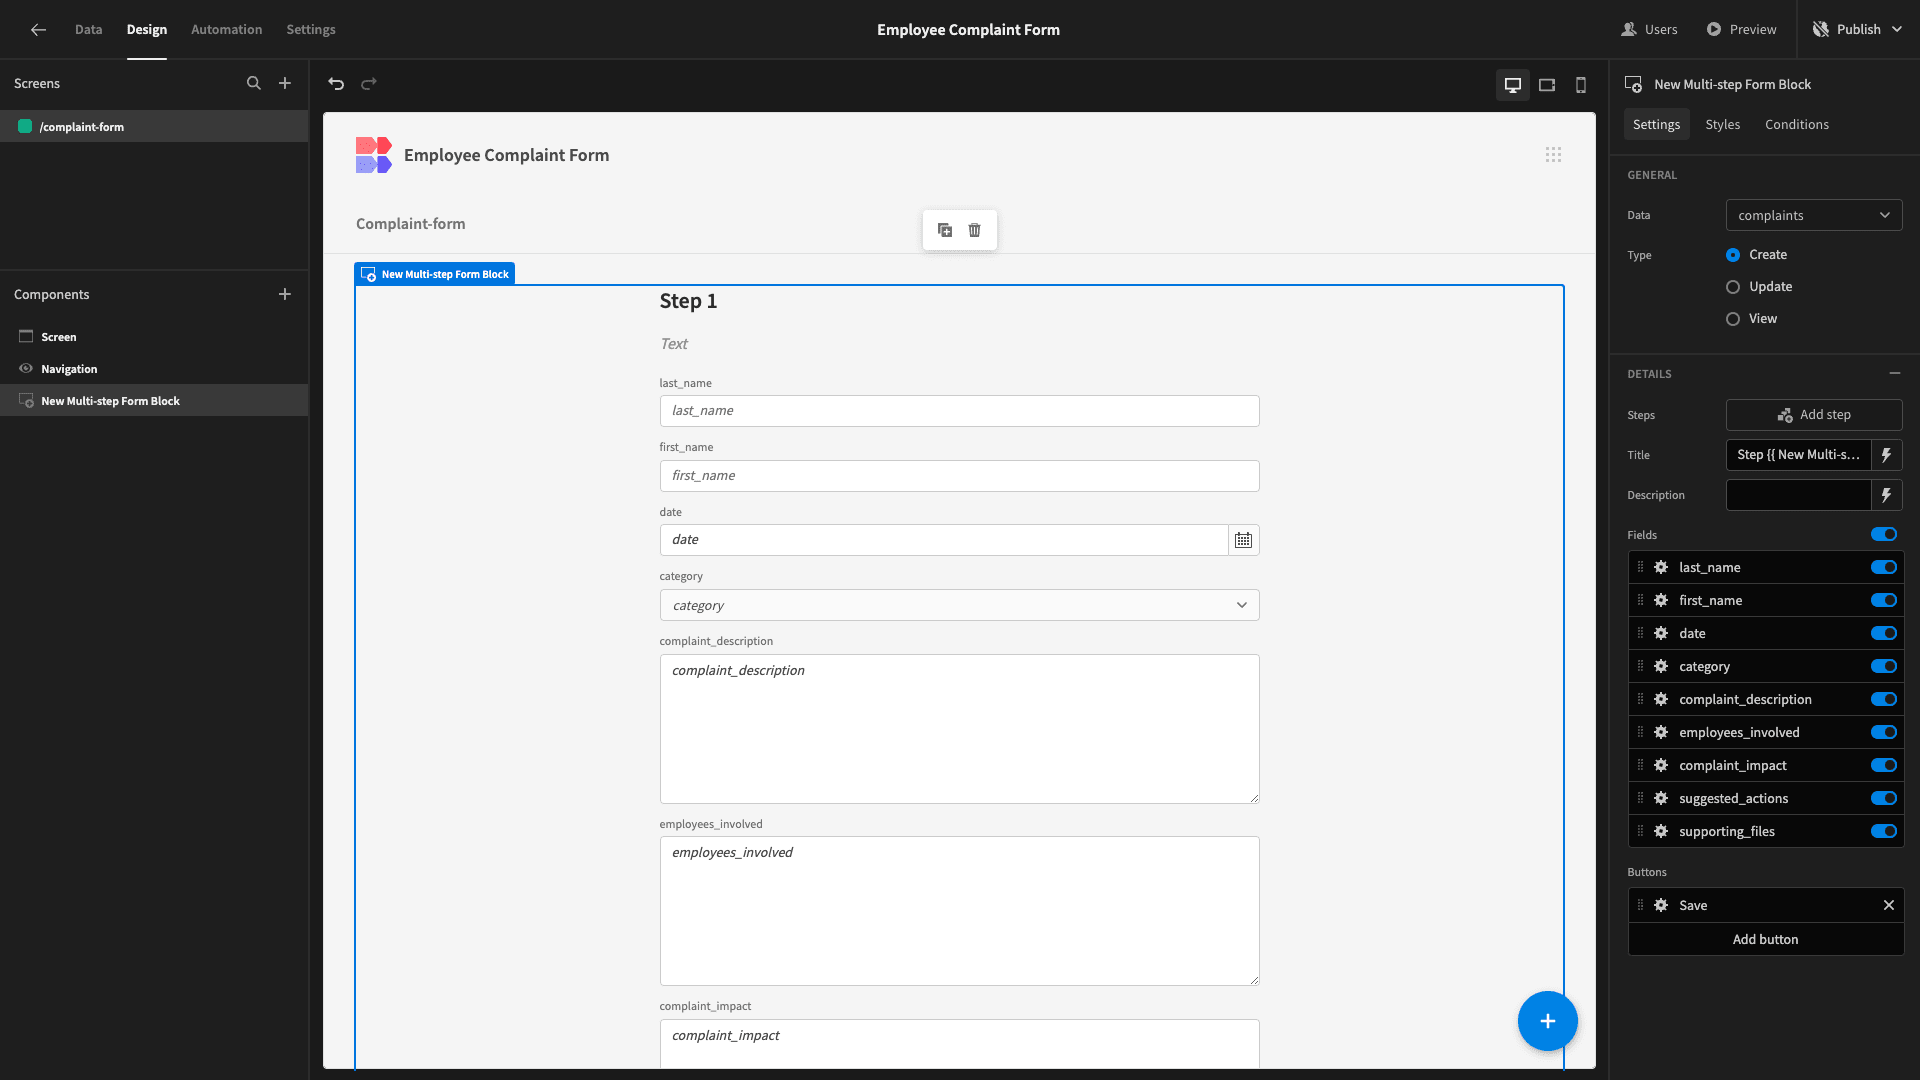
Our first task is to arrange our form fields into different steps.
For the initial step, we’ll only include the first four fields - last_name, first_name, date, and category.
So, we want to deselect everything else.
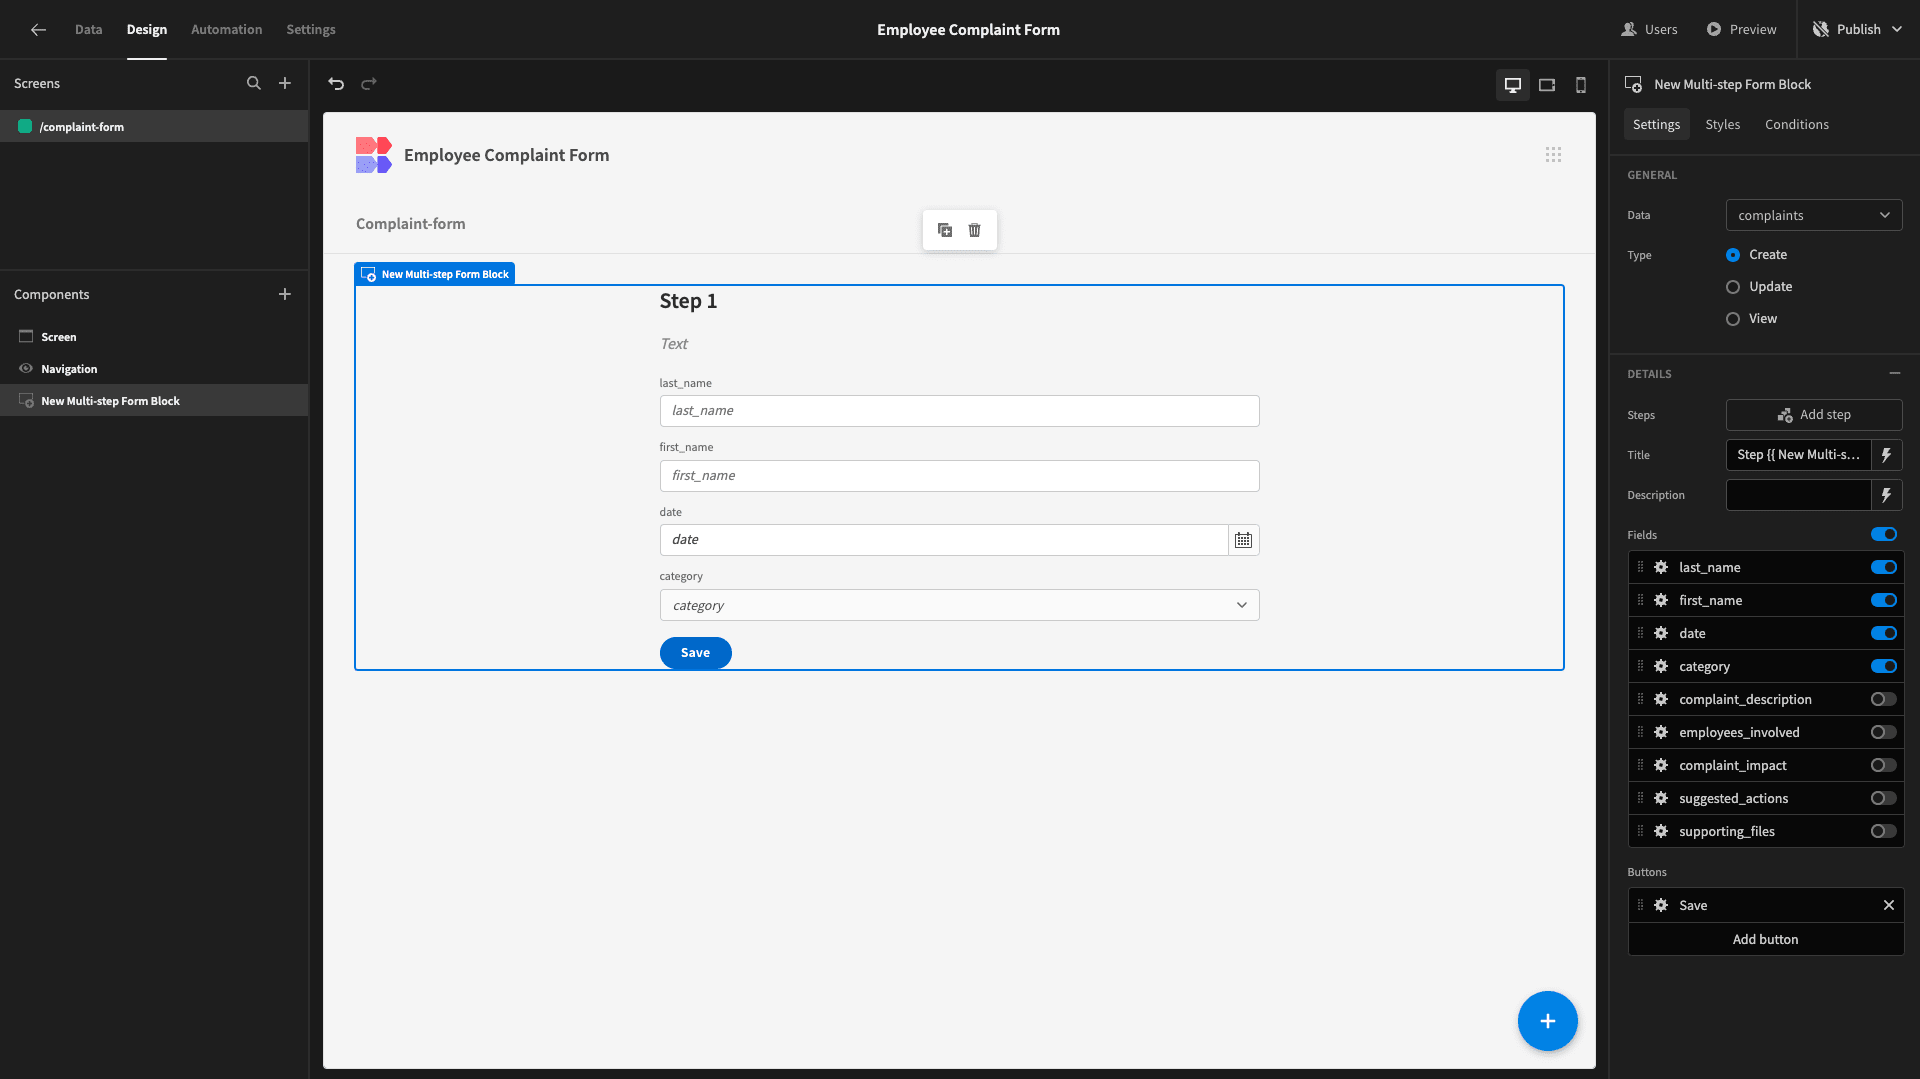
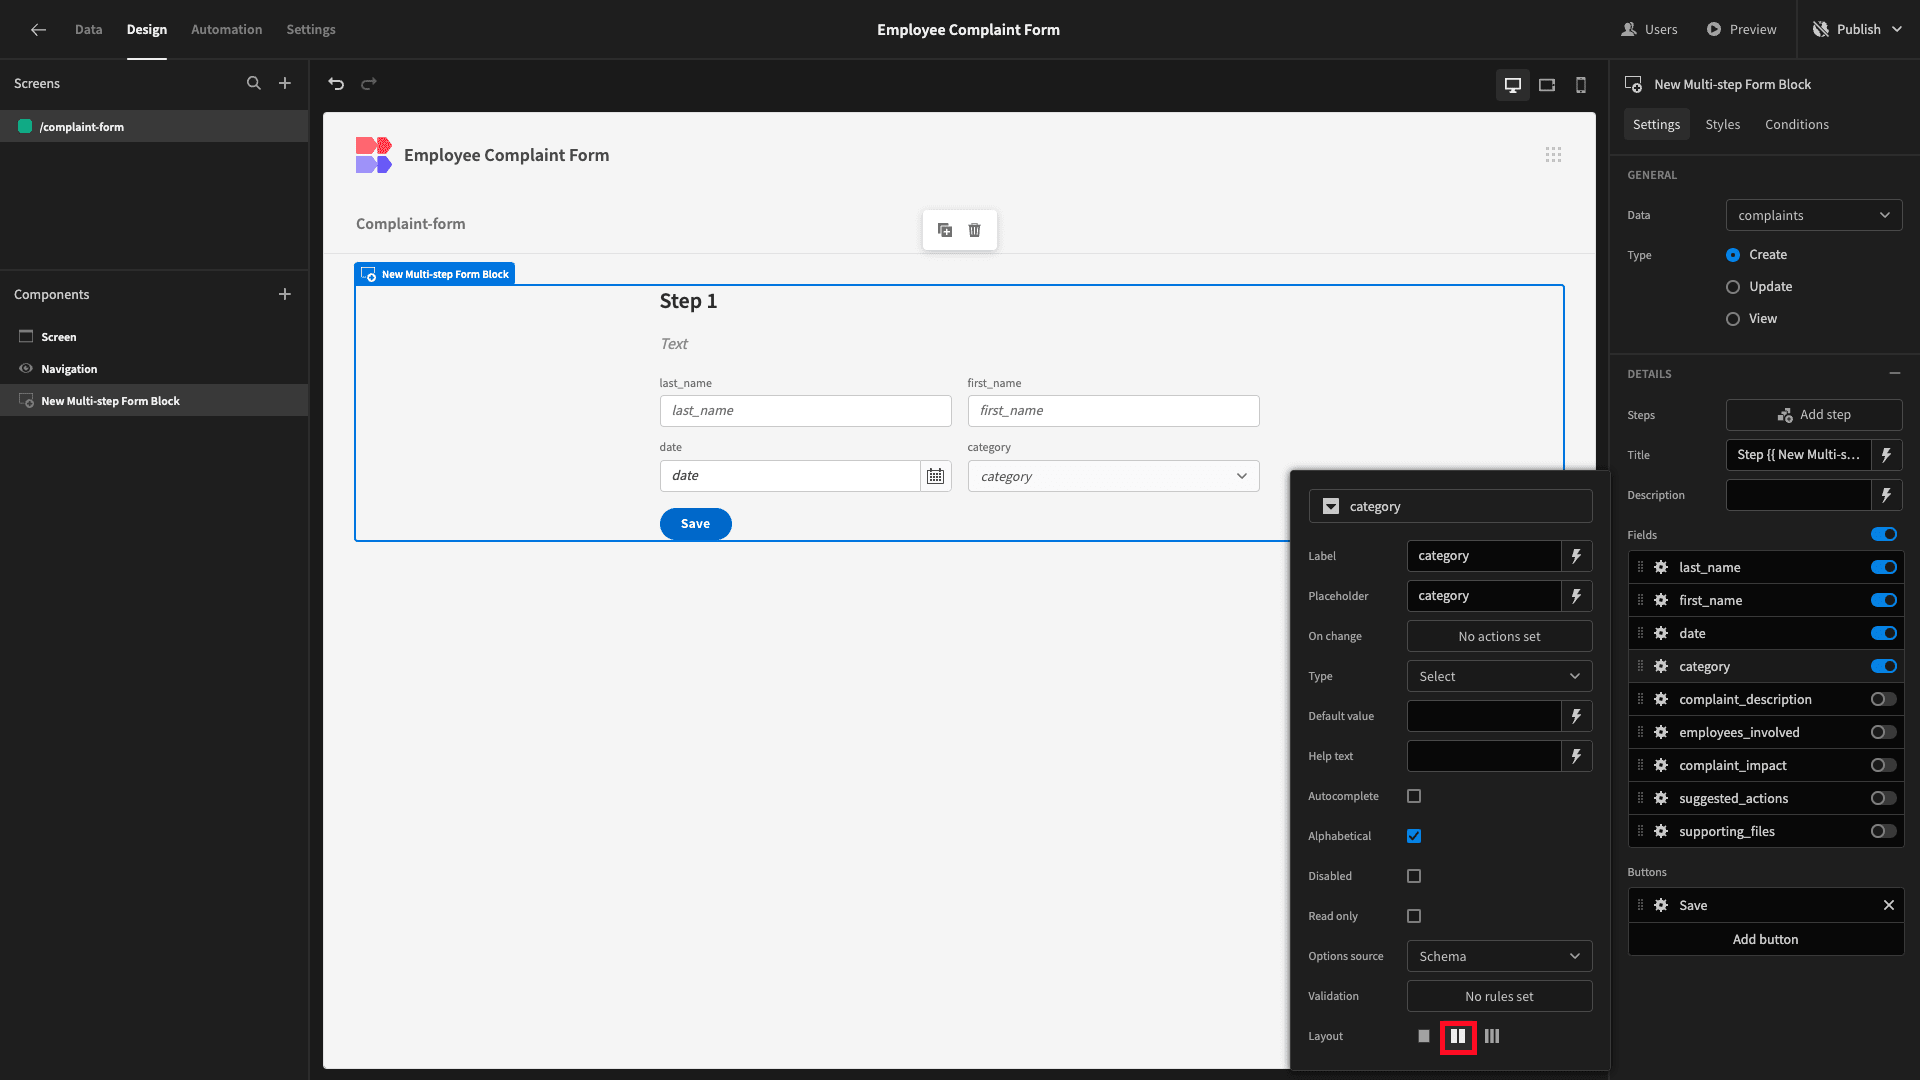
However, these currently occupy slightly more horizontal space than is strictly necessary. We’ll use the layout option within each field’s settings to arrange them into columns.
Lastly, we’ll add some display text to our Description field.
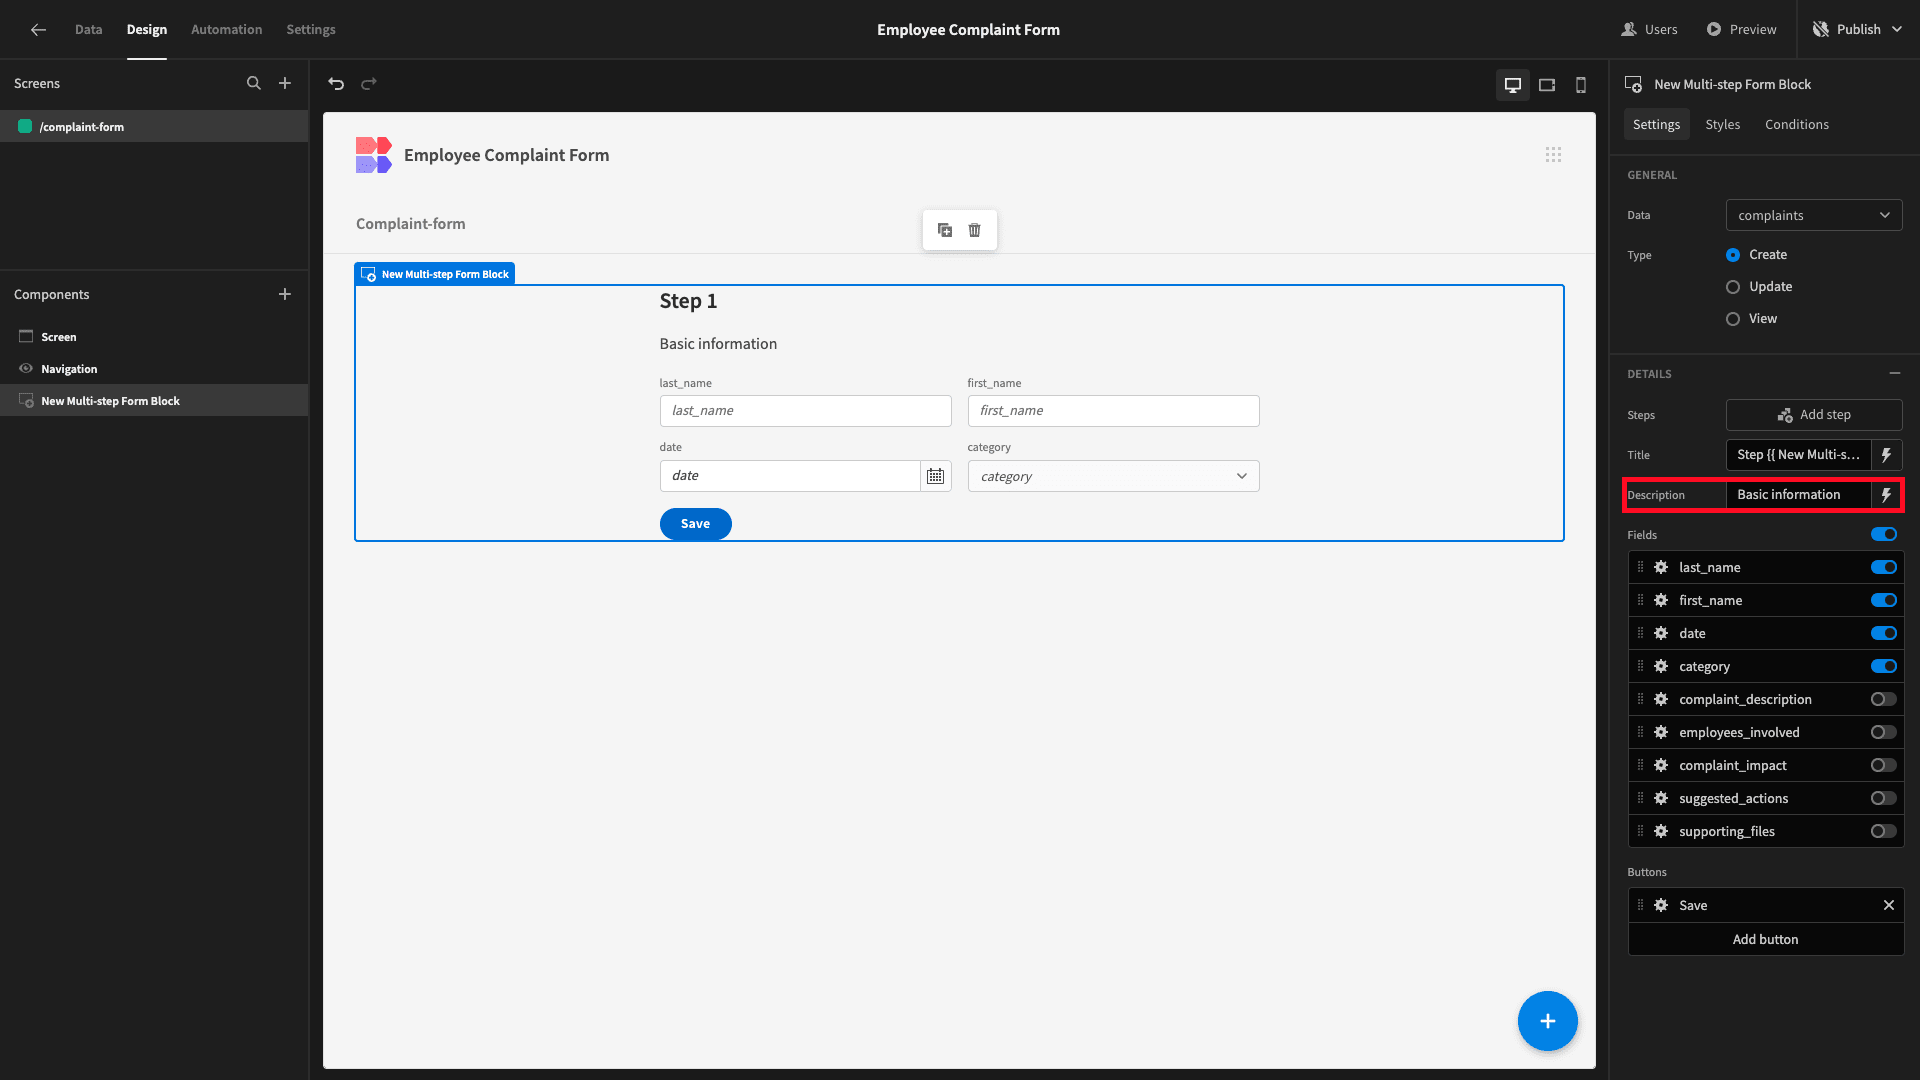
When you’re happy, you can hit Add Step.
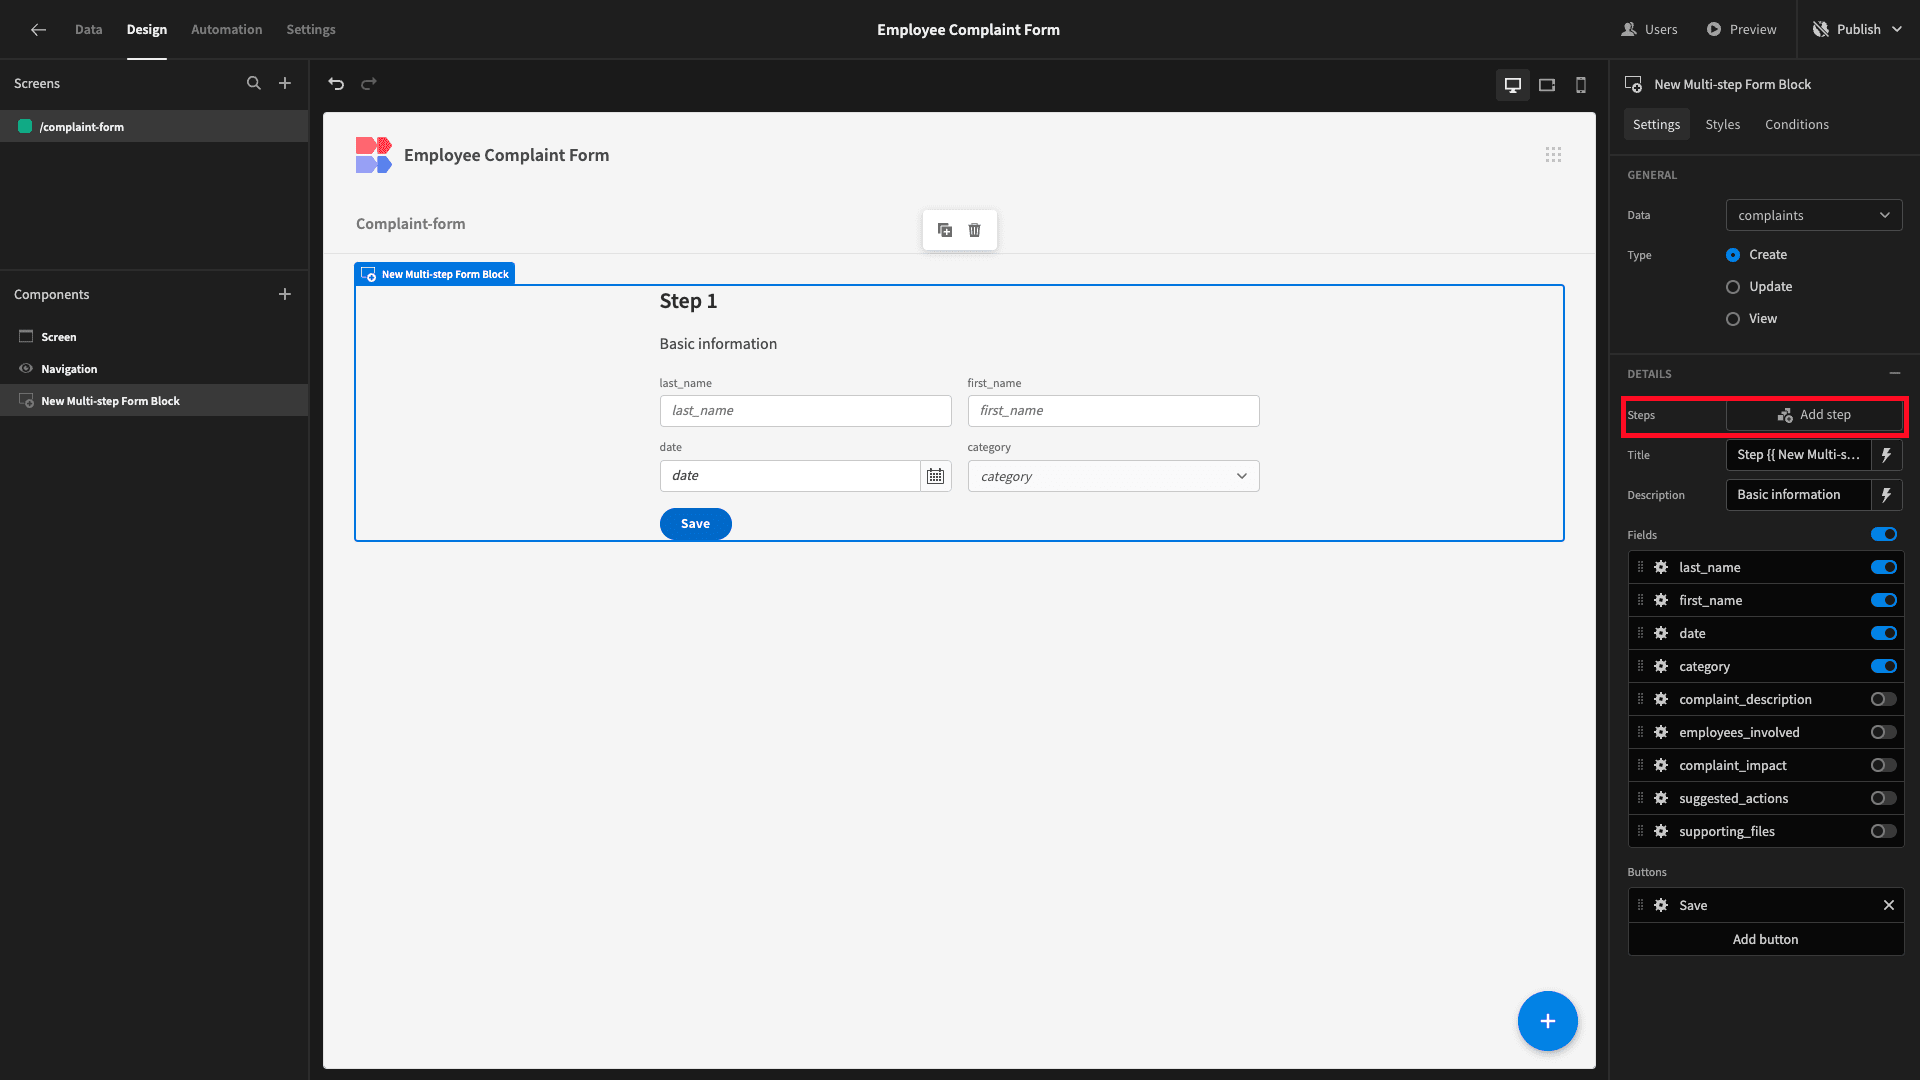
Each of our remaining fields will be displayed separately on their own form steps.
We’ll start by adding a step for our complaint_description attribute - again, adding display text to our Description field.
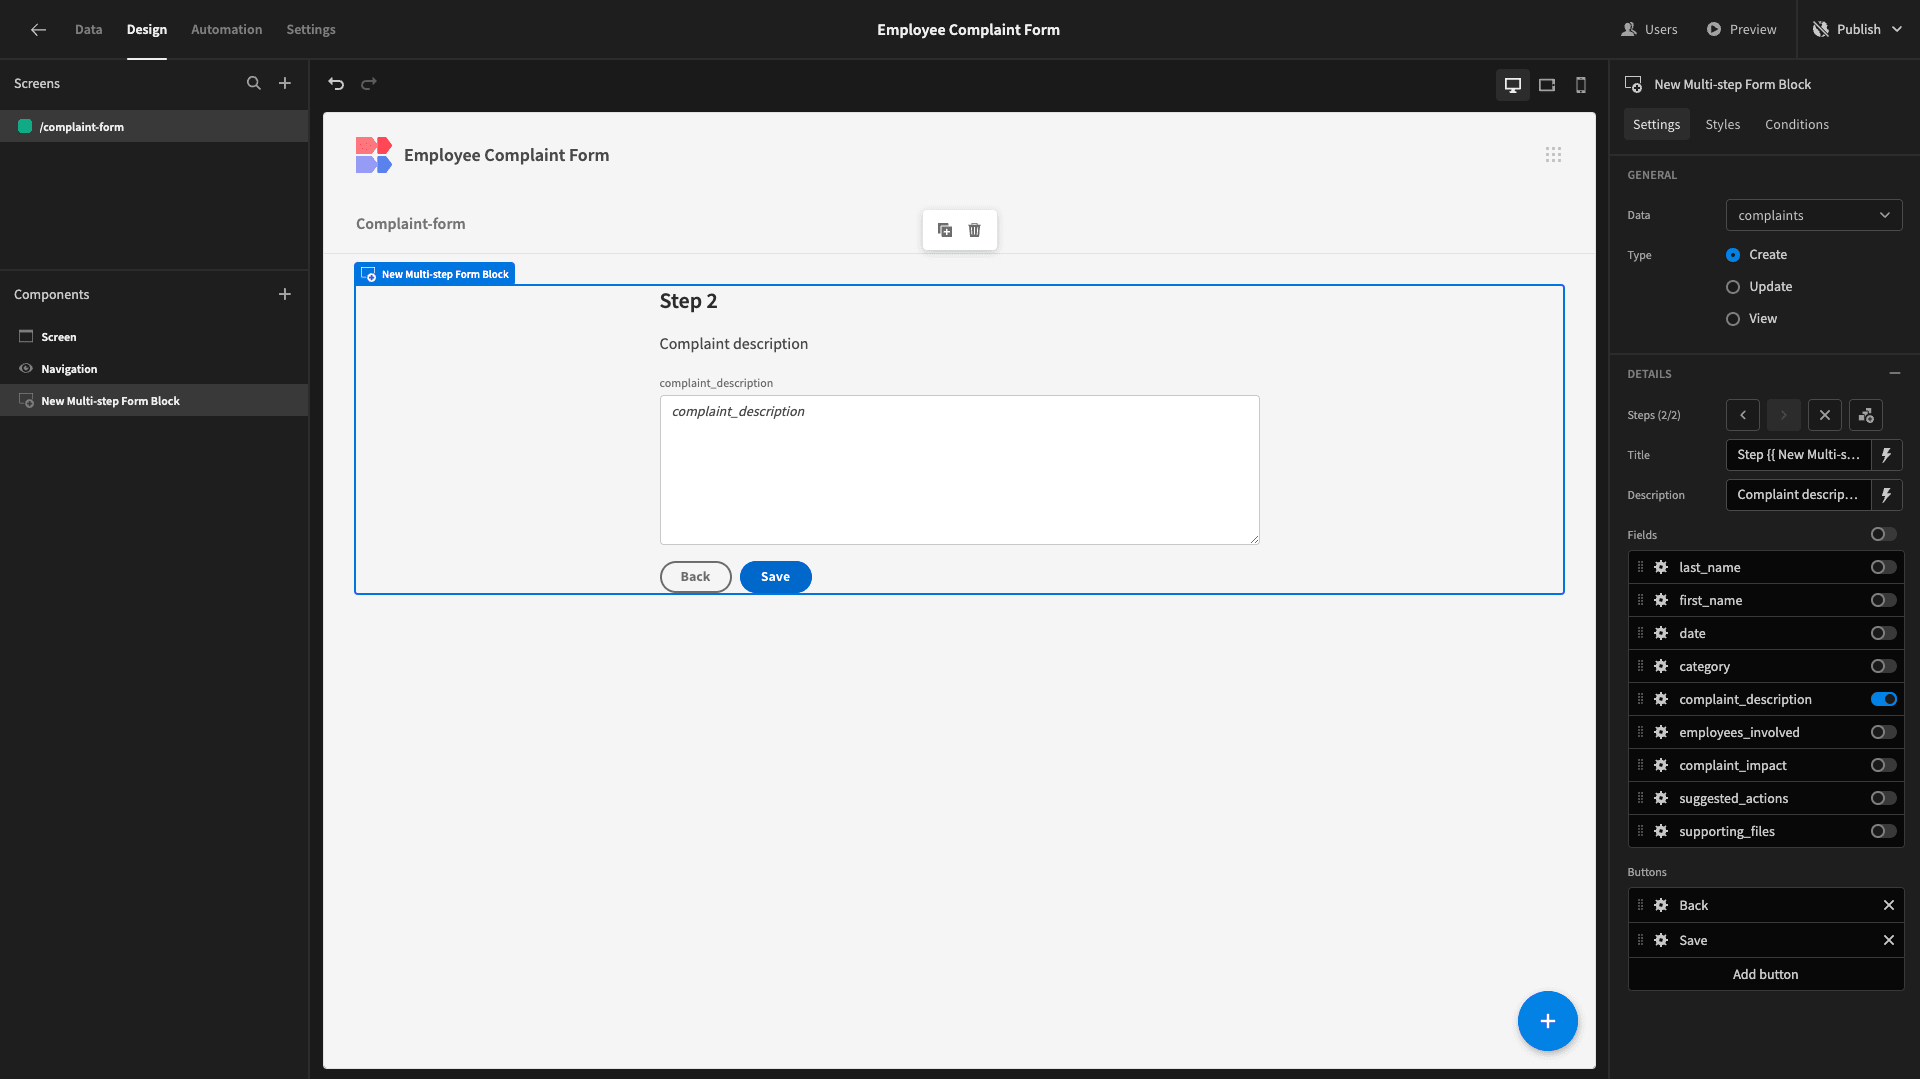
And we’ll repeat this process for all of our remaining fields until we get to supporting_files.
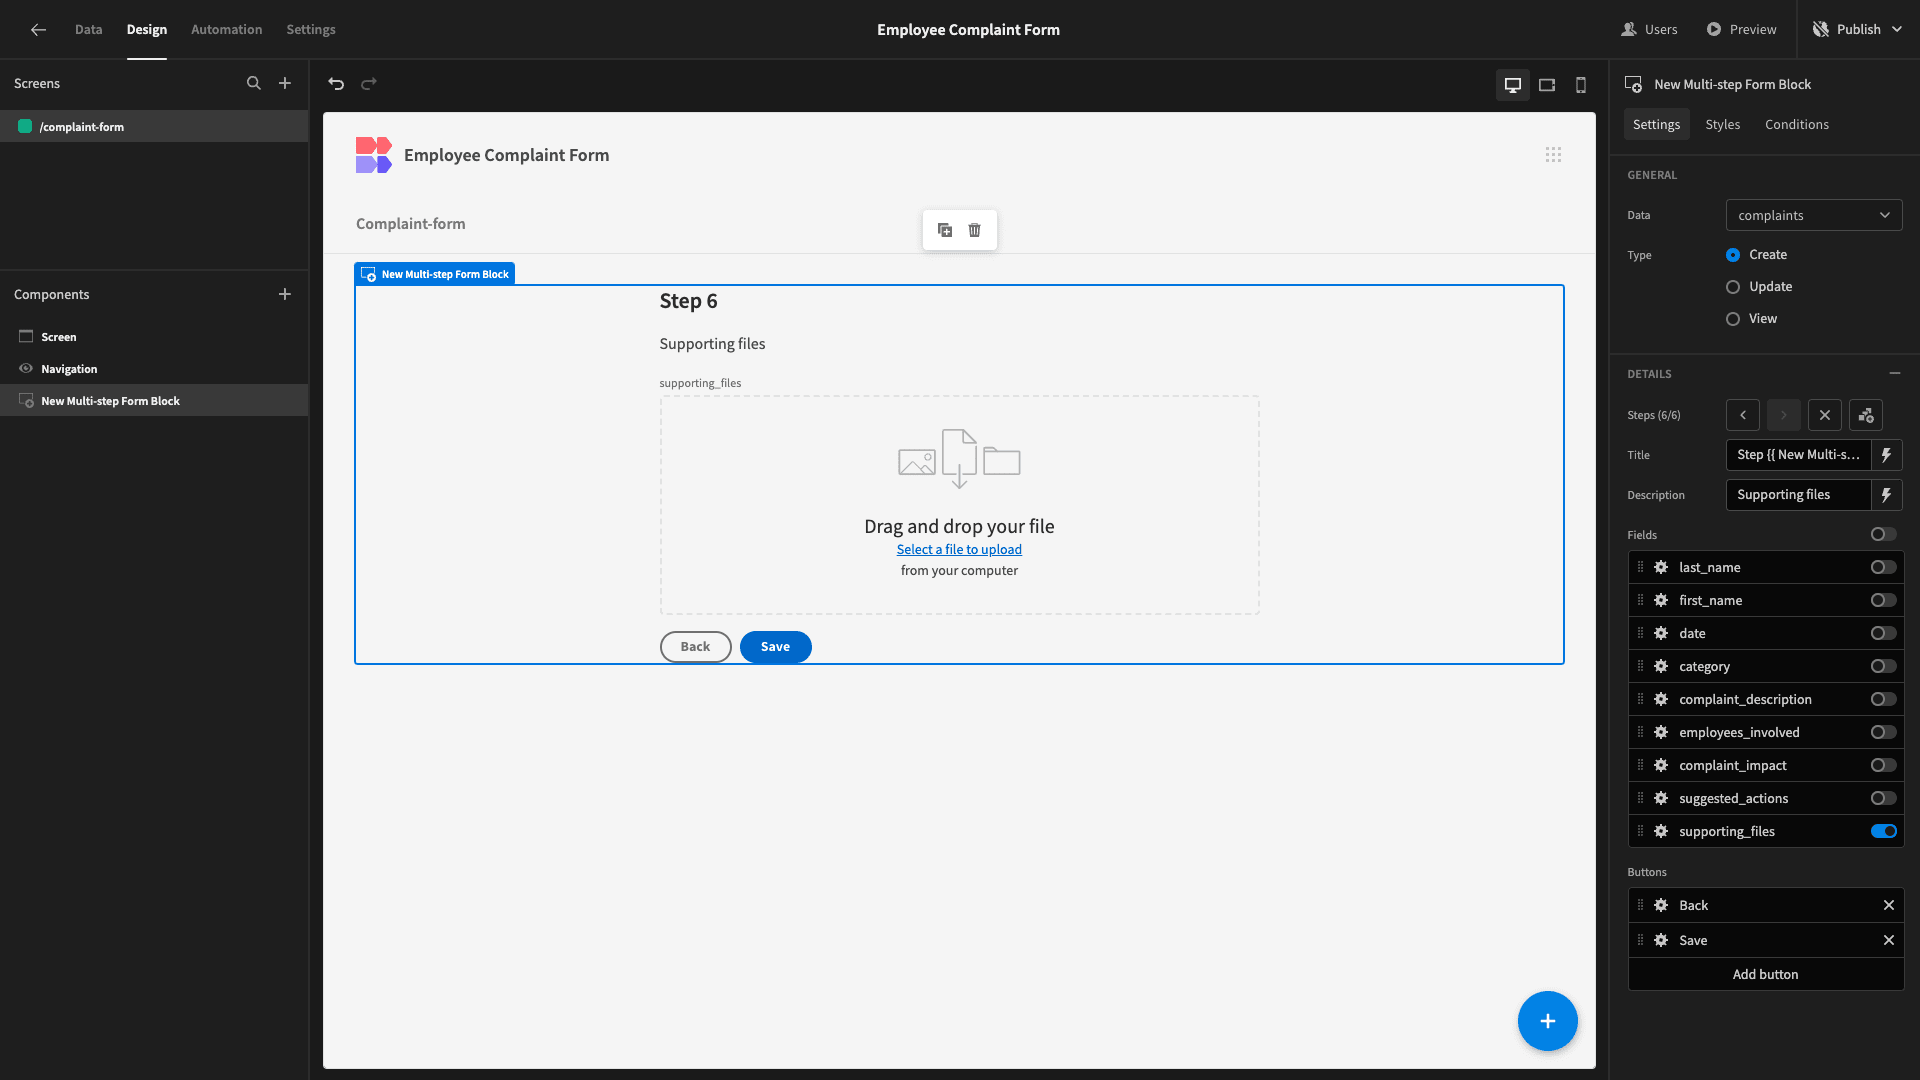
And that’s the basic structure of our employee complaint form completed.
3. Auto-populating data
The next thing we want to do is streamline the process of submitting a complaint by auto-populating certain values based on context.
Specifically, we already know the names of authenticated users - as well as the current date. So, we can assign values to these fields without necessarily needing manual user inputs.
Each of these has a setting called Default Value, which we can assign using dynamic bindings.
We can populate this with any data that our form is exposed to - either in its present form or using custom JavaScript and Handlebars expressions.
Use the lightning bolt icon to open the bindings drawer for the last_name attribute.
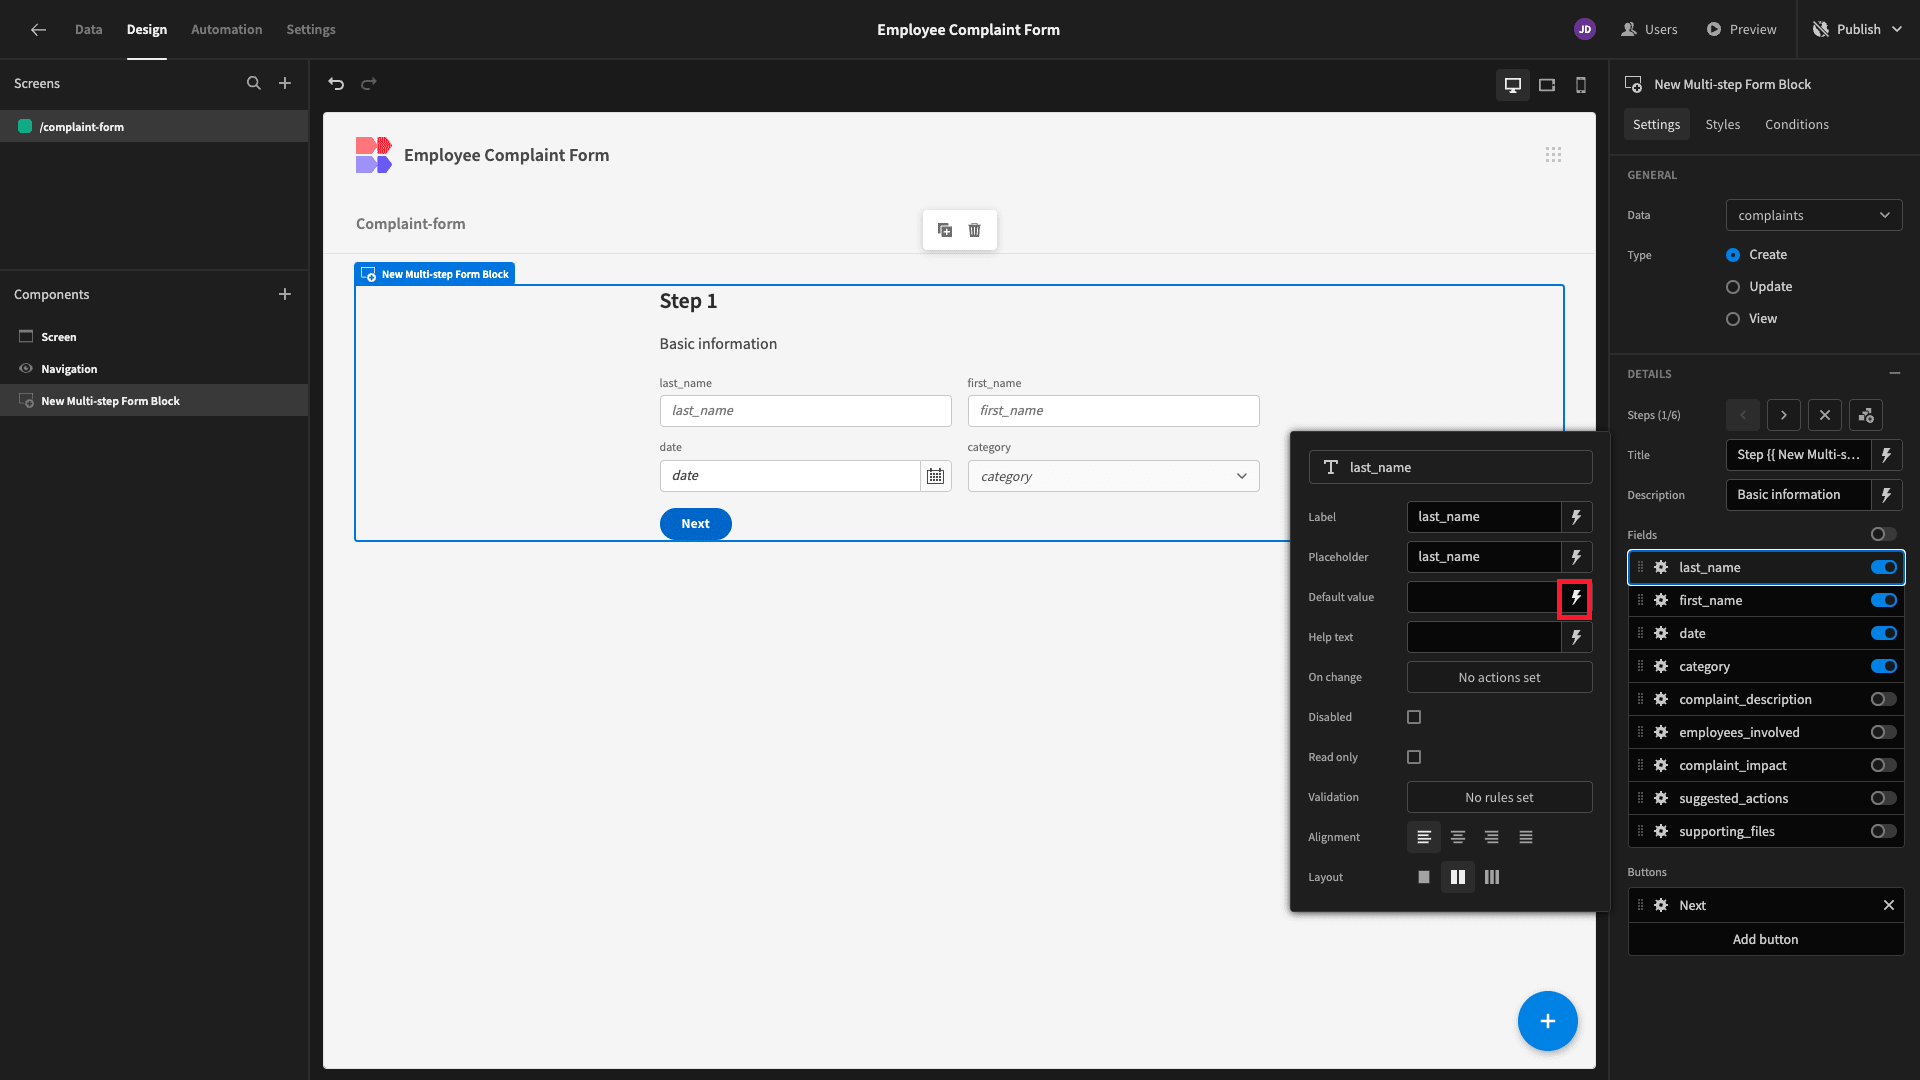
We can see a list of all of the categories of values we can use for our binding. We’re choosing Current User.
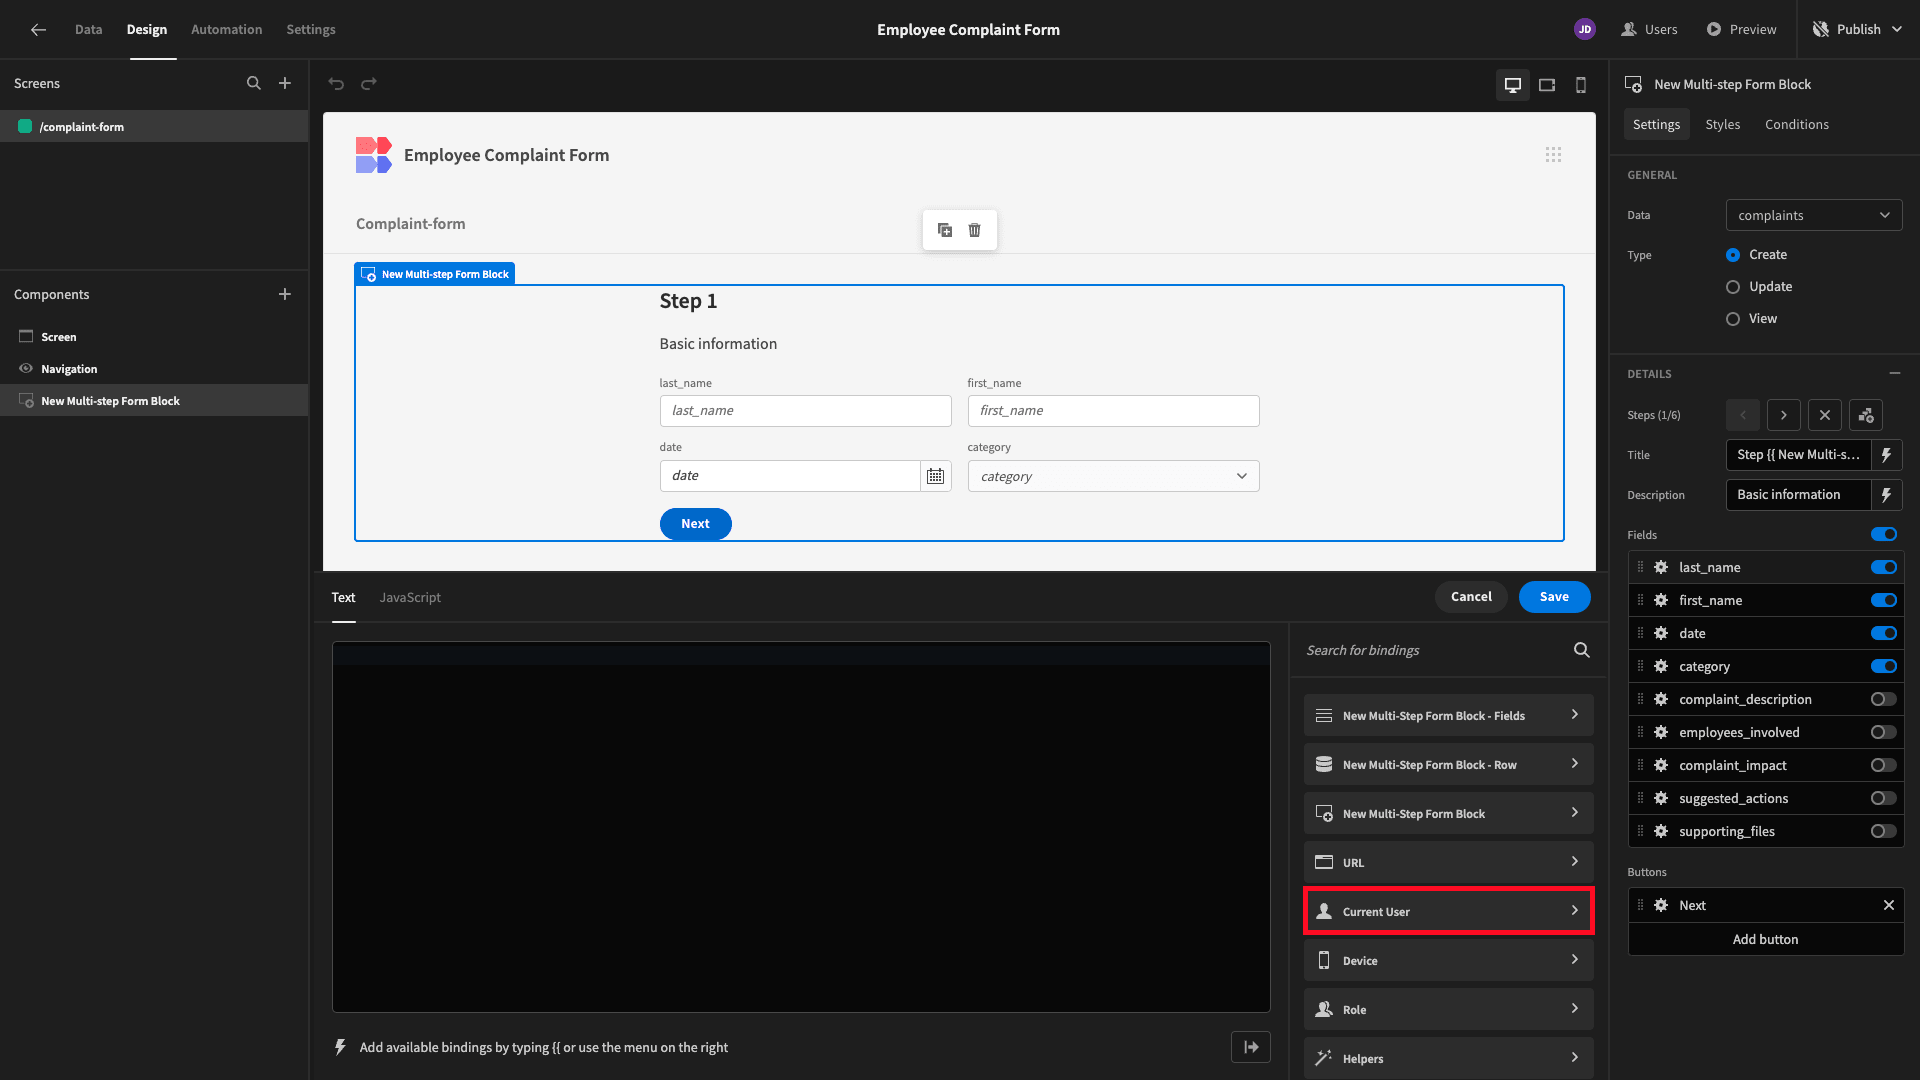
Then, we’re choosing LastName.
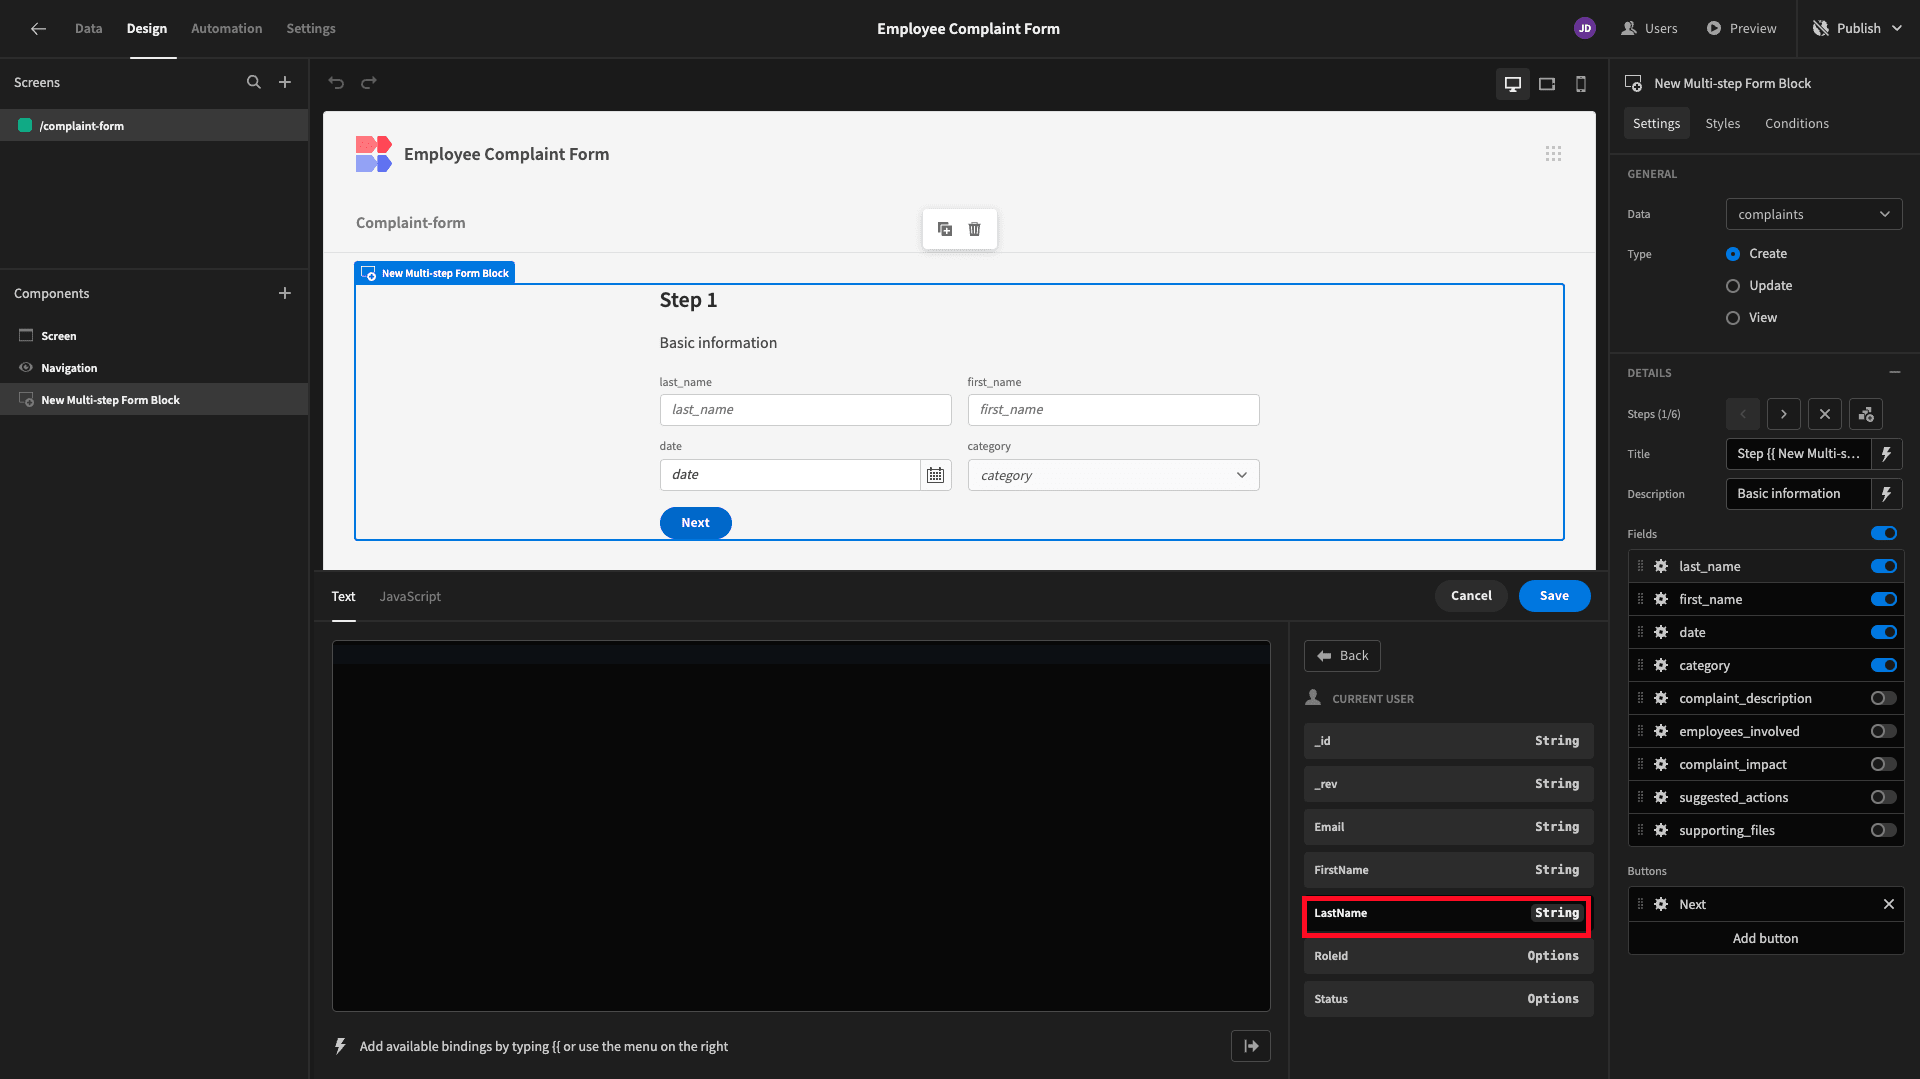
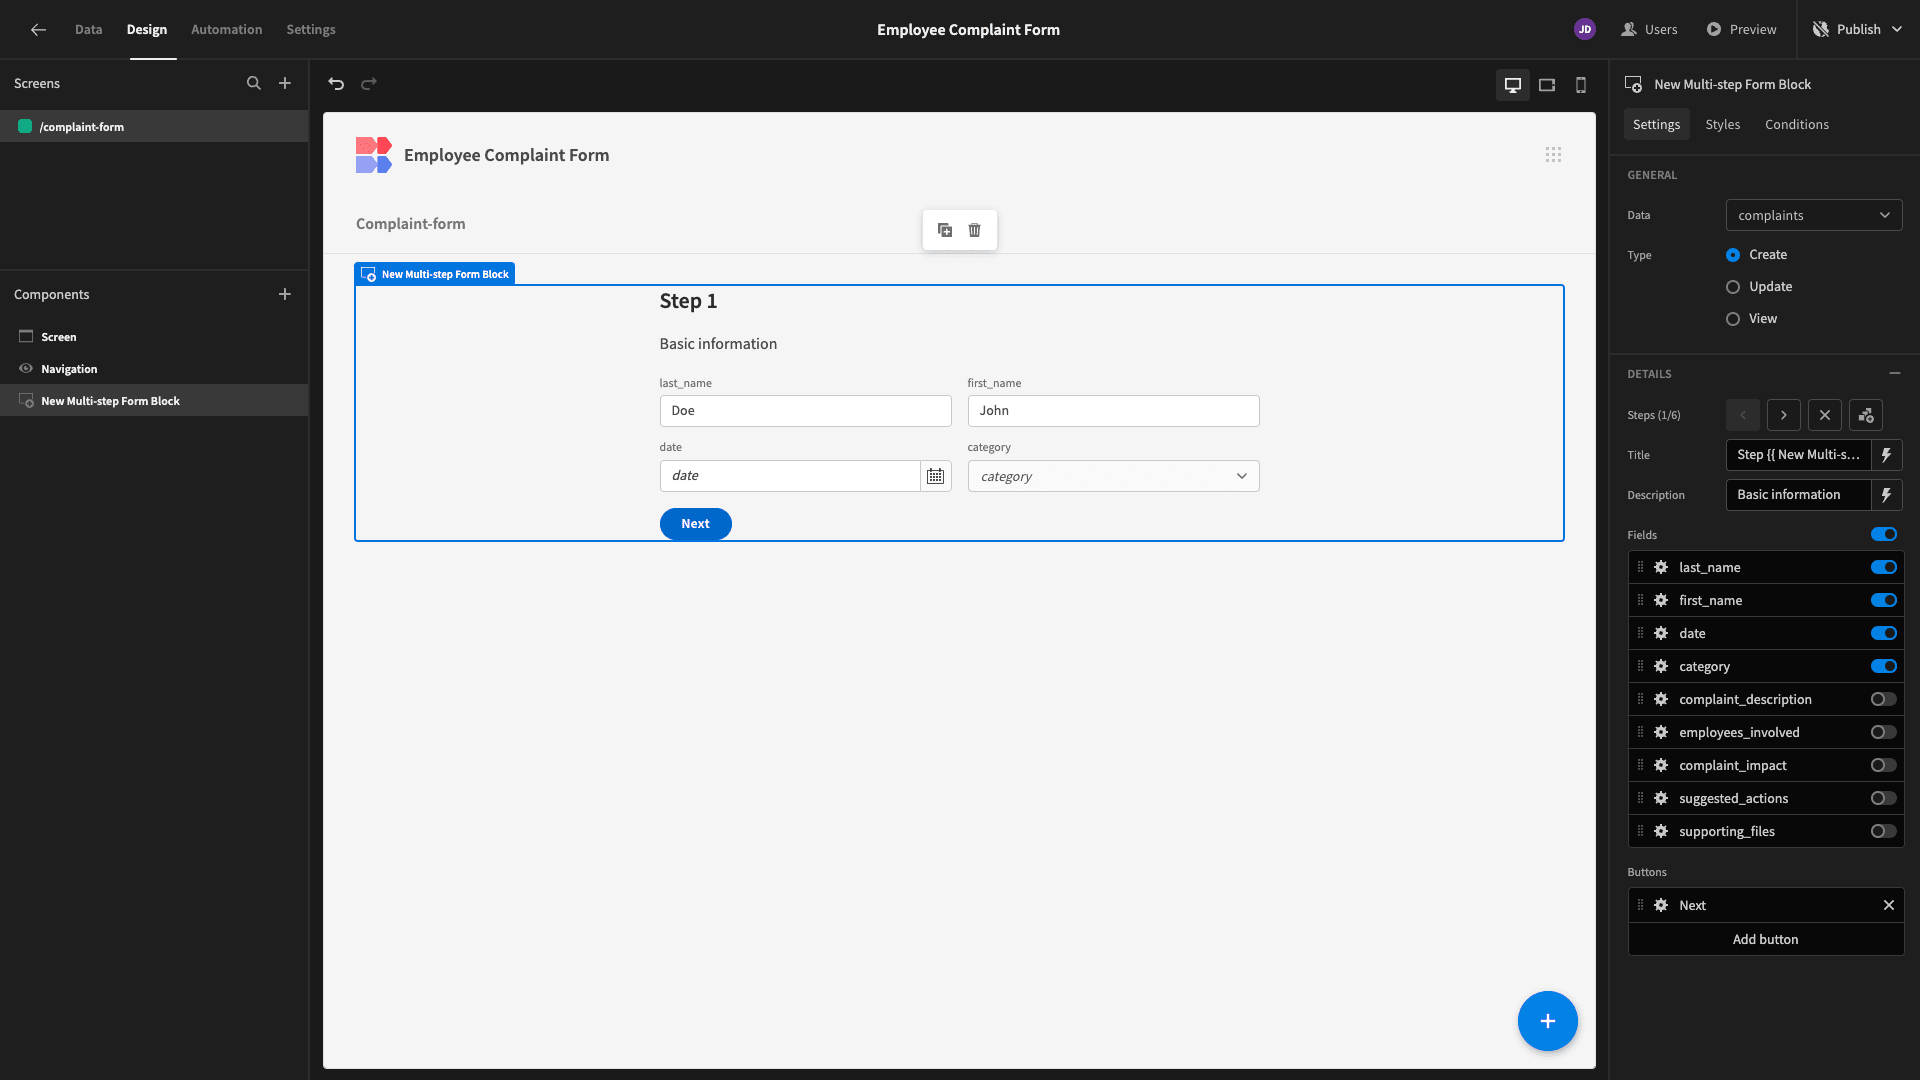
We could use Handlebar helpers or JavaScript to manipulate this value, but we’re simply using it as is. When we repeat this process for the first_name attribute, our form will look like this.
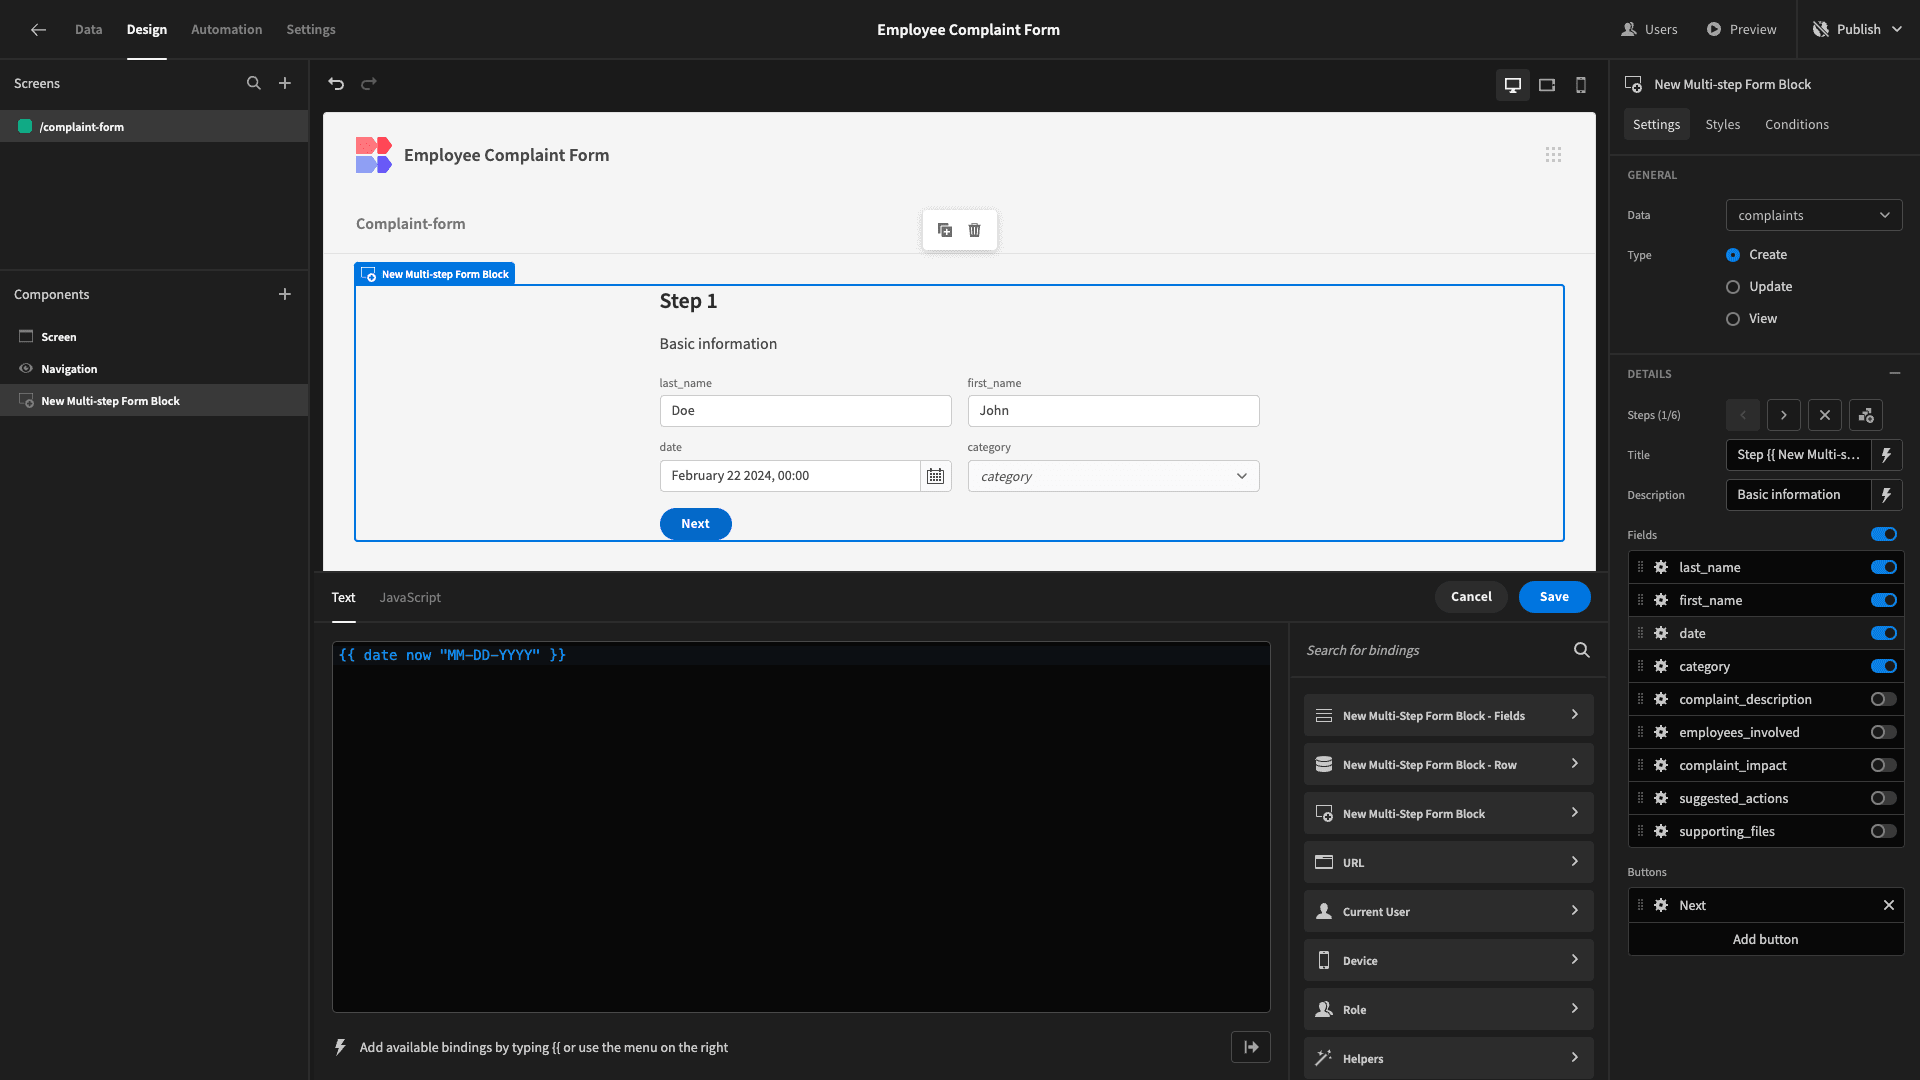
To enter our default value for the date field, we can use Budibase’s built-in contextual handlebar helpers. Open the bindings drawer again, but this time we’ll use {{ date now “MM-DD-YYYY }} as our binding.
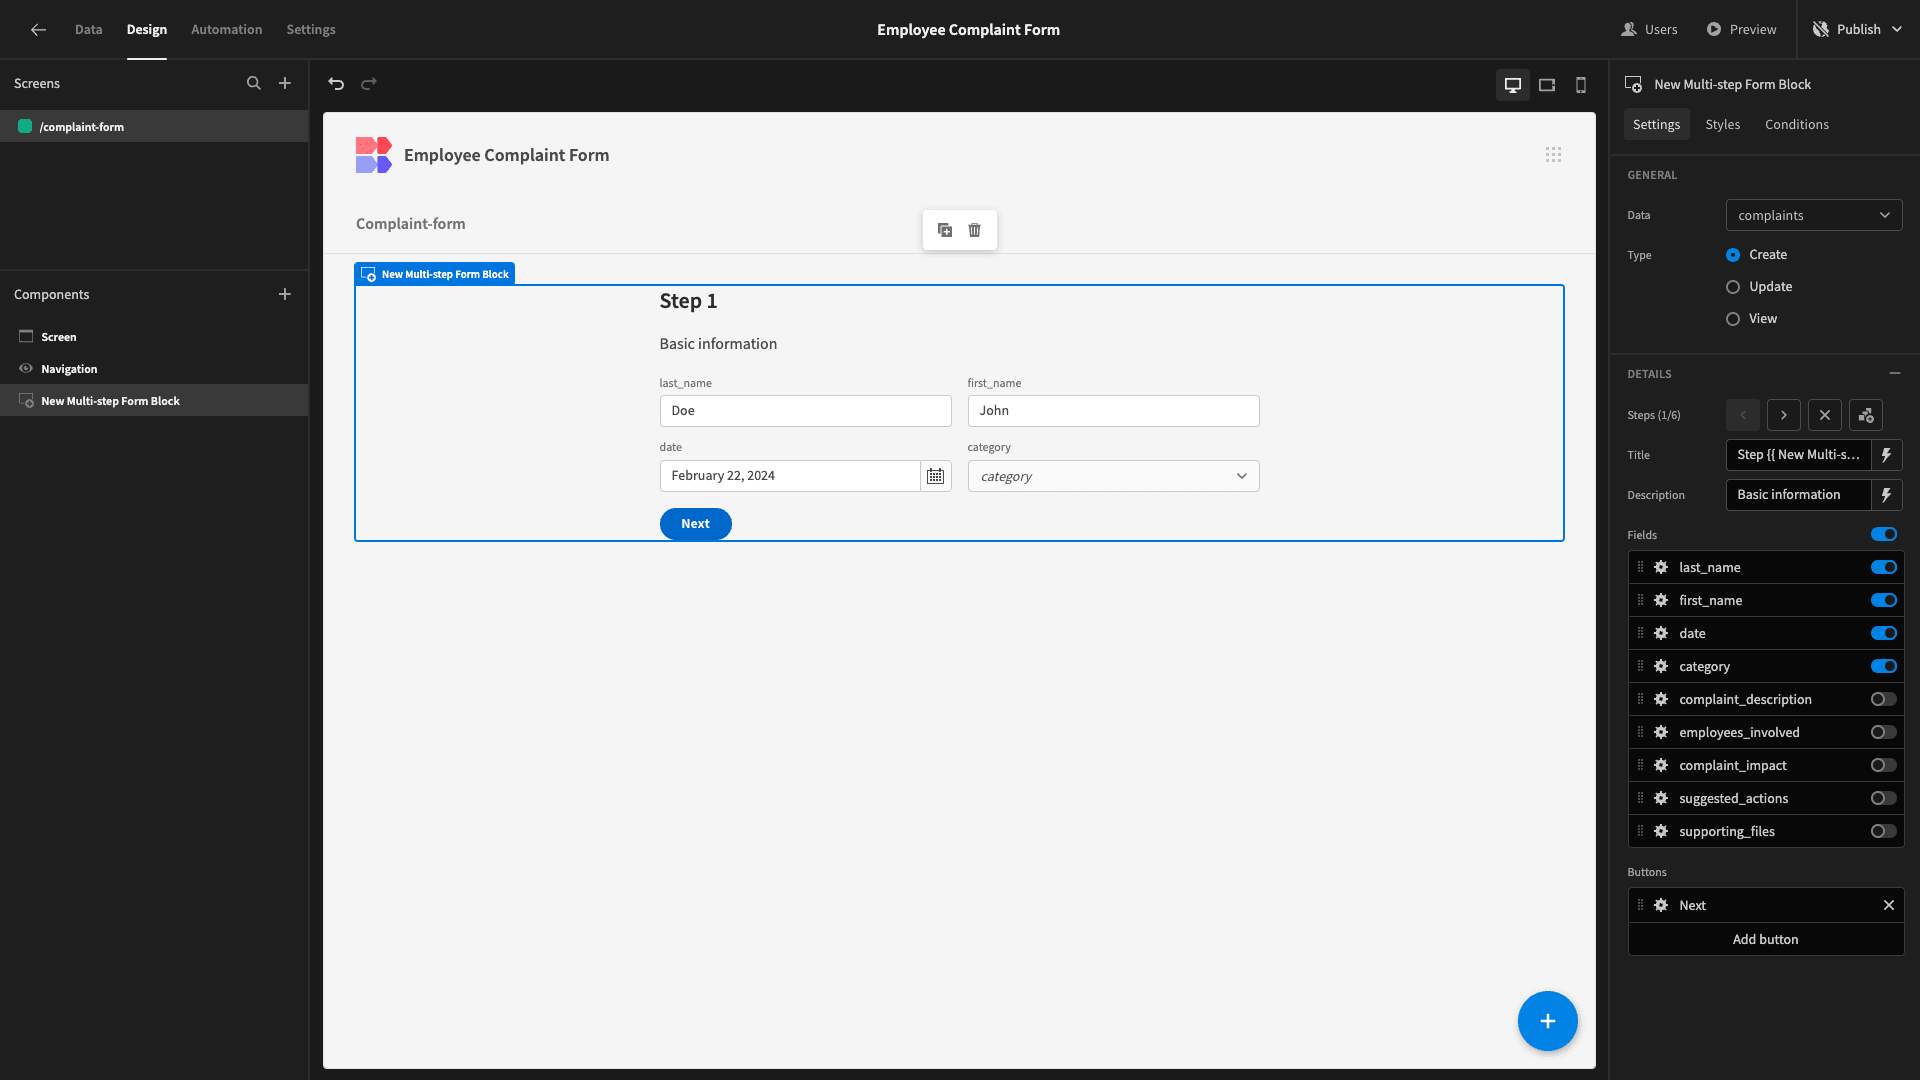
Here’s how our form will look with all of our auto-populating values.
4. Form UX improvements
Before we go any further, we want to improve the visuals and user experience of our form.
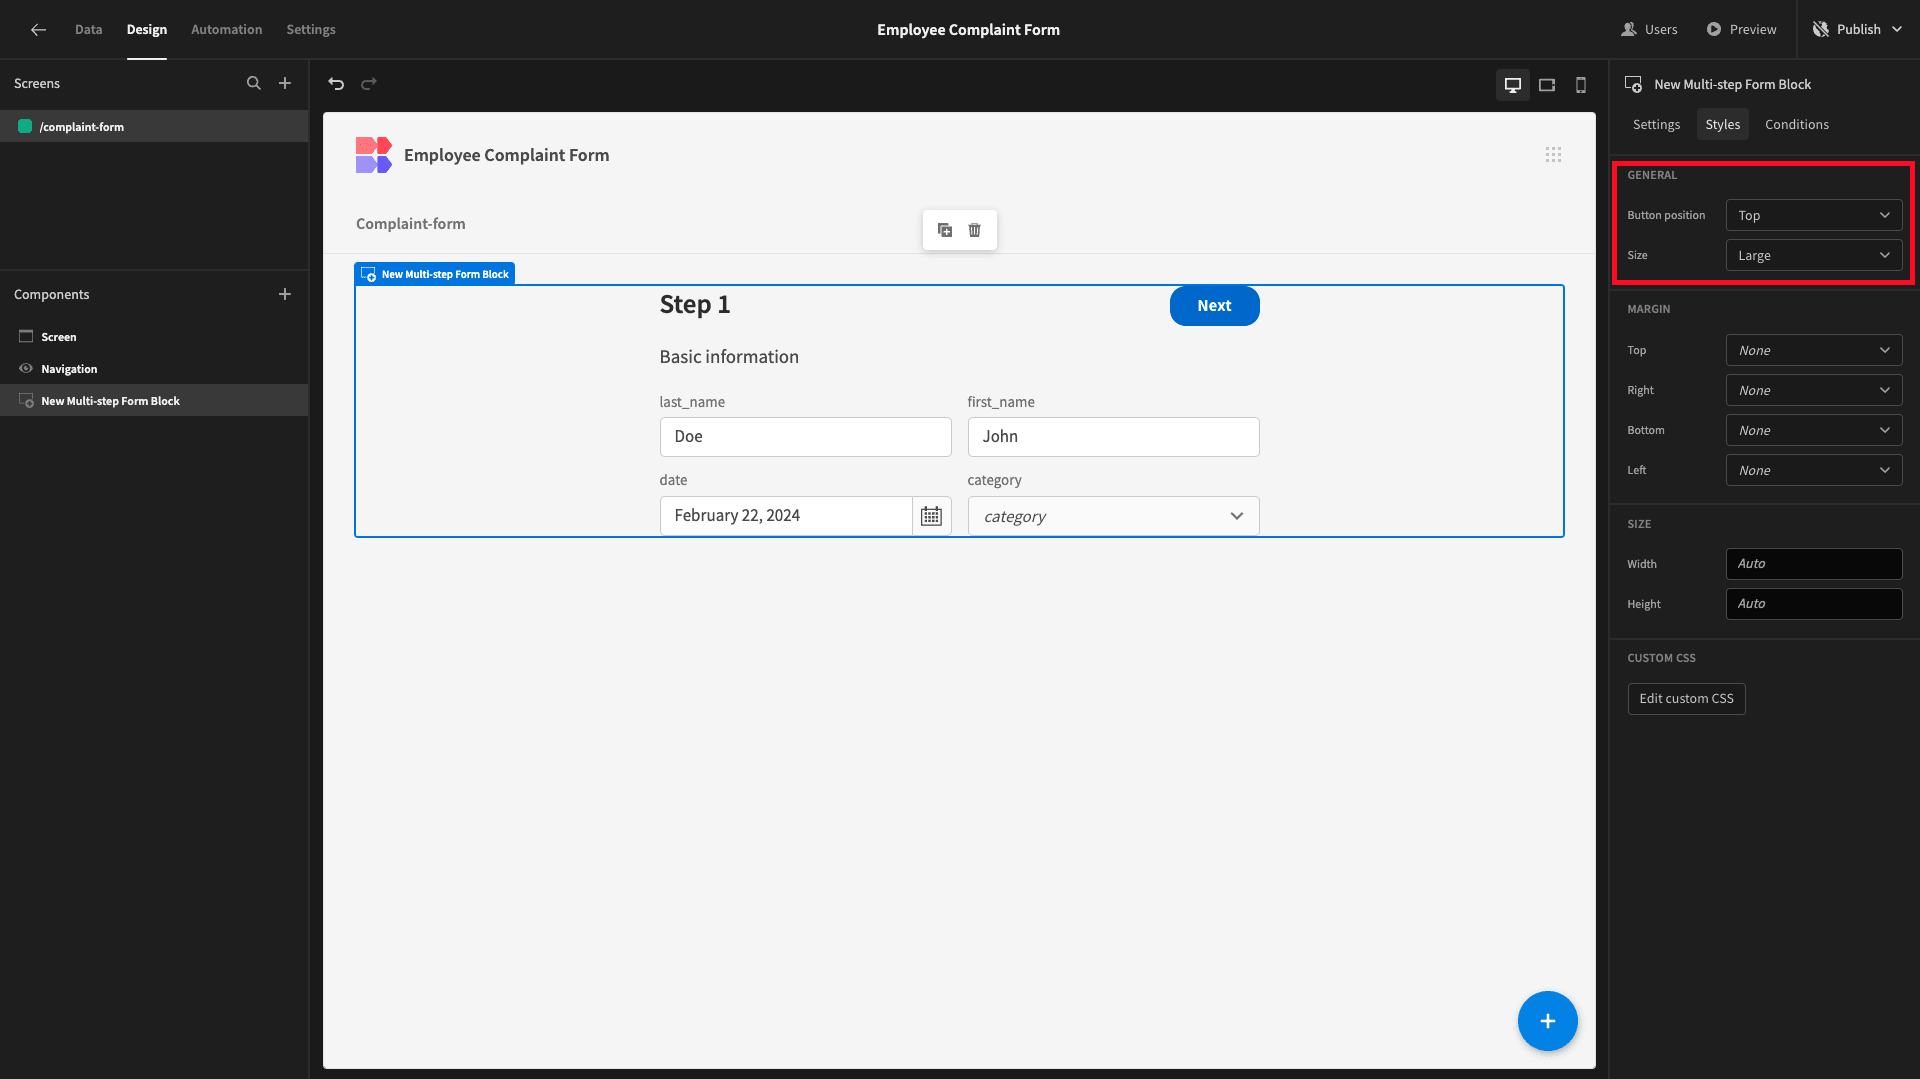
We’ll start by making a couple of simple design changes. Under the Styles tab, we’re setting the Button Position option to Top and the Size to Large.
Currently, the display text for our form fields is simply the name of each attribute as it’s stored in our database.
This isn’t ideal for end-users, so we want to update these.
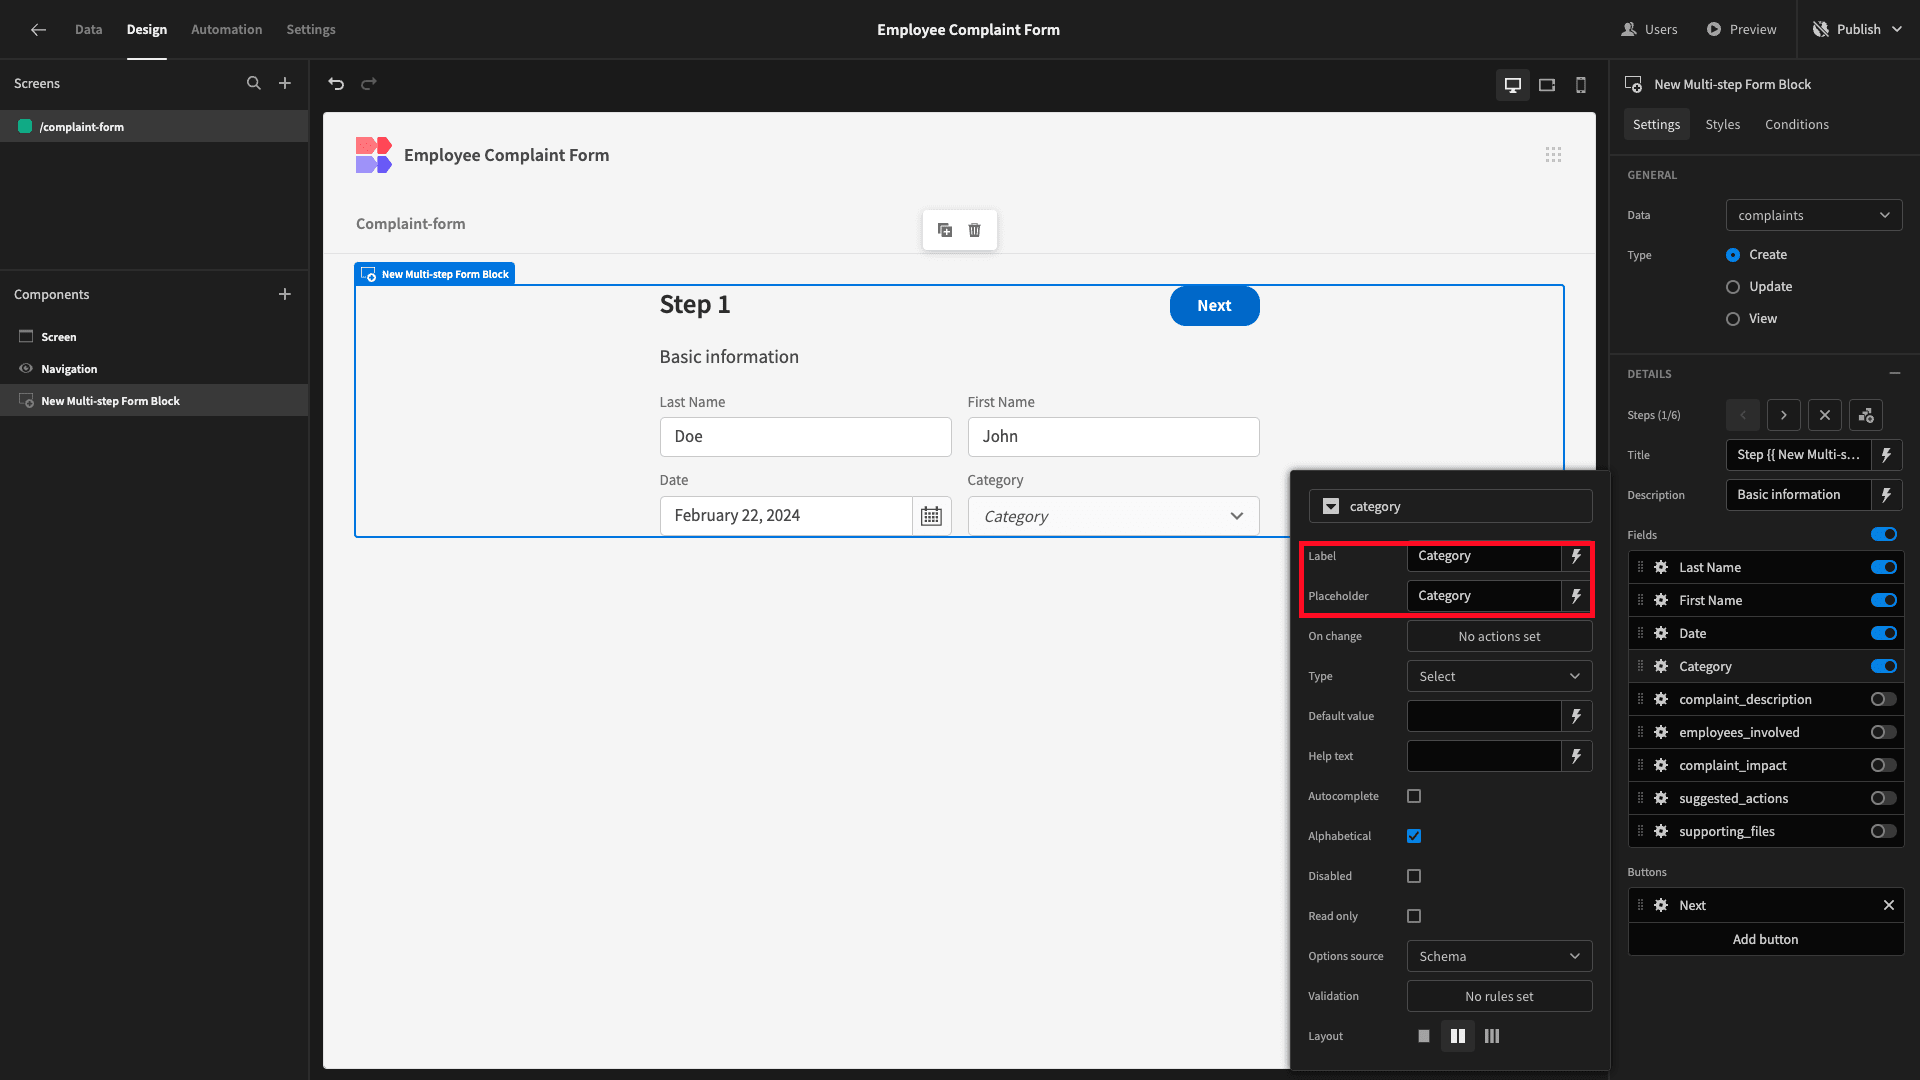
For our first form step, we can simply add some stylization. We’ll update our Label and Placeholder settings to add capitalization and replace our underscores with whitespace.
For our long-form fields, we’ll remove the placeholder text entirely and update the labels to advise users on the information they need to provide for each attribute.
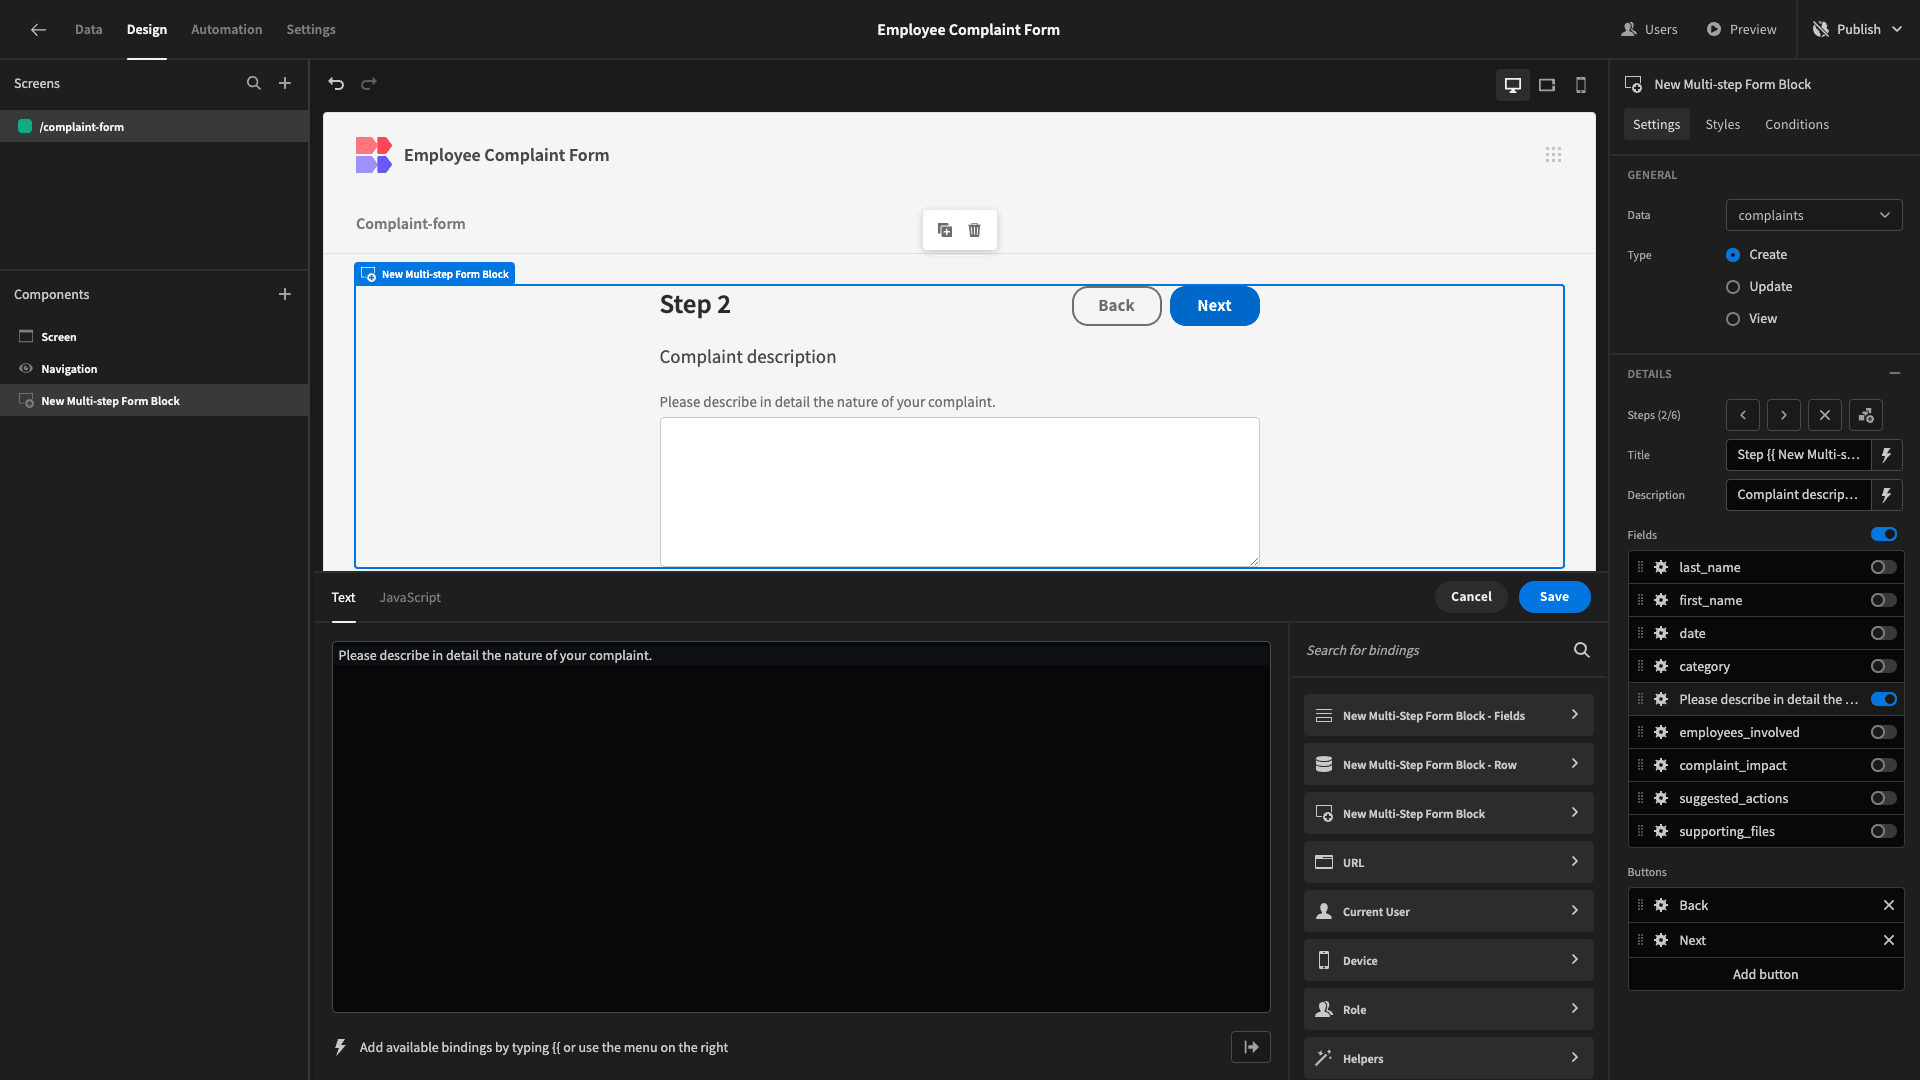
Here’s how this will work for our complaint_description attribute. We need to repeat this step for all long-form fields.
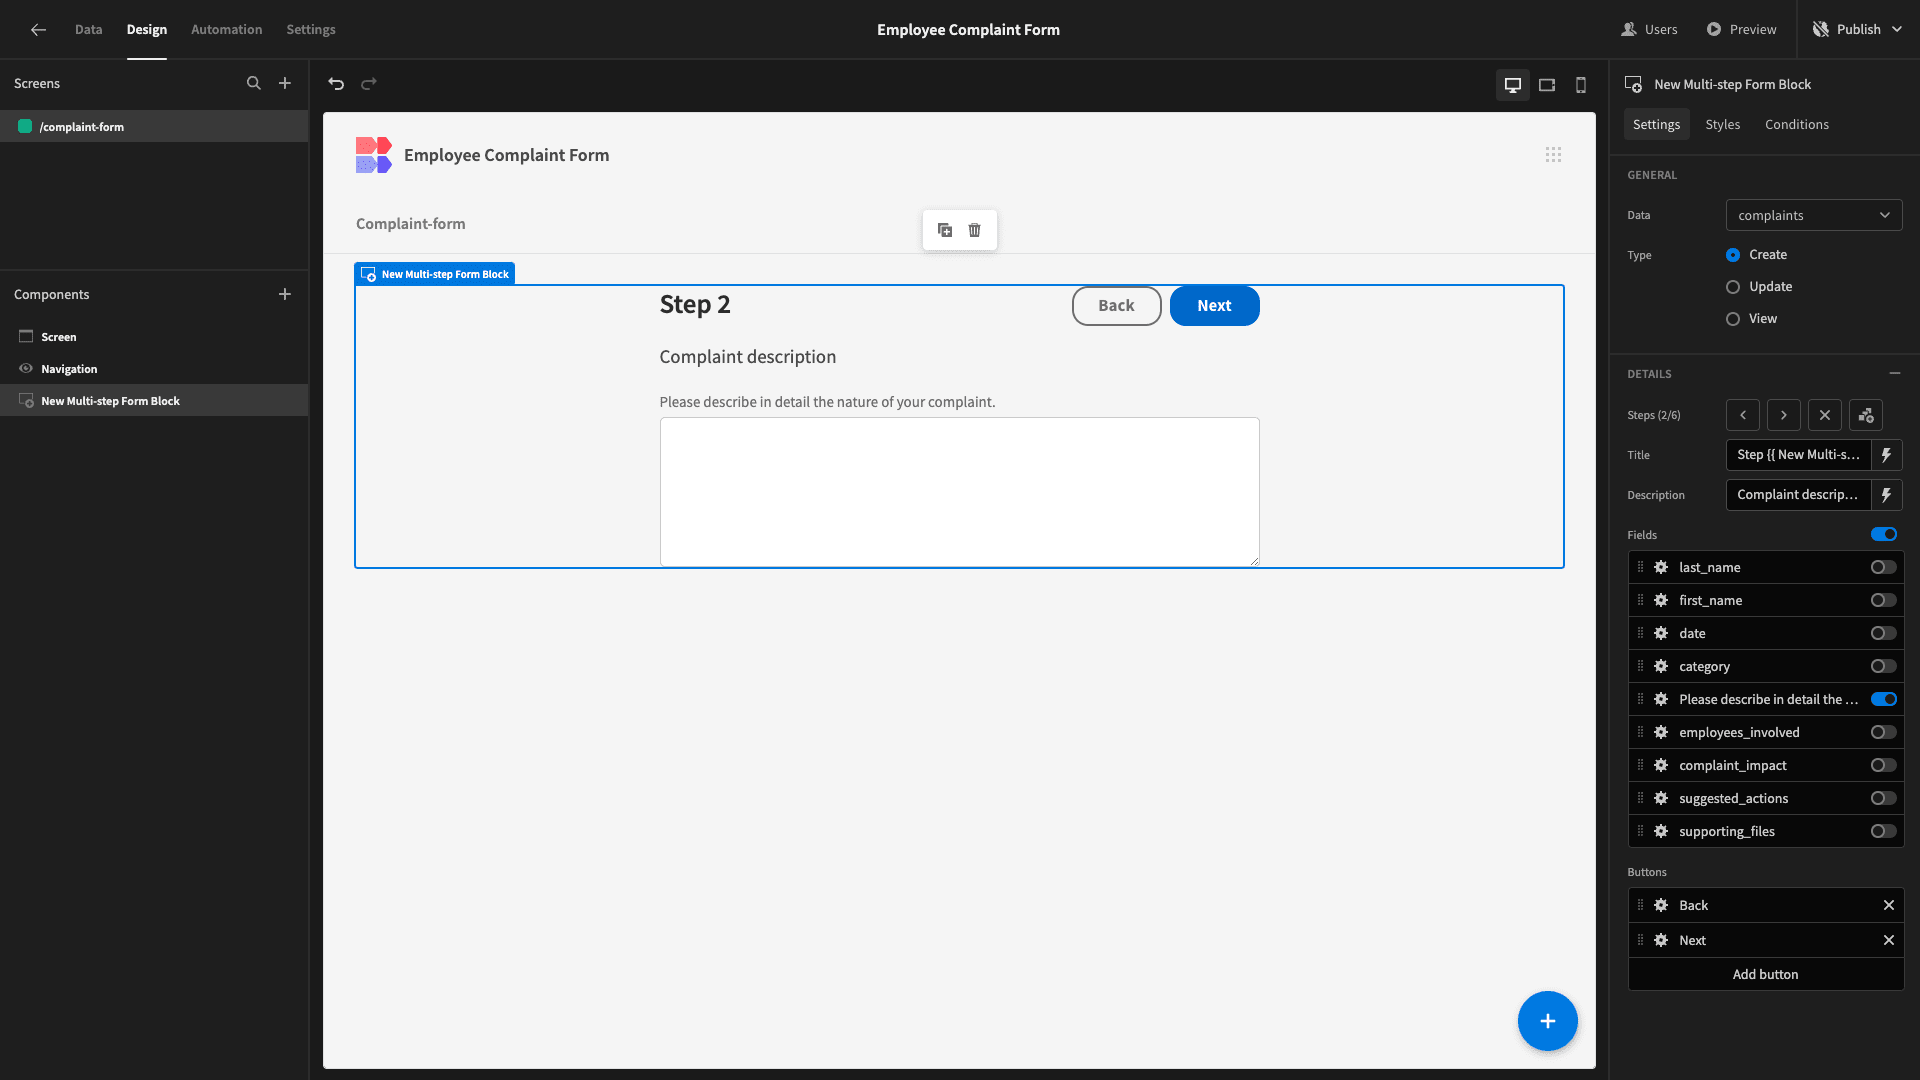
The supporting_files field doesn’t have a Placeholder setting - so we can simply update the Label.
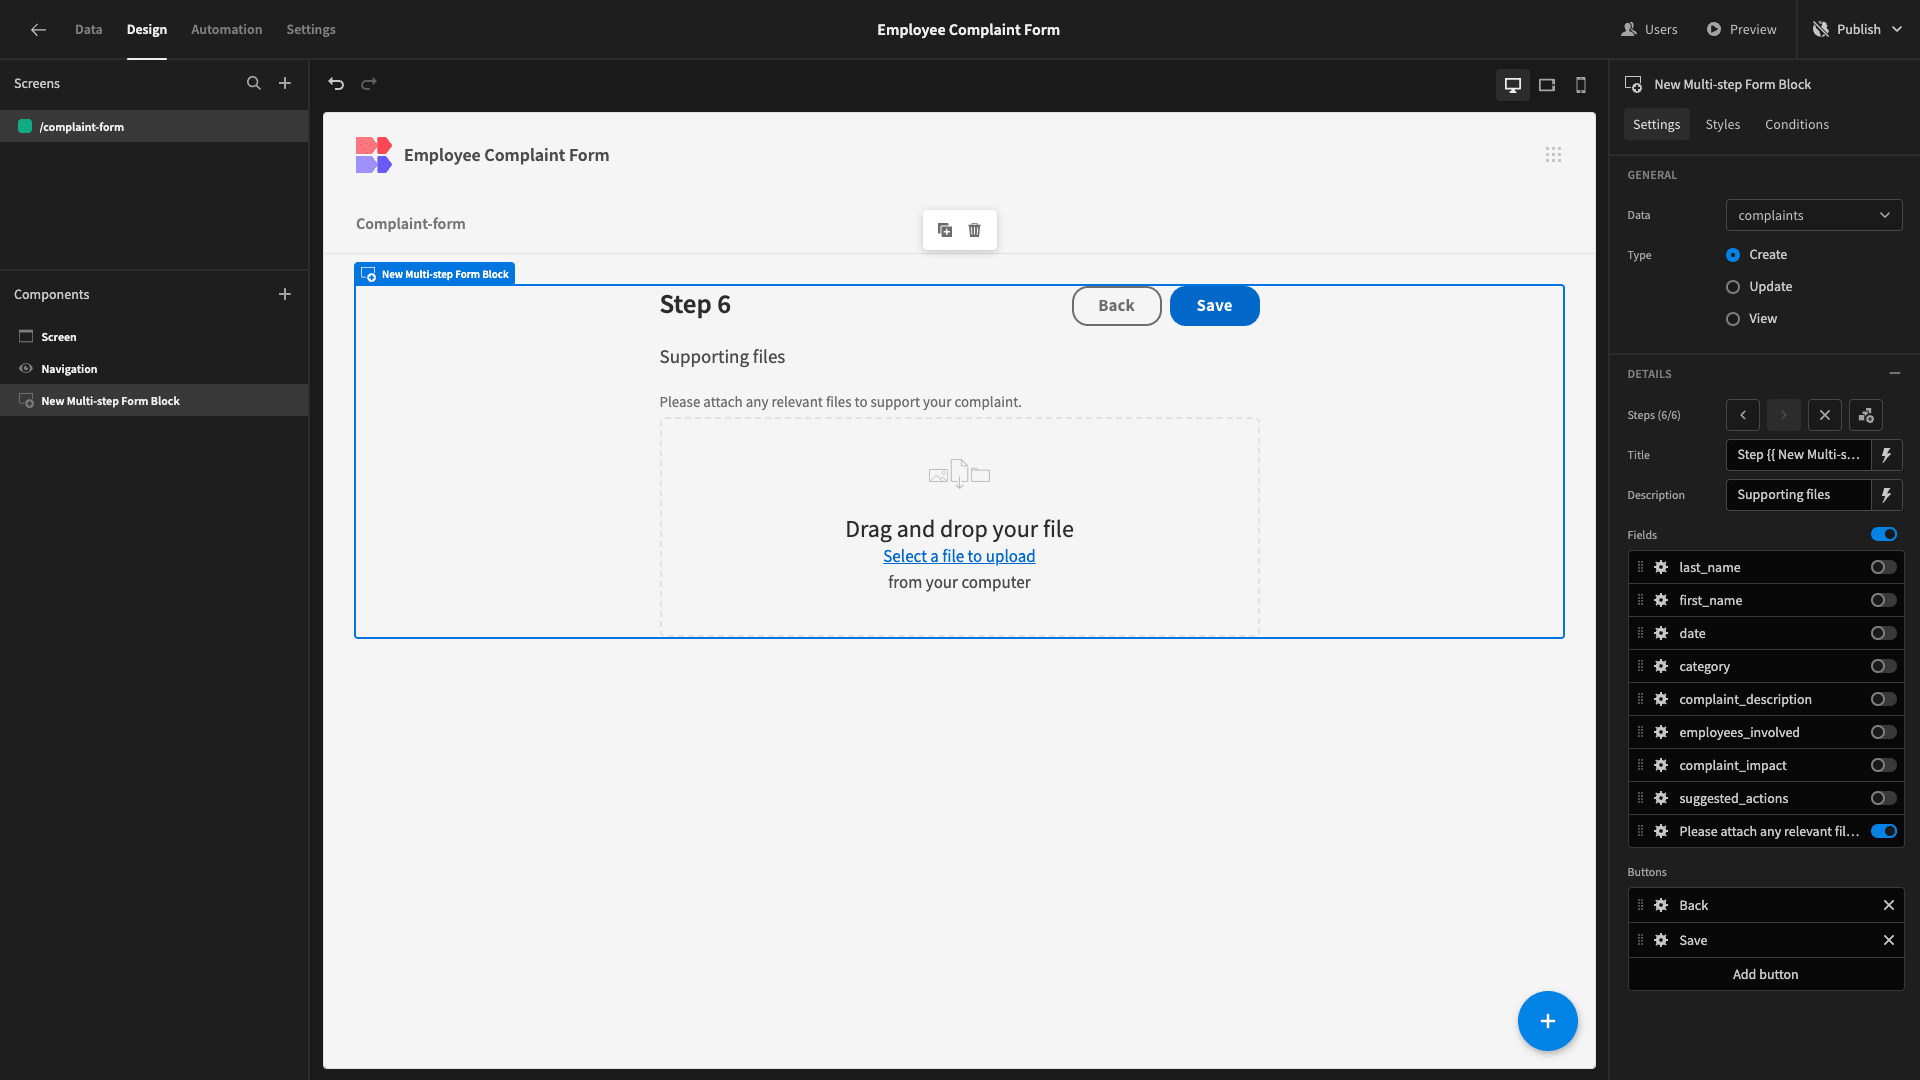
5. Adding a confirmation message
We also want to build some on-screen logic for displaying a thank you message each time a user completes our employee complaint form. We can do this using Budibase’s built-in conditionality rules.
The way this will work is as follows:
- When a user hits save, we’ll generate a backend state and set it to true.
- We’ll add a conditionality rule to our form, hiding it if the state is true.
- We’ll create a confirmation message that’s only displayed if the state equals true.
We’ll start by adding a new Headline component, below our form.
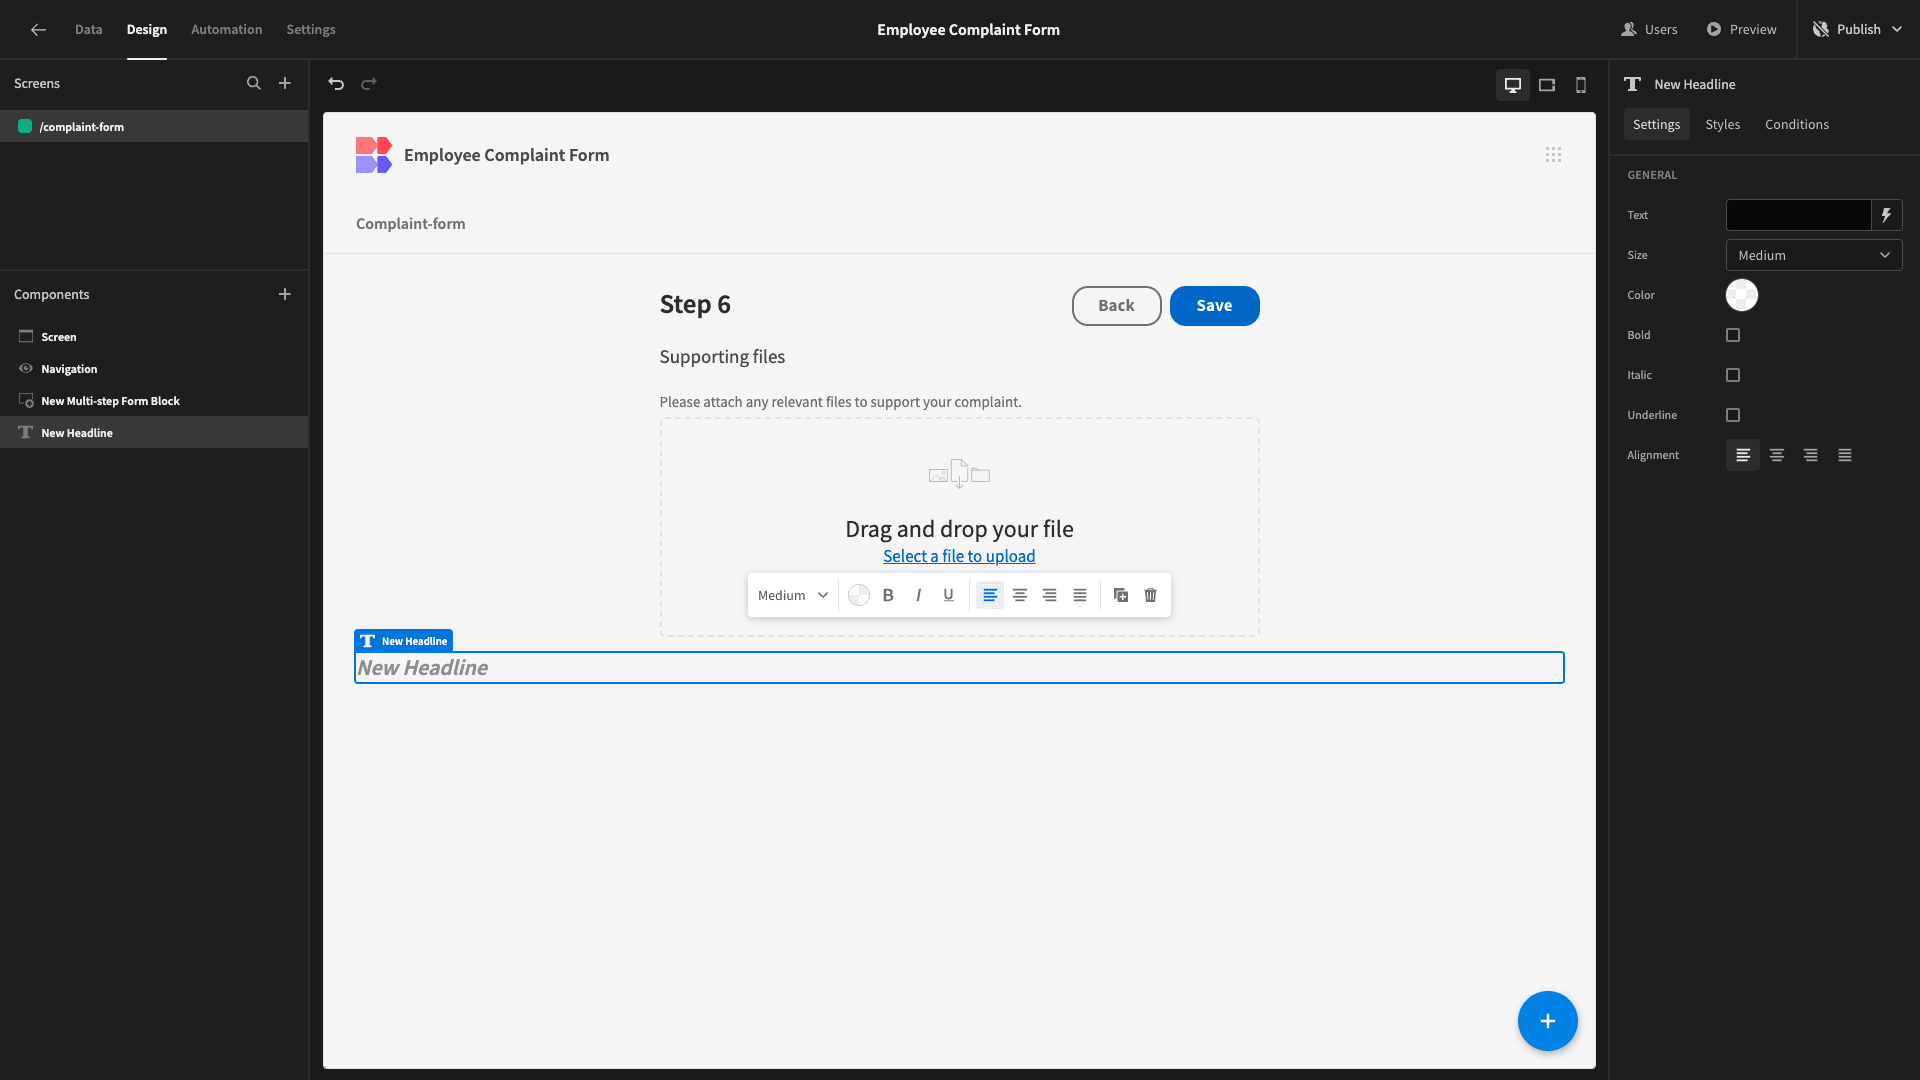
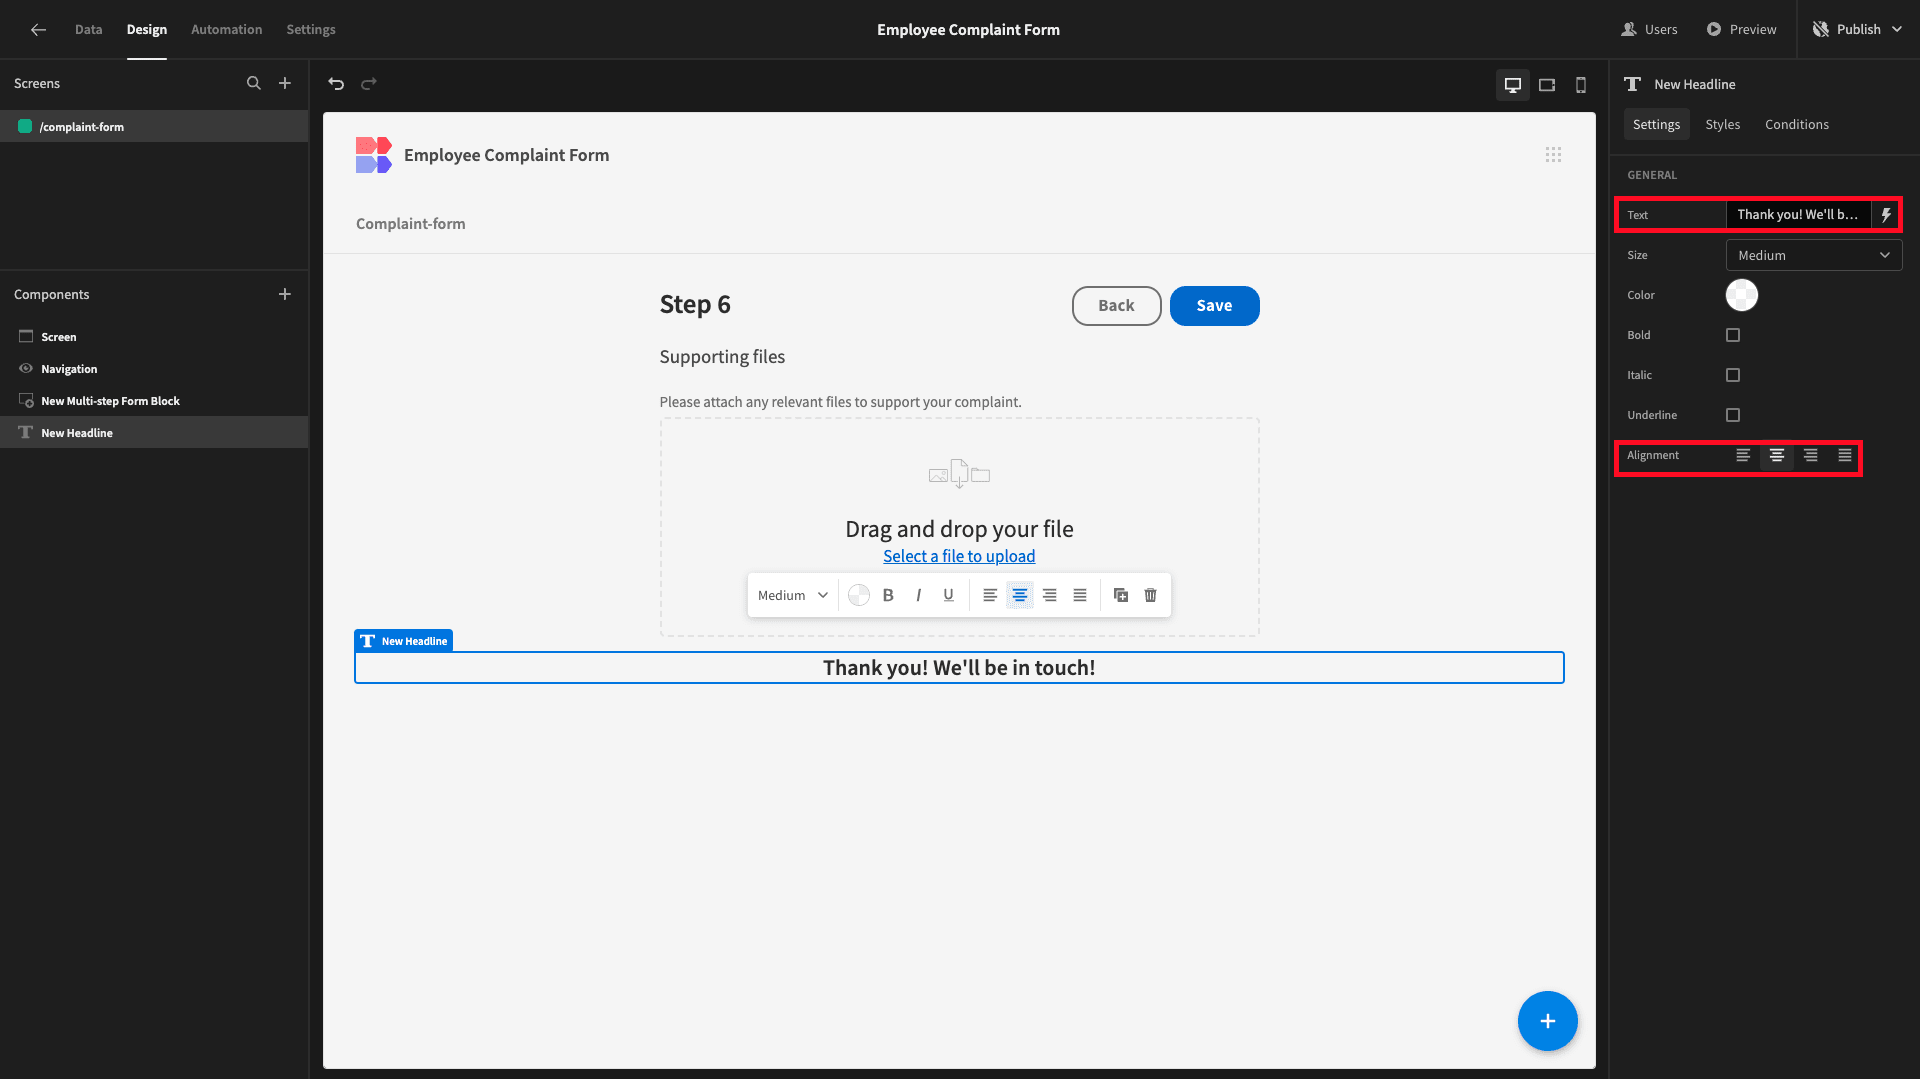
We’ll set the Text field to our confirmation message and align it to the center.
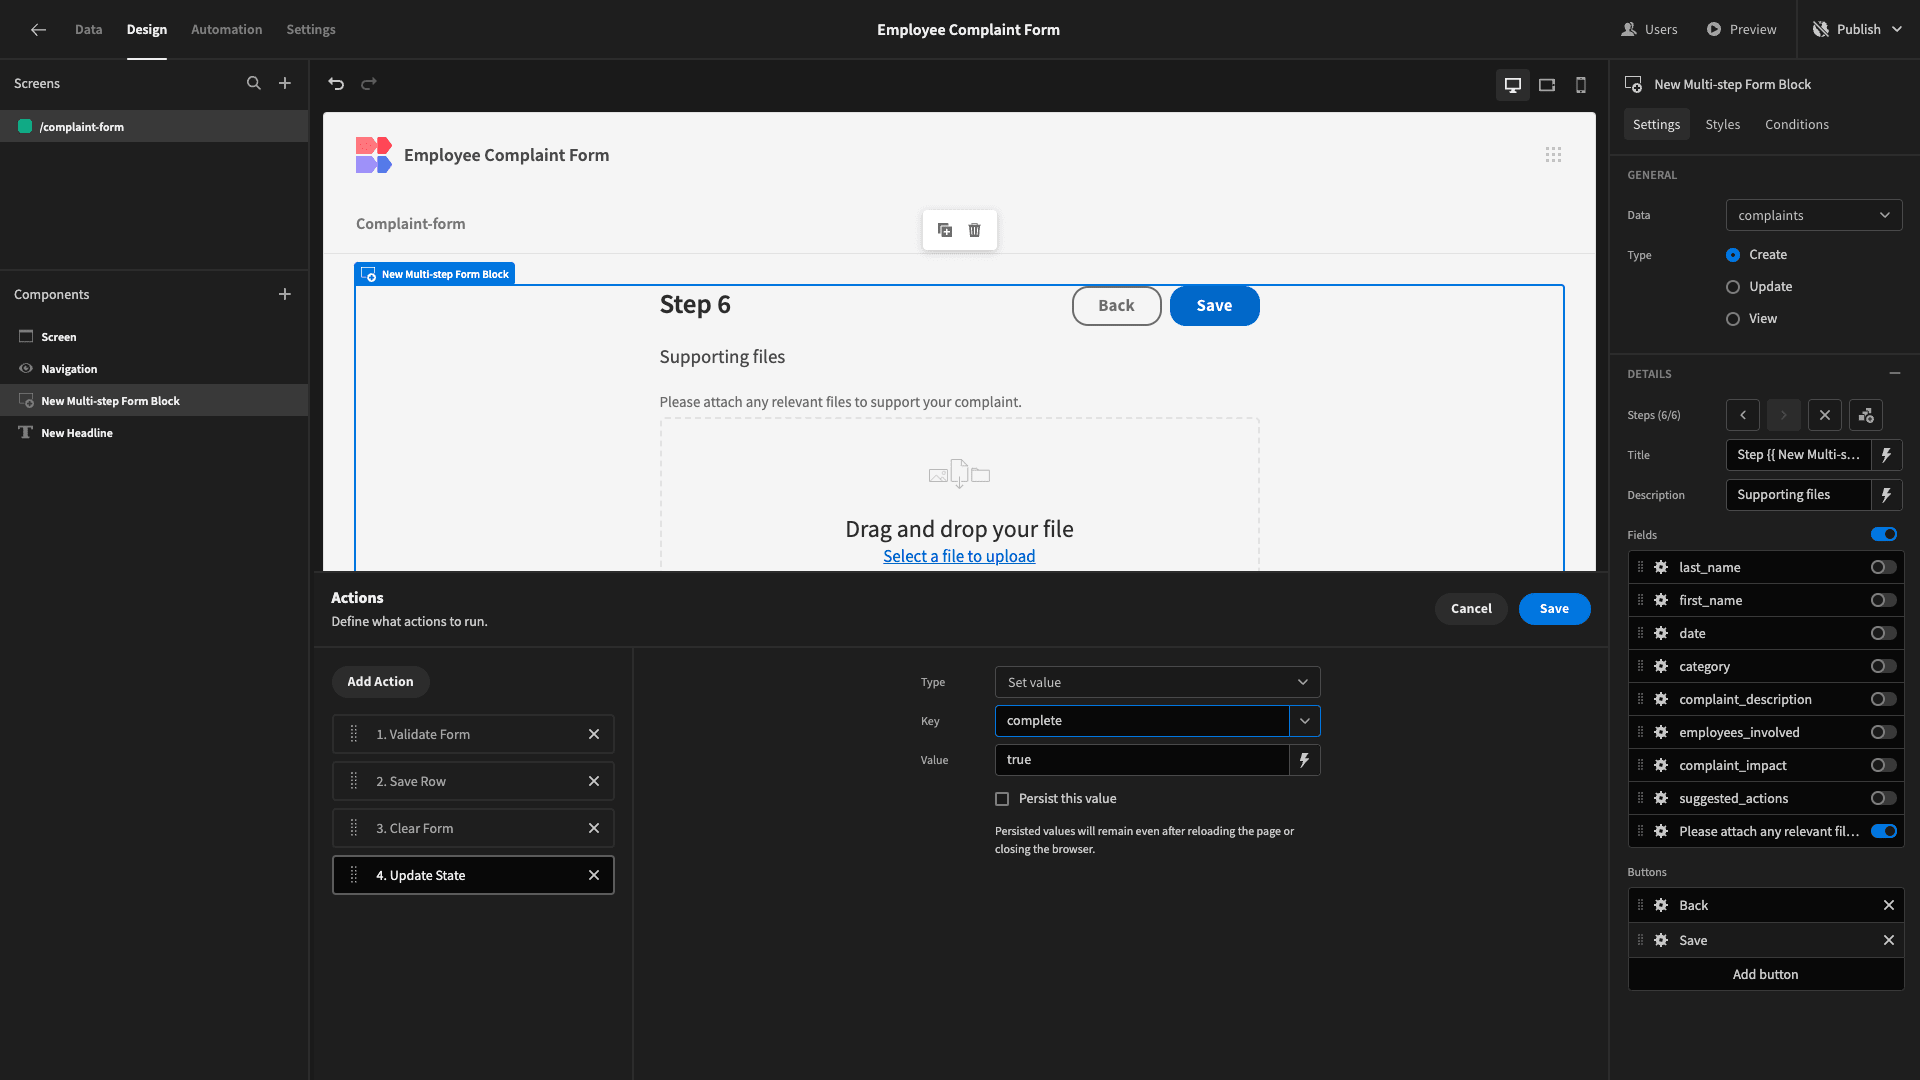
Now, we need to create our state by adding a new action to our Save button.
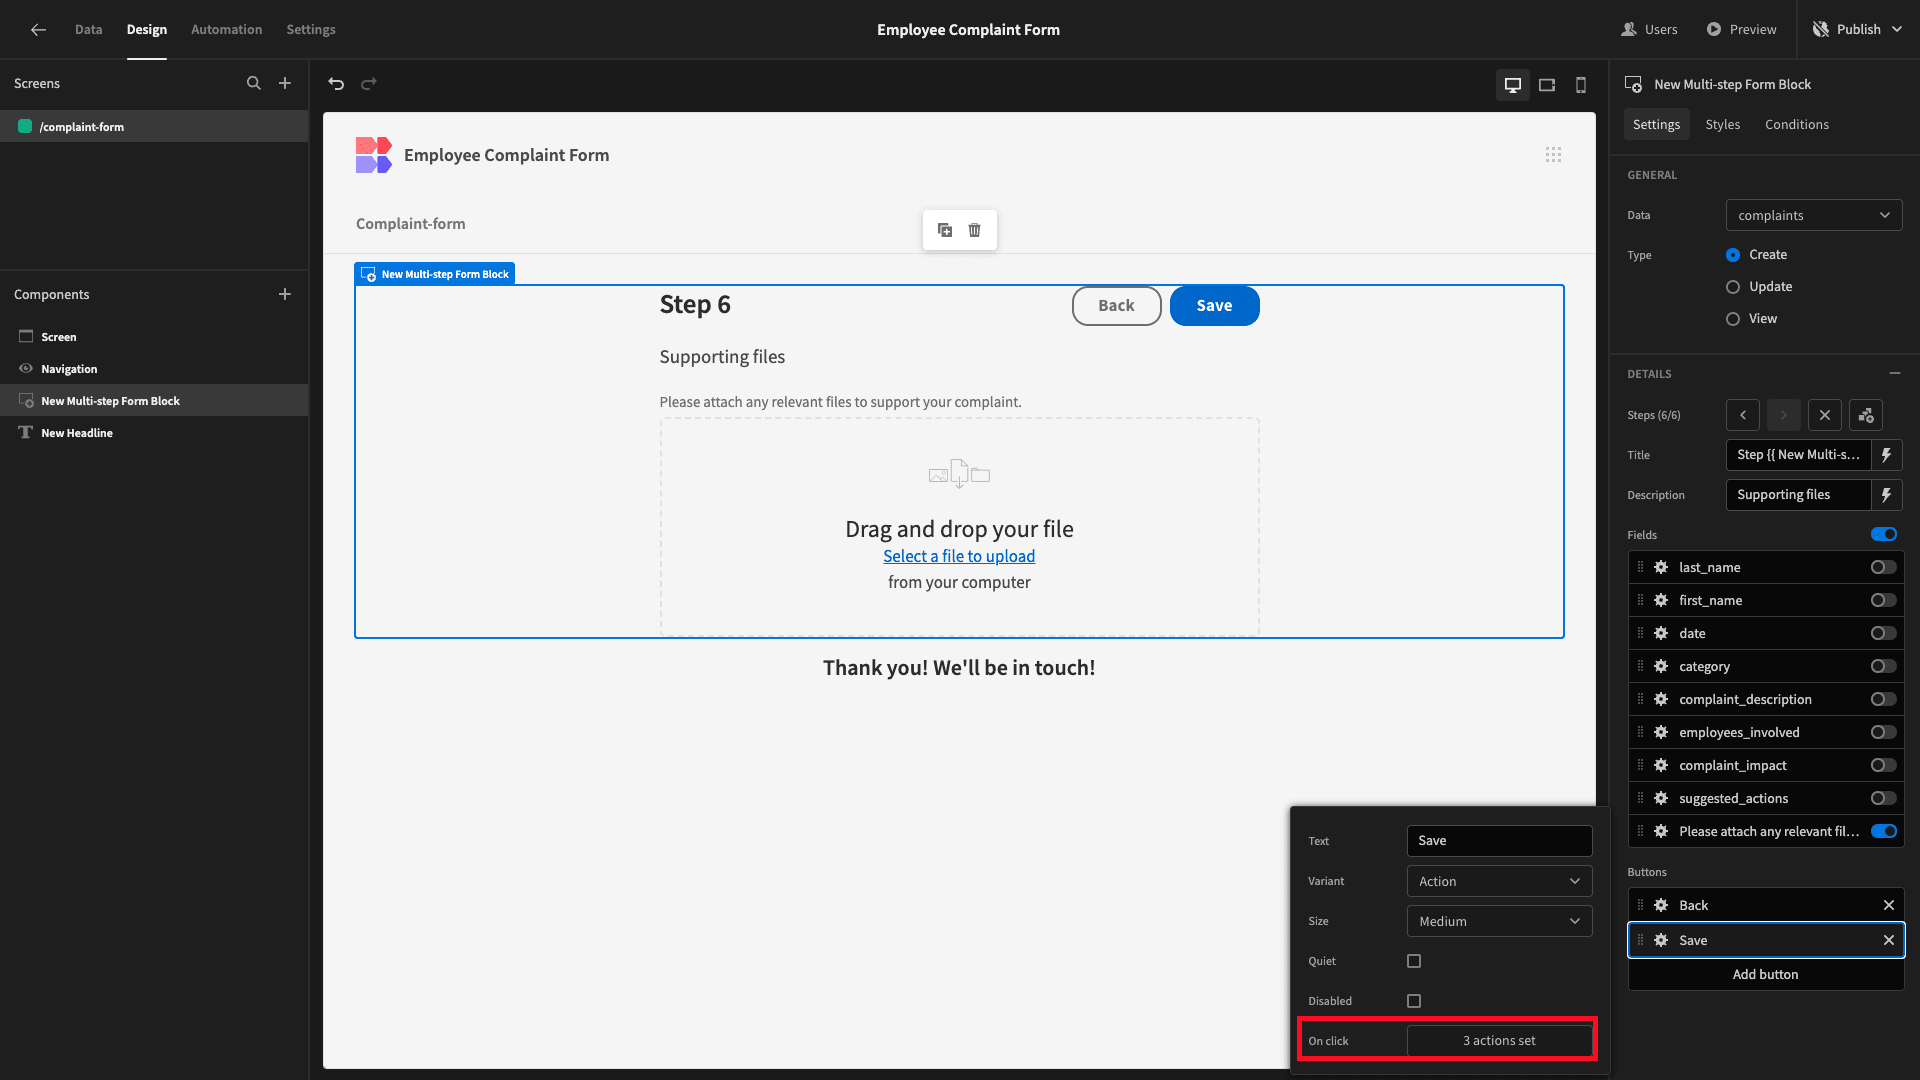
We’re adding an action called Update State. This accepts two arguments - a key and a value. Our key is ‘complete,’ and our value is ‘true’.
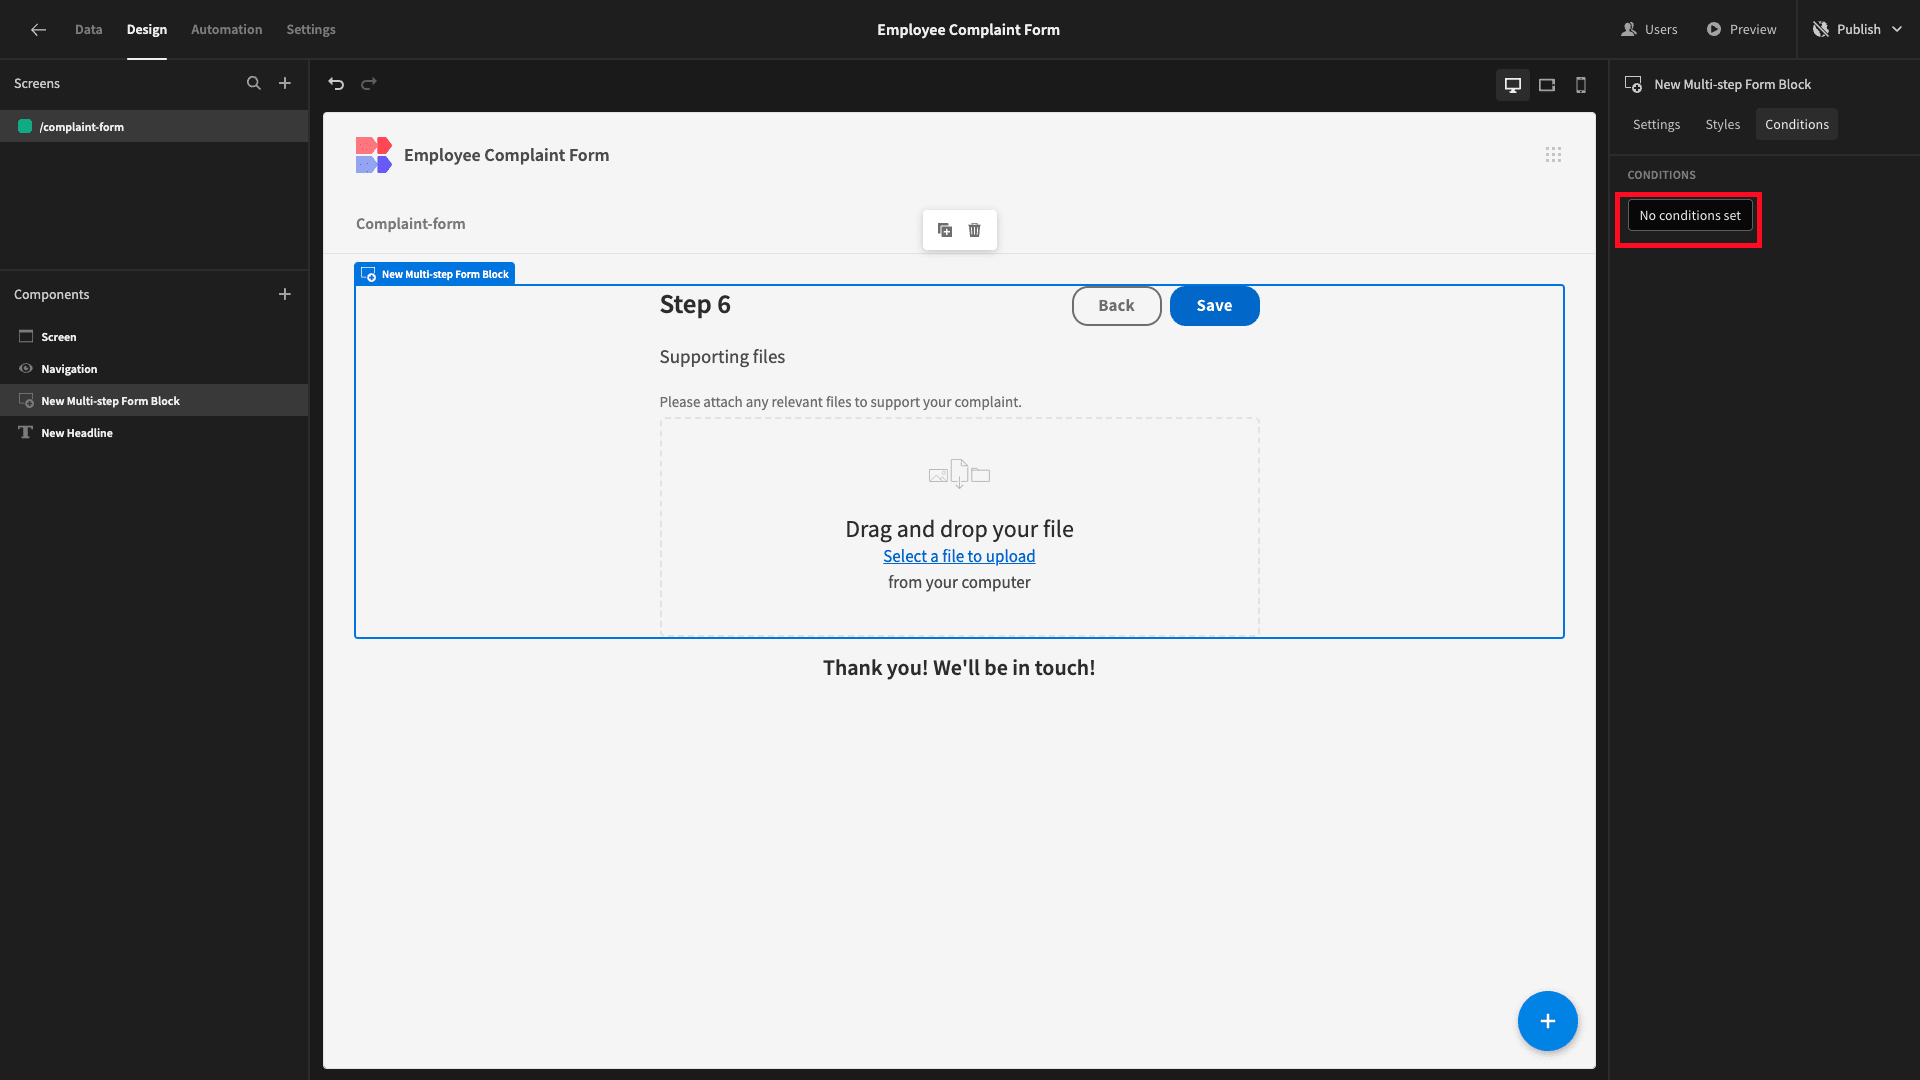
Next, we’ll open the Conditions drawer for our Multi-Step Form Block.
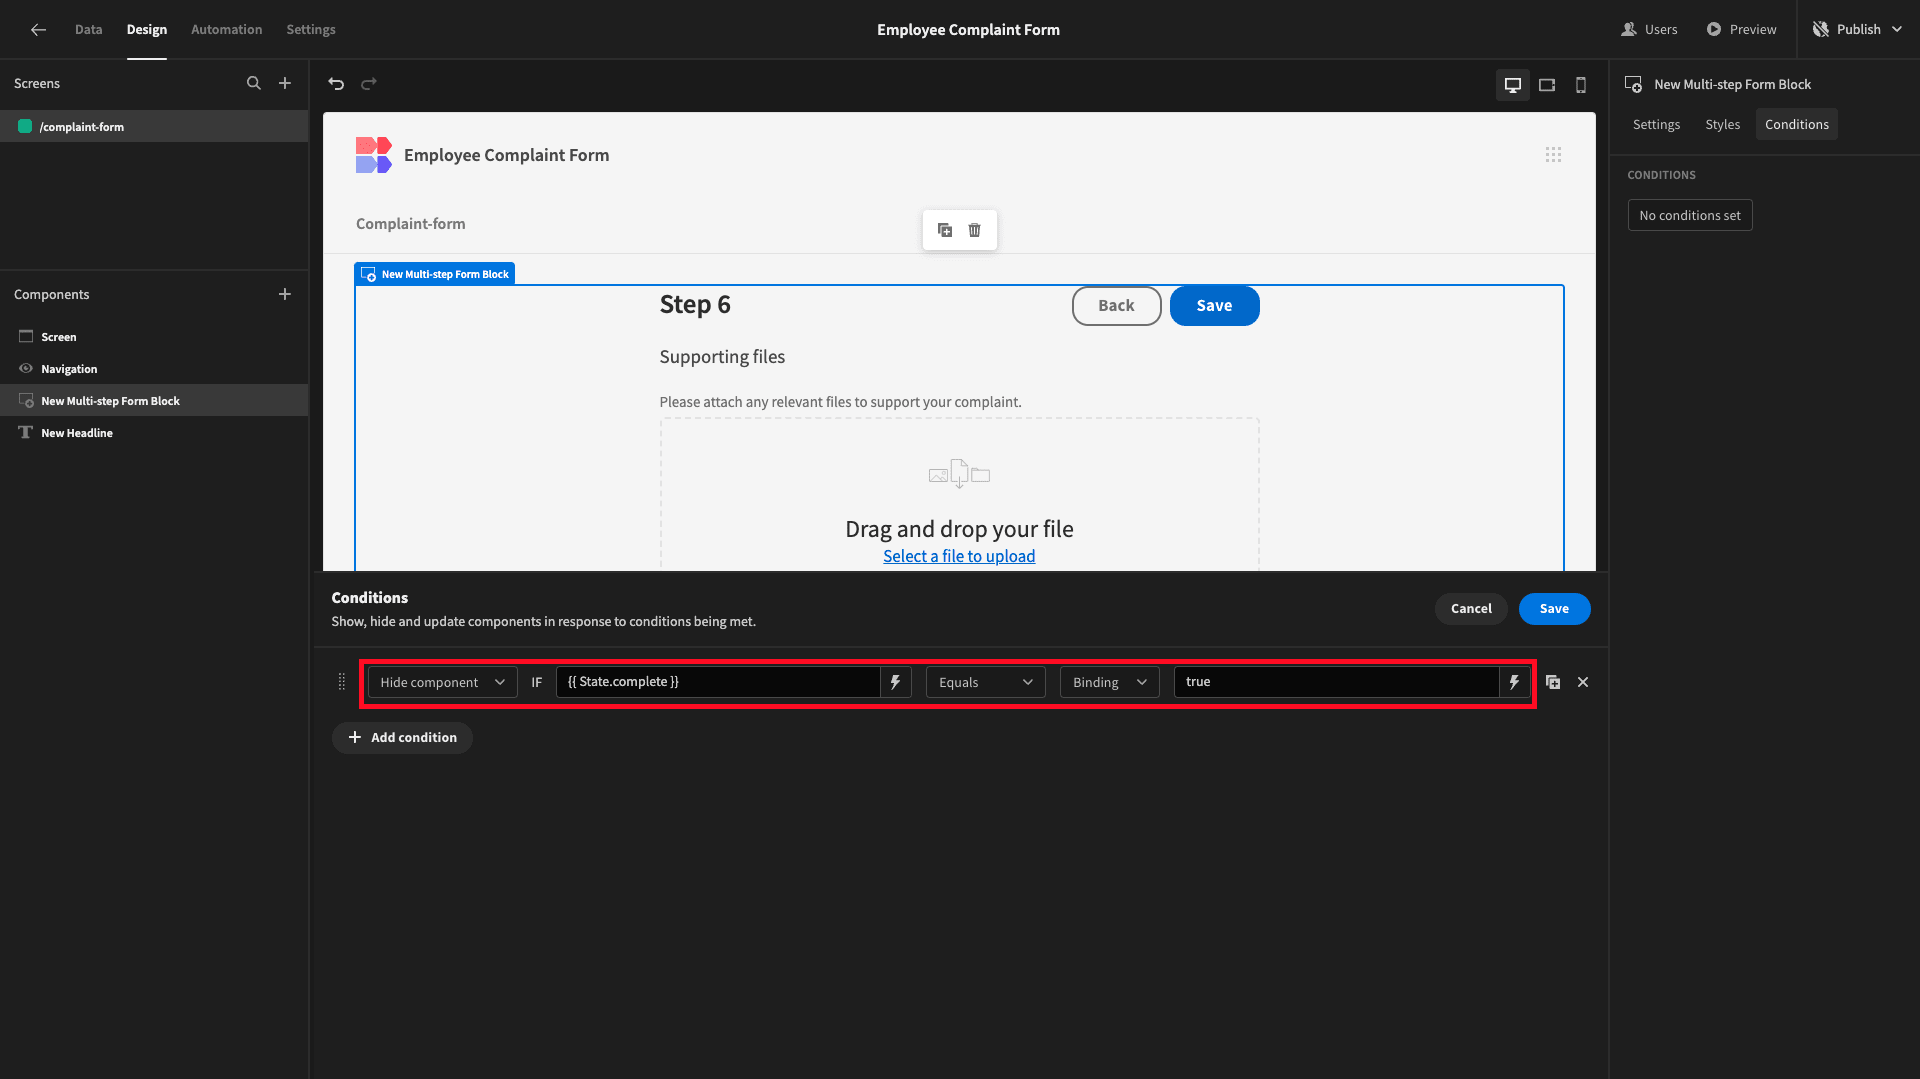
Here, we can create a rule to hide the component is {{ State.complete }} equals true.
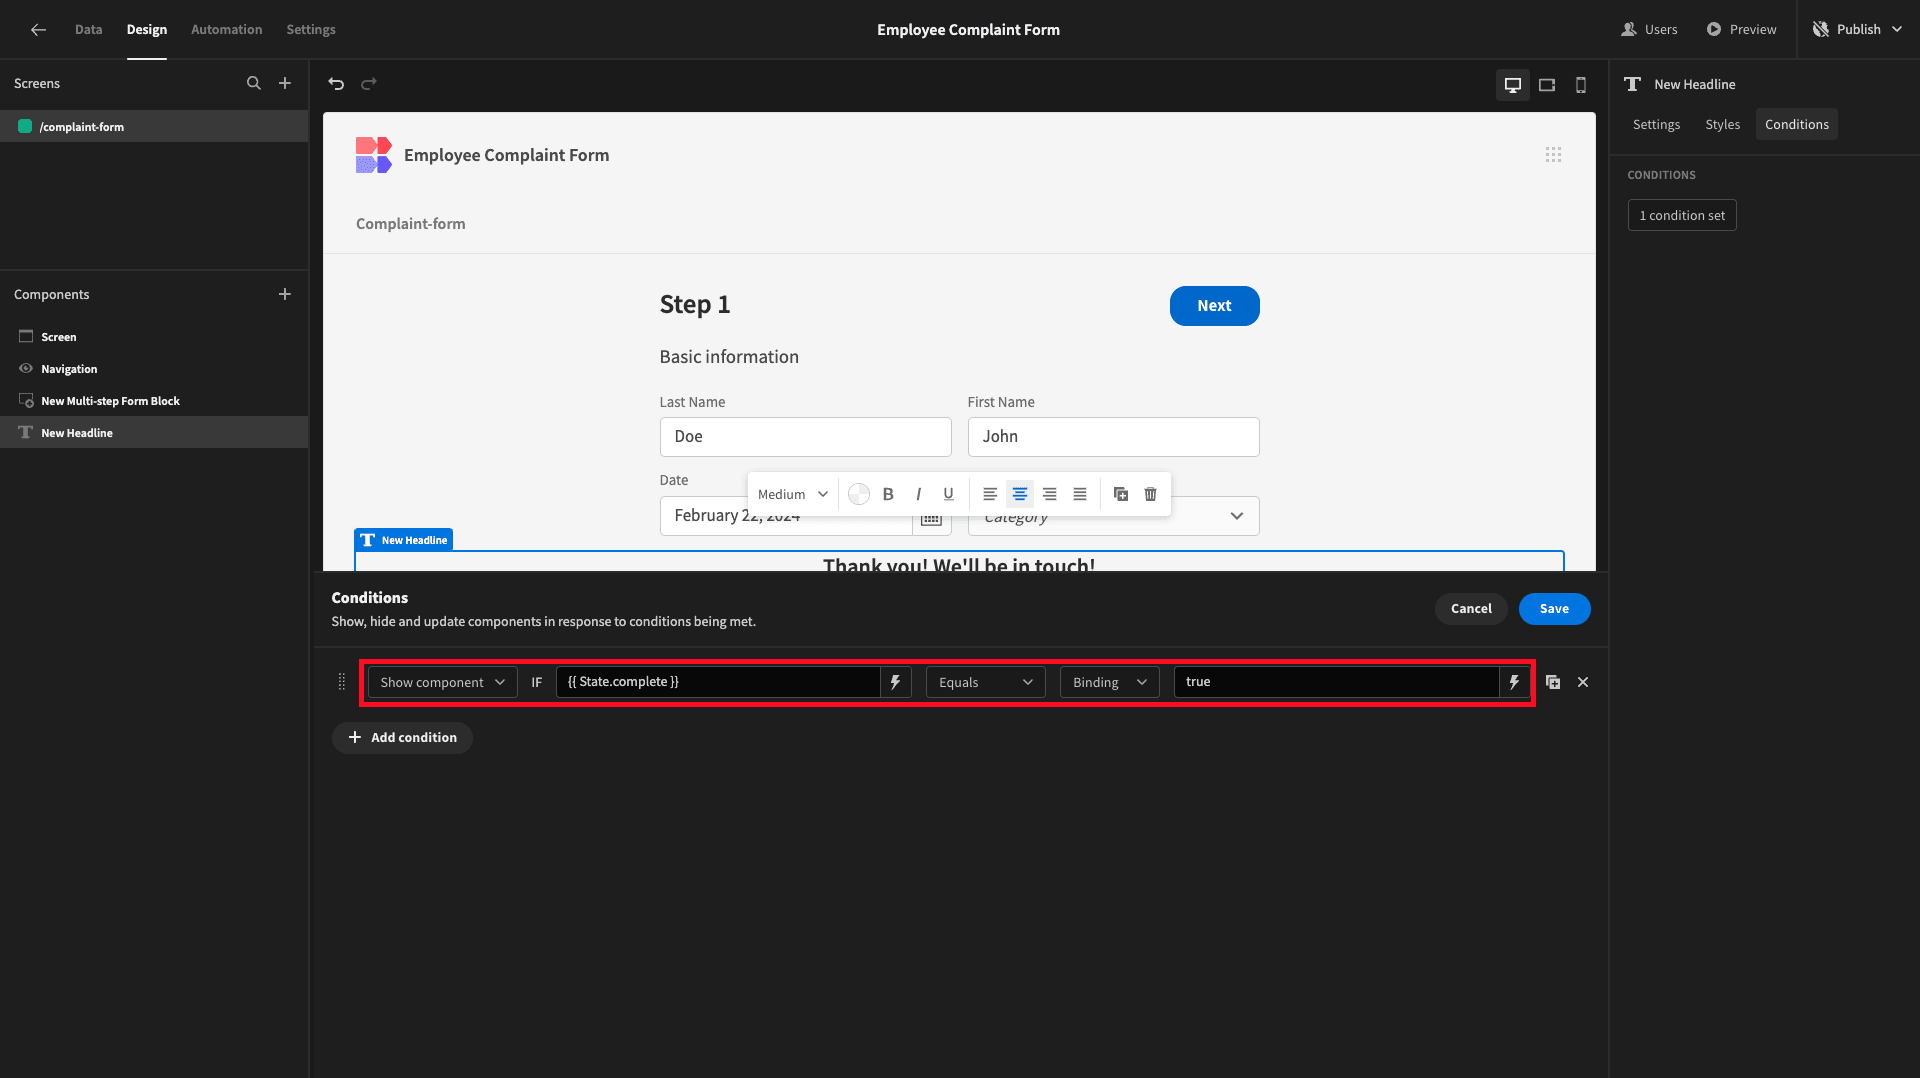
We’ll then add a corresponding rule to our Headline, this time displaying the component is {{ State.complete }} equals true.
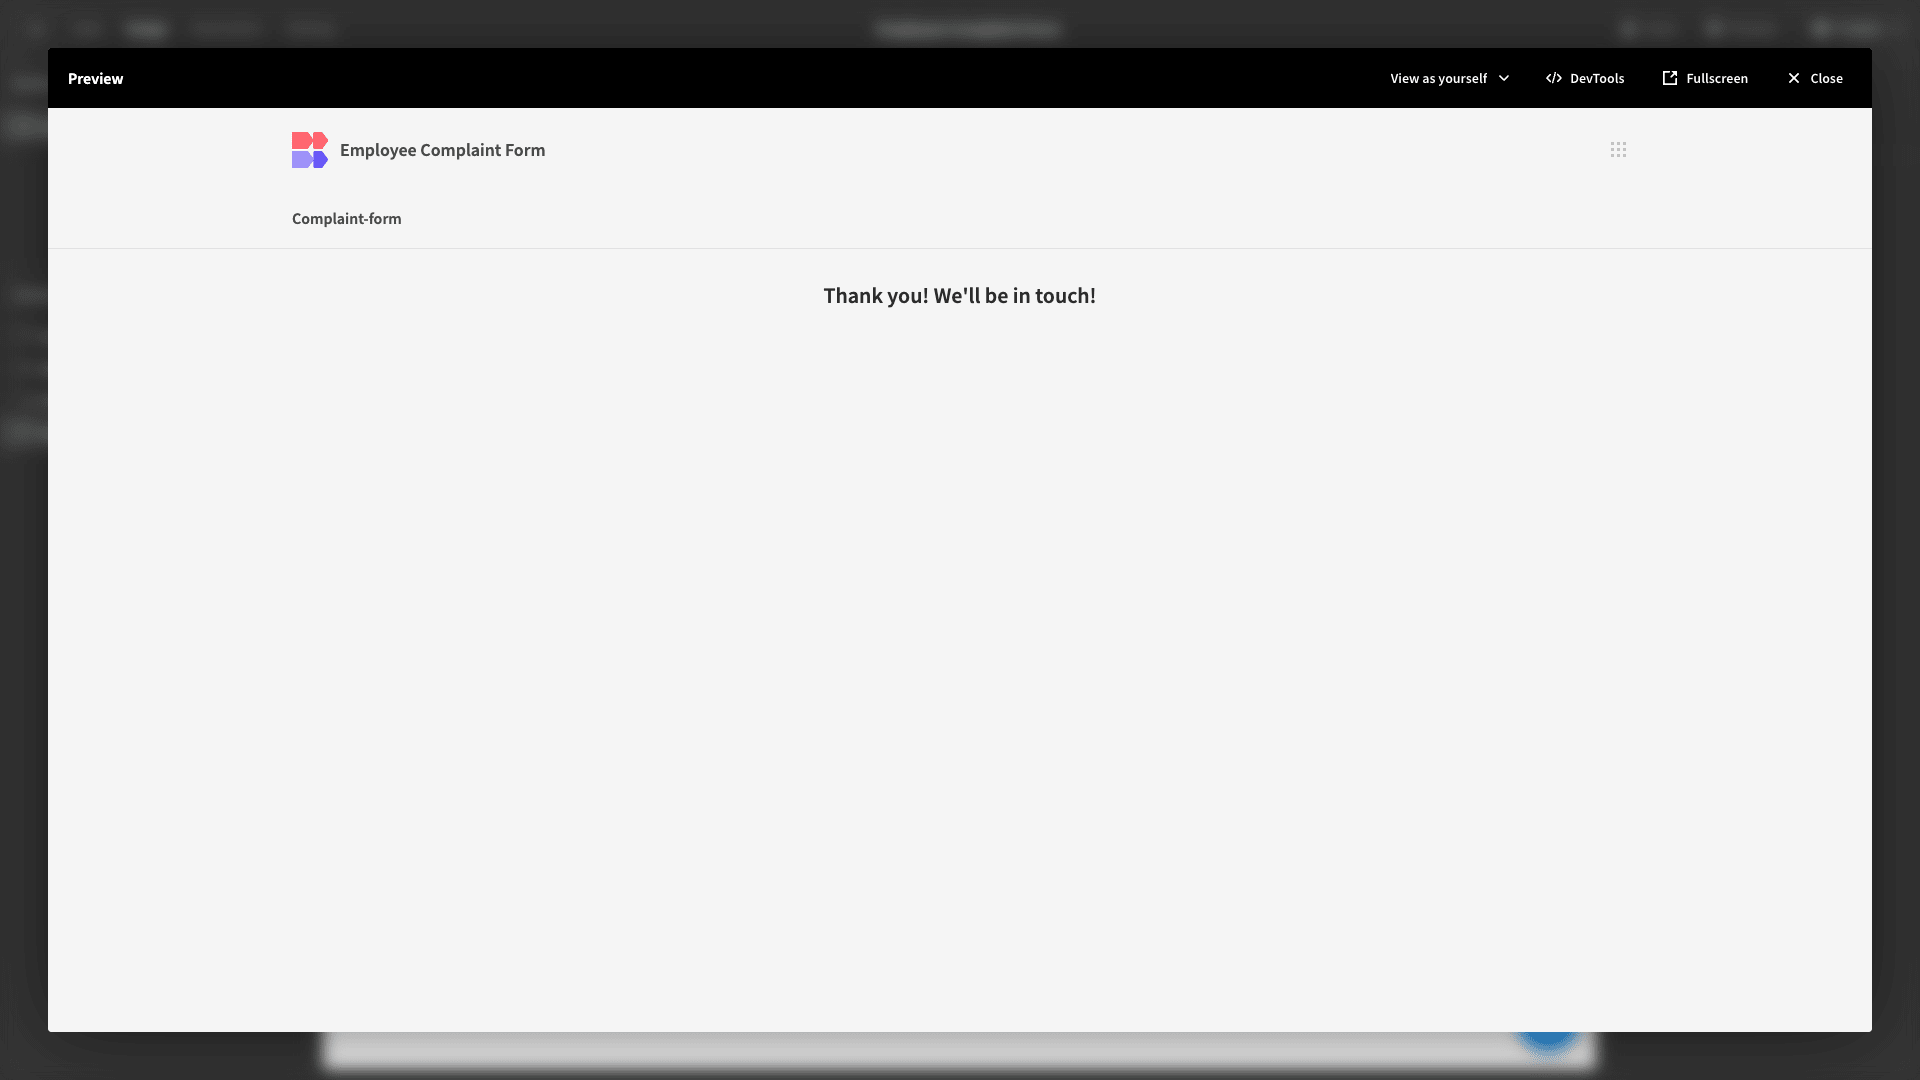
Here’s what this will look like when we complete our form.
6. Design tweaks and publishing
We’re almost ready to push our employee complaint form live.
Before we do that, though, we want to make a couple of final design tweaks. First, this is a single-screen app, so the navigation bar isn’t totally necessary.
Hit Configure Links under Navigation.
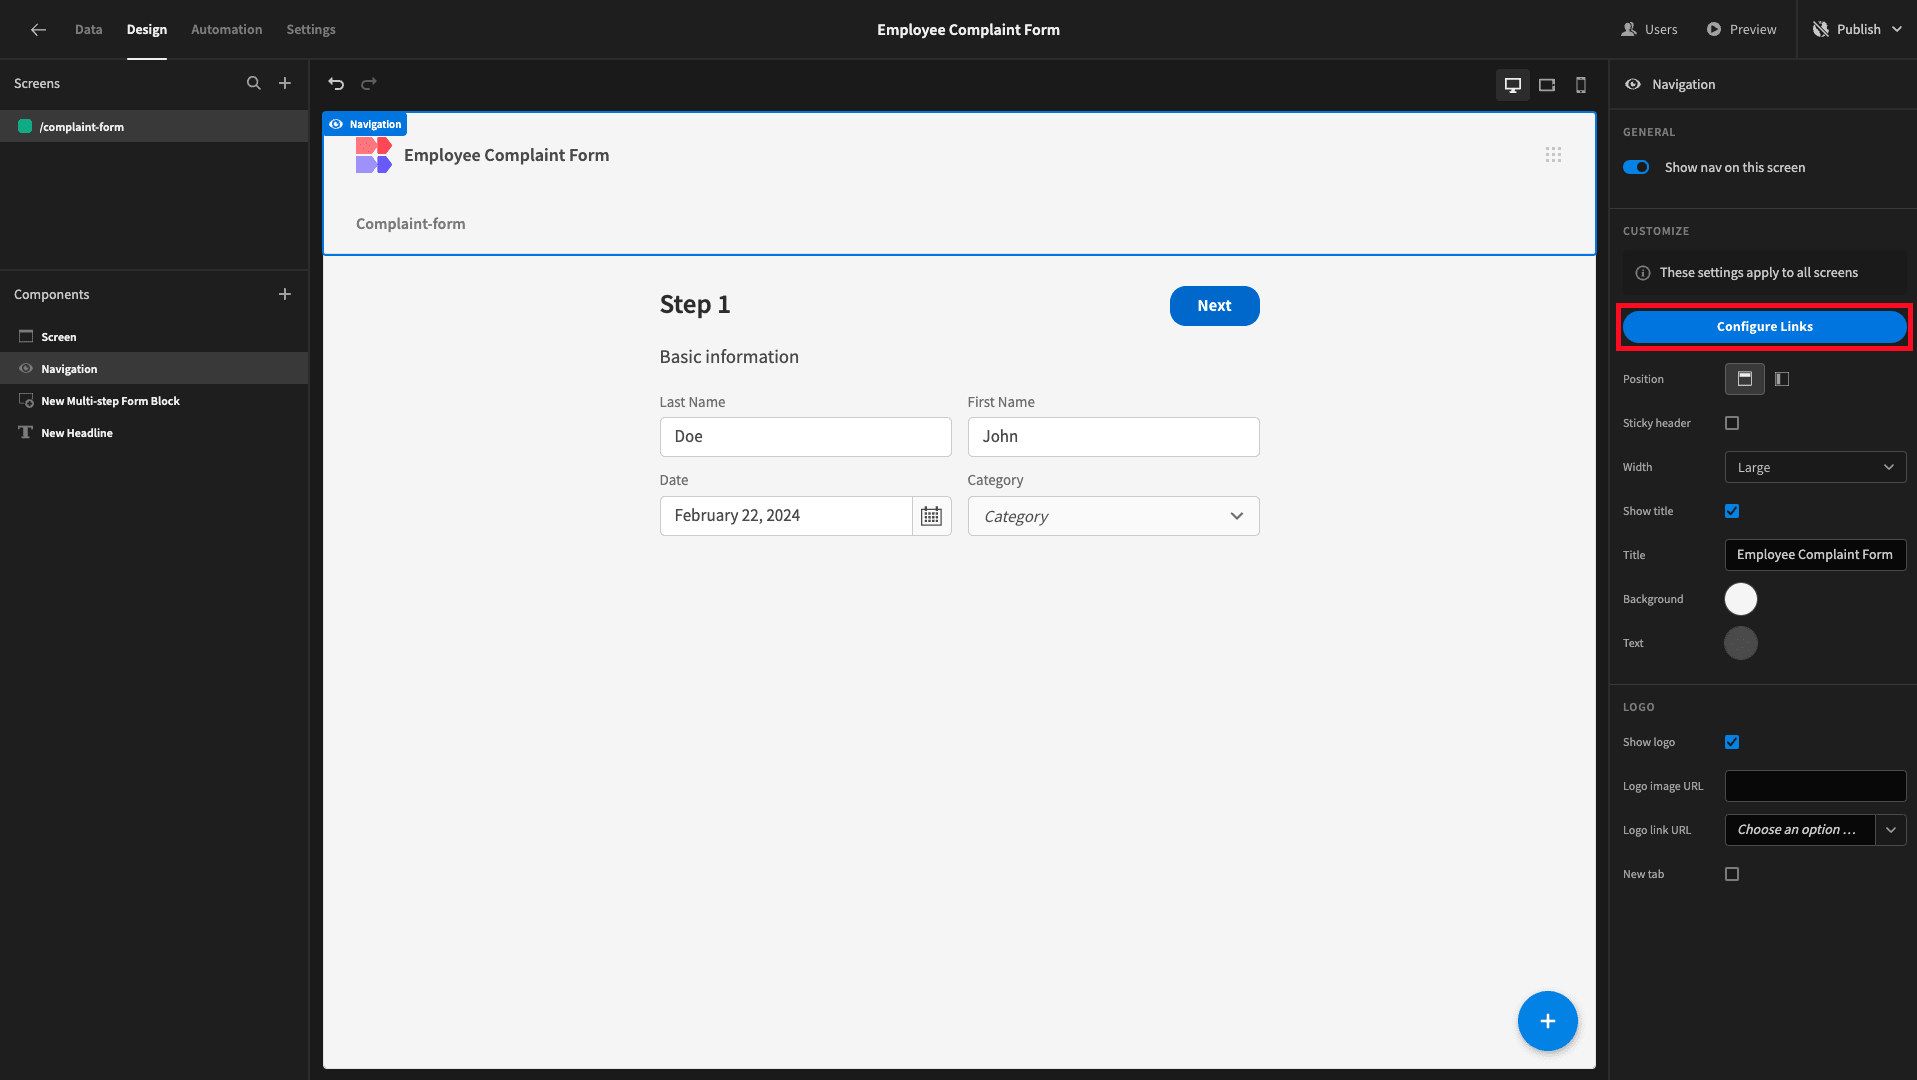
Here, we’ll use the X icon to remove the entry that’s currently in our nav bar.

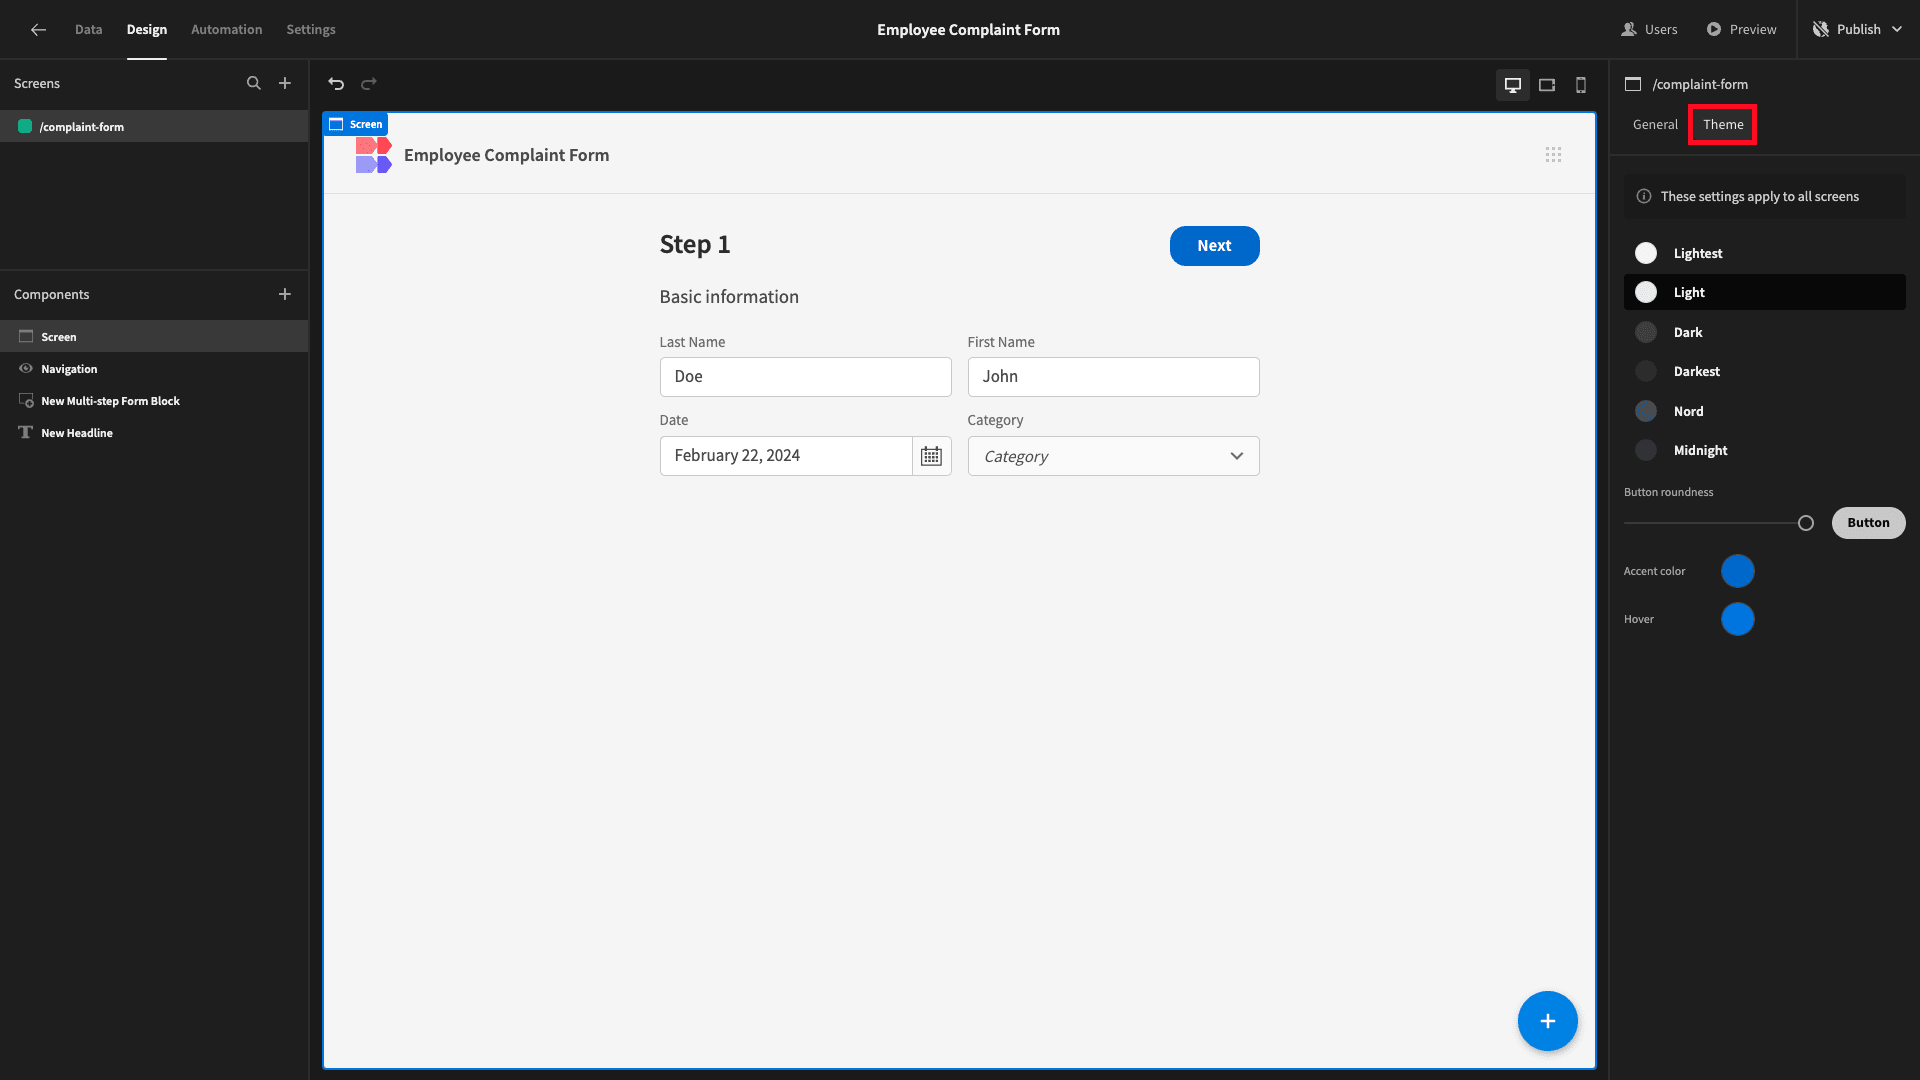
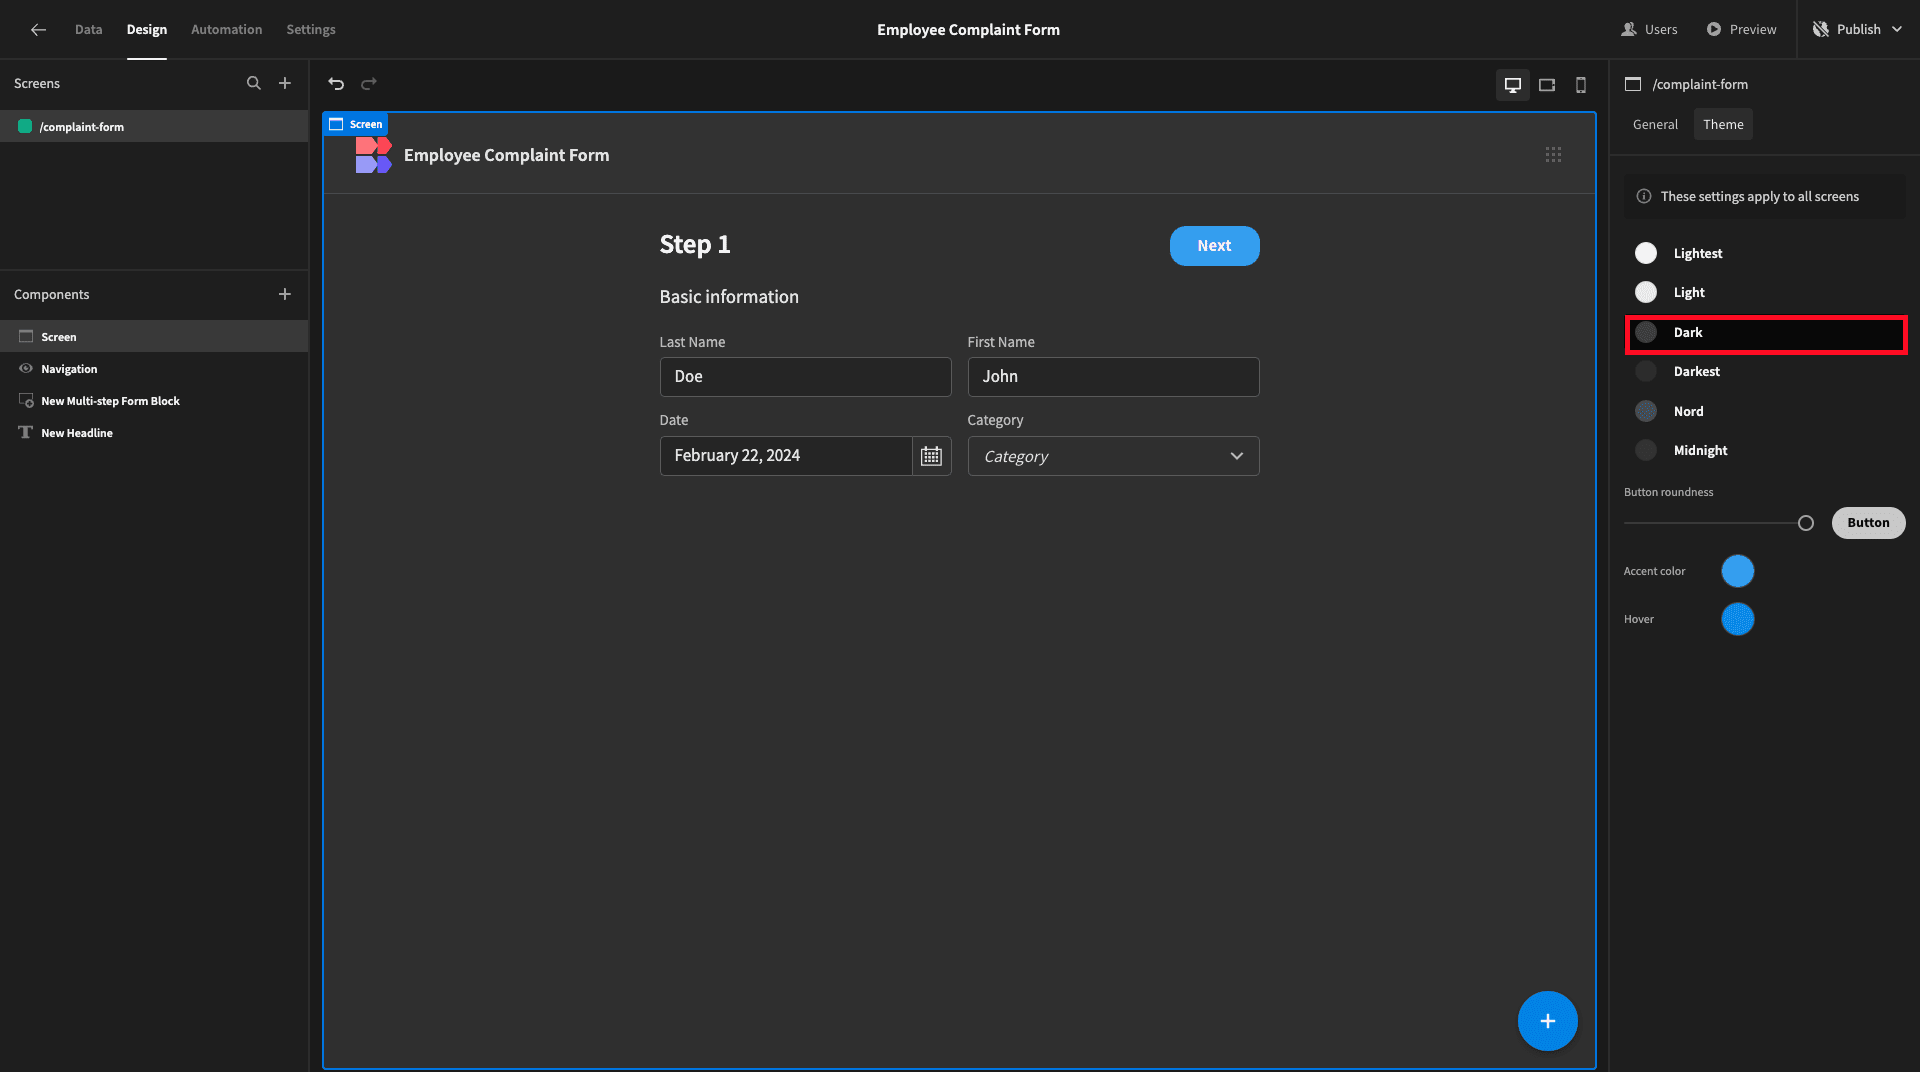
The last thing we’ll do is update our app’s theme under the Screen menu.
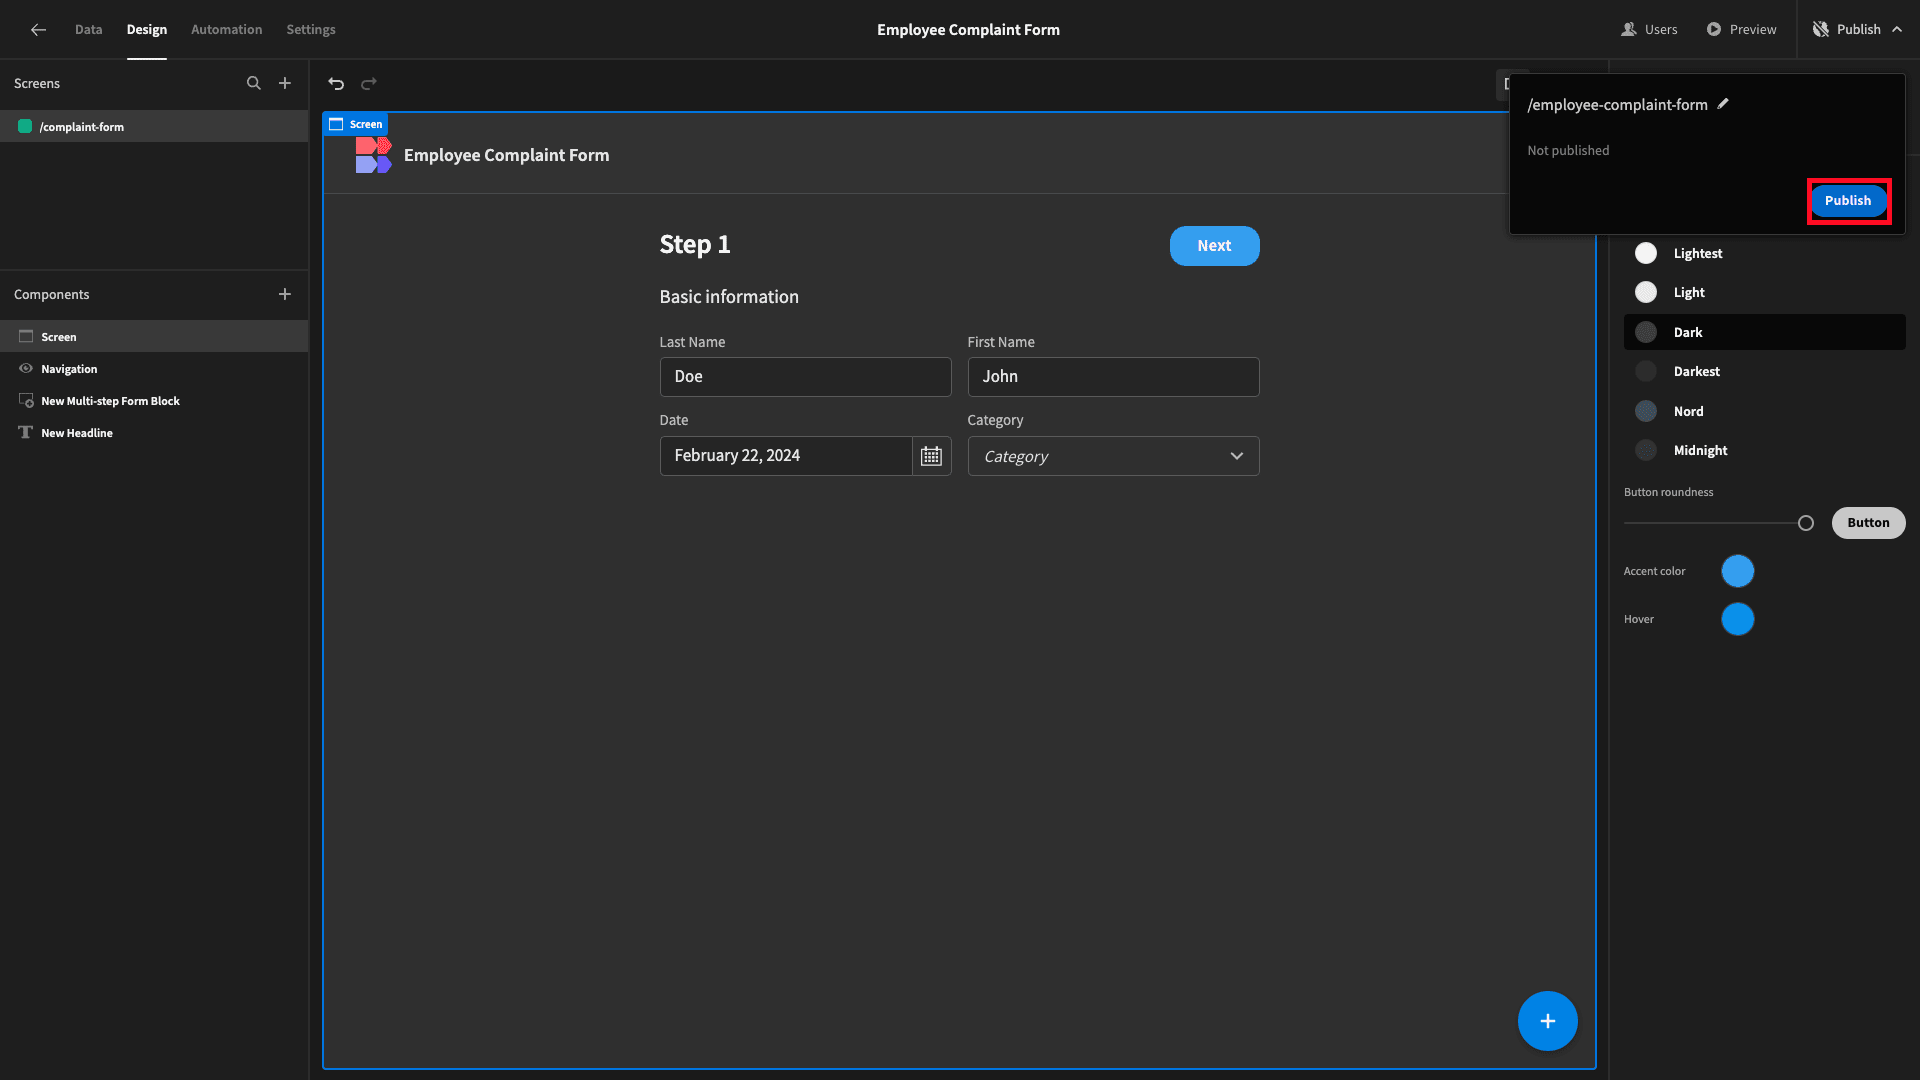
Today, we’re opting for Dark.
When we’re ready to push our employee complaint form live, we can hit publish.
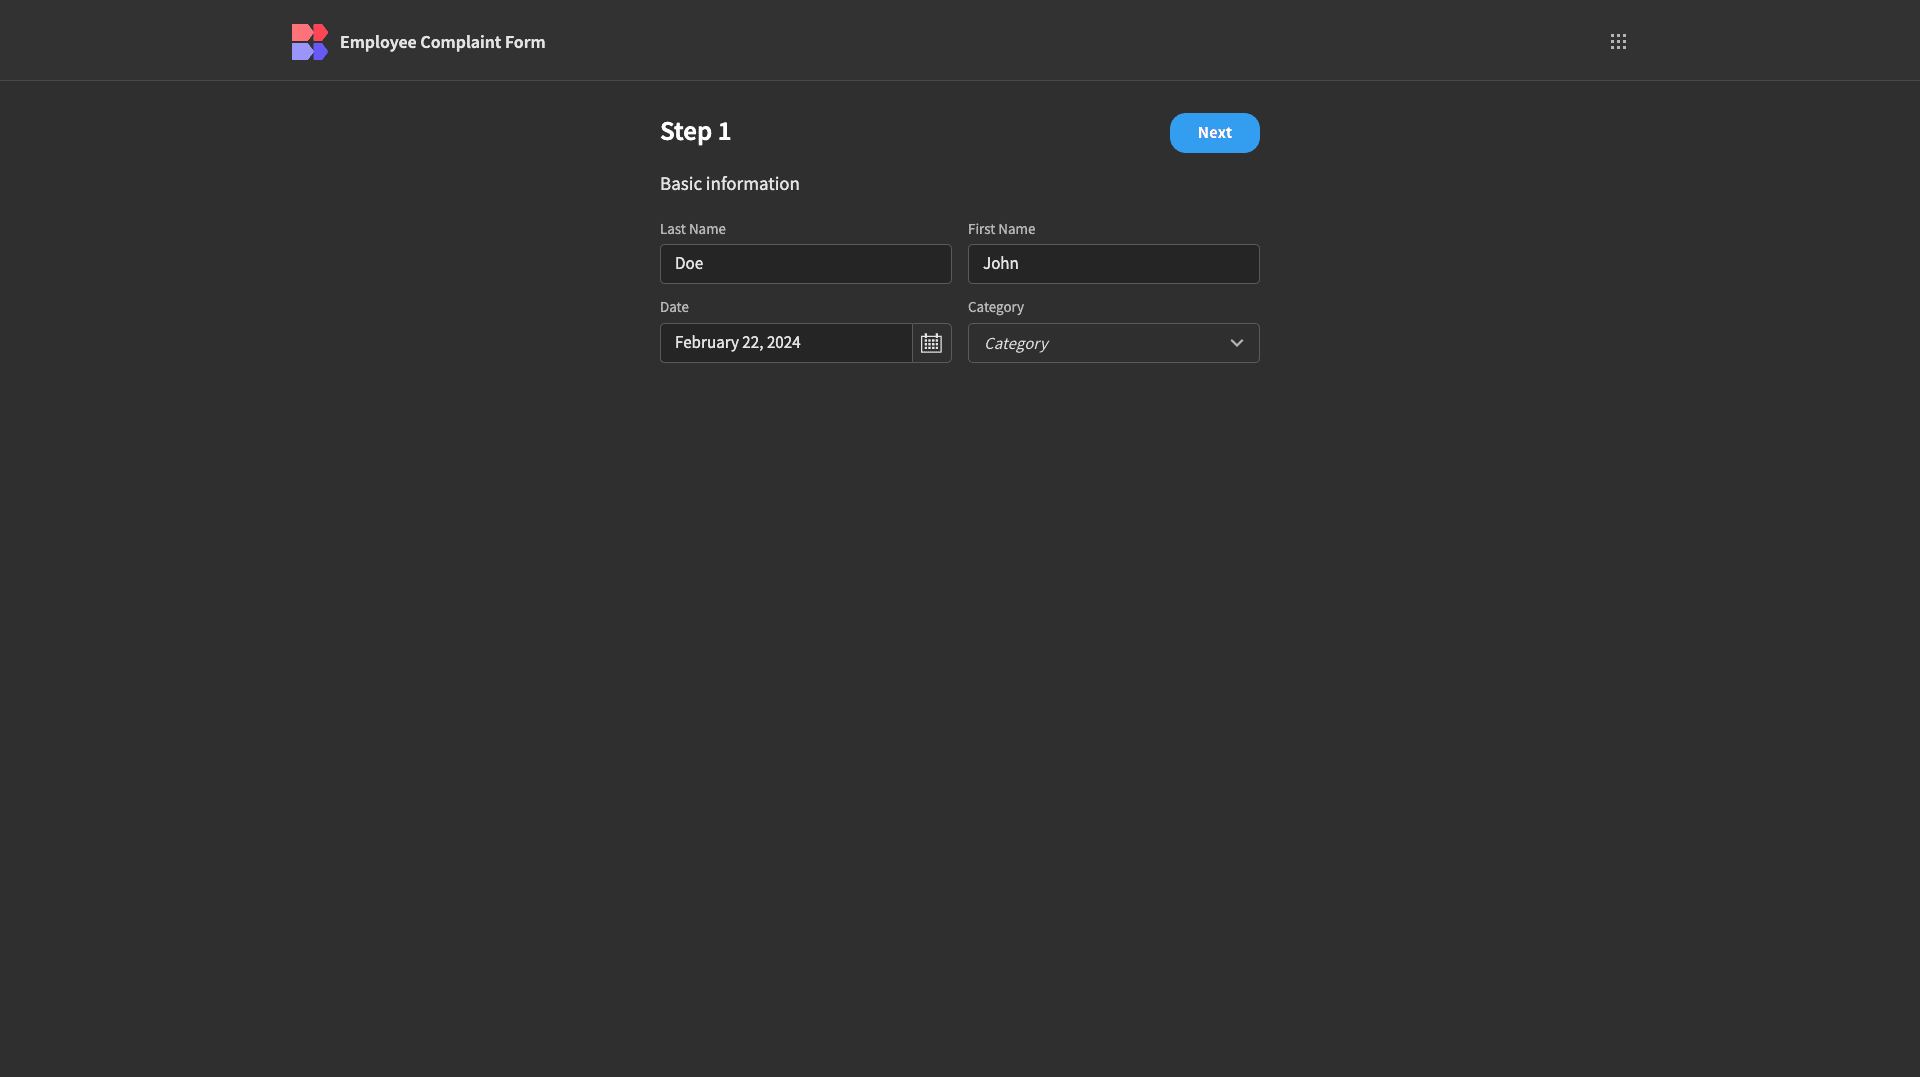
Here’s a reminder of what our finished app will look like.
Budibase is the fast, easy way to build advanced forms on top of any data set. To learn more, check out our guide to digital forms .