How to Build an IT Request Form
IT teams rely heavily on request forms for delivering services to colleagues. For instance, support ticketing, equipment checkout workflows, incident reporting, or a whole host of other workflows.
The goal - first of all - is to gather the information we need in a consistent structure and format.
This can then be used for categorizing, prioritizing, delegating, and ultimately actioning requests.
Today, we’re exploring how Budibase empowers teams to build secure, advanced forms for all sorts of request workflows. By the end, you’ll have a fully functional, customizable IT request form.
But first …
What is an IT request form?
An IT request form is a simple interface for colleagues to submit requests to the IT team. However, the exact nature of what’s being requested can vary quite widely - and most teams will have multiple forms for different kinds of tasks and workflows.
Some of the most common examples include repair, maintenance, support, device rental, development, or other service requests.
Request forms can also vary in terms of additional functionality.
For instance, logic to help support related business processes or integration with other tools within a given workflow.
Budibase offers market leading flexibility for building advanced forms, including automations, integrations, and extensive support for external data sources.
So…
What are we building?
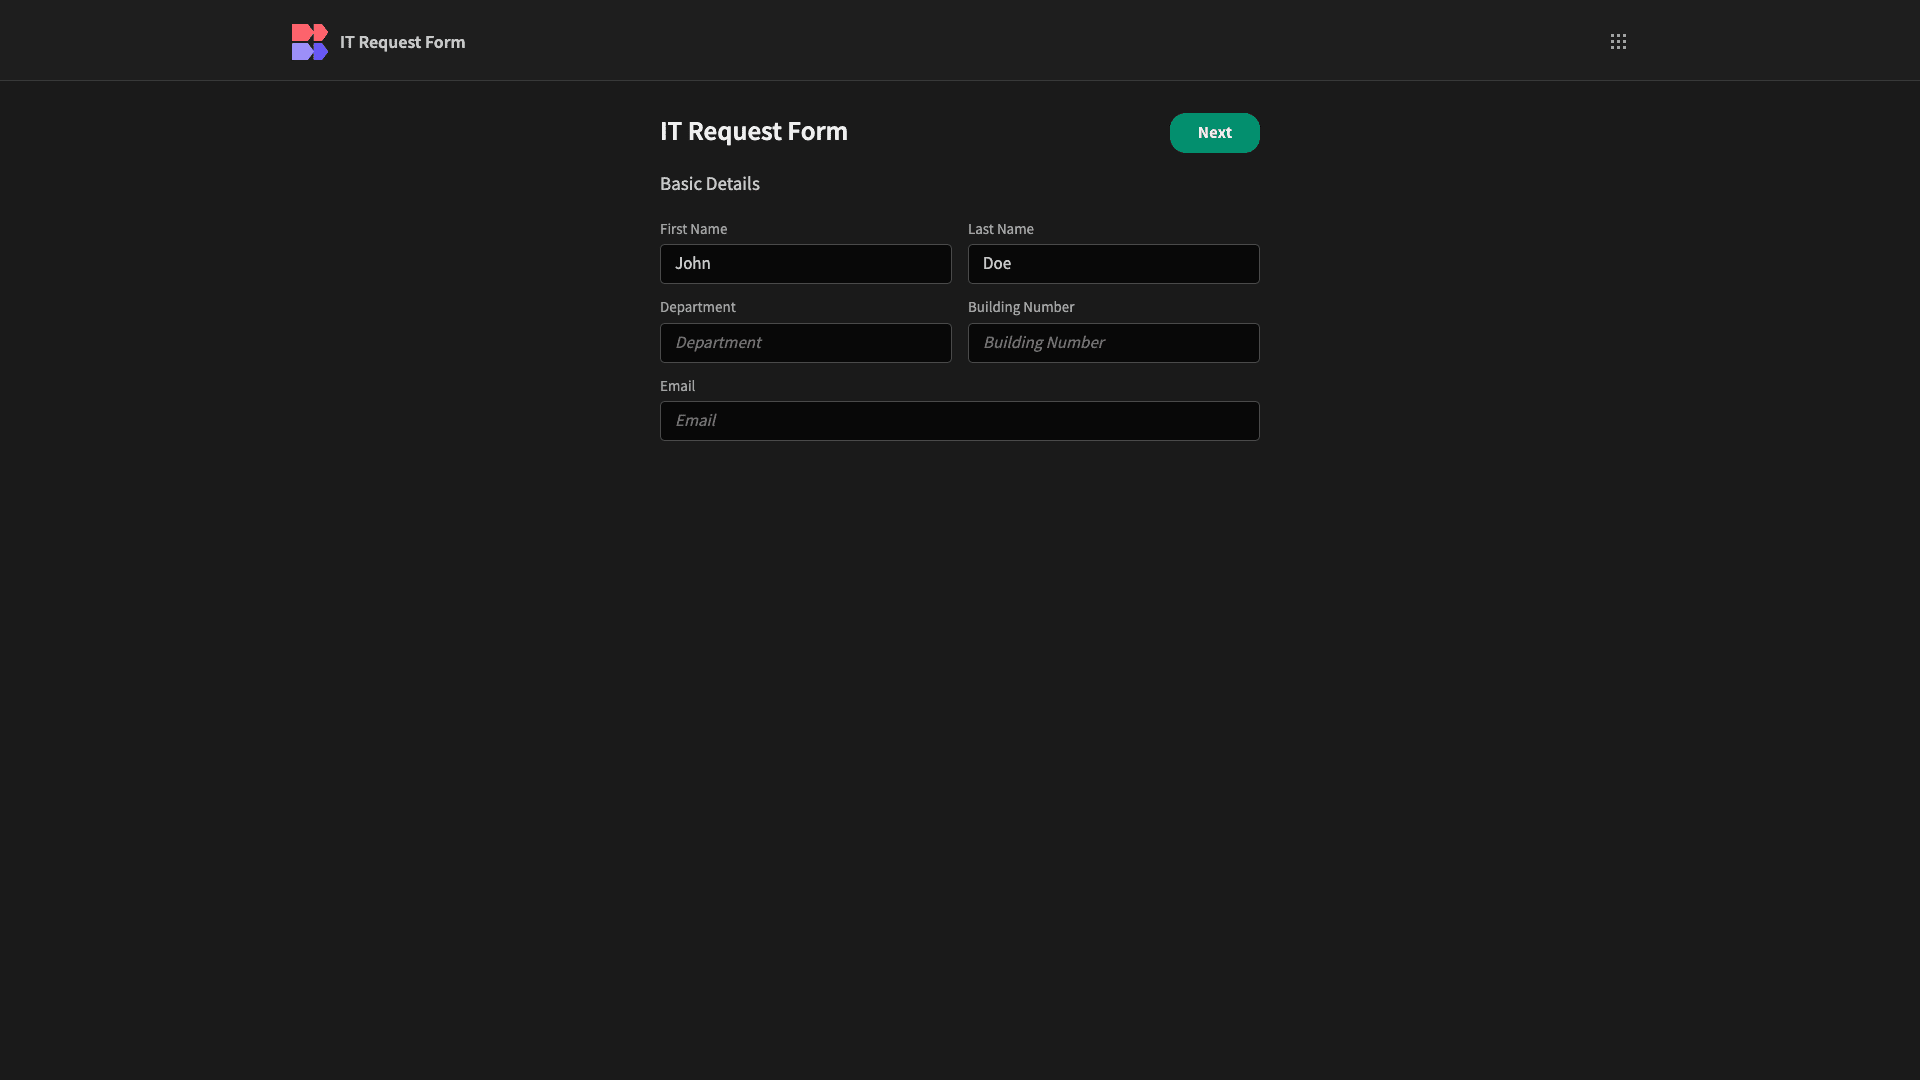
We’re building a multi-step request form for submitting issues to our IT team. Specifically, we’re going to provide three distinct steps to our form.
First, we’ll have a series of text fields for the user’s basic information. Then, we’ll provide long-form text fields to enable them to provide more context on the issue. And, finally, we’ll offer them the chance to upload some supporting documents.
We’ll also use front-end logic to populate some other data about the request, without users needing to provide this explicitly.
We’re going to create our form schema from scratch, using Budibase’s built-in database - although we also have the option of connecting to a huge range of existing DBMSs and other data sources.
Let’s jump in.
How to build an IT request form in 5 steps
If you haven’t already, sign up for a Budibase account, to start building as many forms as you want - for free.
1. Creating our form schema
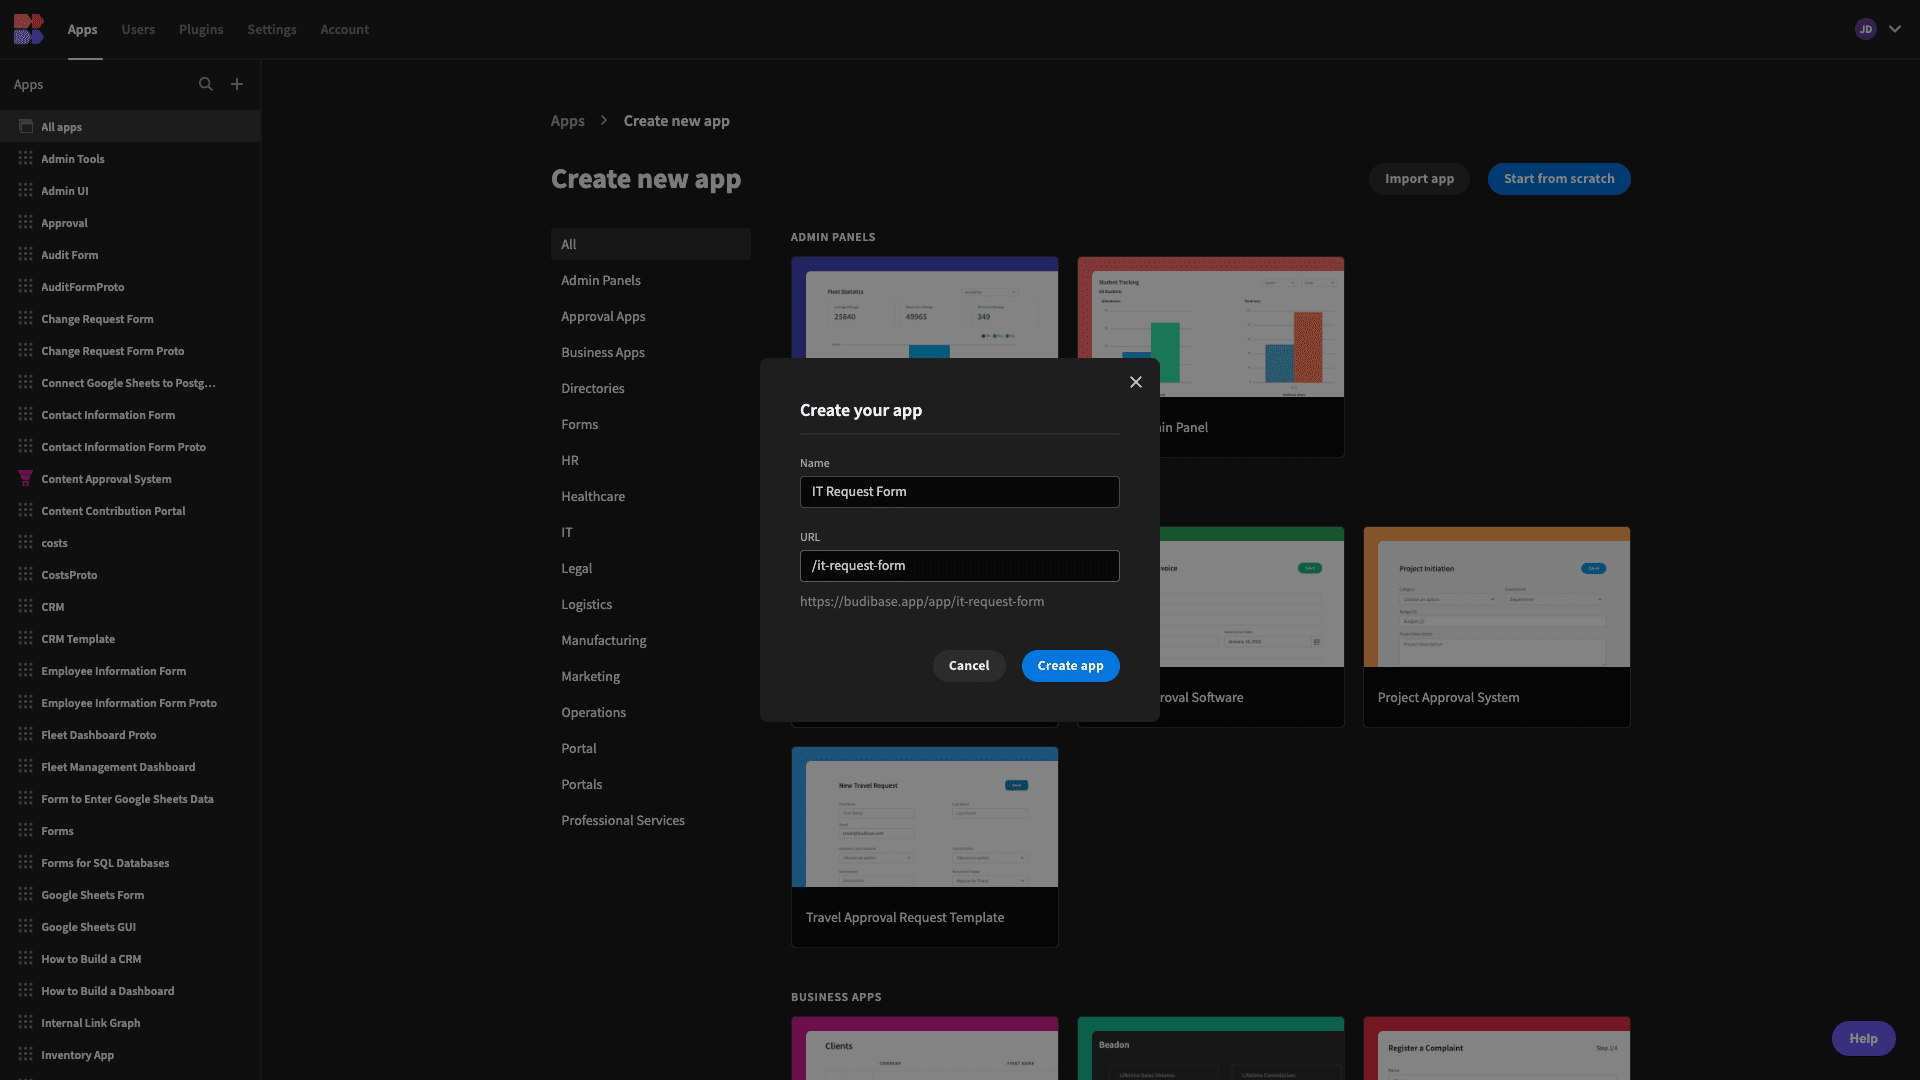
The first thing we’ll do is create a new Budibase application. We have the option of using a template or importing an app dump, but today we’re starting from scratch.
When we choose this option, we’re prompted to give our new app a name and URL extension.
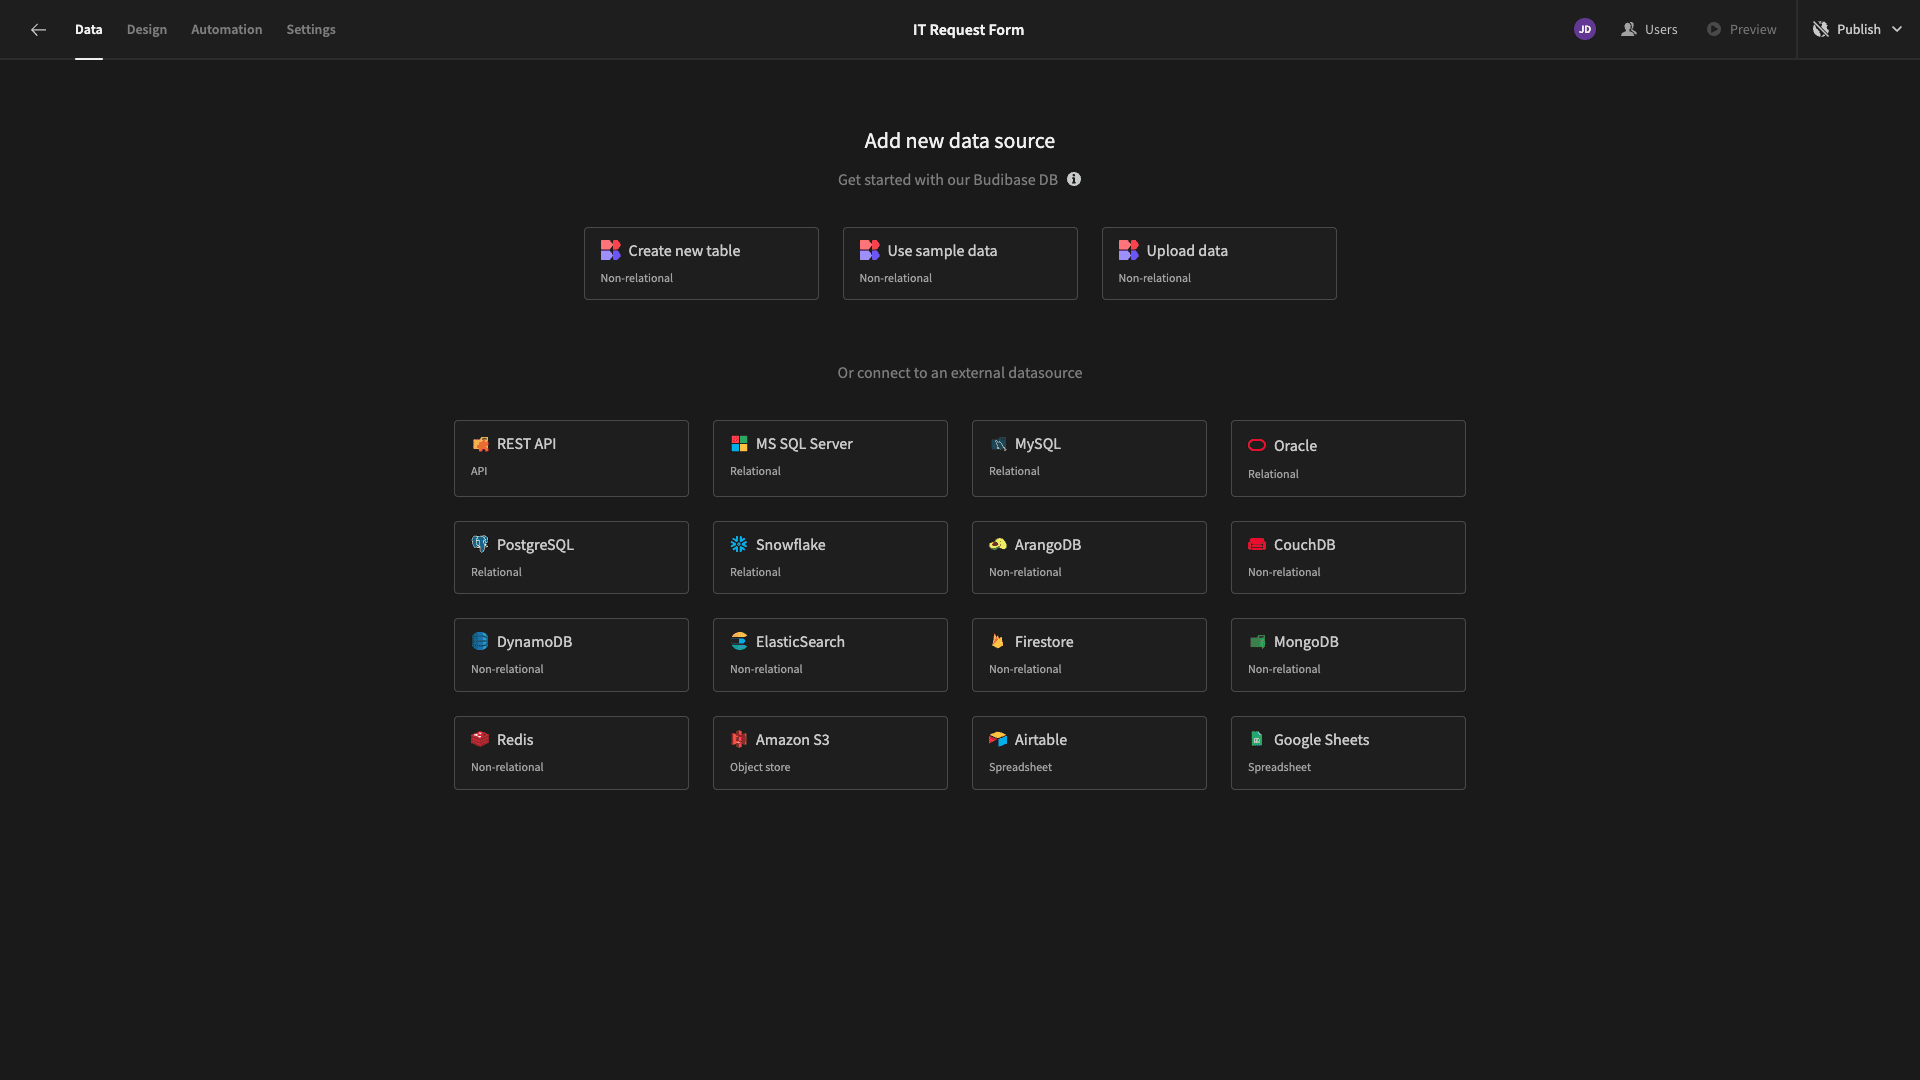
Next, we’re presented with a series of options for how we’d like to store data from our form. Budibase offers dedicated connectors for a range of relational and non-relational databases, along with REST APIs, Google Sheets, Airtable, and more.
As we said earlier, today we’re using Budibase’s built-in database. We’re going to hit Create New Table - we’ll then be prompted to give this a name:
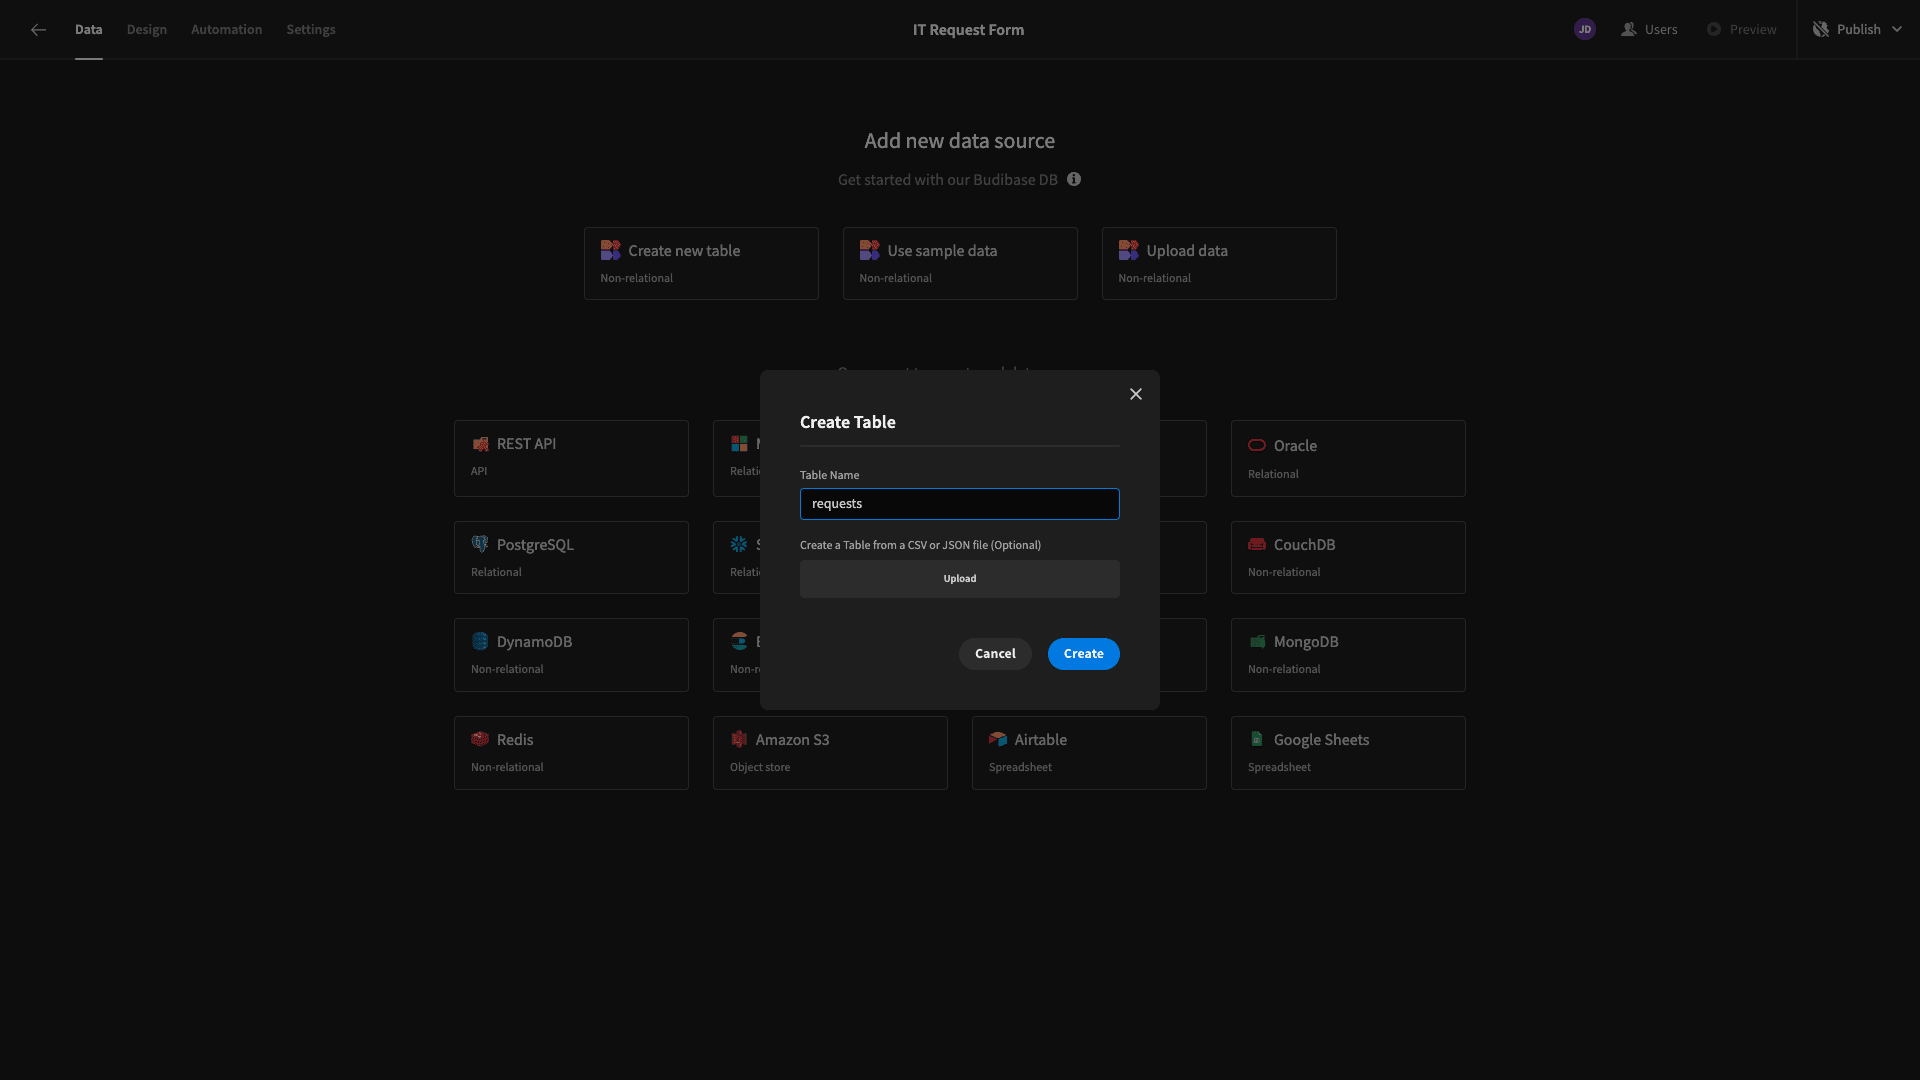
We’re calling ours ‘requests’.
Here’s how our empty table looks:

So, let’s pause for a second to consider what our data model should look like.
We said earlier that our IT request form will comprise three steps, concerning:
- The basic information of the user making the requests.
- More detailed information about the request itself.
- Any supporting files or documents.
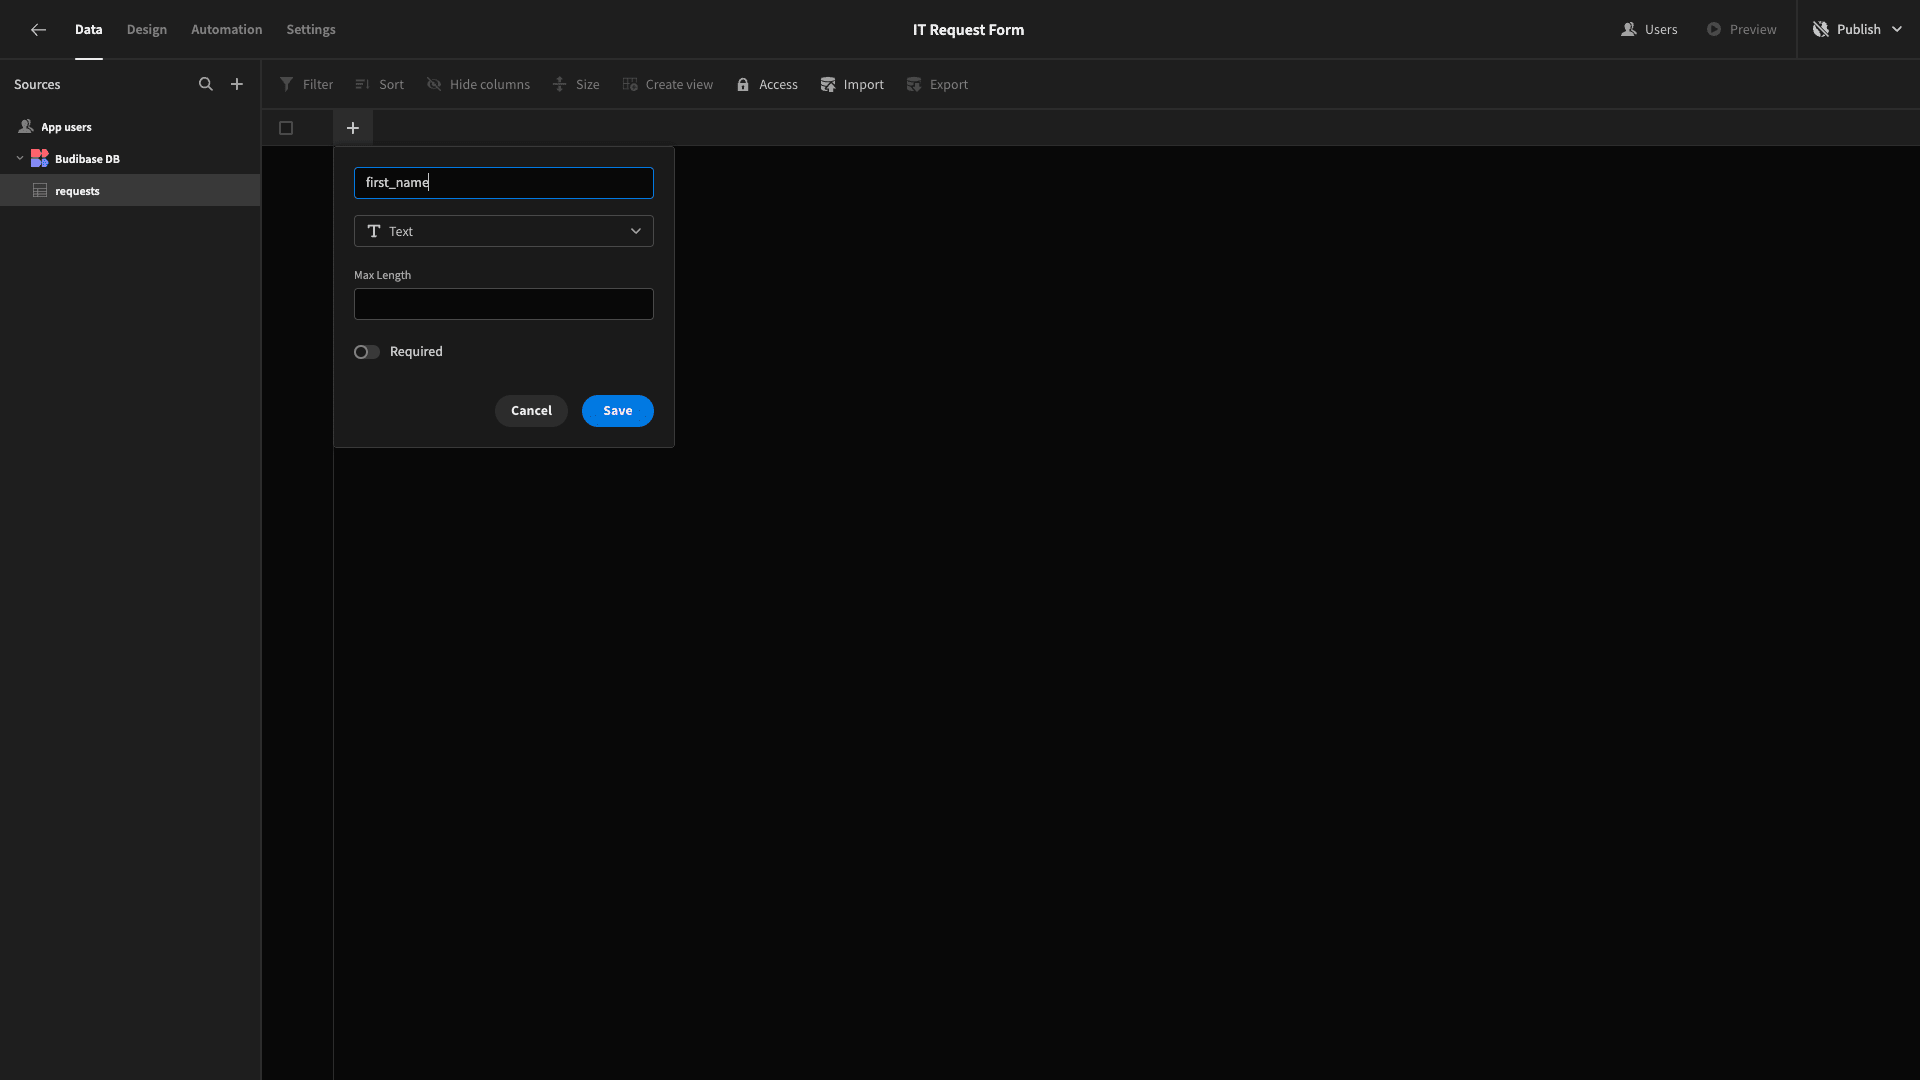
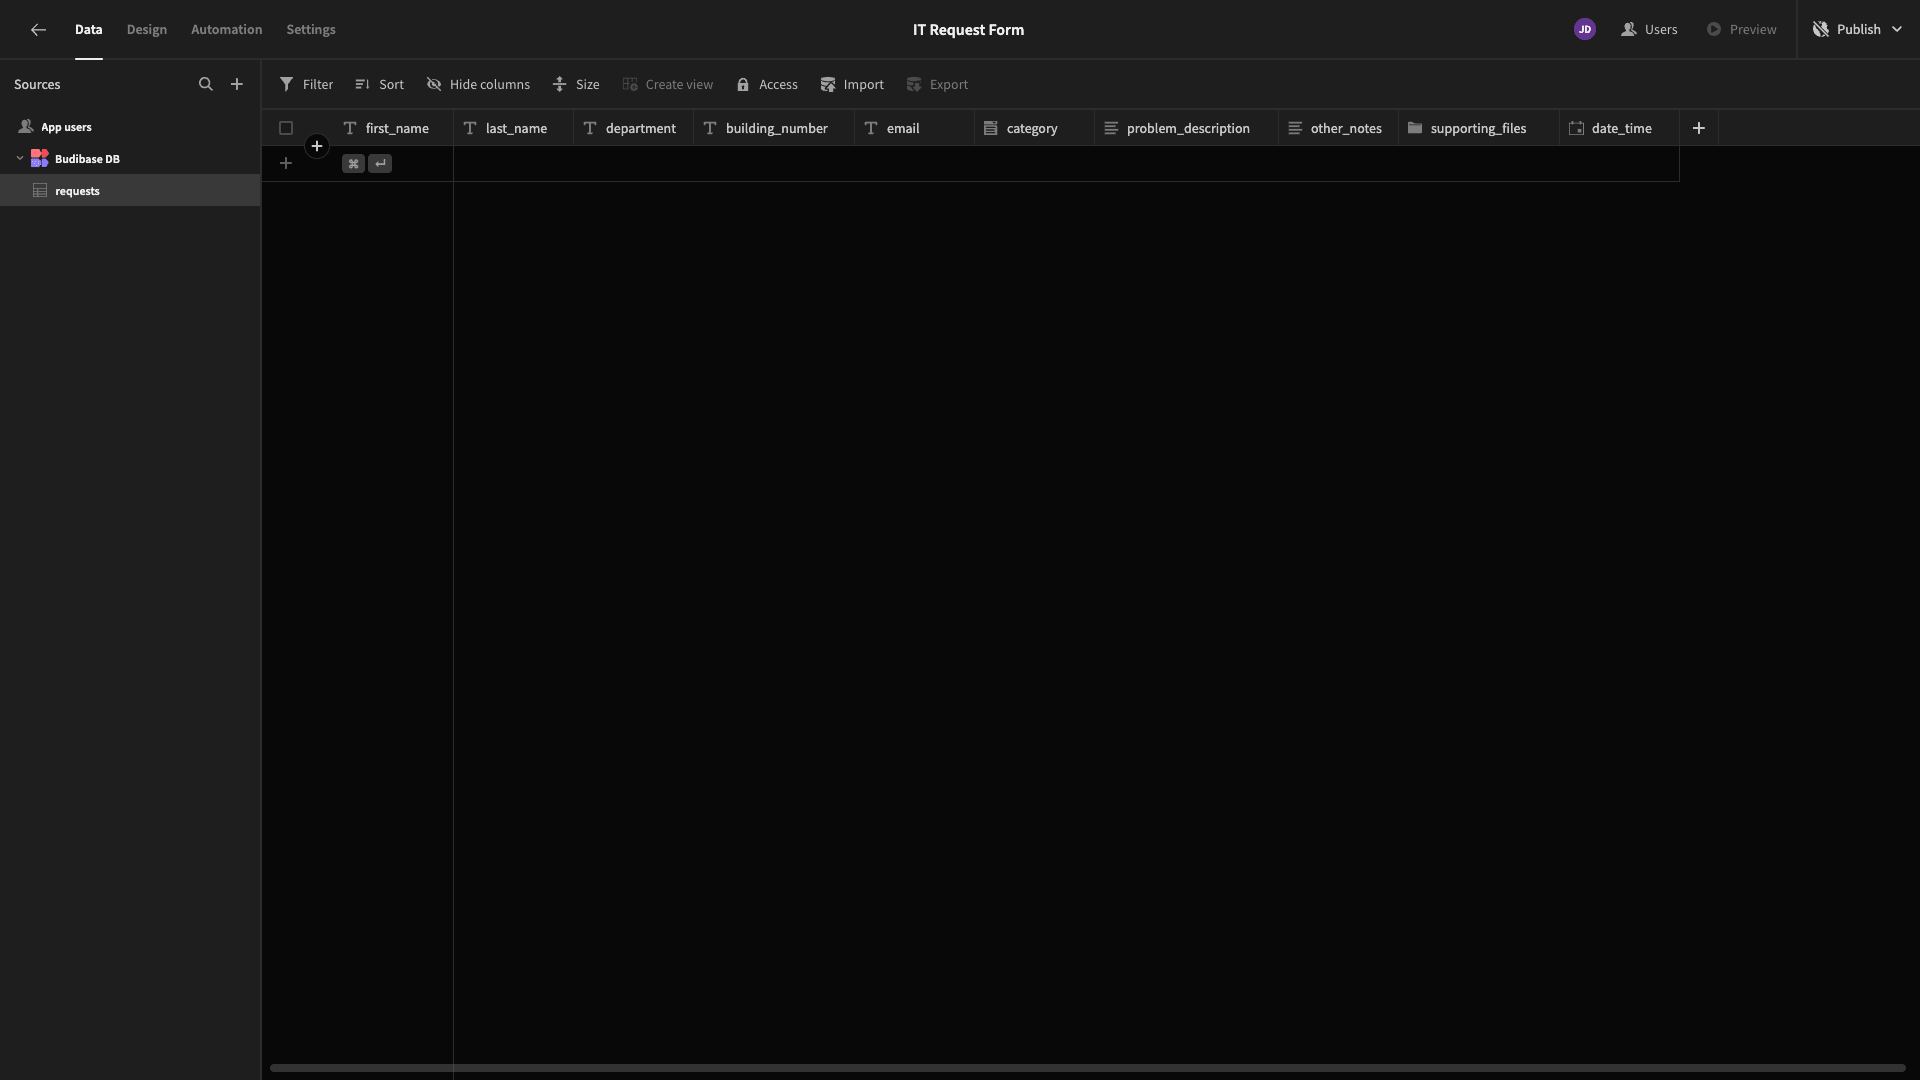
To achieve this, we’re adding columns to our database with the following names and types:
- first_name - text,
- last_name - text,
- department - text,
- building_number - number,
- category - options,
- problem_description - long-form text,
- other_notes - long-form text,
- supporting_files - attachment,
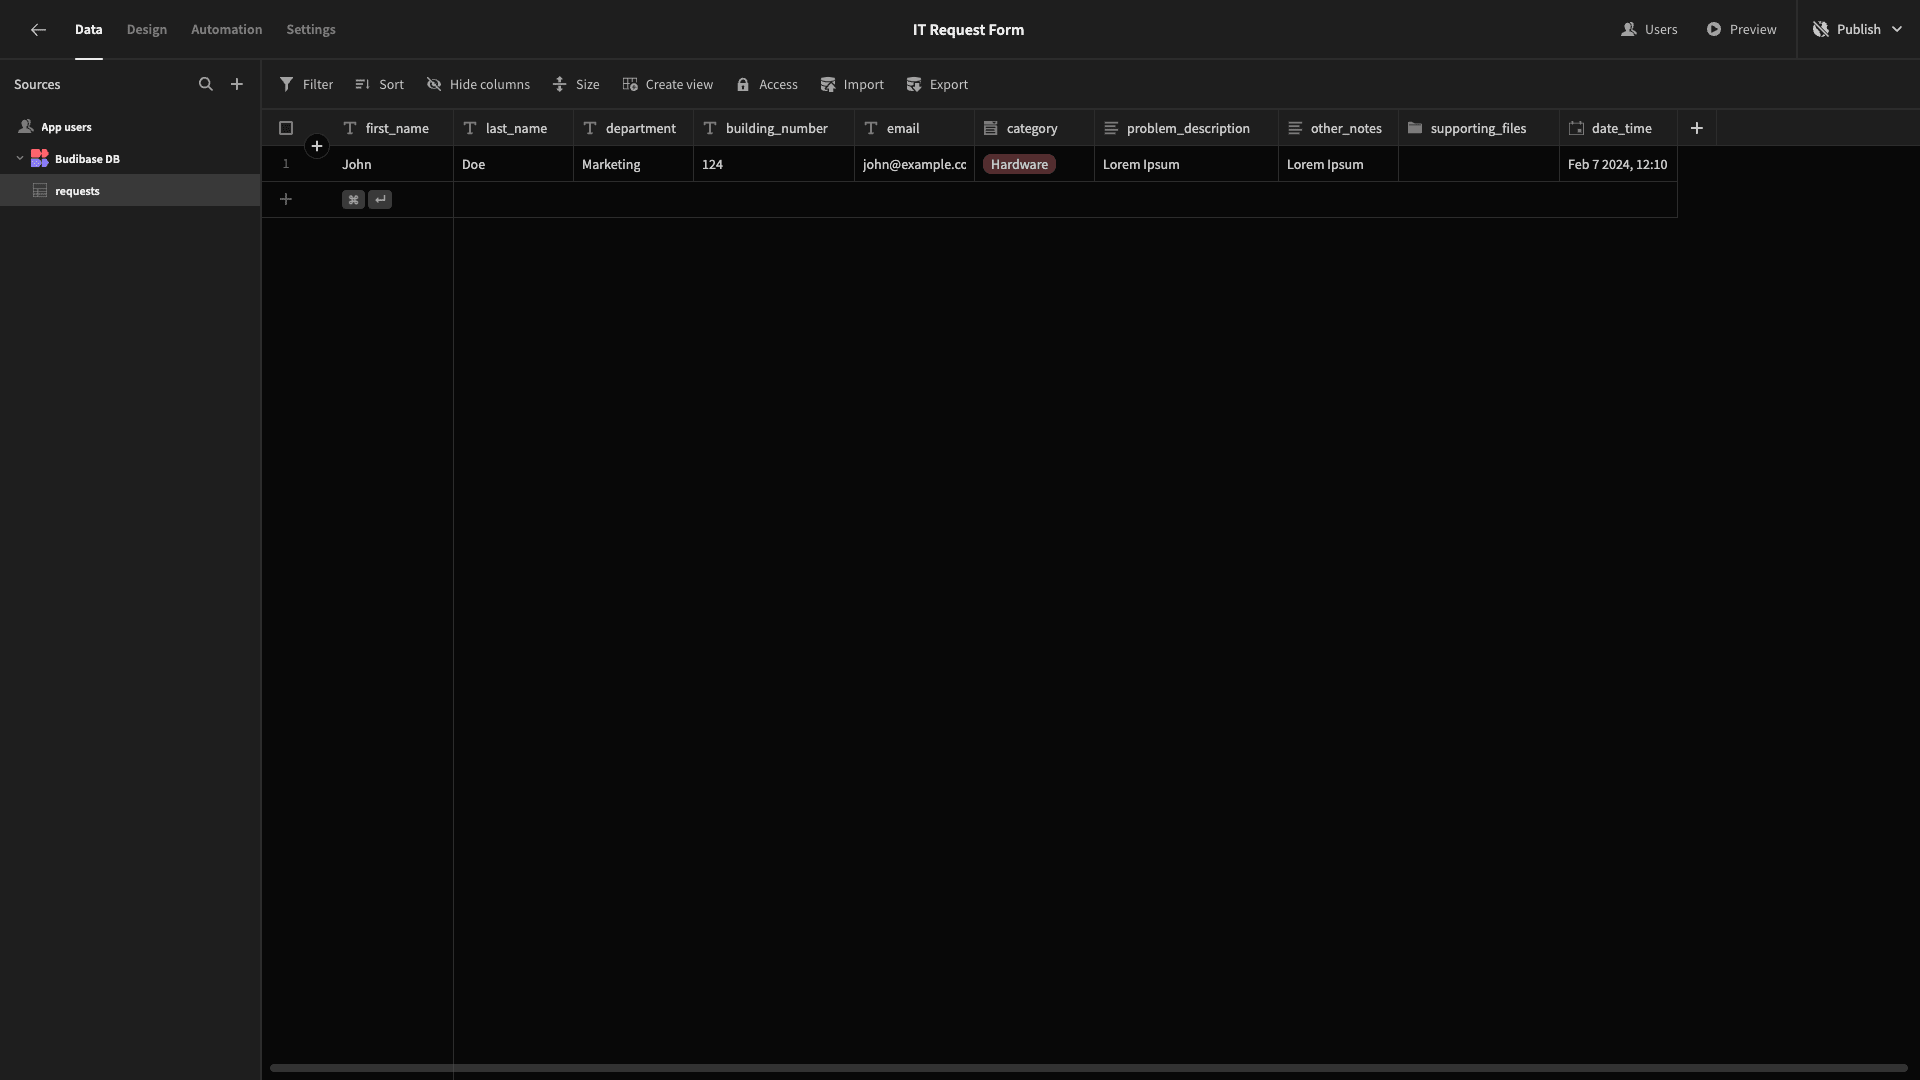
- date_time - date.
We can use the plus icon to add new attributes:
Here’s what our table will look like once we’ve added all of our columns.
There’s just one last thing we need to do to complete our data model.
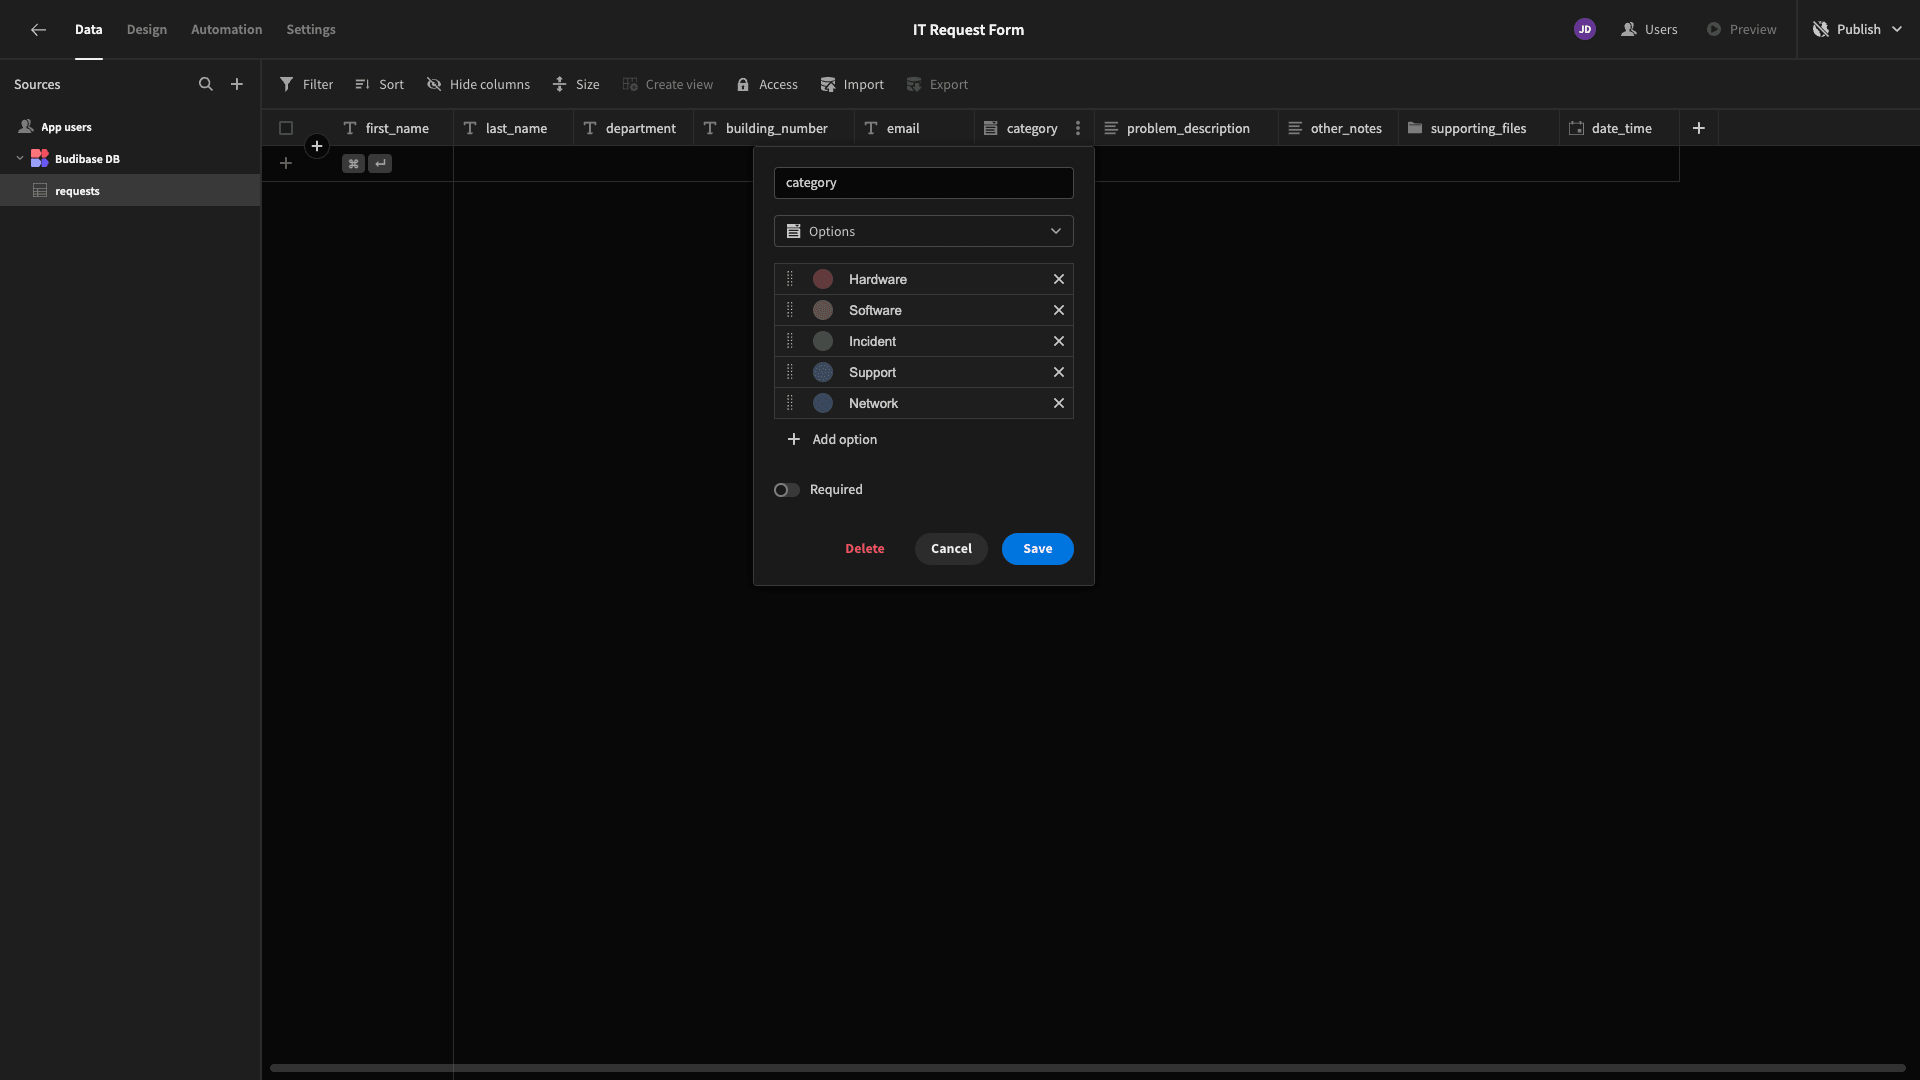
Our category column is an options variable. We need to define what these options are:
Now we’re ready to start building our IT request form’s UI.
2. Building a multi-step form
Head over to the Design tab. Here, we’re offered a few choices for how we want to build our first screen - including using one of Budibase’s pre-built layouts.
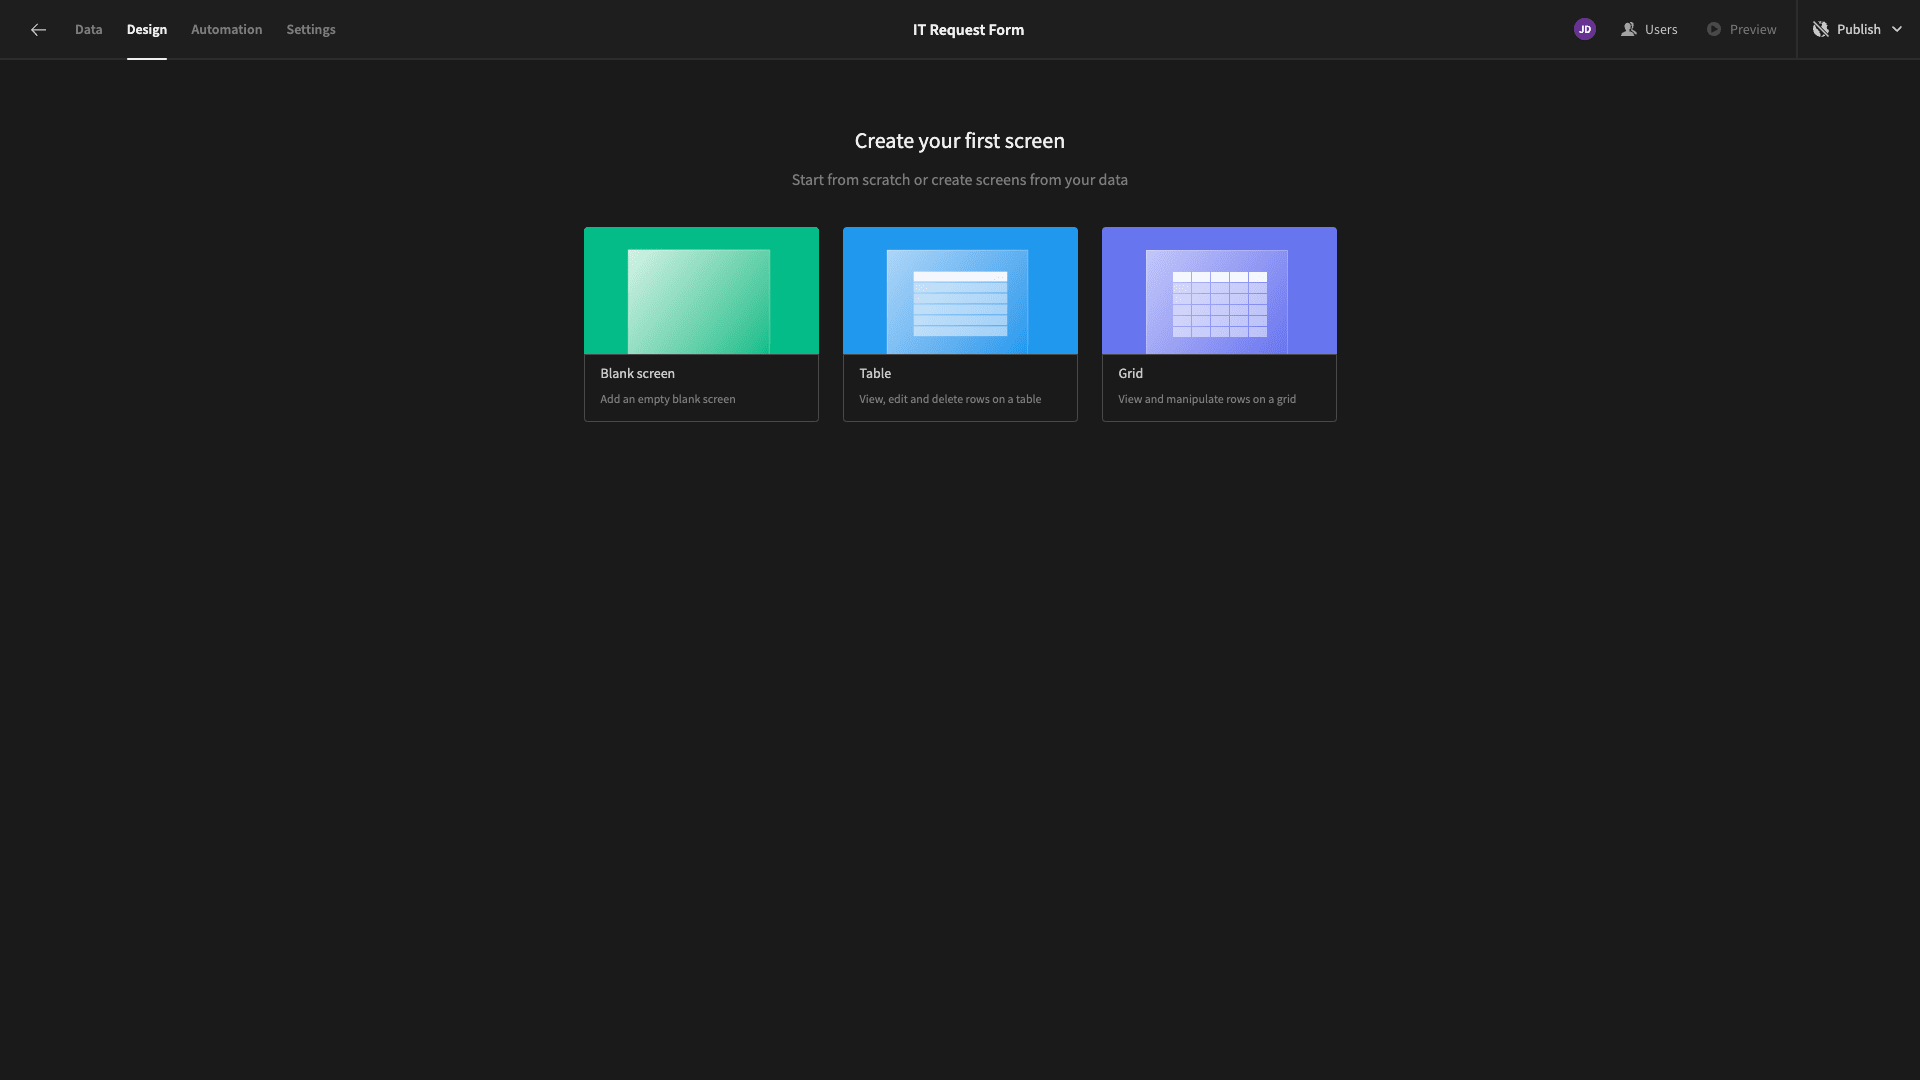
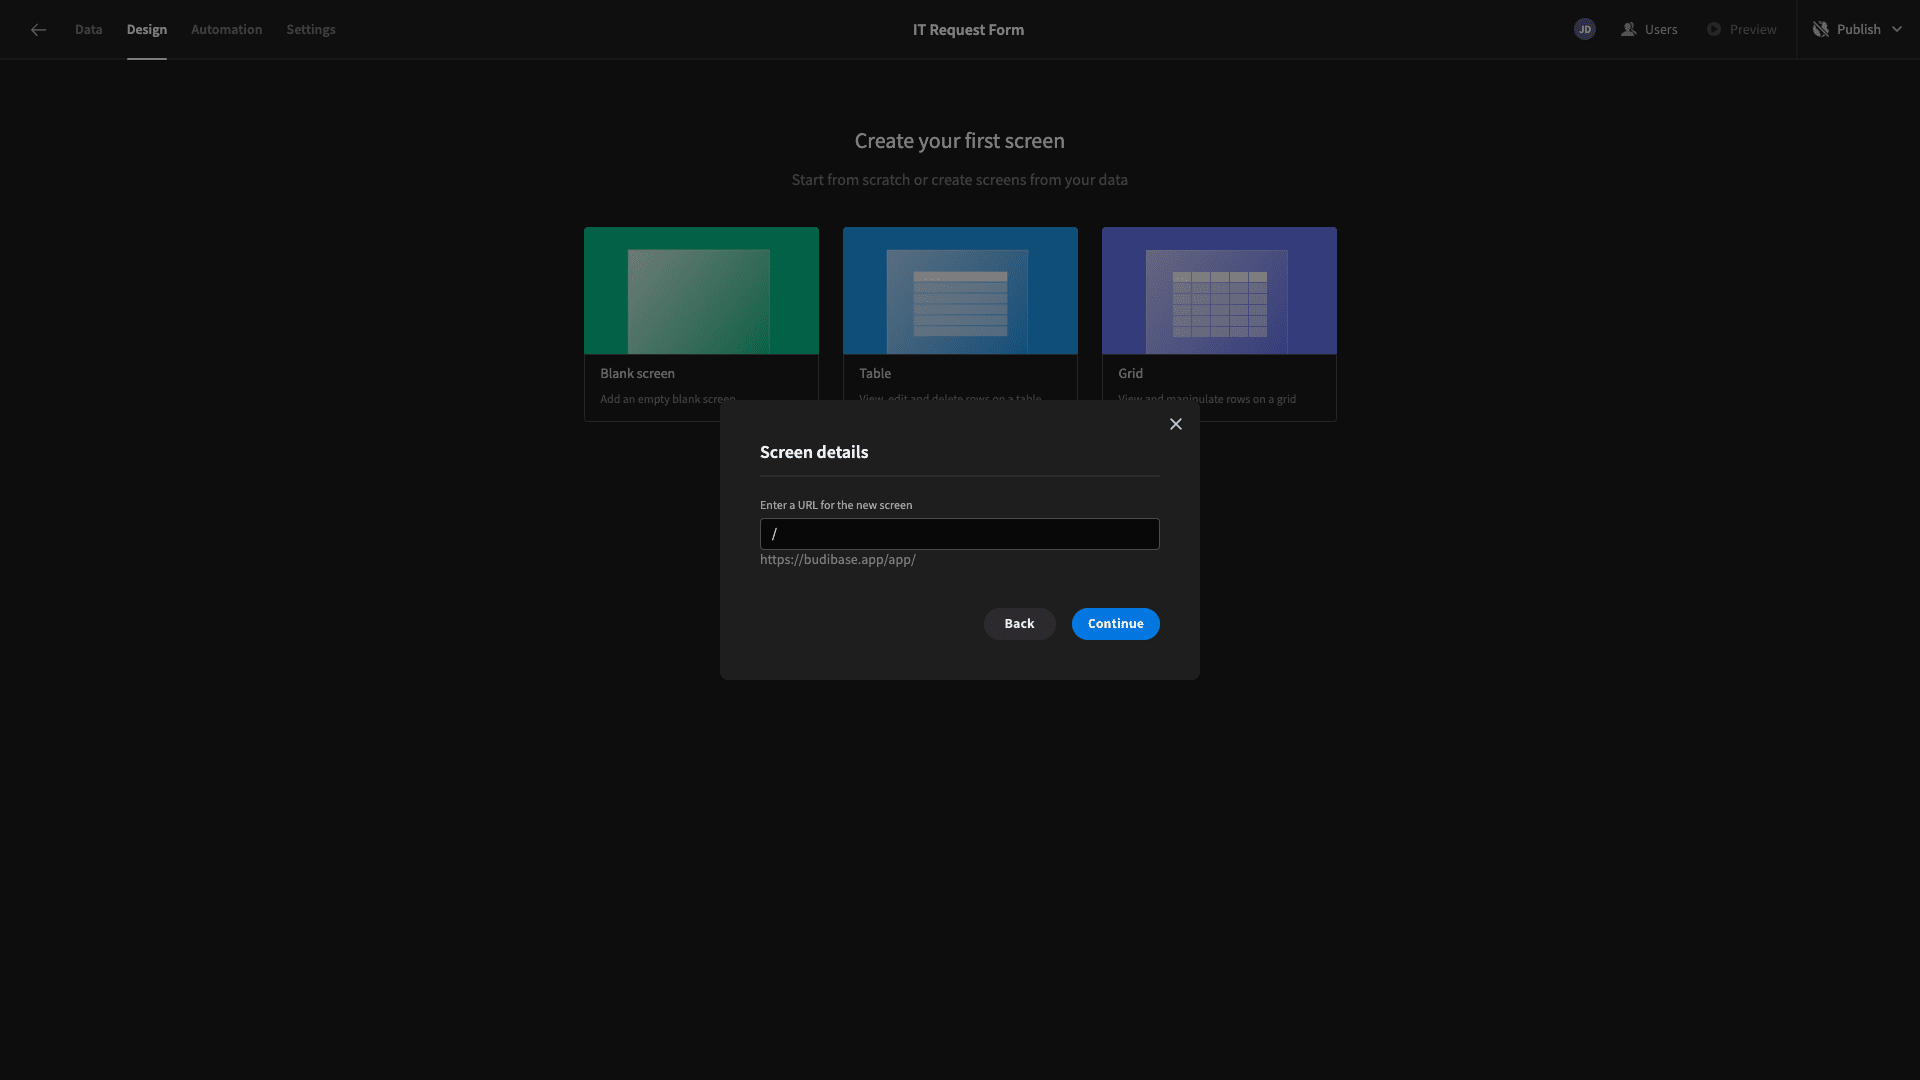
We’re going to start from scratch with a blank screen though. When we choose this option, we’re asked to give our screen a URL path. Since our app will only have one screen, this can be anything:
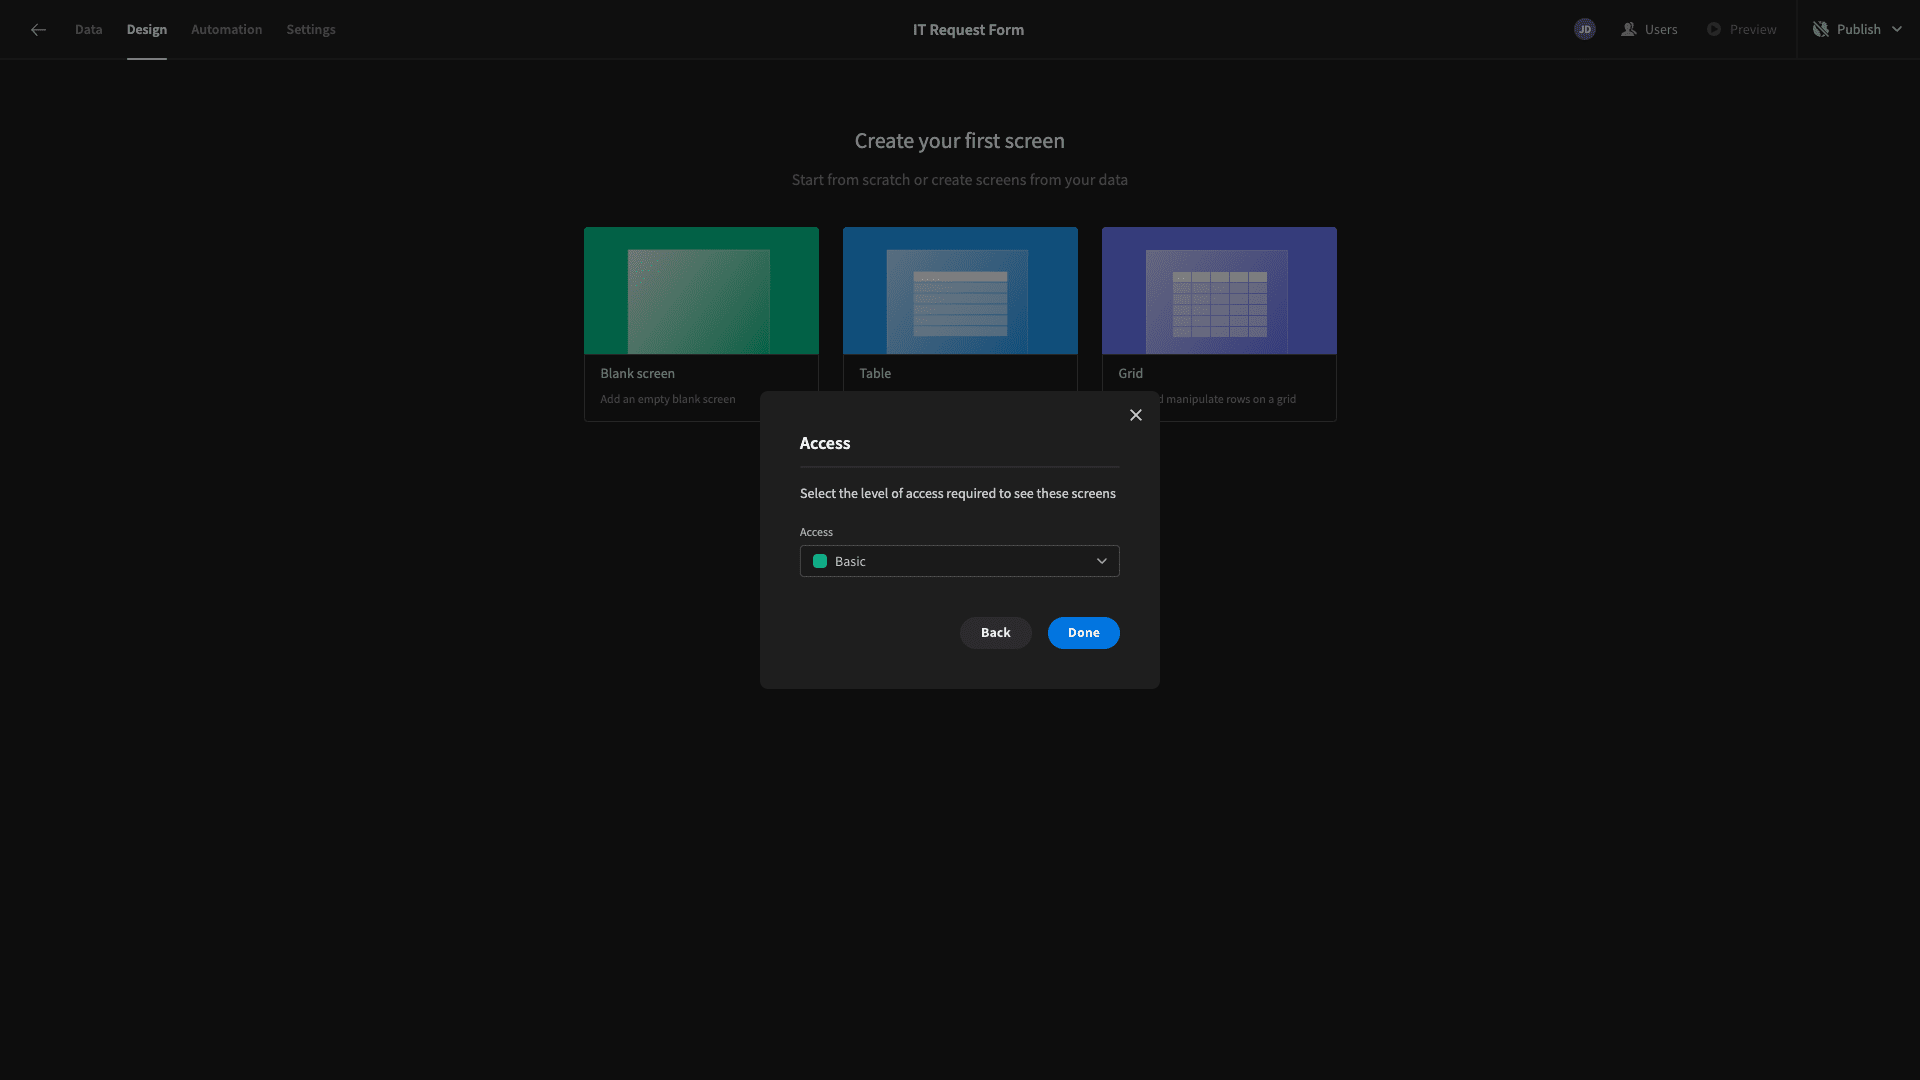
We can also set the minimum access role required to use our screen, but we’re leaving this set to the default option:
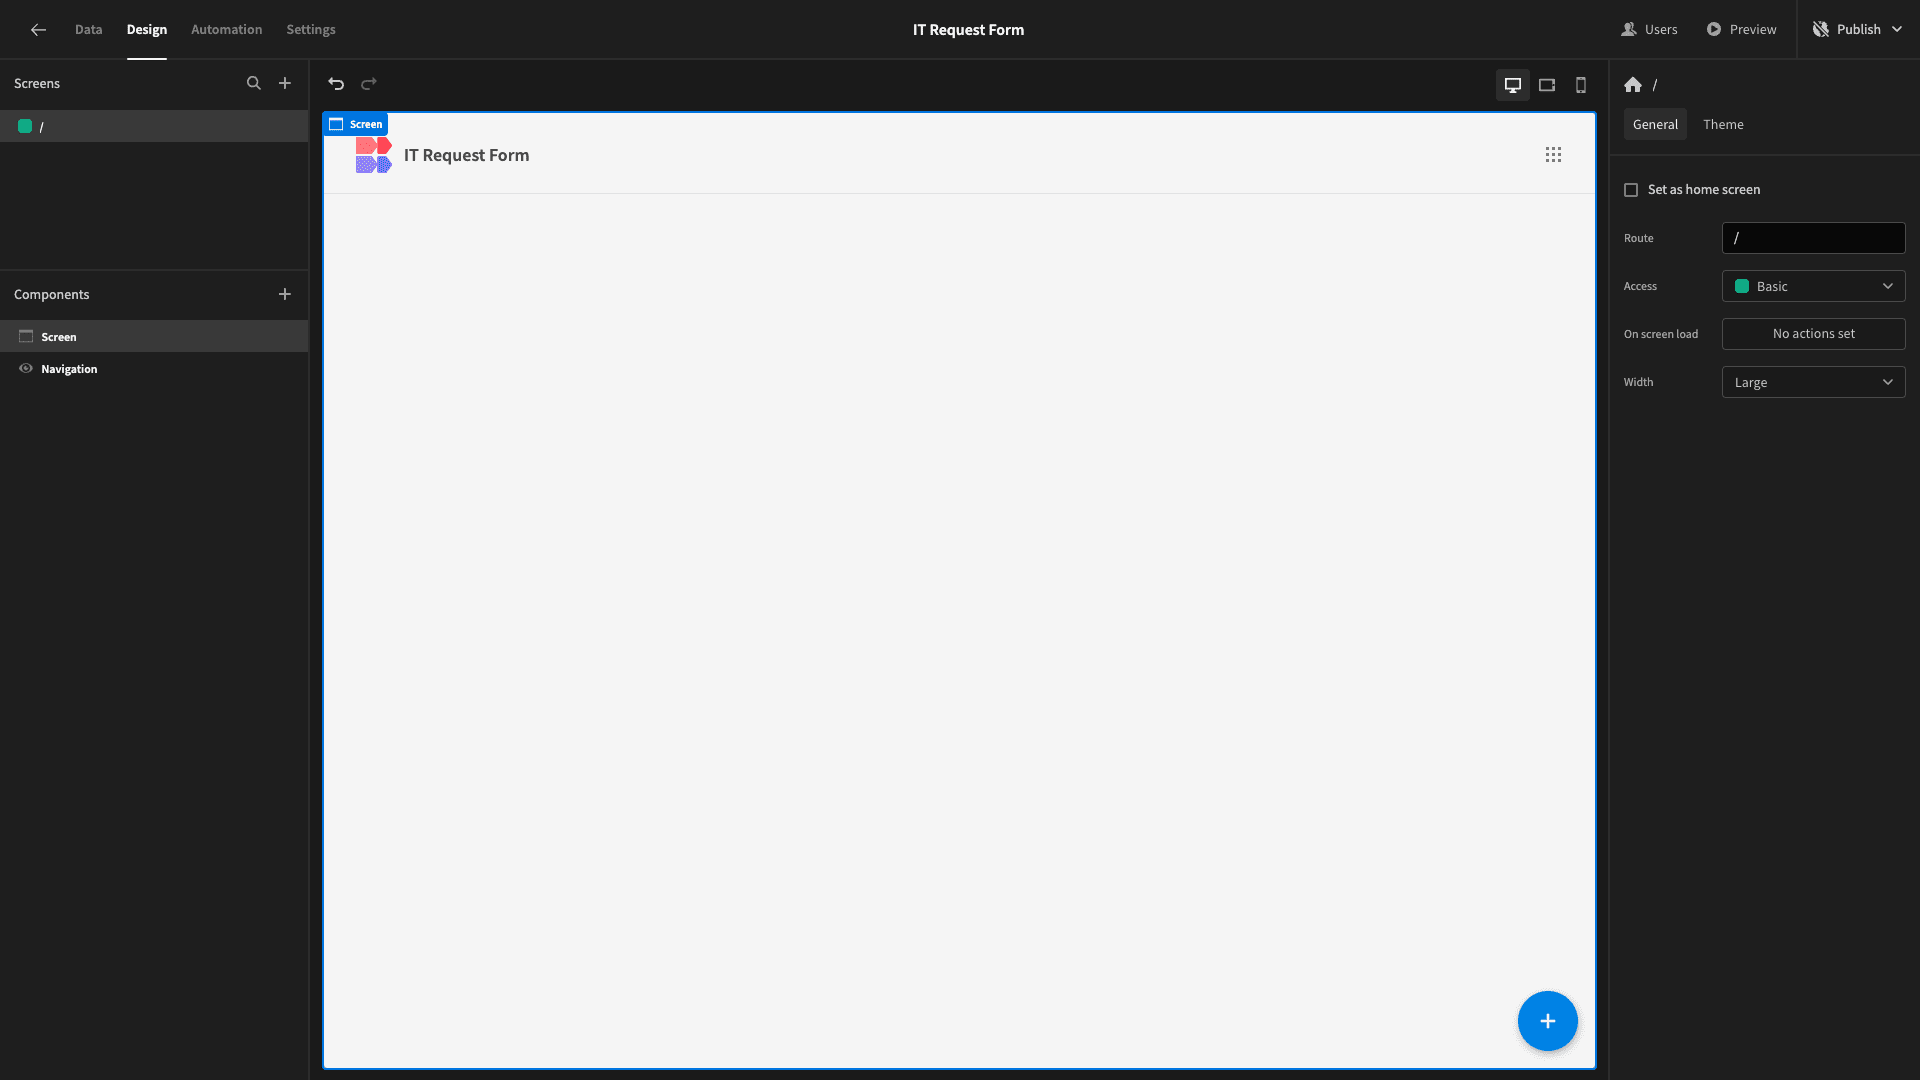
Here’s our blank screen.
We can create our IT request form by adding a single component. We’ll add a multi-step form block. This is a preconfigured set of UI elements that generates a form based on the data table we point it at:
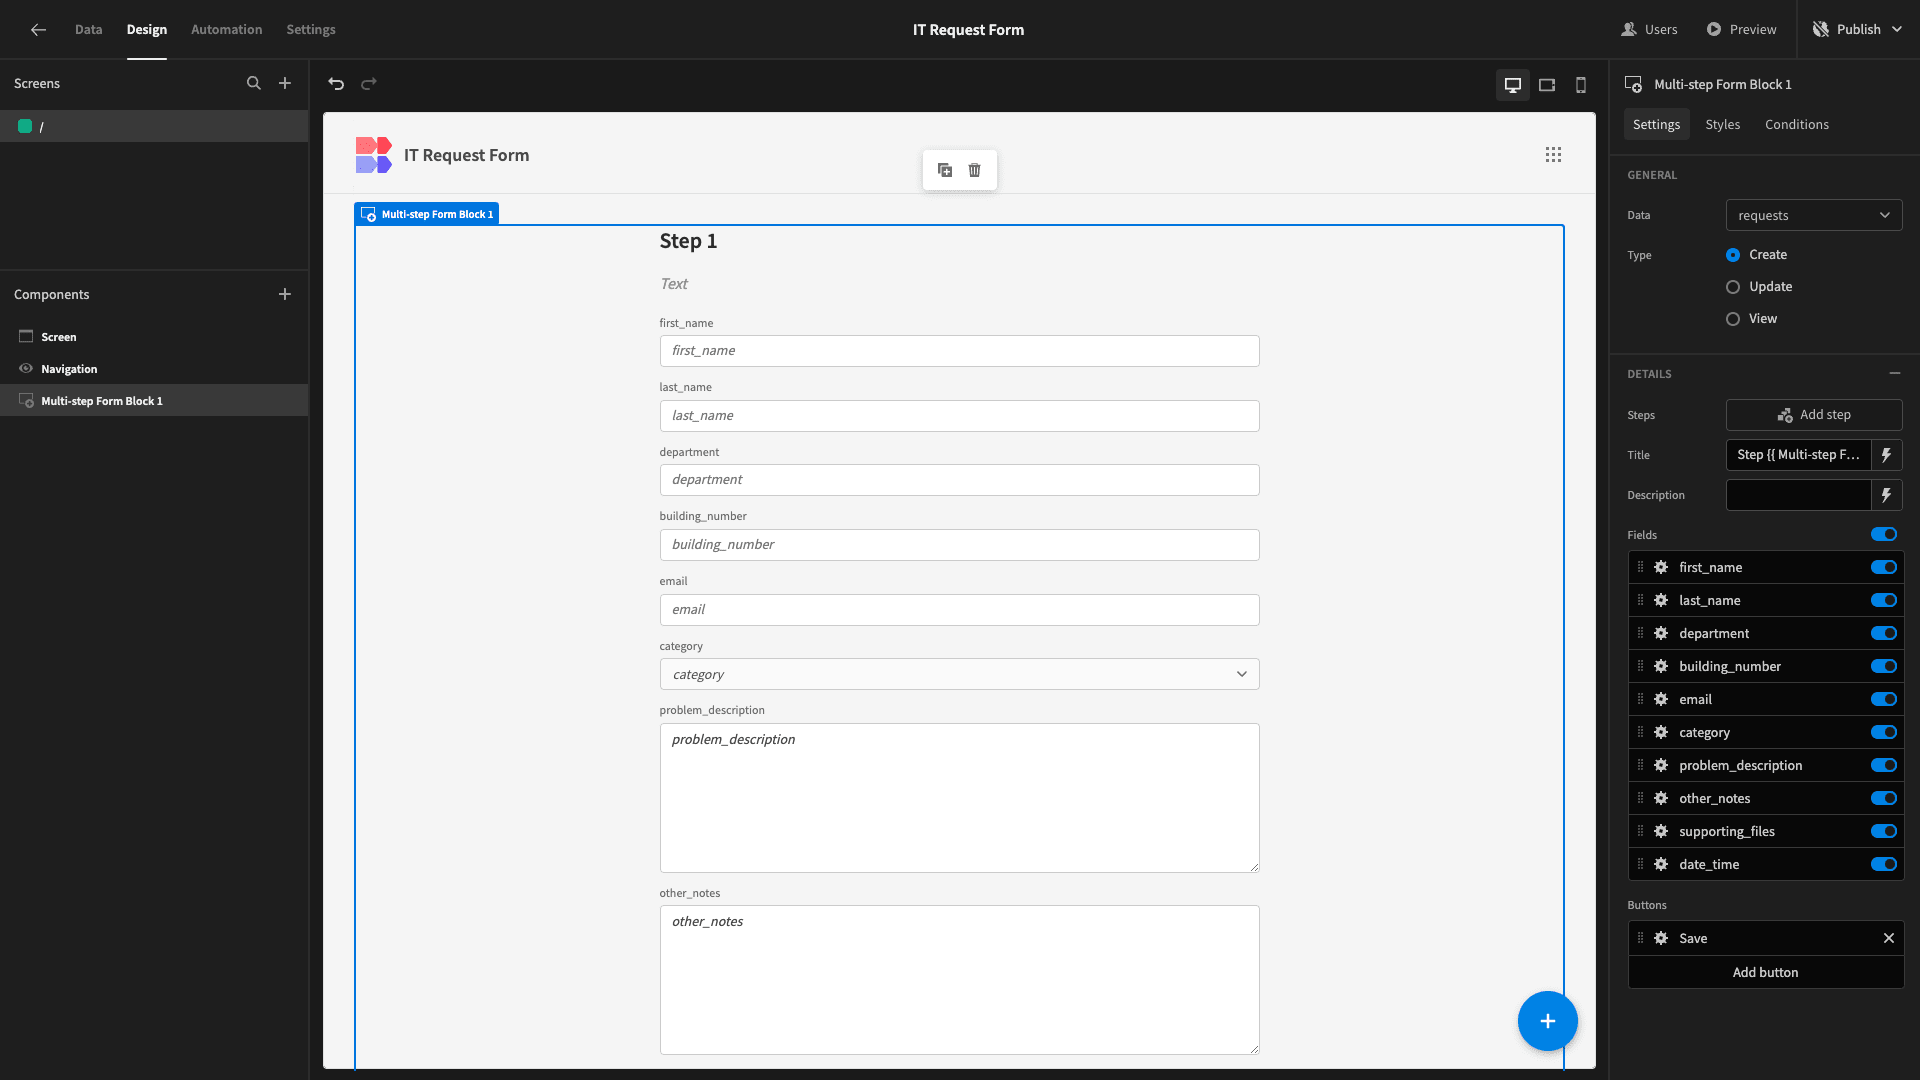
By default, our form only has one step, featuring every column in our database schema.
Our first task is to arrange our form fields into logical groupings on each step.
We want the first step to contain the fields for first_name, last_name, department, building_number, and email.
So, we’ll deselect everything except for these five fields:
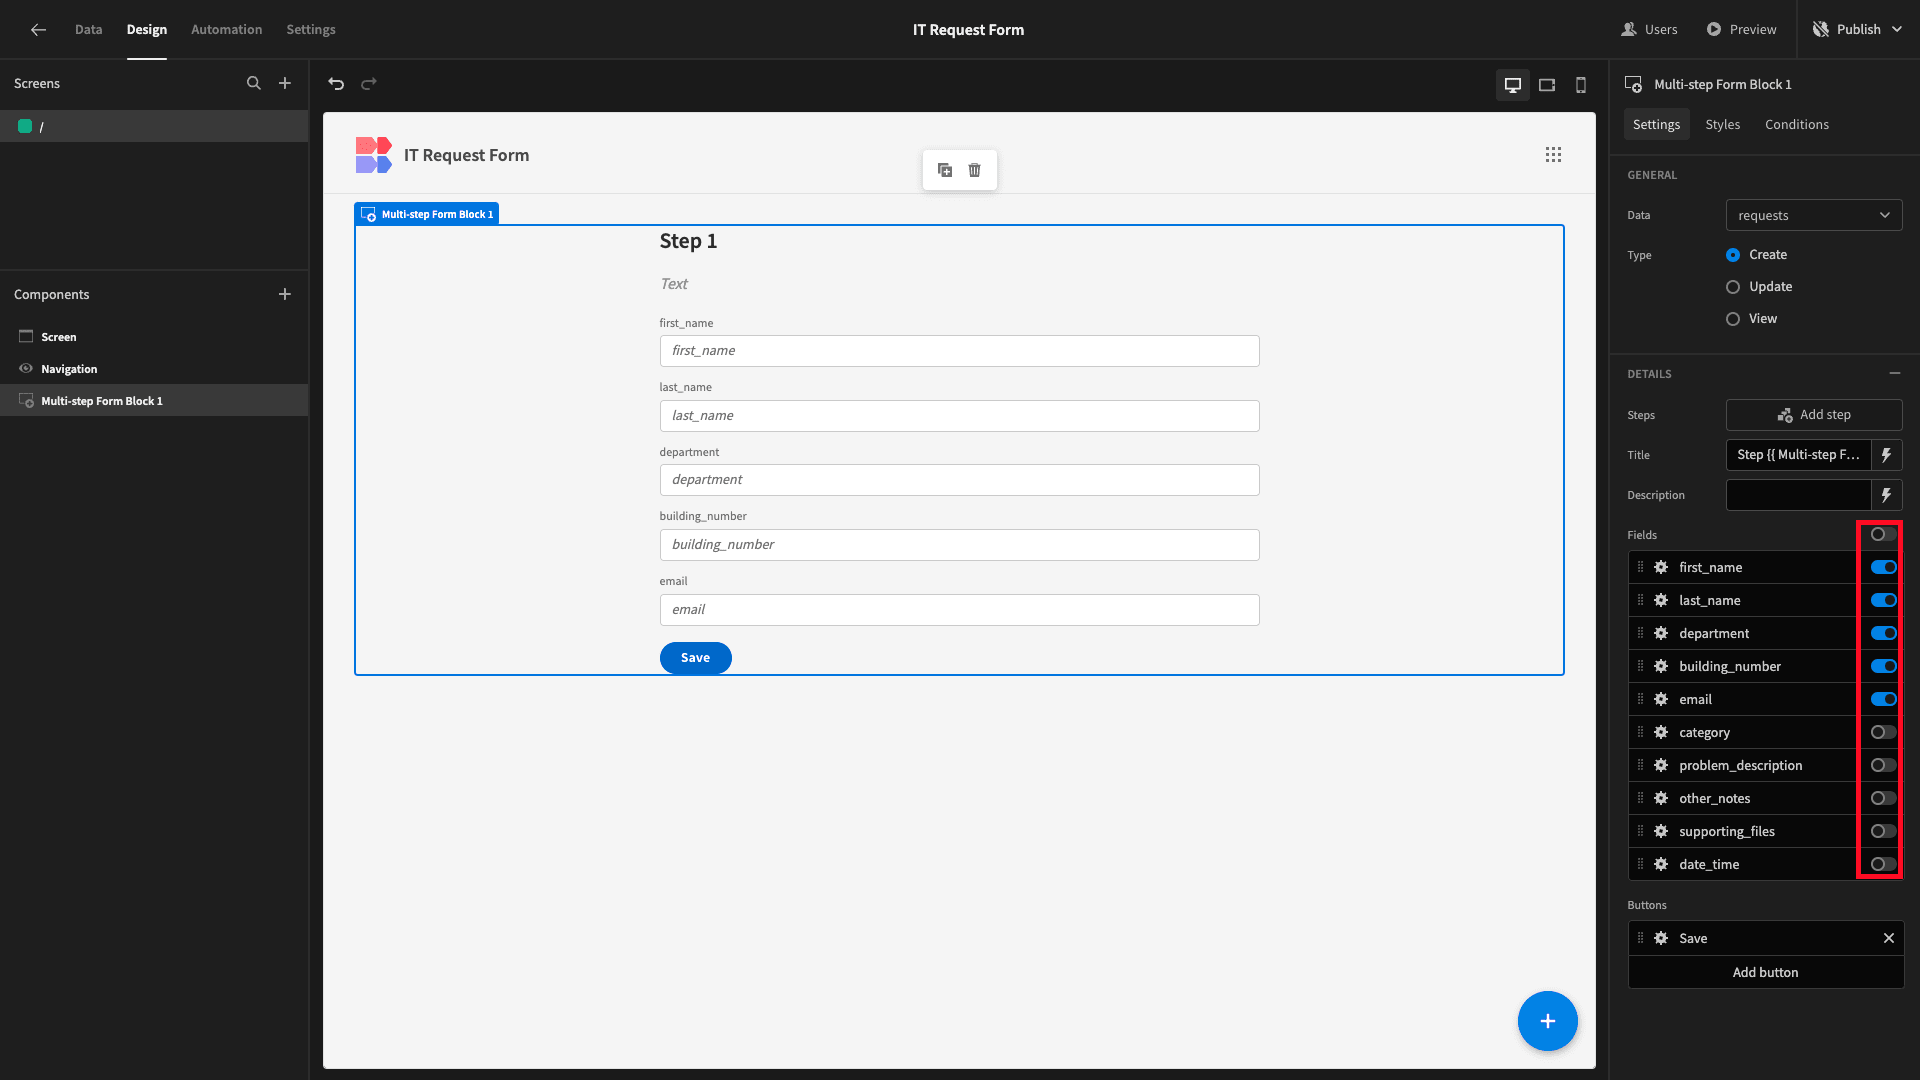
This is a good start. However, these fields probably don’t need to take up so much horizontal space.
We’ll use the Layout option under each to arrange them into two columns:
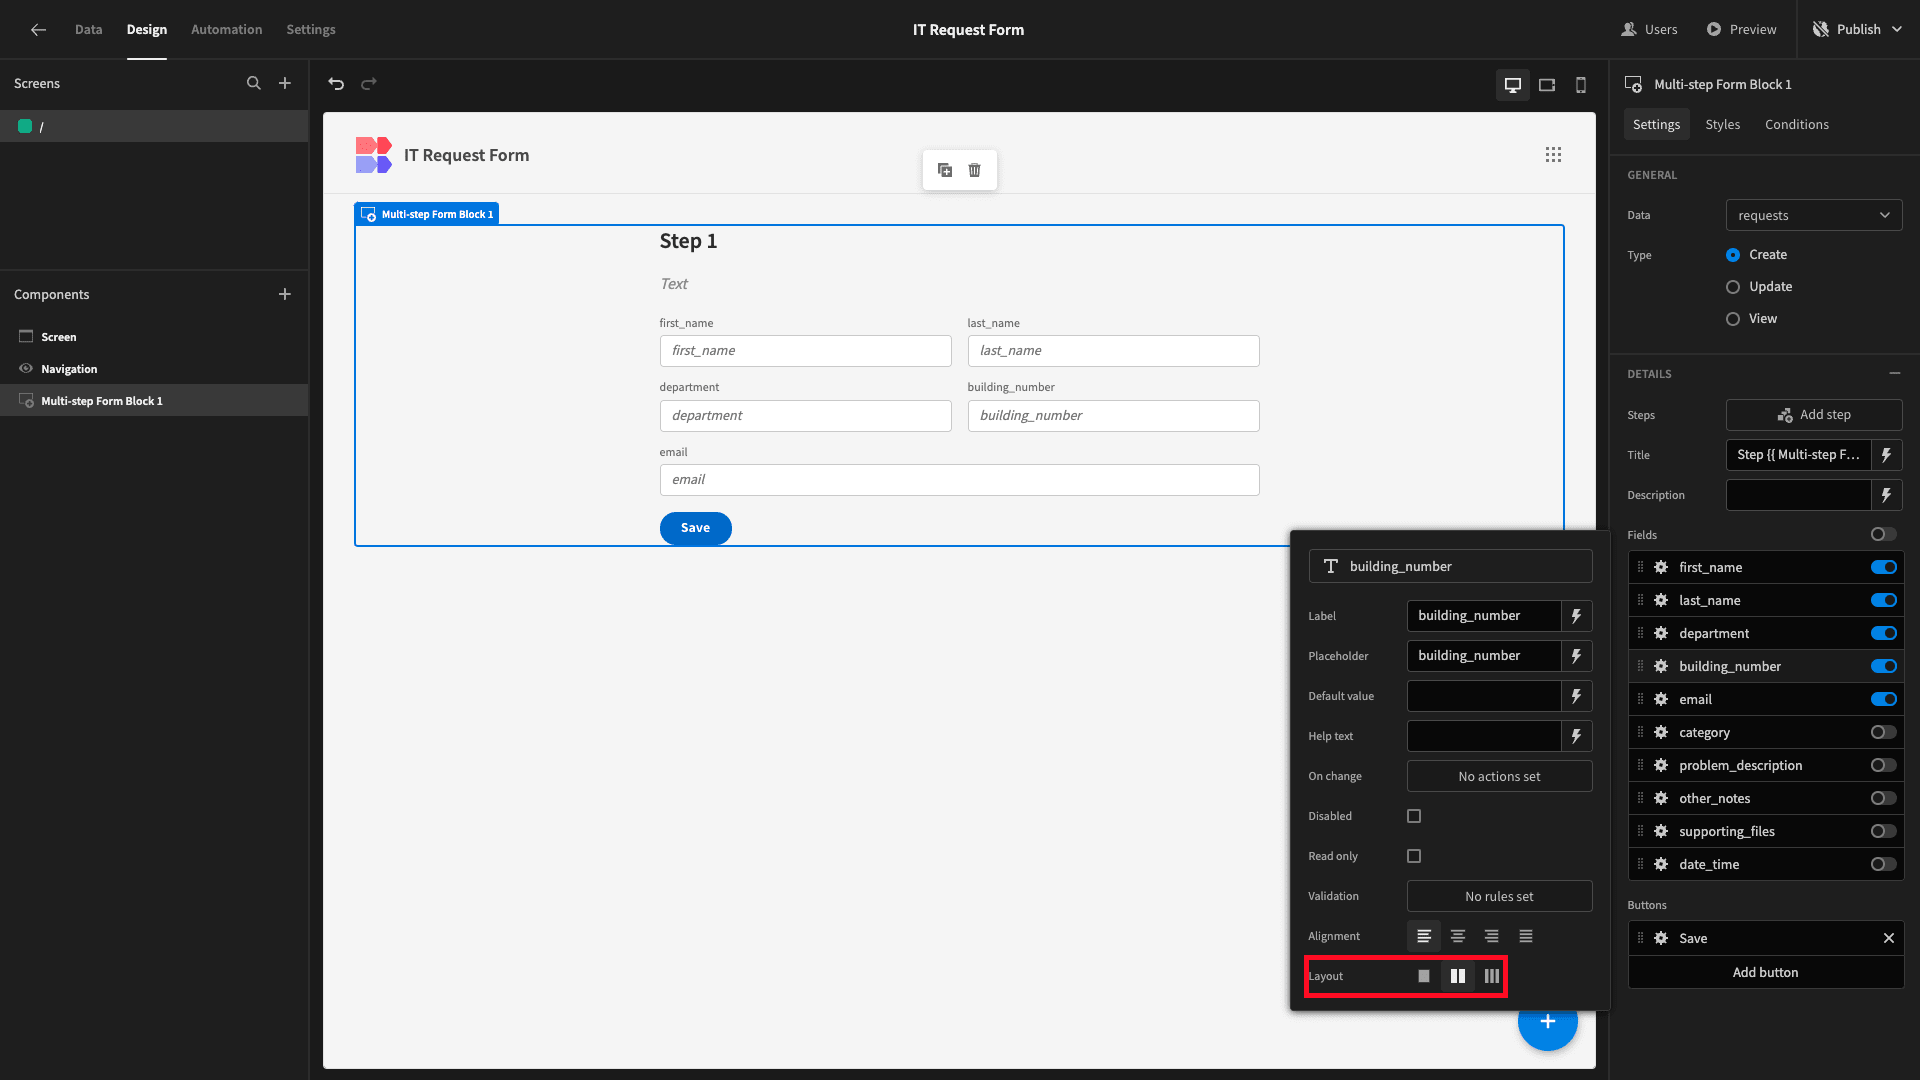
That’s better.
Next, we’ll hit Add Step:
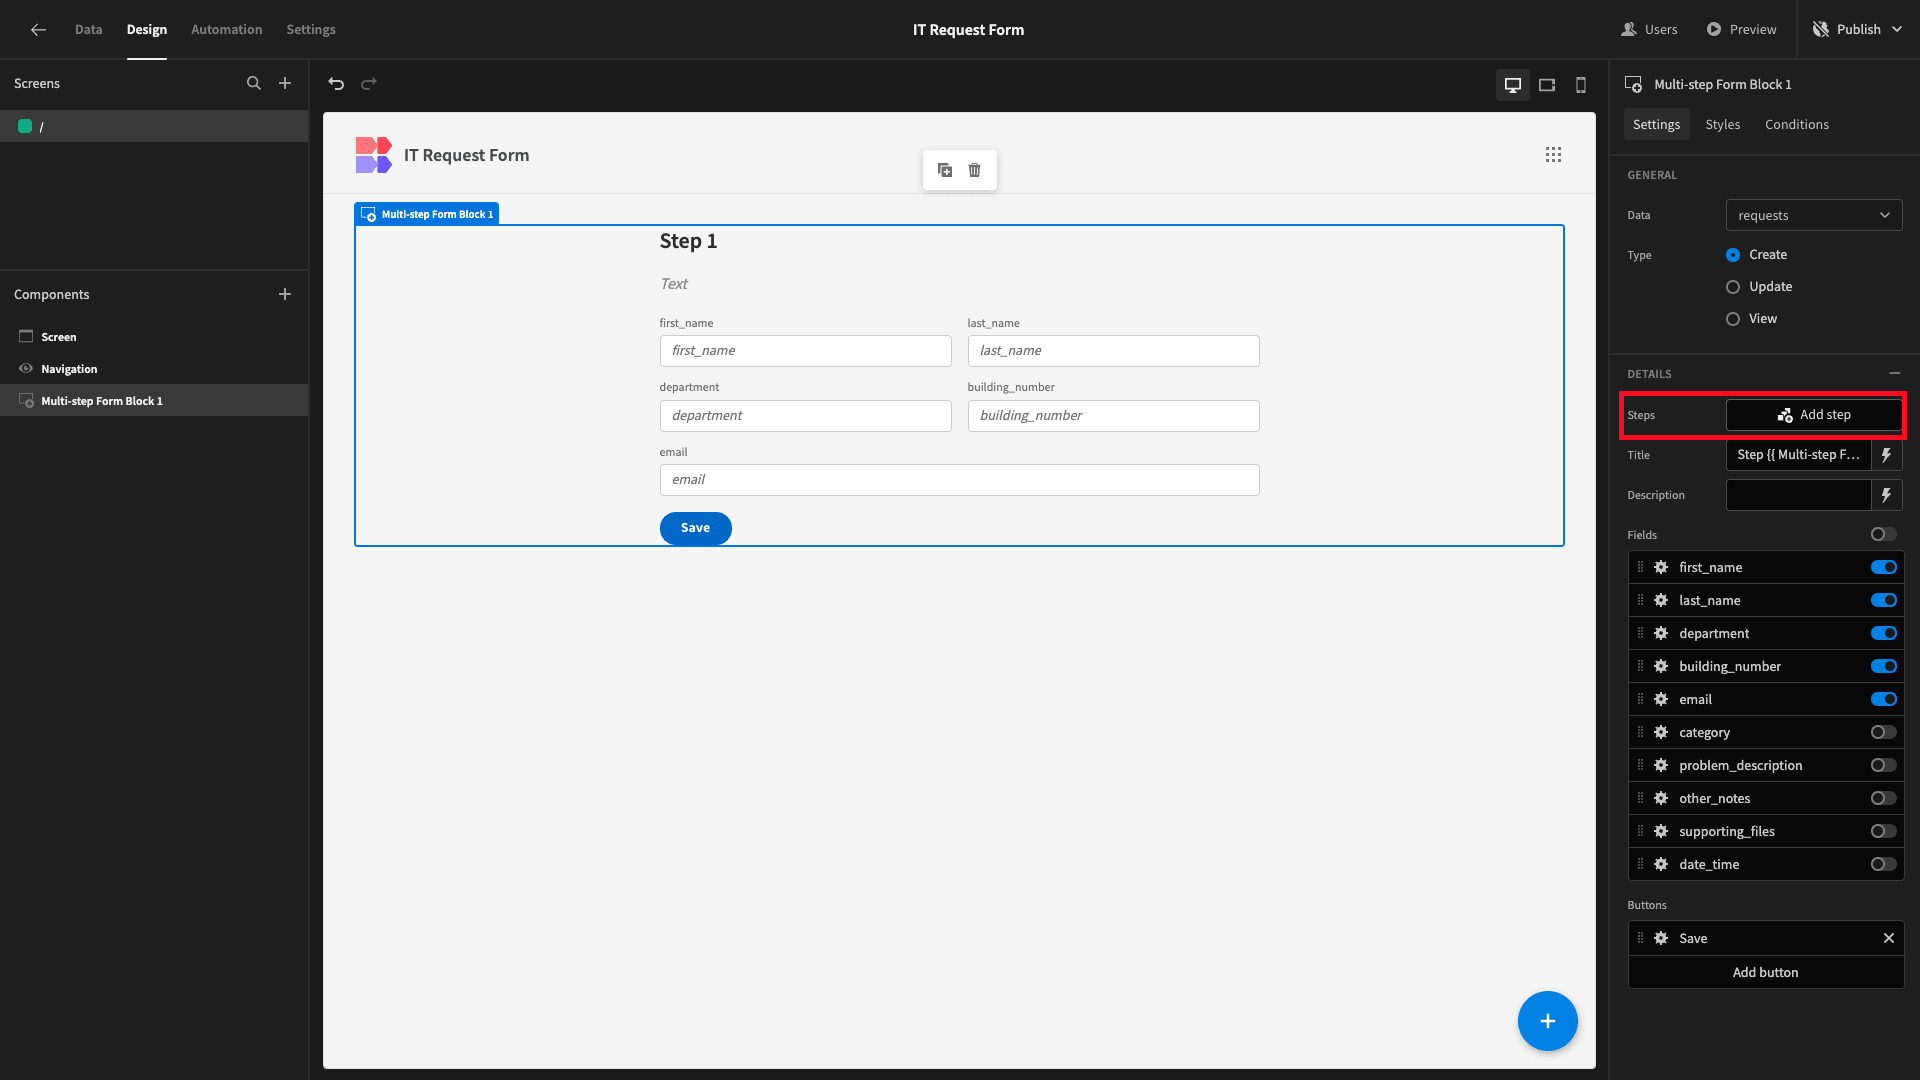
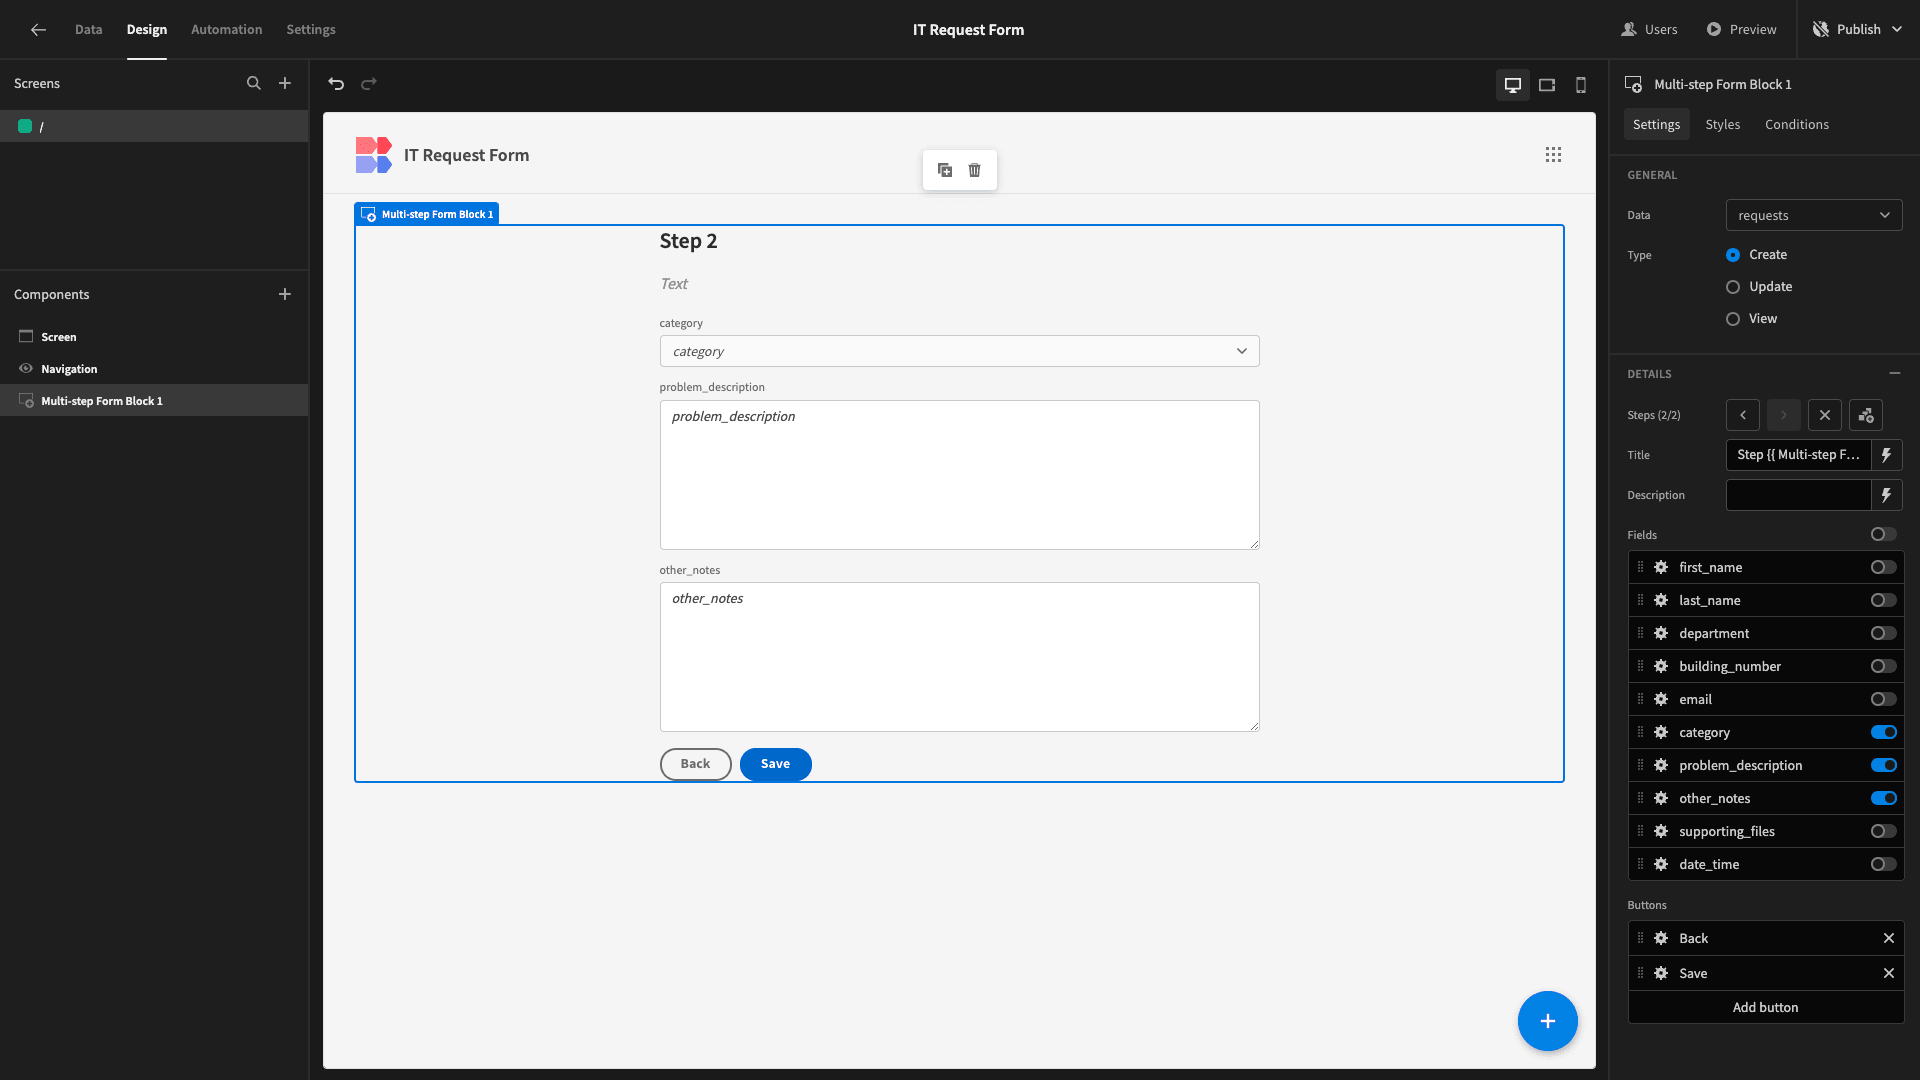
For our second step, we want to include category, problem_description, and other_notes.
Lastly, we’ll add a third form step, which will contain our supporting_files attribute:
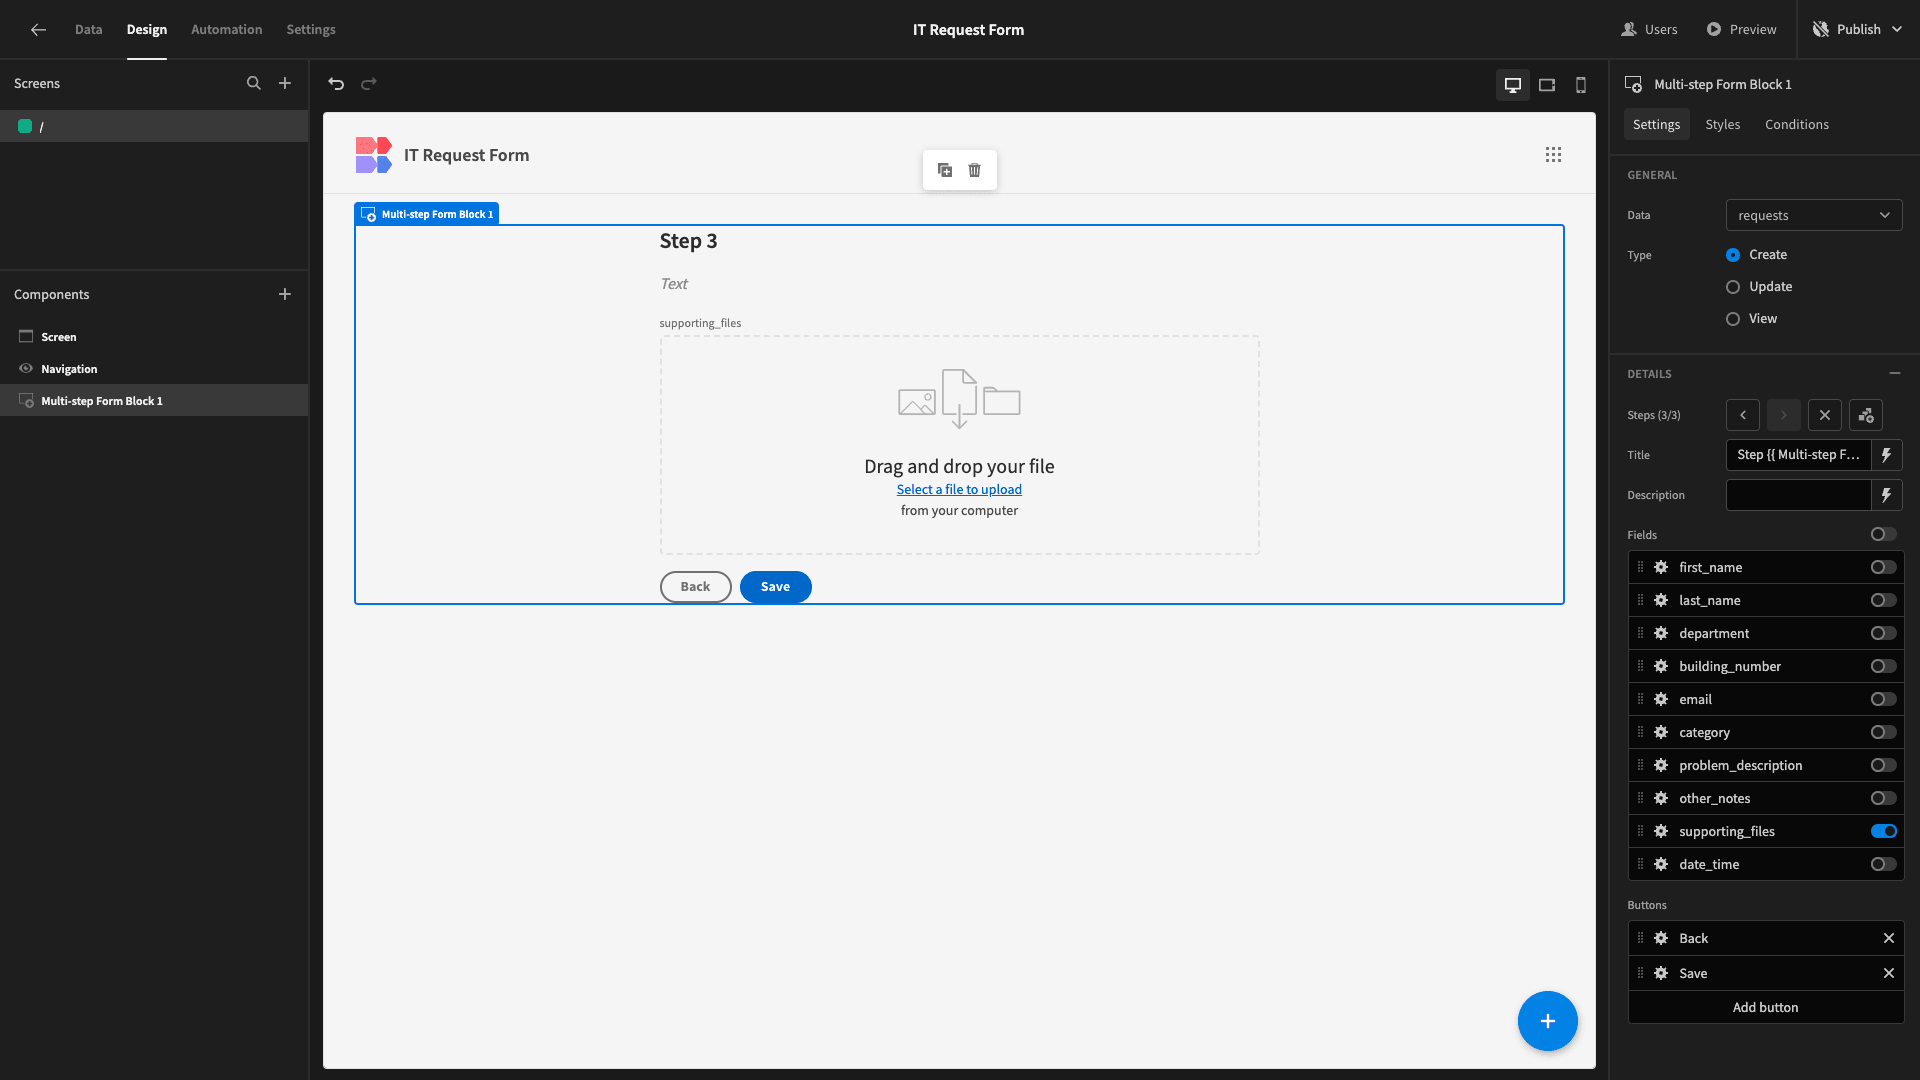
Note that our data table contains a column called date_time which we haven’t included in our form. We’ll see how to add a value from this without requiring users to specify it a little bit later.
3. Perfecting our form UX
Now our IT request form is perfectly functional, we still have scope to improve its user experience.
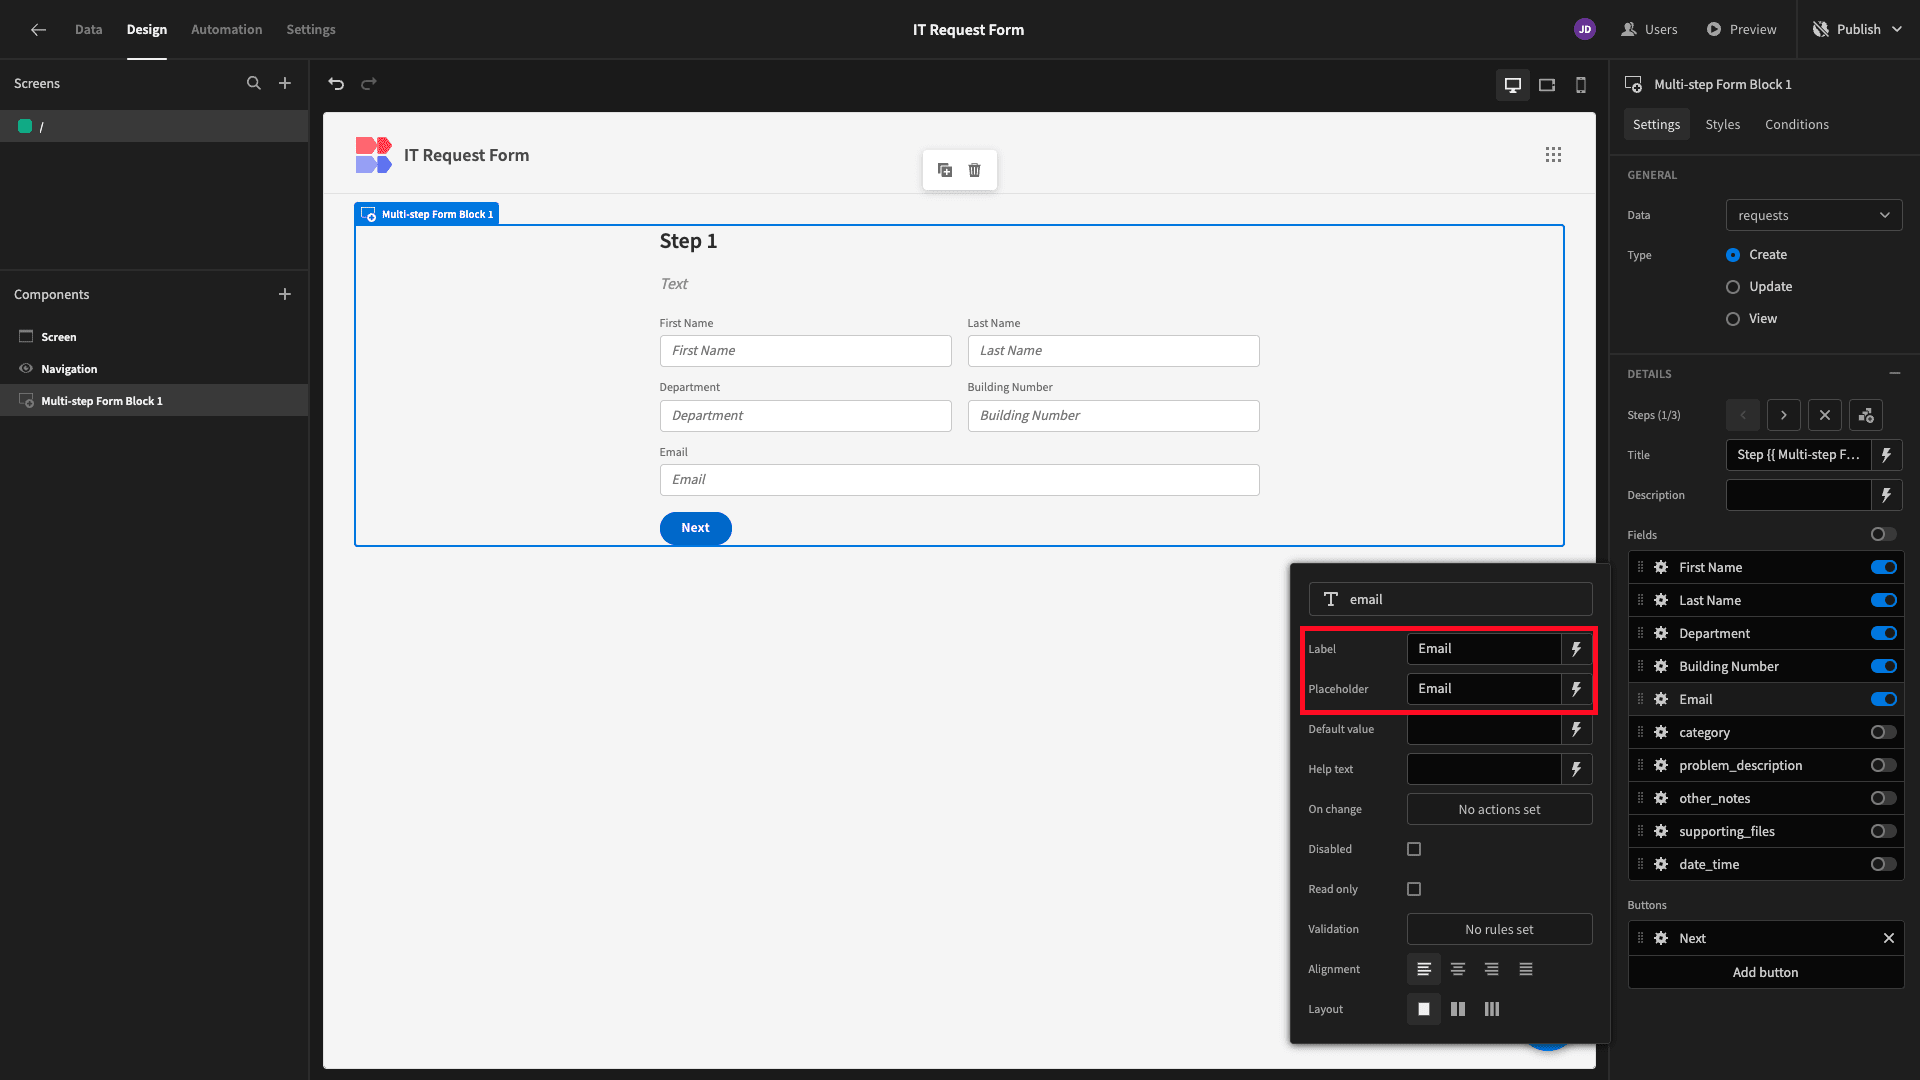
We’re going to start by replacing the Label and Placeholder text for each form field with more human-readable copy, rather than the name of the columns in our data table:
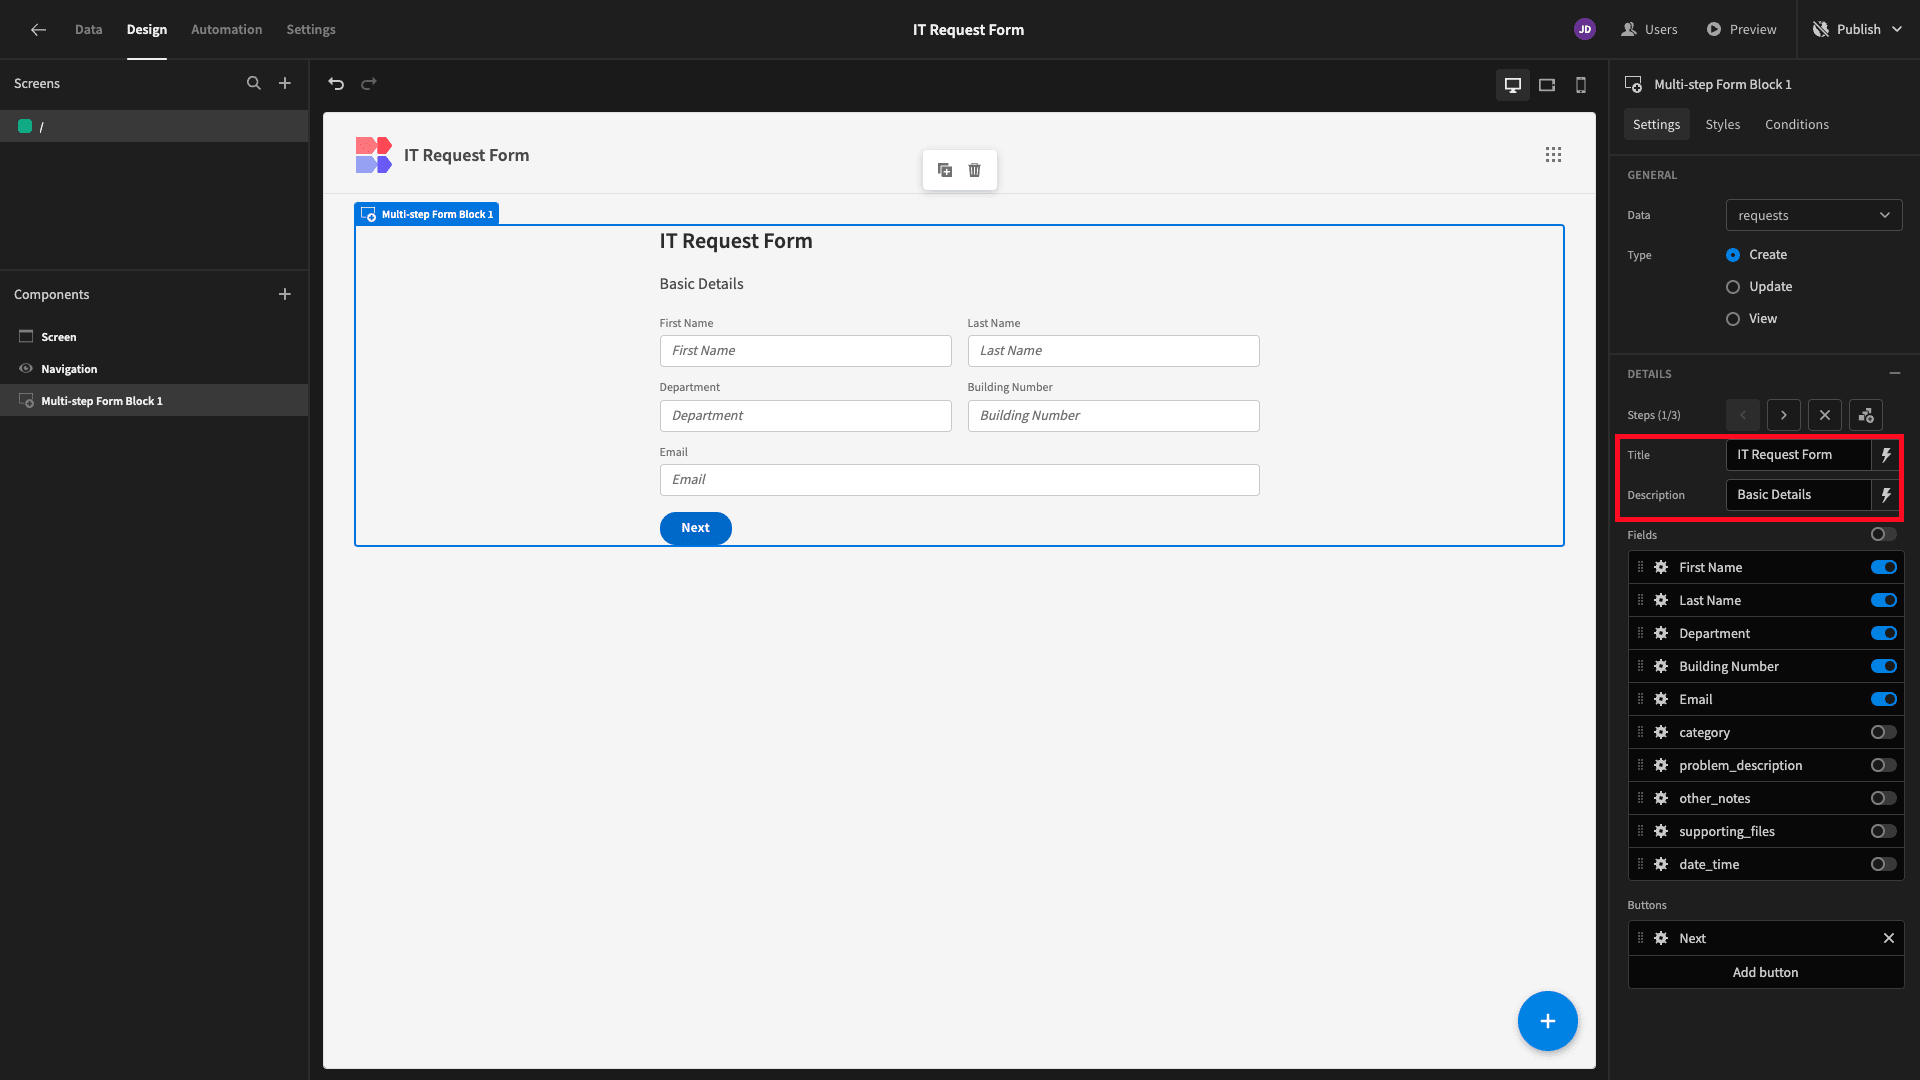
We’ll also add more descriptive Title and Description texts to each of our form steps:
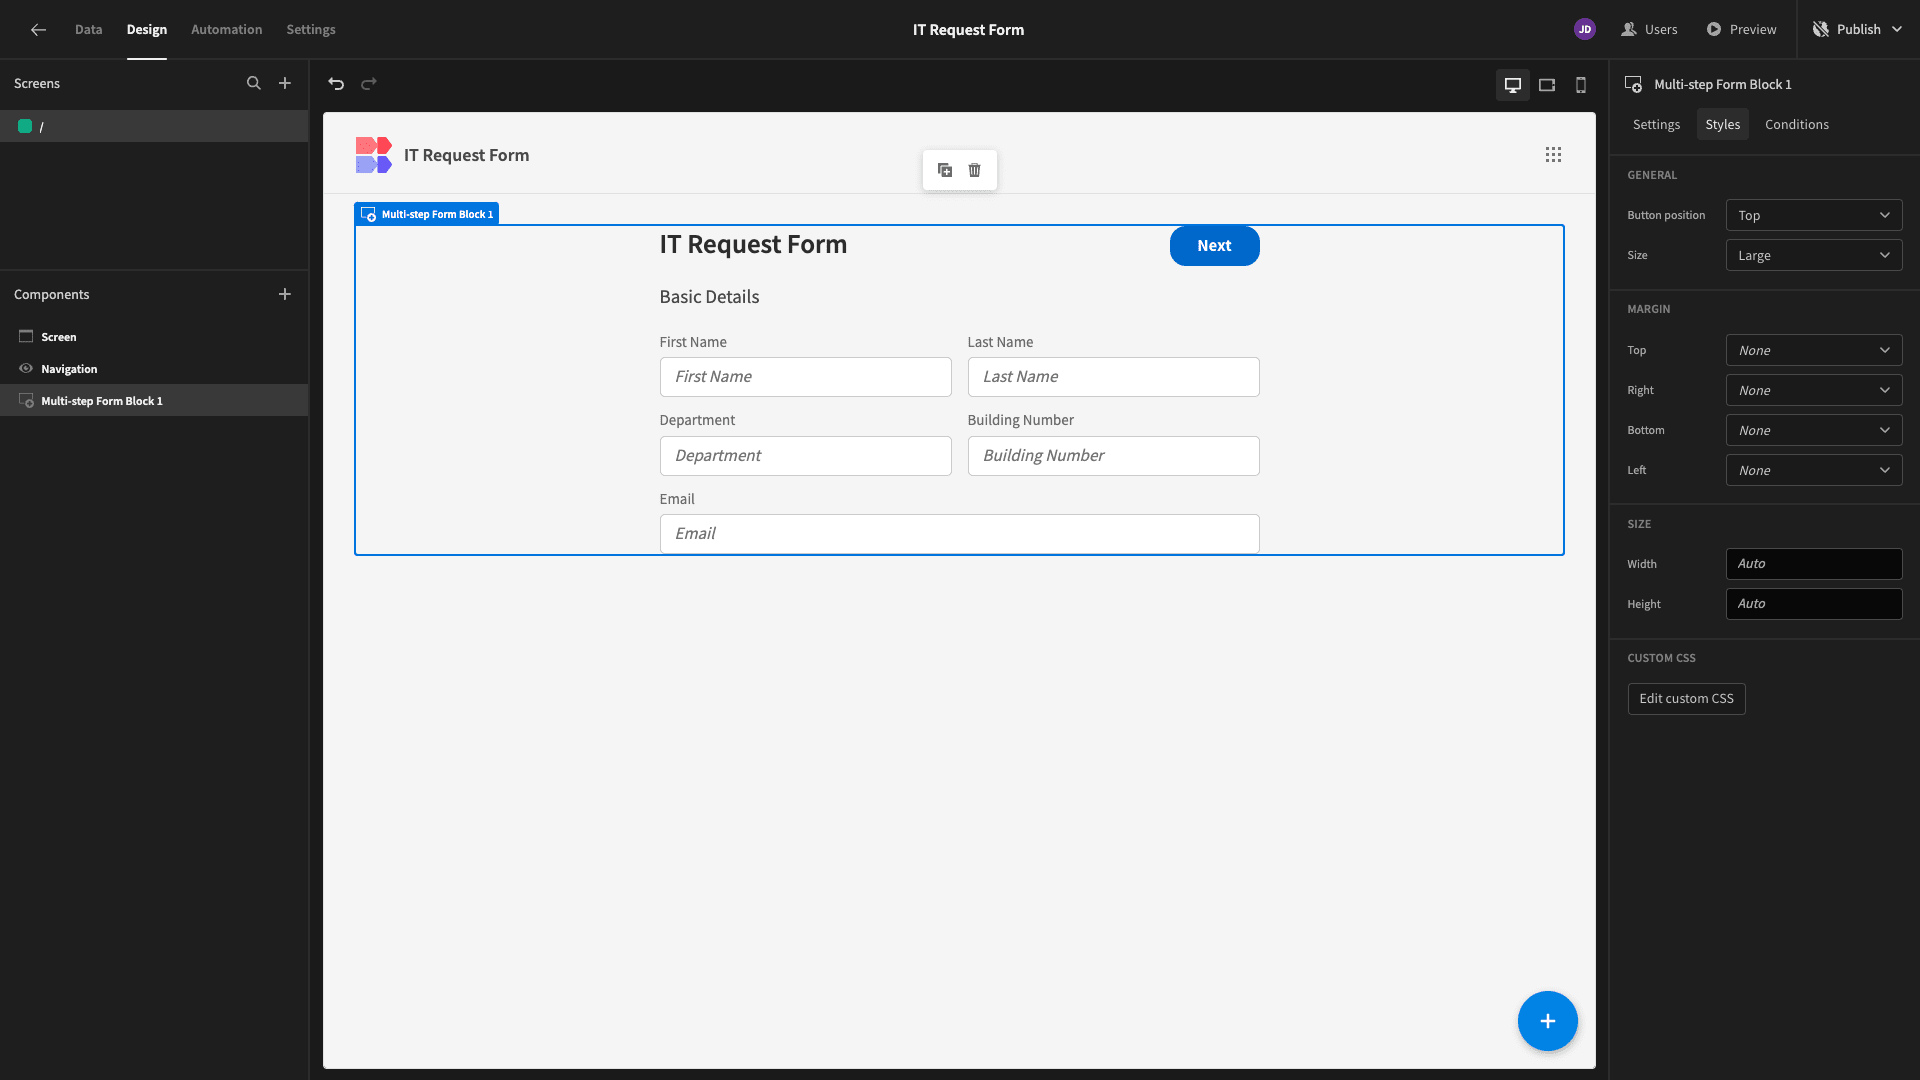
Lastly, under Styles, we’re going to set the Size option to Large and the Button Position to Top:
4. Auto-populating data
One of Budibase’s huge strengths when it comes to building forms is the power to add extensive front-end scripting to use contextual information to automatically populate different fields.
We can do this using JavaScript or our built-in library of handlebars helpers.
We’re going to start by using the current user’s details to provide default values for the first and last name fields.
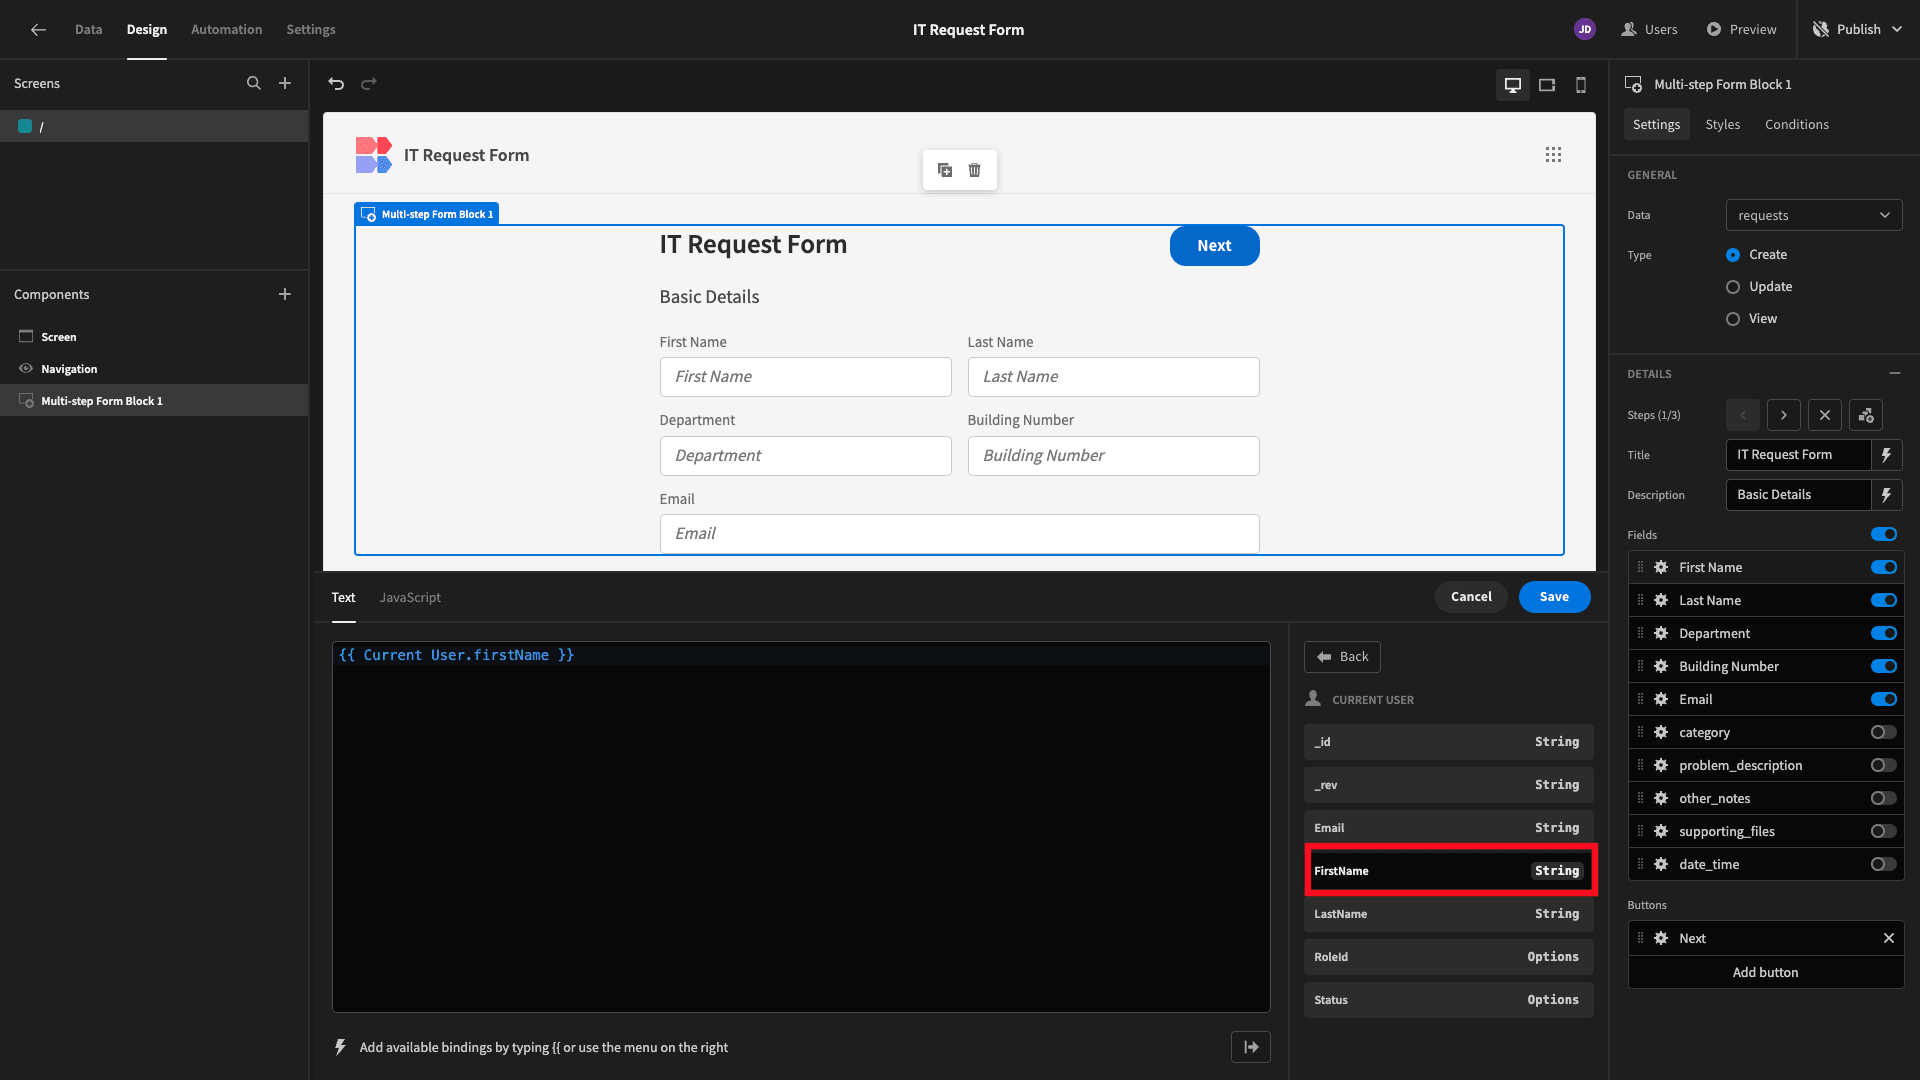
Use the lightning bolt beside the Default Value field to open the bindings drawer:
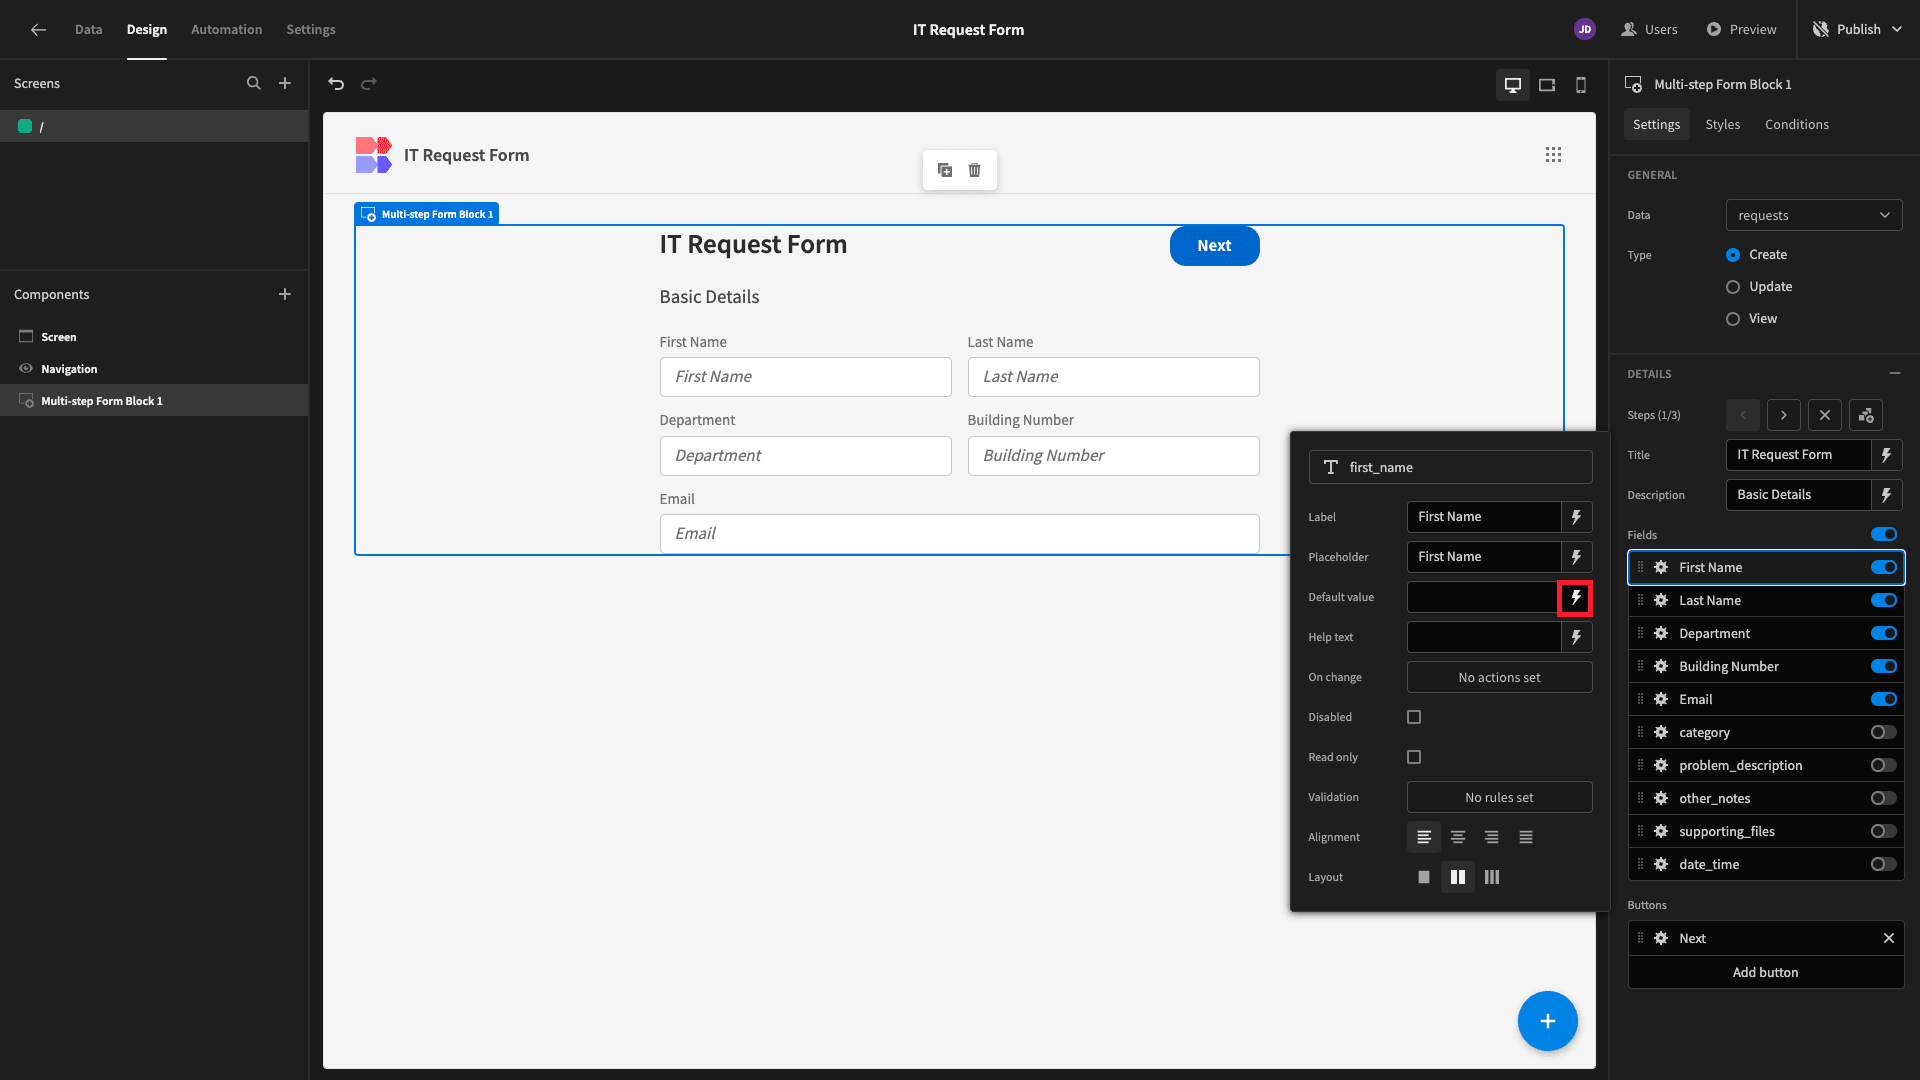
Then, under Current User, we’ll choose First Name and Last Name, respectively.
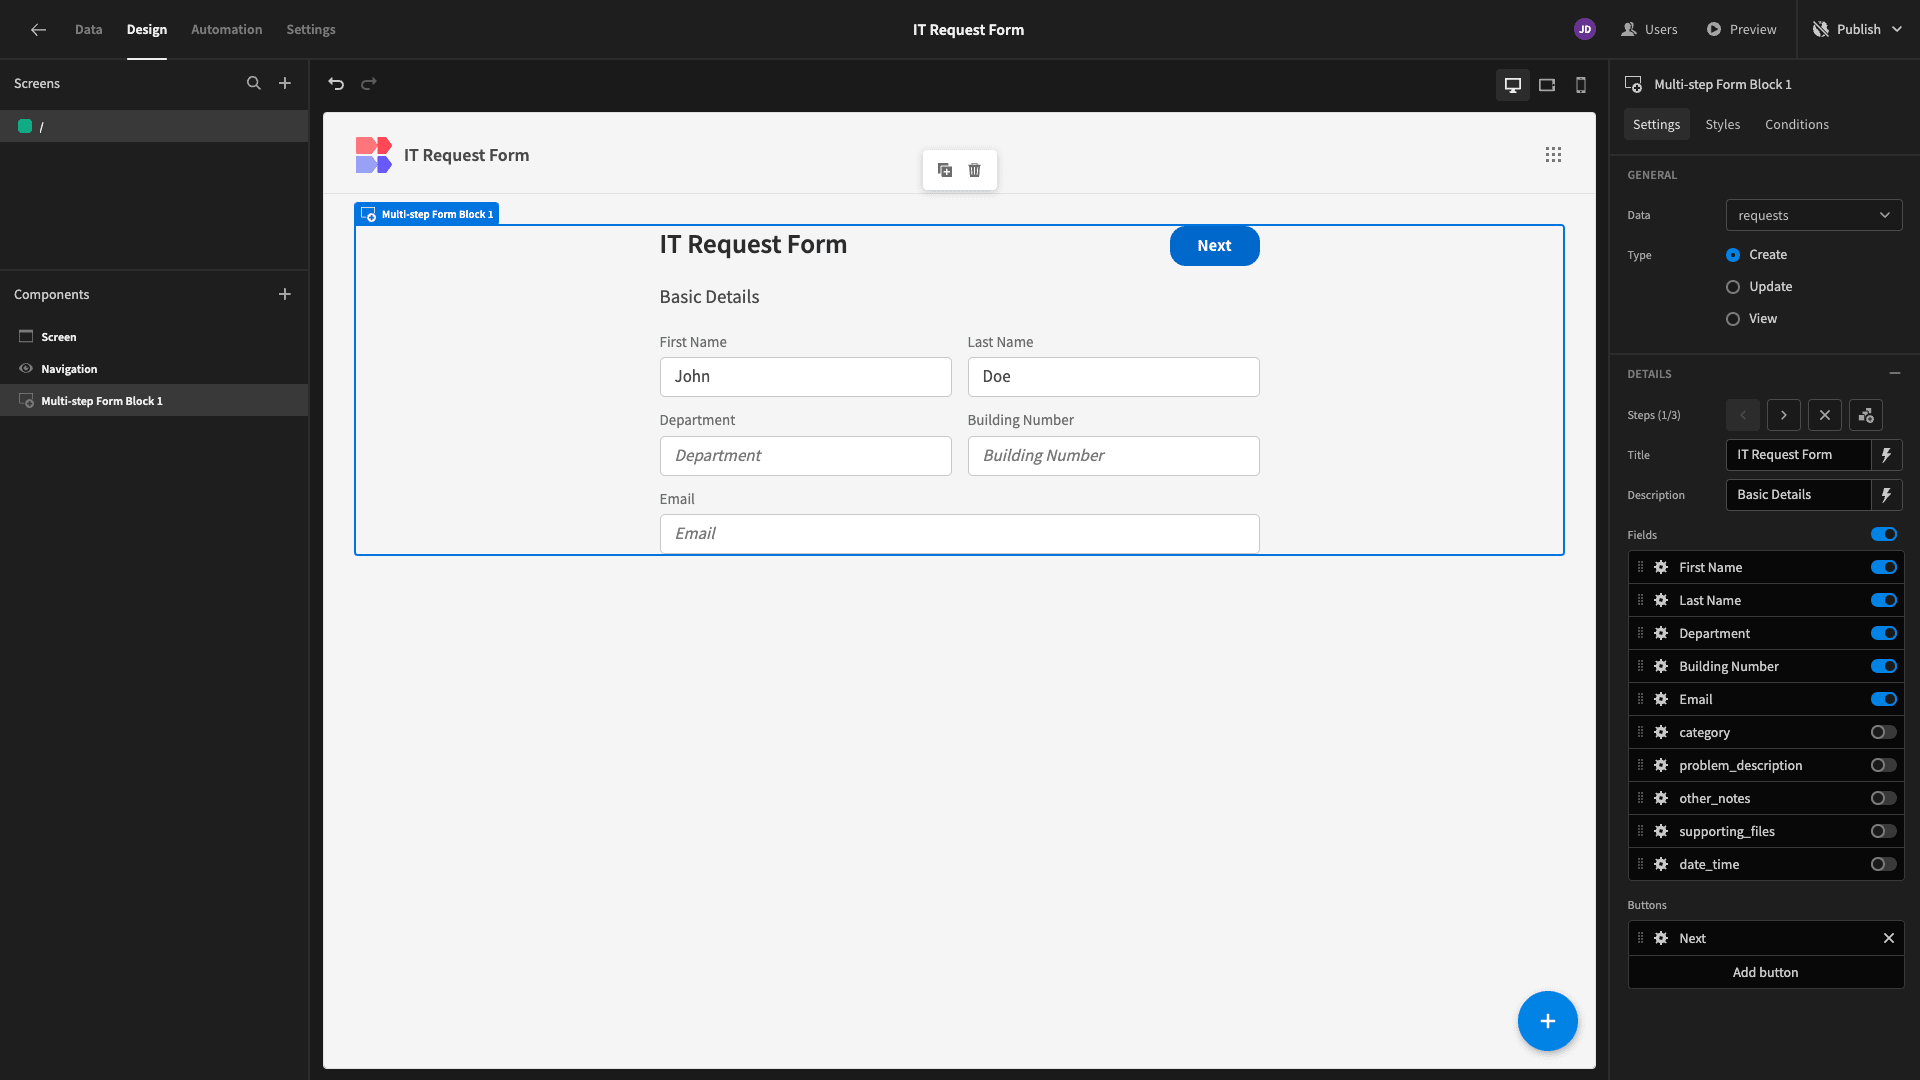
Now, these are auto-populated for users, but they can be overridden:
Lastly, we need to provide some logic so that a value is saved for our date_time attribute without being specified by the user.
Head to the final form step and open the Save button’s actions drawer:
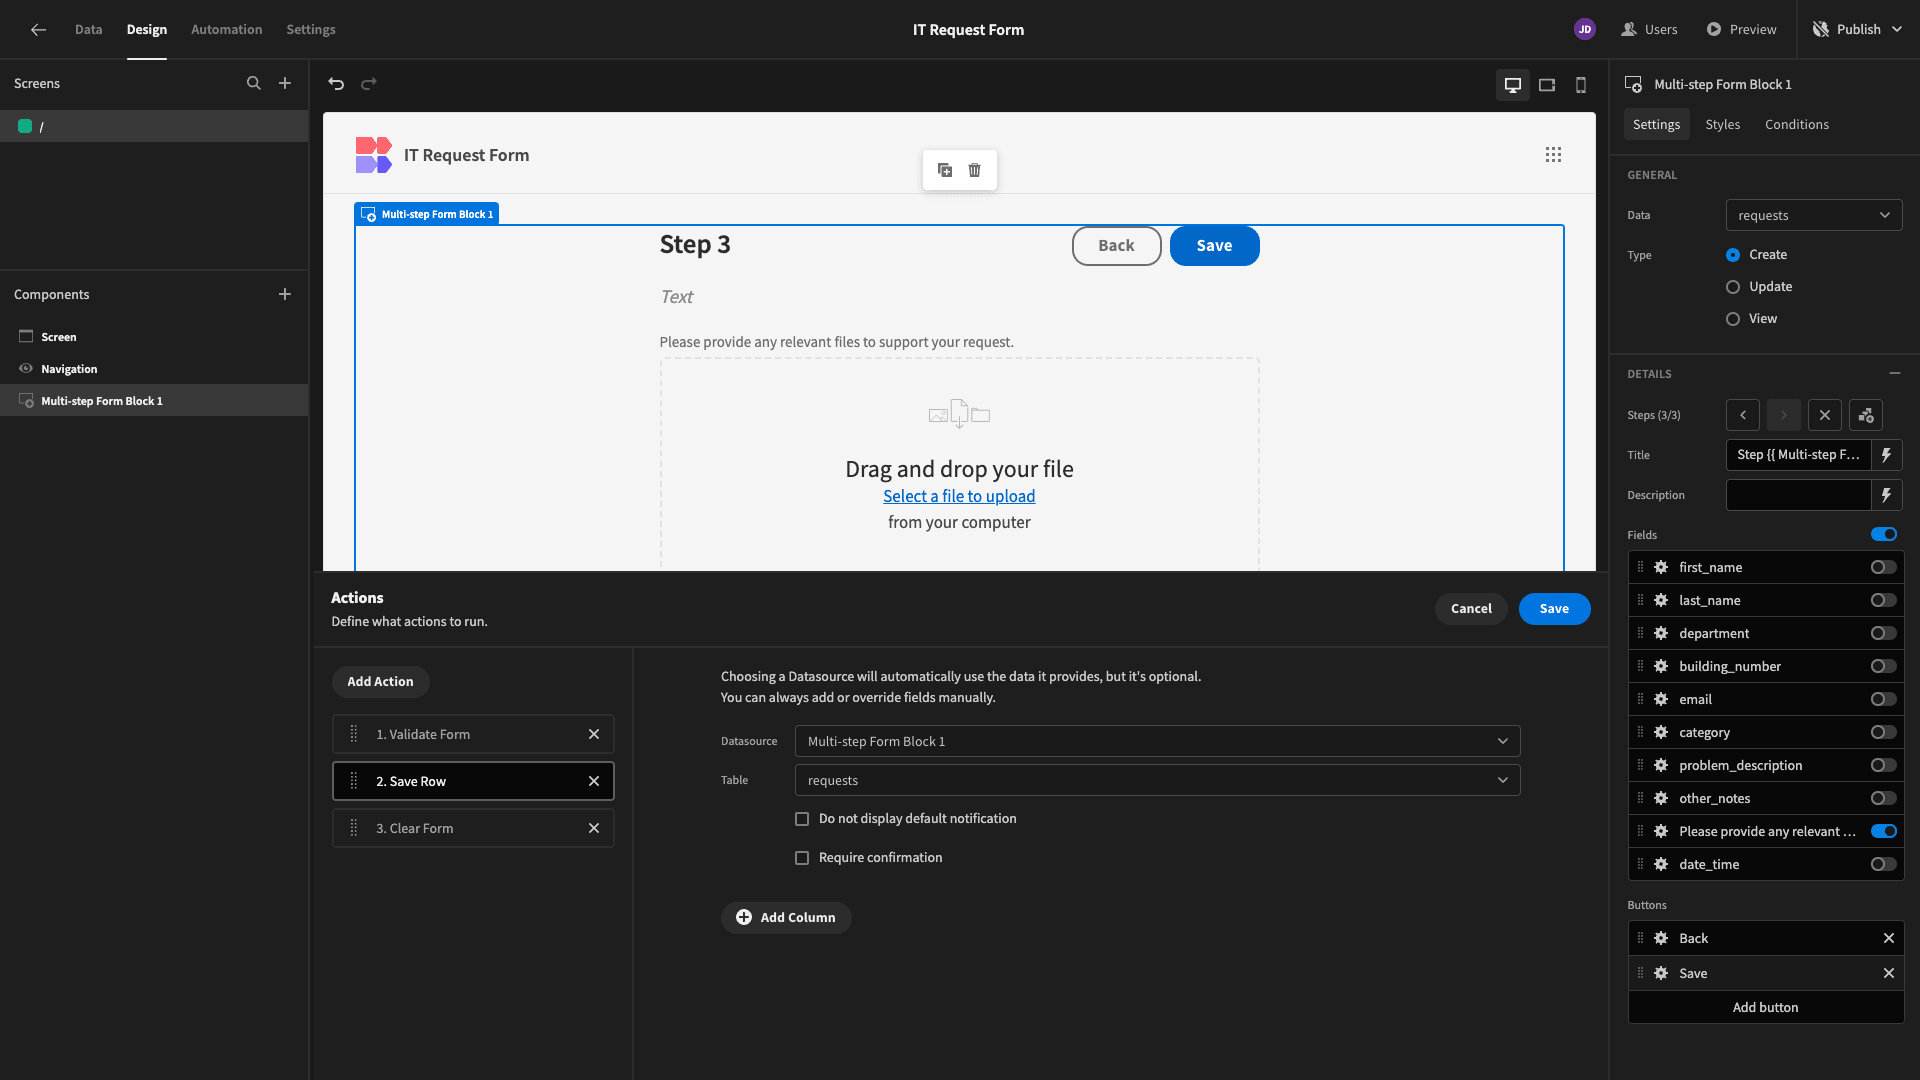
Under the existing Save Row action, we can add columns and values that are saved each time the button is pressed.
We’ve used handlebars to set the date_time attribute to the current date and time:
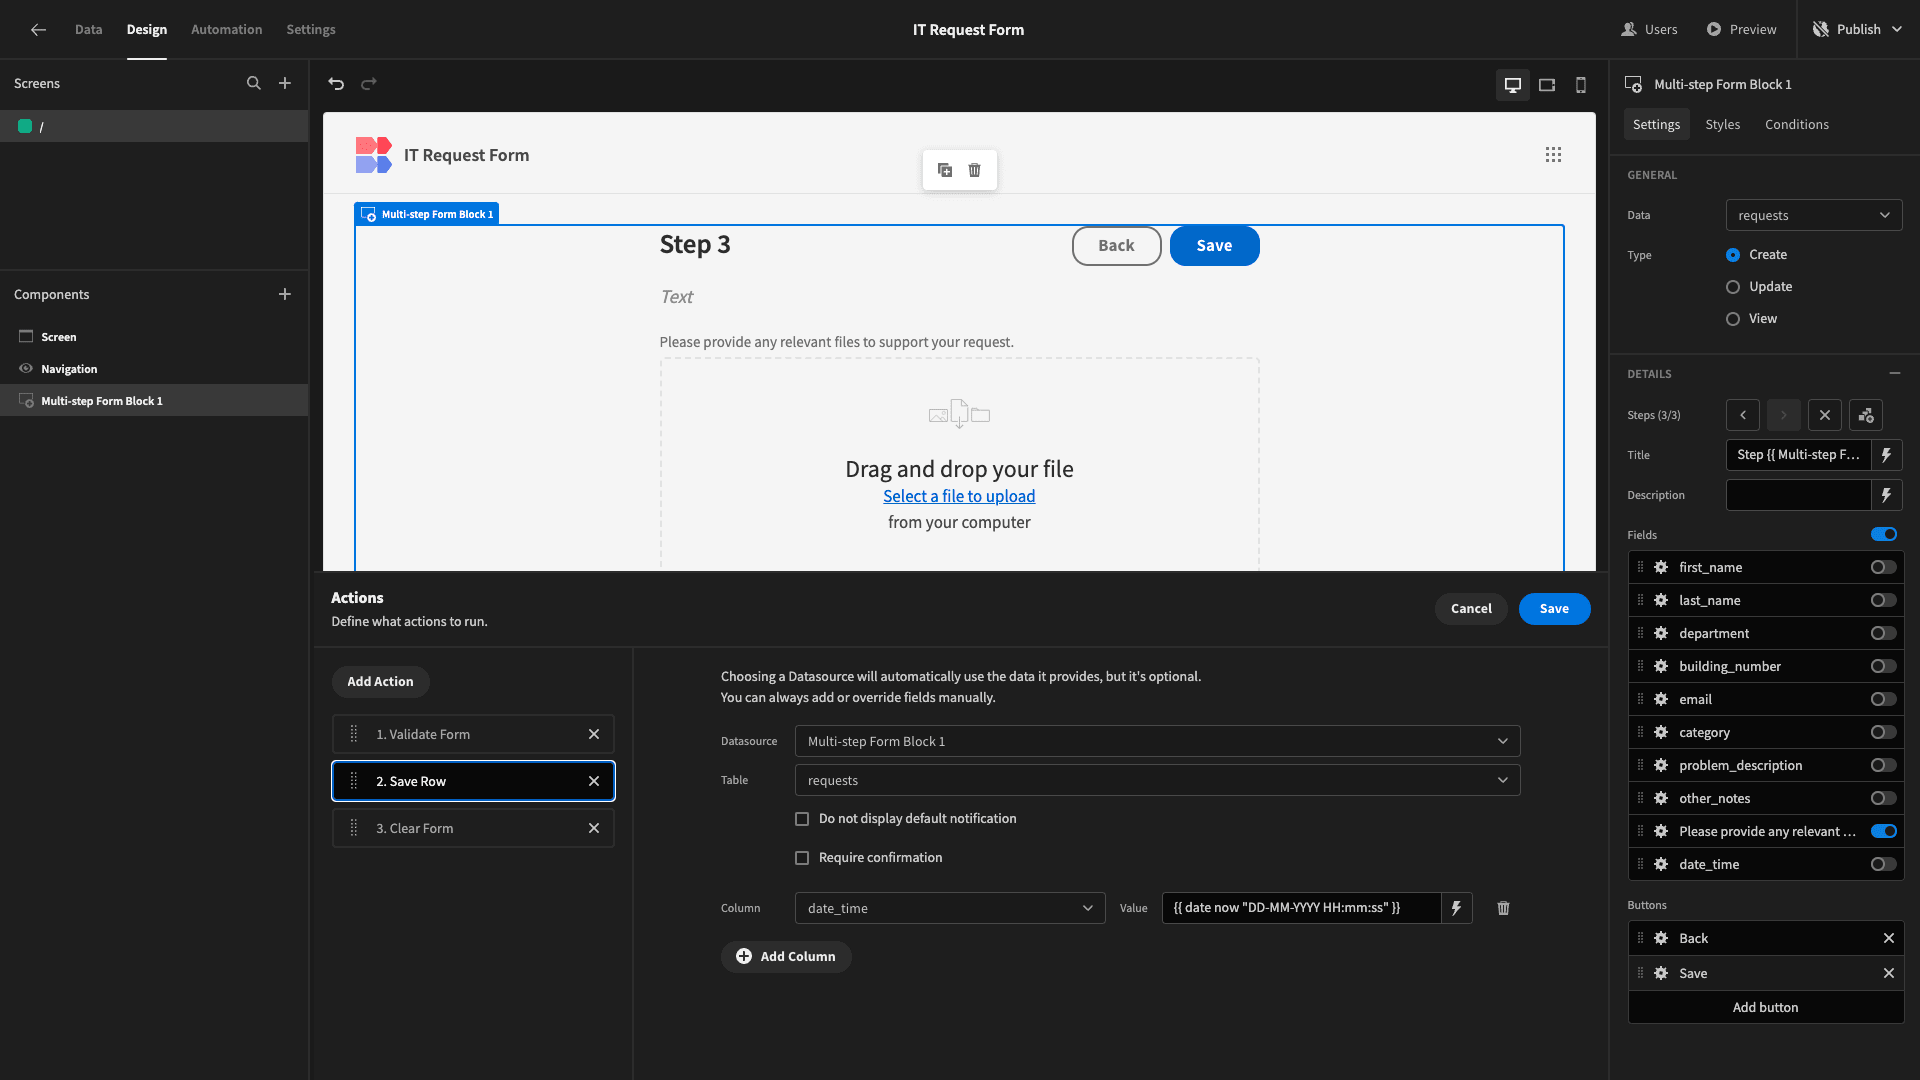
The full expression we’ve used is:
1{{ date now "DD-MM-YYYY HH:mm:ss" }}We can hit preview and fill in our form to confirm that this works as expected:
5. Design tweaks and publishing
Before pushing our IT request form live for users, we’re going to make a couple more minor design improvements.
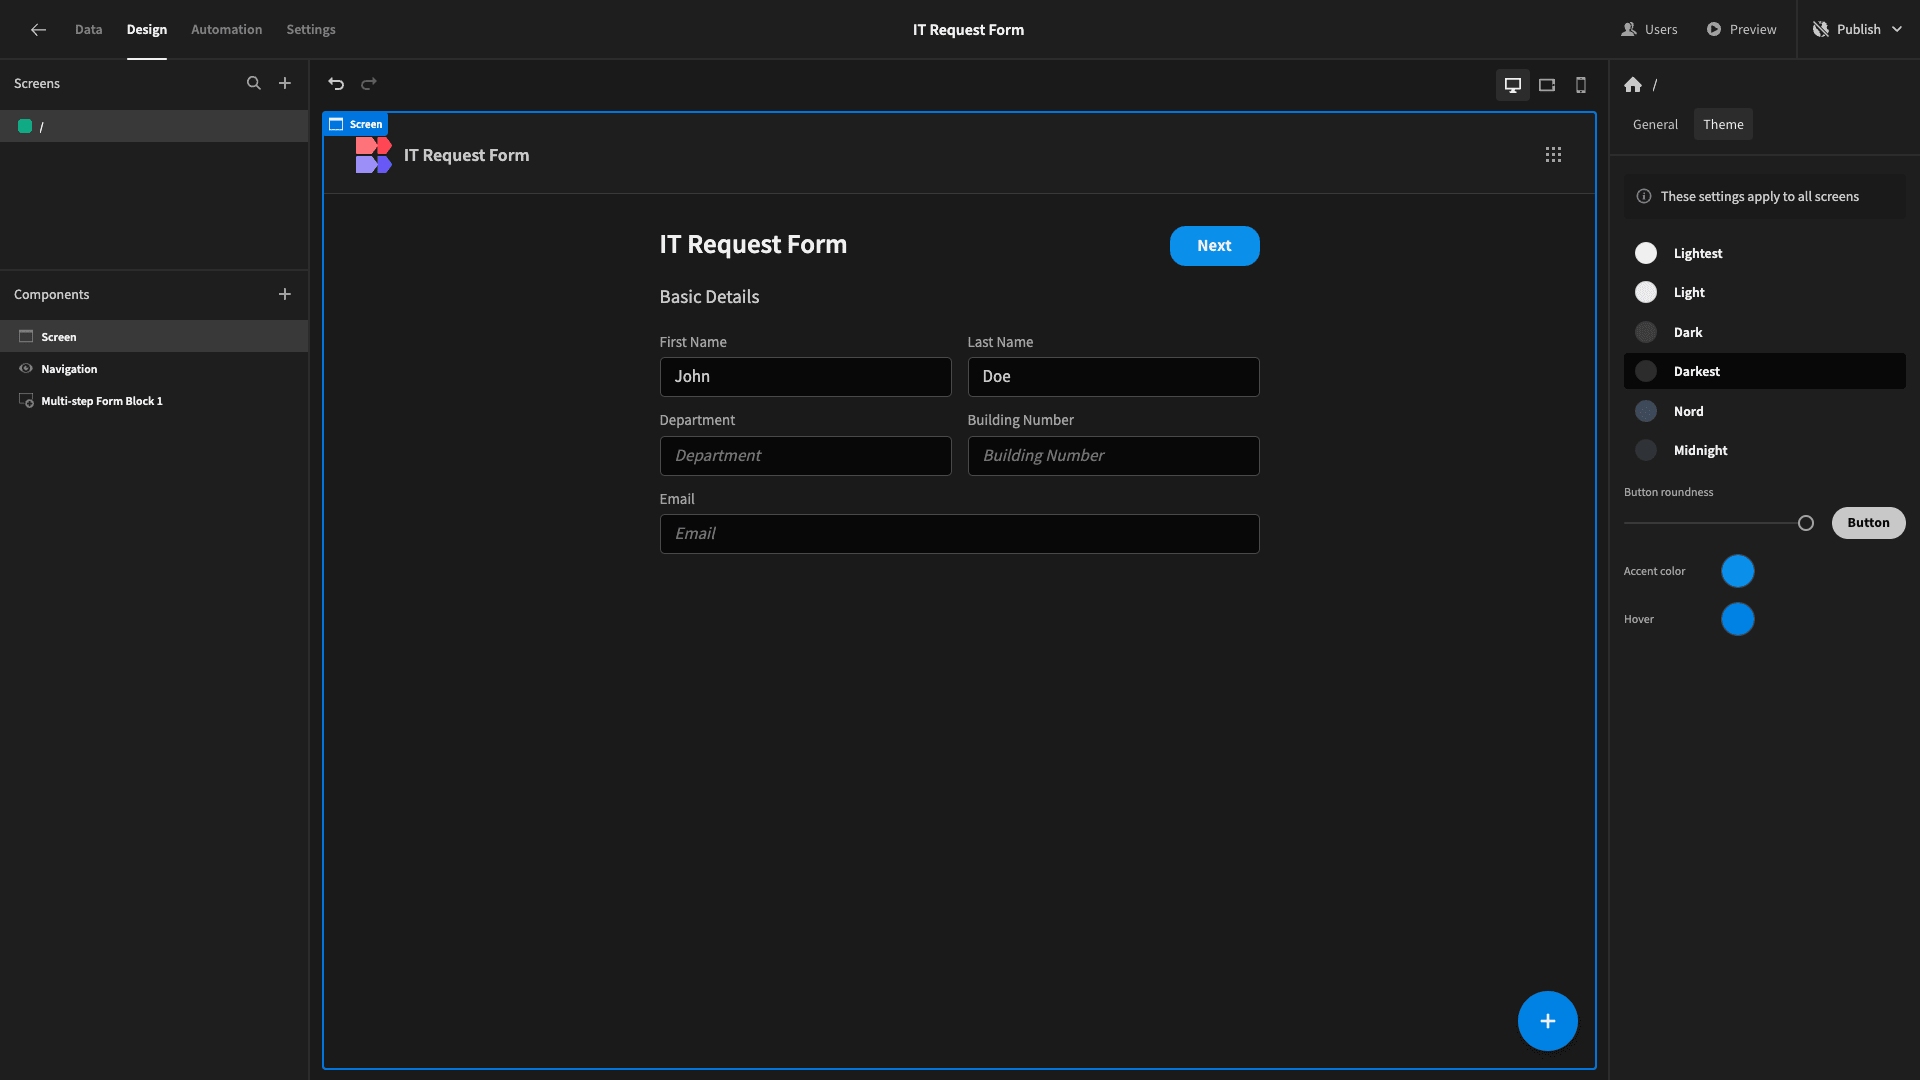
Under the Screen menu, we have several options for app themes that we can apply.
Today, we’re going to go with Darkest:
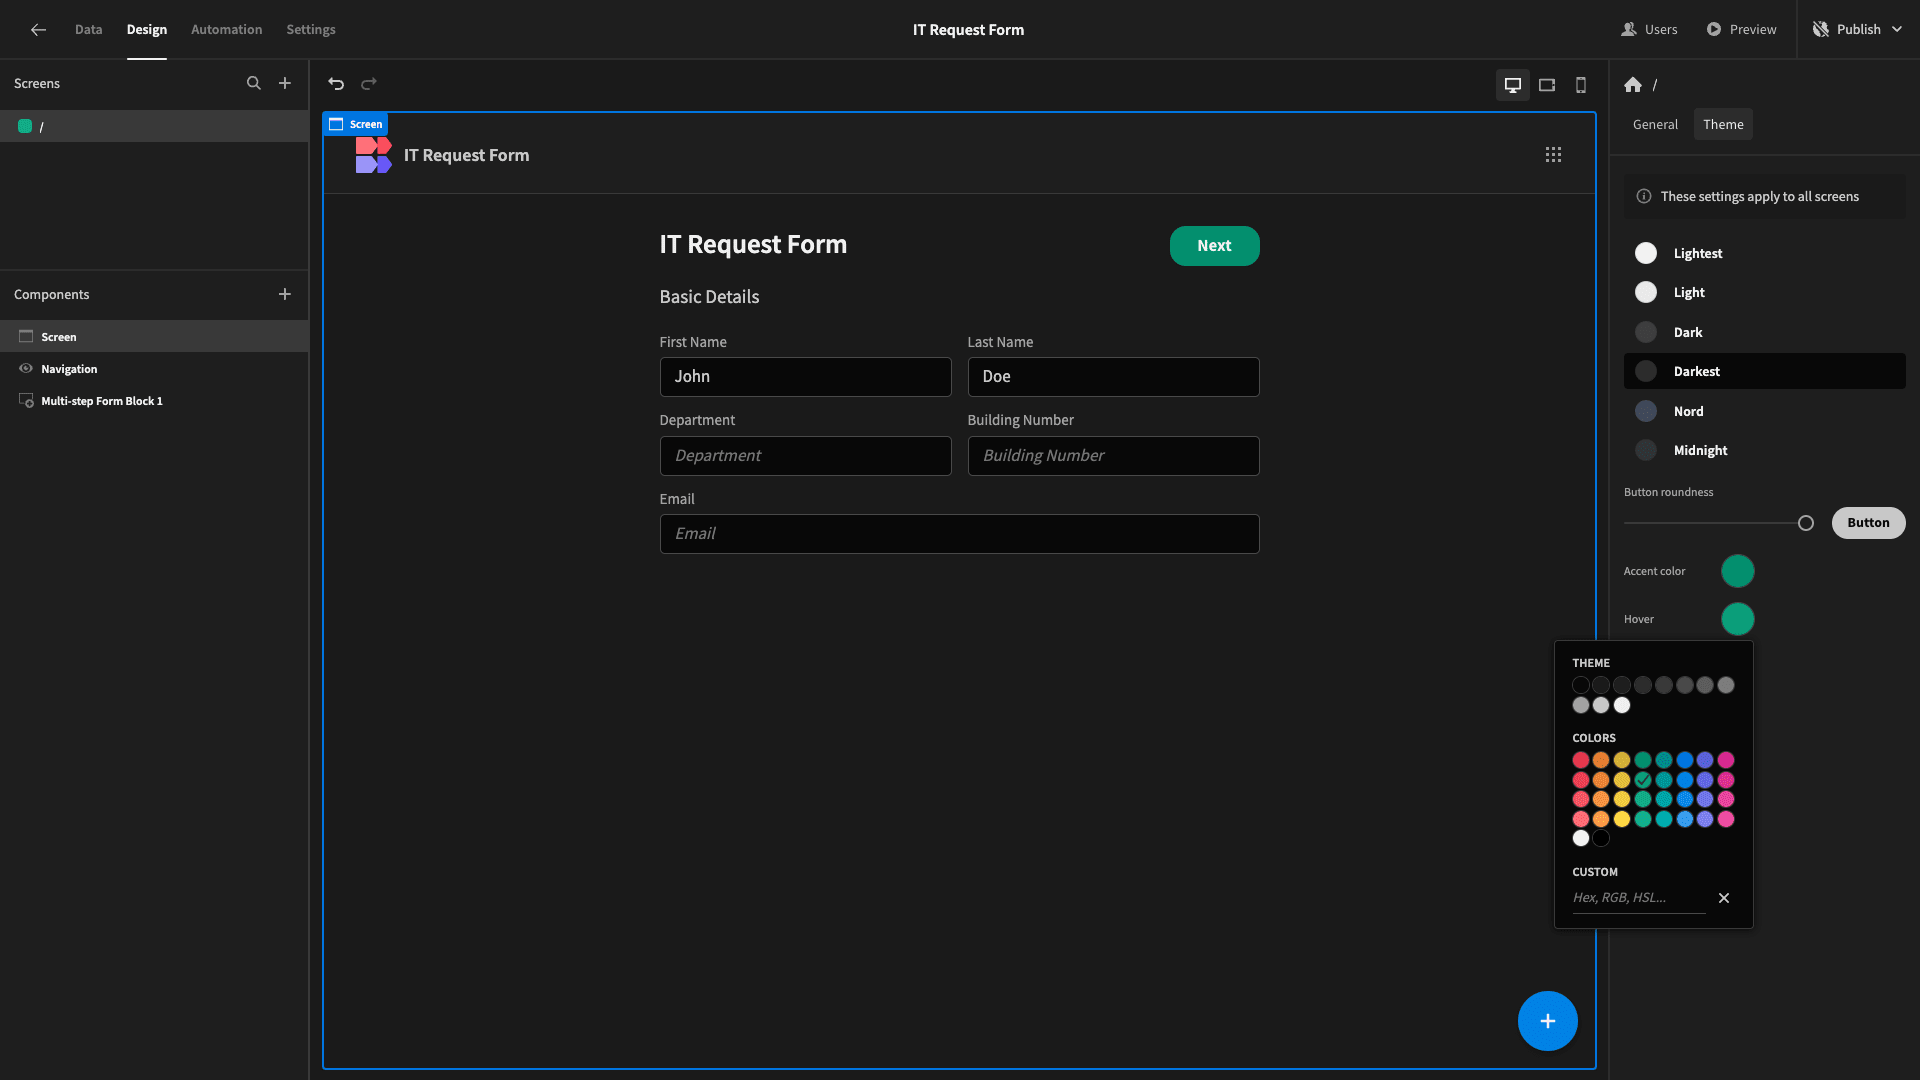
We’ll also update our default button colors to stand out a little better against this background:
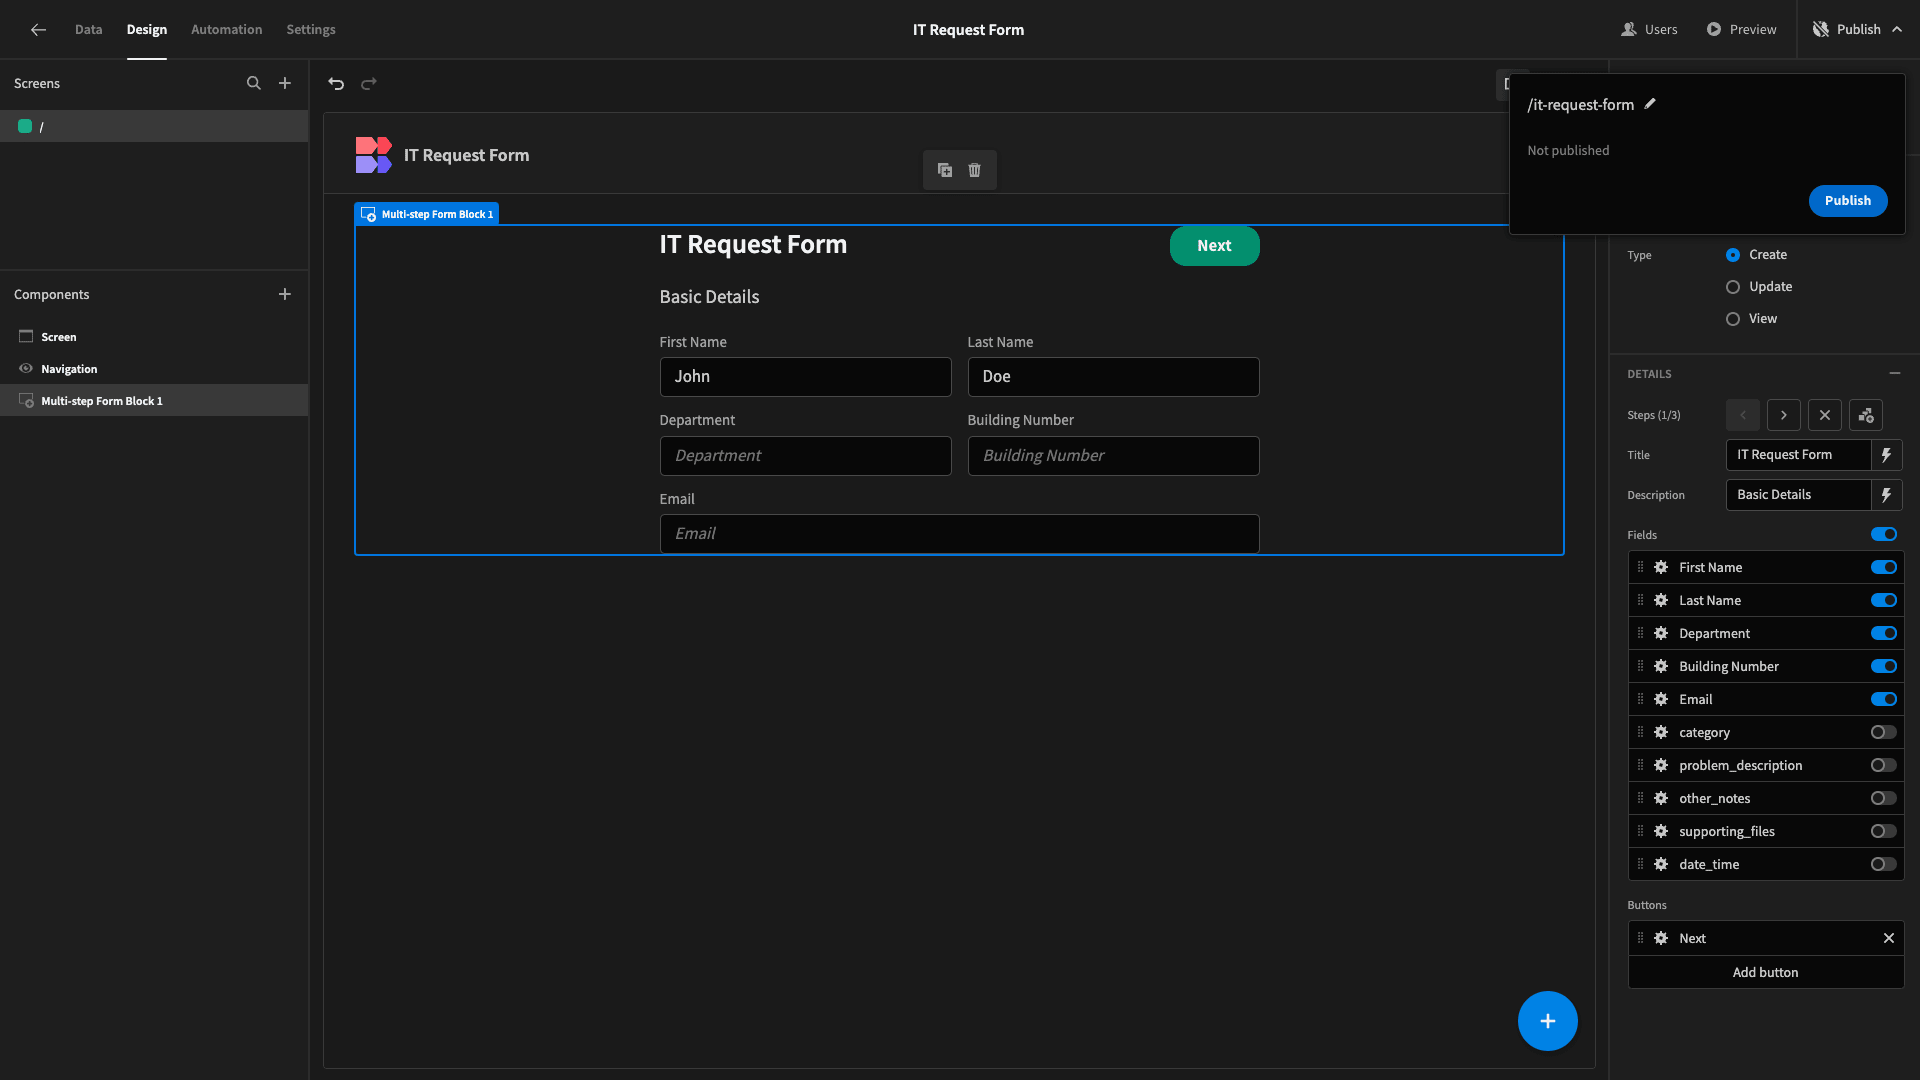
Once we’re happy, we can hit Publish to push our app live:
Here’s a reminder of what our finished IT Request Form looks like:
If you found this tutorial helpful, check out our digital forms page to learn more about how Budibase empowers teams to turn data into action.