How to Build a Workload Management Tool in 7 Steps
Nowadays, your workload management tool is at the center of your daily operations. In the age of remote, distributed teams, effective oversight and coordination is everything.
And the market has responded. In fact, there are countless platforms out there trying to fill this niche.
The only trouble is that every company has its own unique requirements and challenges.
Therefore, COTS vendors typically cast the widest net possible - aiming to provide value for the largest number of buyers rather than fully meeting more individualized requirements.
Luckily, this is one of the tool classes that we can most easily go down the custom route. That is, from a technical point of view, workload management tools aren’t actually that complicated.
Today, we’re checking out a fast, easy way to build a fully customized solution - for free. Even better, it probably won’t take much longer than you’d spend setting up an off-the-shelf solution.
But first, let’s get a bit of background.
What is a workload management tool?
Workload management tools are so ubiquitous nowadays that you might not have paused for long to think about what they actually are.
Essentially, these are platforms that help us to use our employees’ time in the most effective way possible - while also ensuring that daily tasks are delegated to the people best suited to perform them.
In other words, the goal is to match employees up with tasks.
What this means in practice can vary greatly, however. The crux of this is that an effective workload management tool mimics your existing business logic for how tasks should be delegated.
That is, it codifies whatever rules around employee capacity, skills, and responsibilities you use to determine which tasks are assigned to different employees.
To understand this better, we can dig a bit deeper into more concrete functionality for workload management solutions.
What does a workload management tool do?
So, at a practical level, what capabilities does a workload management tool offer?
For the most basic solutions, we’re dealing with two kinds of related data objects:
- Tasks.
- Employees.
The core functionality for each is pretty simple. Basically, this means implementing basic CRUD actions. So, creating, reading, updating, and deleting entries. We also need to create relationships between these two entities - to assign tasks to employees.
However, we’ll also probably want some more advanced functionality. For example, if we’re going to the effort of building our own workload management tool, chances are that we don’t want to manually administer task delegation.
Instead, we’re more likely to see benefits when this is automated to the greatest extent possible. For example, automatically assigning tasks to the next available qualified colleague.
The other key thing is user experience. It’s important to note that we’ll almost inevitably have different kinds of users - with their own respective internal responsibilities.
Our workload management tool must provide an appropriate UX for each of these. So, the most basic solution might have one type of user that can create tasks and assign them to employees - and then another type that can view the tasks that have been assigned to them.
Why do we need workload management software?
Why bother?
Of course, this is a flippant way of framing the question. Really, what we want to explore are the business-level benefits that we can achieve with workload management software.
As ever, a good option here is to think about the alternatives.
For many teams, this means managing workloads with spreadsheets. In fact, this is just the way that a lot of teams manage pretty much anything. Despite this, it’s far from the ideal solution.
Even worse, a large proportion of teams have no discernable system in place for managing workloads. That is - they rely on things like informal conversations, employee initiative, or instant messages.
Dedicated workload management solutions offer several quantifiable advantages over either of these approaches. The most obvious is the reduction in associated admin costs.
Even if we can’t entirely eliminate the need to manually delegate work, we can make it a much smoother - and therefore cost-effective process.
Besides this, workload management tools help us to rationalize our resource utilization. So - with improved oversight and codified logic, we’re in a much better position to ensure that tasks are divided fairly - based on availability, experience, and skills.
Why would we build our own?
We’ve already touched on the fact that there are a bunch of off-the-shelf options available for workload management - many of which are hugely popular.
However, we only thought very briefly about how these stack up against custom solutions.
So, let’s work through the cost/benefit calculation for custom vs COTS in the case of workload management tools.
There are a few interrelated issues to deal with here. Specifically, we’ll deal with three factors that tend to sway the balance in favor of custom solutions.
The first is something we alluded to previously. That is, the fact that the internal logic governing which colleagues are assigned different tasks will typically be unique to your business - or even to individual teams.
This means that off-the-shelf tools can often be unable to support the functionality we need - forcing us to compromise.
The second key point is that, technically speaking, workload management solutions aren’t particularly complex. We’ll come onto the details of this in a minute.
For now, the important thing to realize is that the costs of building a solution from scratch are relatively low, owing to this lack of technical complexity.
Finally, building a custom solution allows us to avoid overreliance on SaaS platforms. We know already that workload management tools are a critical node in our internal operations, but this doesn’t mean we need to pay for them in perpetuity.
Indeed, opting for a custom solution is often the more cost-effective option - even in the medium term.
Workload management from a technical POV
Before we start looking at the specific steps for building a workload management tool in Budibase, let’s pause and think about the architecture of such a solution.
We’ll take this one step at a time.
First, our data model. We said earlier that we’re dealing with two kinds of objects - so we need two tables to deal with them - Employees and Tasks. Each of these only really needs to store a handful of quite basic attributes.
So, for our employees, we need to know their personal details, roles, departments, and skills. For tasks, we want to store a name, description, starting date, and time estimate.
Onto our process layer. Again, we’re not dealing with anything super complex here. The core of our app’s functionality is user-initiated CRUD functions, including creating relationships between entries on our two tables.
Besides this, we’ll add a little bit more logic to display whether or not each colleague is currently available - and if not, when they are next available. We’ll also calculate when each task should be completed, allowing for an eight-hour workday and a five-day week.
Finally, our presentation layer consists of three screens. One is for basic users to view the tasks that have been assigned to them and when they’re scheduled.
The other two allow power and admin users respectively to perform CRUD actions on our tasks and employees tables.
Simple!
How to build a workload management tool
So, now that we know exactly what we’re building, there’s nothing left but to build it. As we said, using Budibase, this won’t actually take that much longer than setting up an off-the-shelf solution.
Here are the seven steps you can follow to create a professional workload management tool in Budibase.
1. Create a new Budibase app
First, we need to create a new application in Budibase - assuming you’ve already signed up for a free account.
Then, we’ll hit Create New App and select Start From Scratch. We’ll then be prompted to give our app a name and URL:
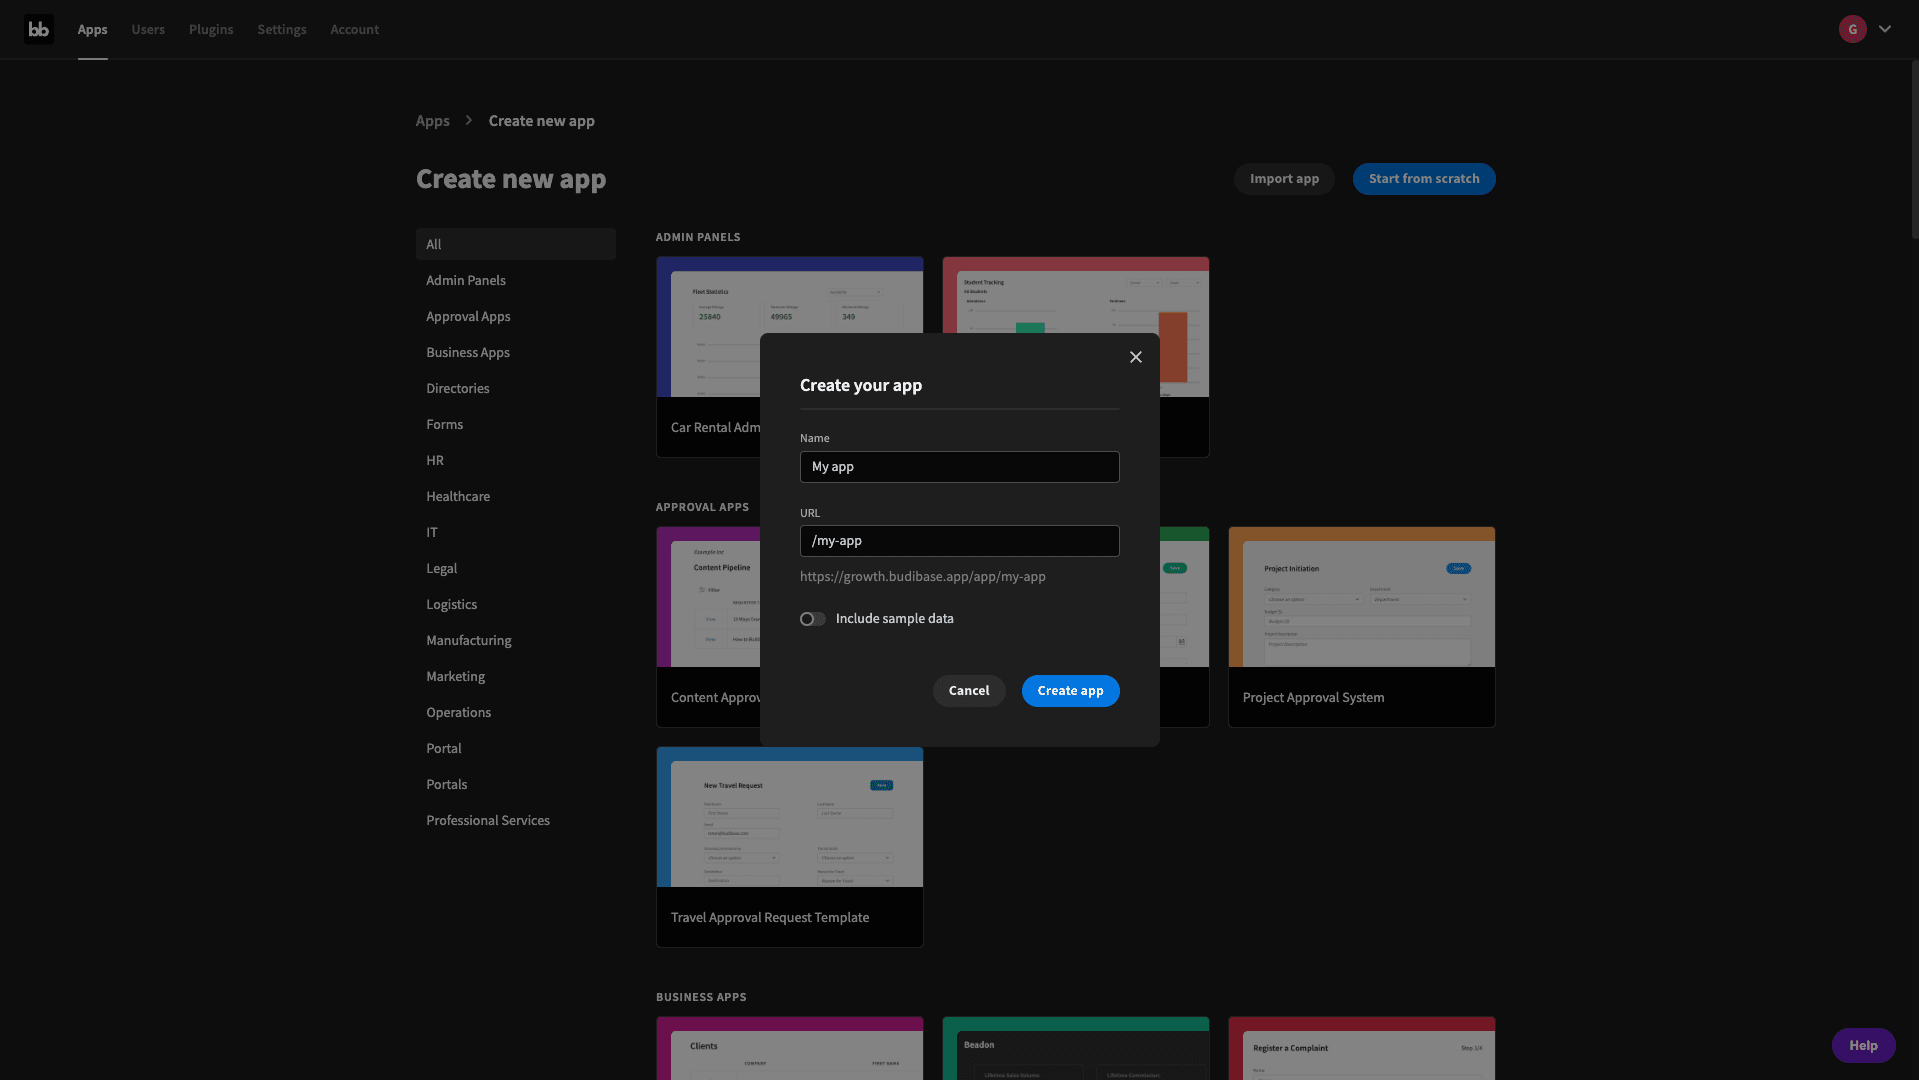
As you can see, we’ve de-selected the option to include sample data - since we want to build our own data model from scratch.
Hit Create App and we can jump straight in.
2. Build your data model
Next, you’ll be prompted with a pop-up that asks you to choose a data source. We’re selecting BudibaseDB - but if your tasks and employee data was already in an external database somewhere, you’d be well covered for that too.
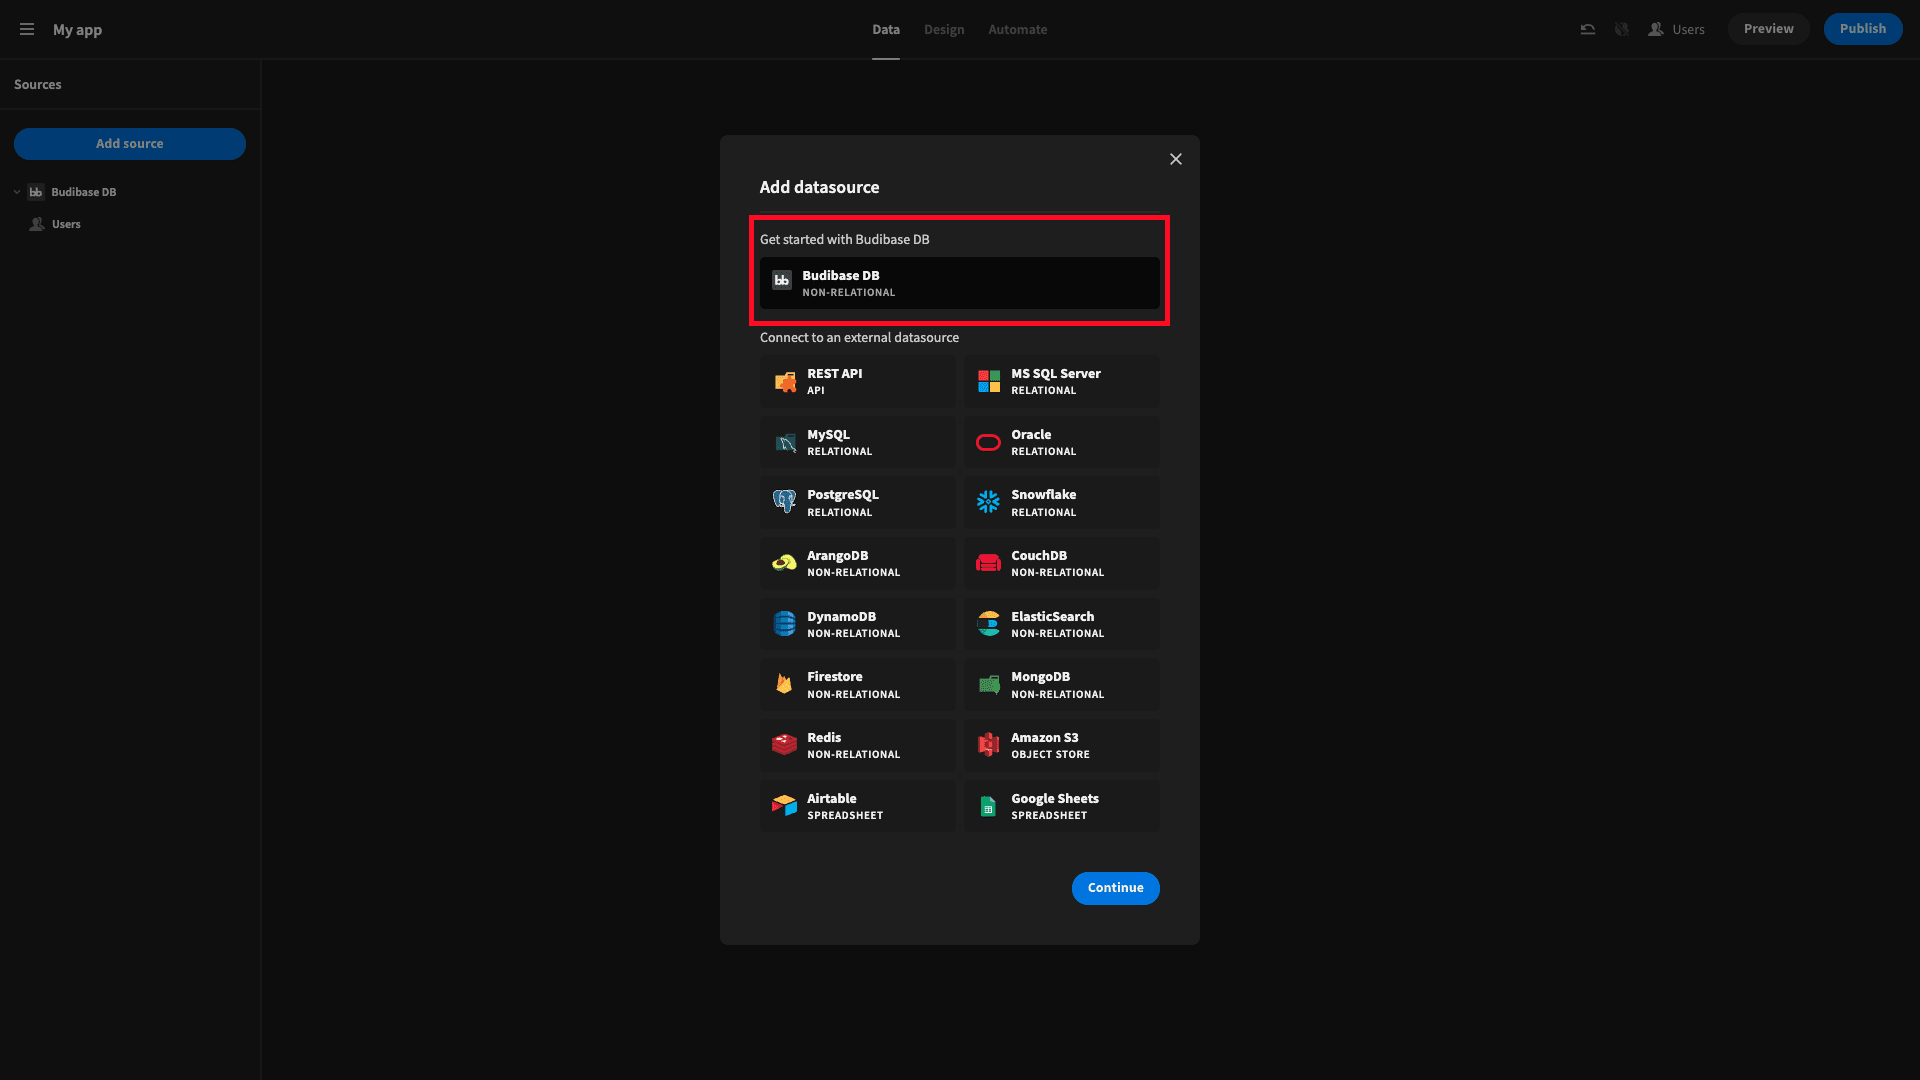
We’re then prompted to give our first table a name. We’ll call this one Tasks:
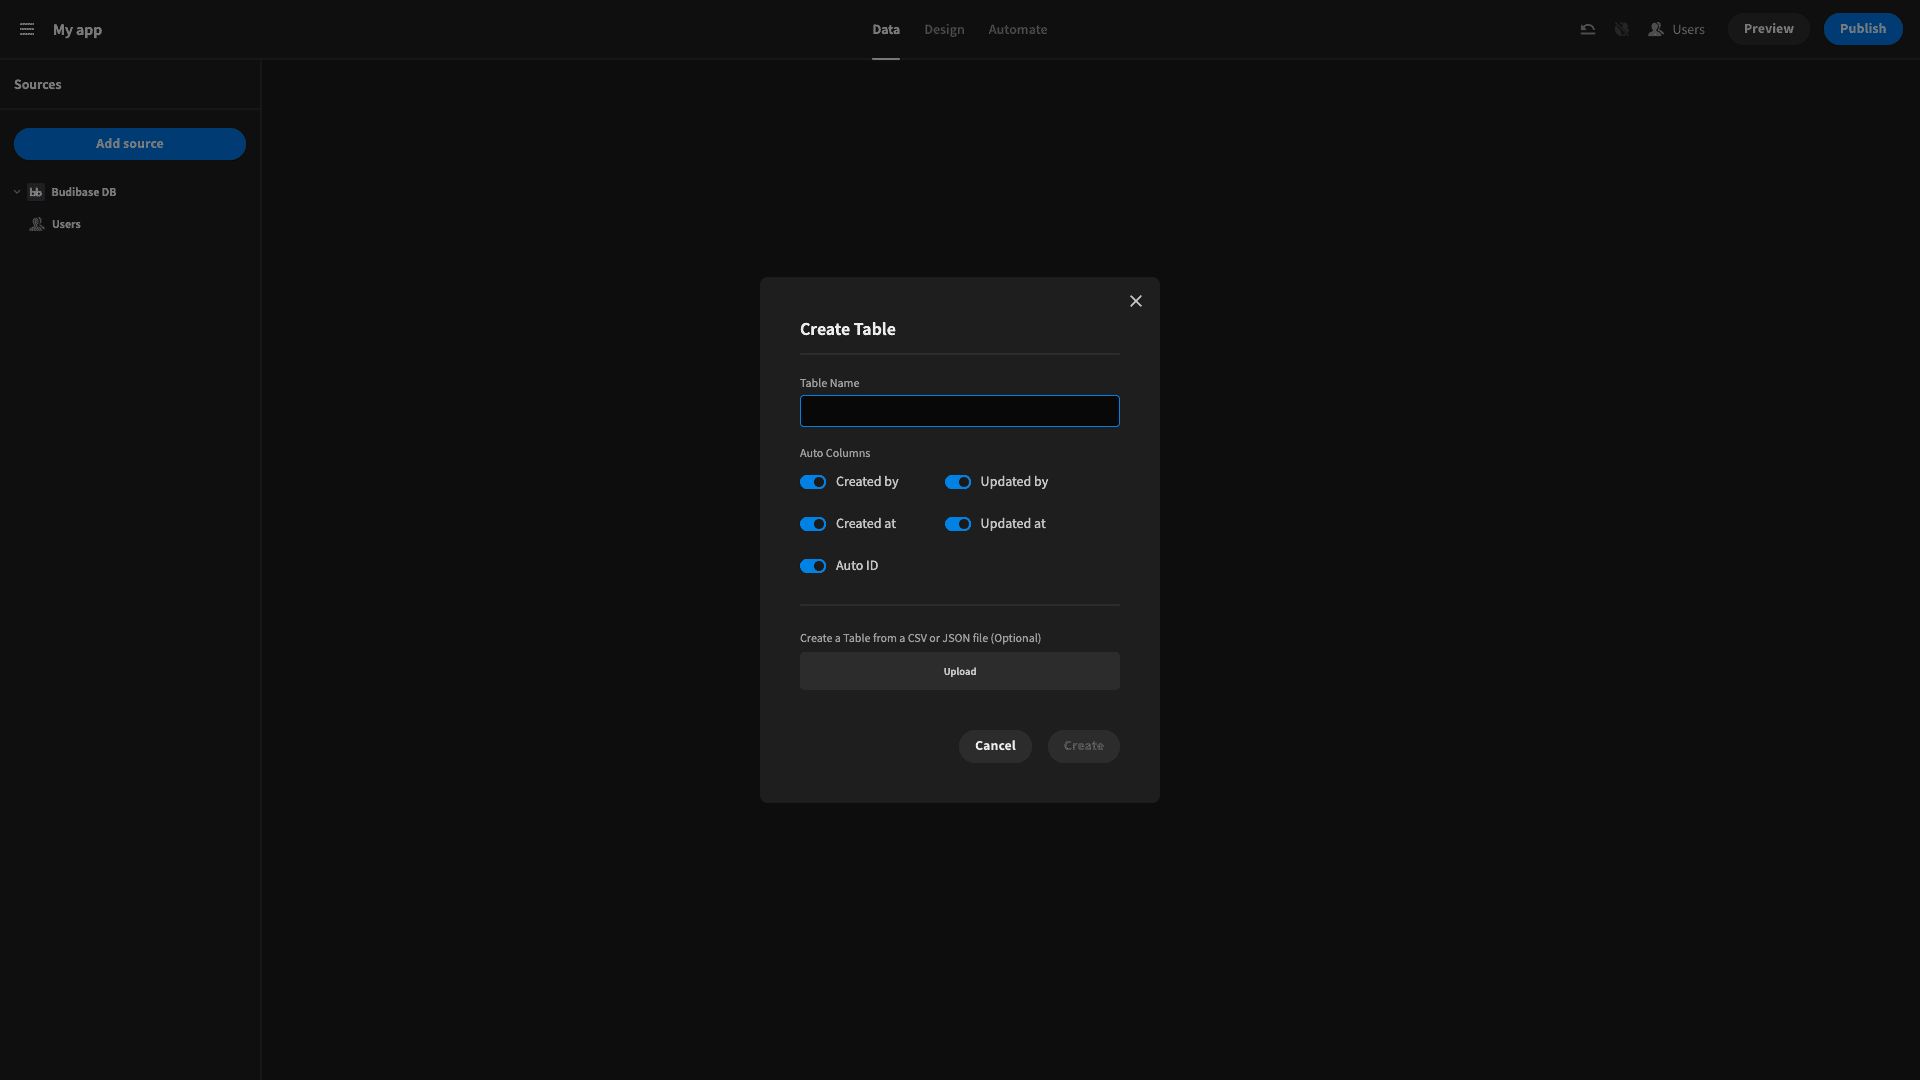
We’ll then use the Add Source button in the top left to repeat this process for our other table, Employees.
Now, for the purposes of our workload management tool tutorial, the specific attributes you store within each of these tables are up to you.
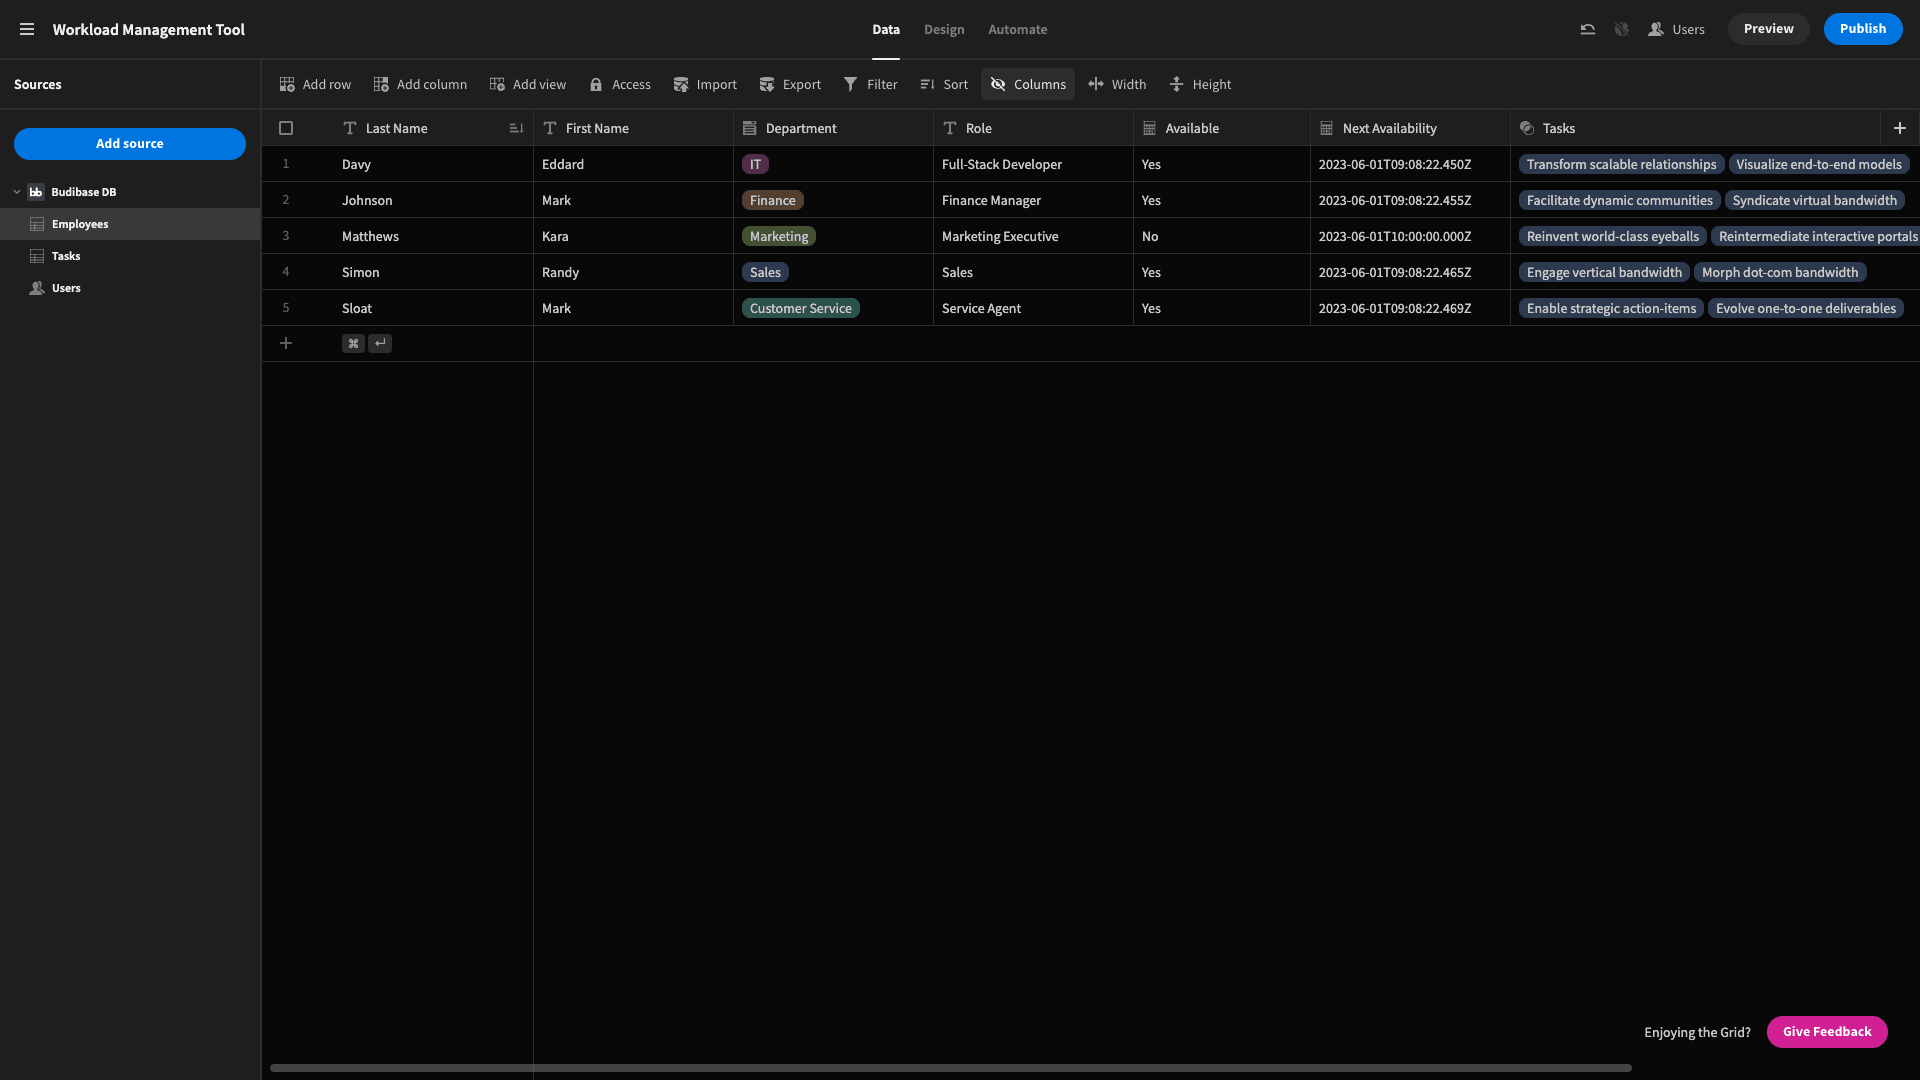
For our Employees table, we’re starting with:
- Last name - Text.
- First name - Text.
- Department - Options.
- Role - Text.
The basic attributes for our Tasks table are:
- Title - Text.
- Description - Long-form text.
- Start date - Date.
- Hours - Number.
- Complete - Boolean.
We also need a relationship to link the two tables. Specifically, we’ll create a many-to-one relationship where one employee can be linked to multiple tasks. In the Employees table, we’ll call this Tasks - and in the Tasks table, we’ll call in Assigned to.
We’ll also add a one-to-one relationship between our Employees and Budibase’s built-in Users table.
3. Add formula variables
To finish off our data model, we’re going to add a few formula variables into the mix. On the Tasks table, we want to use the start time and hours attributes to calculate a finish time, allowing for evenings and weekends.
On the Employees table, we want to display whether each colleague is currently available, and when their next availability is.
Once we’re done here our tables will look like this. Employees:
And Tasks:
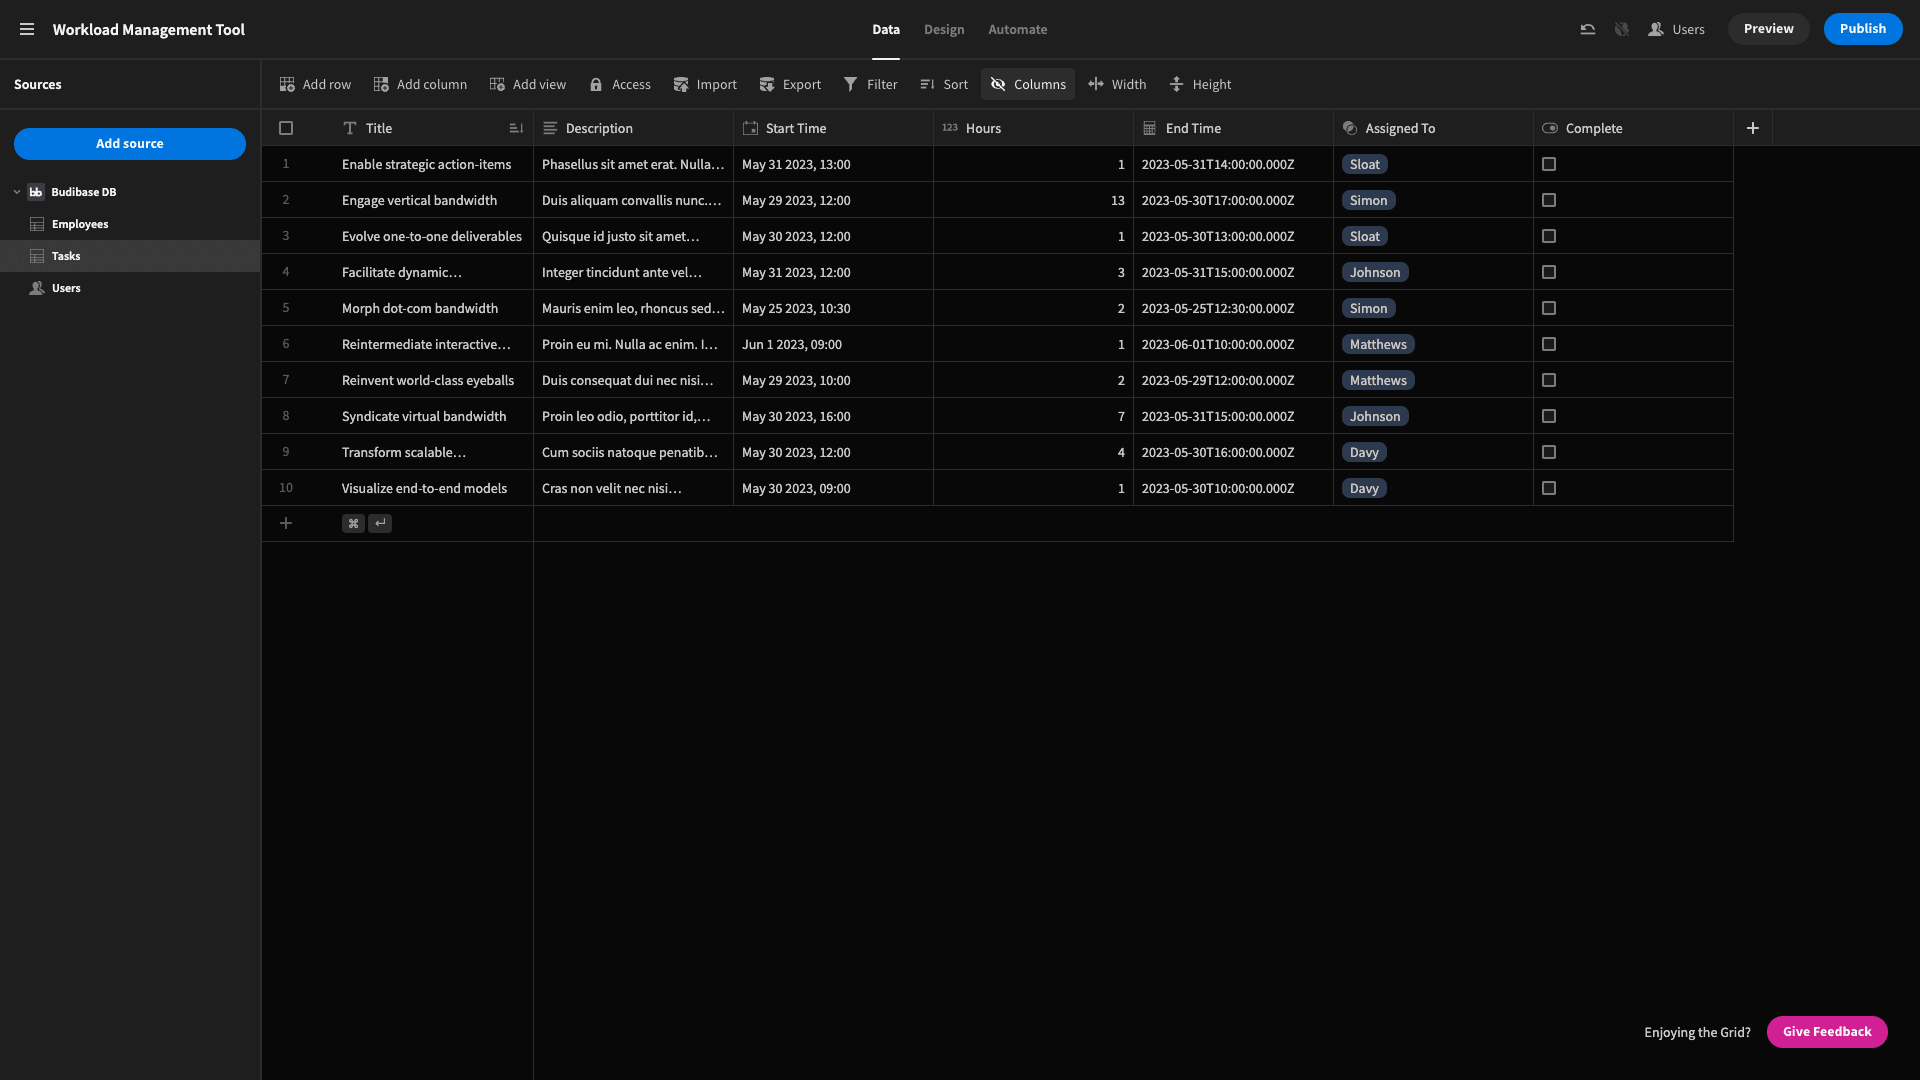
Note that we’ve simply added a few dummy entries to each so you can see what we’re doing.
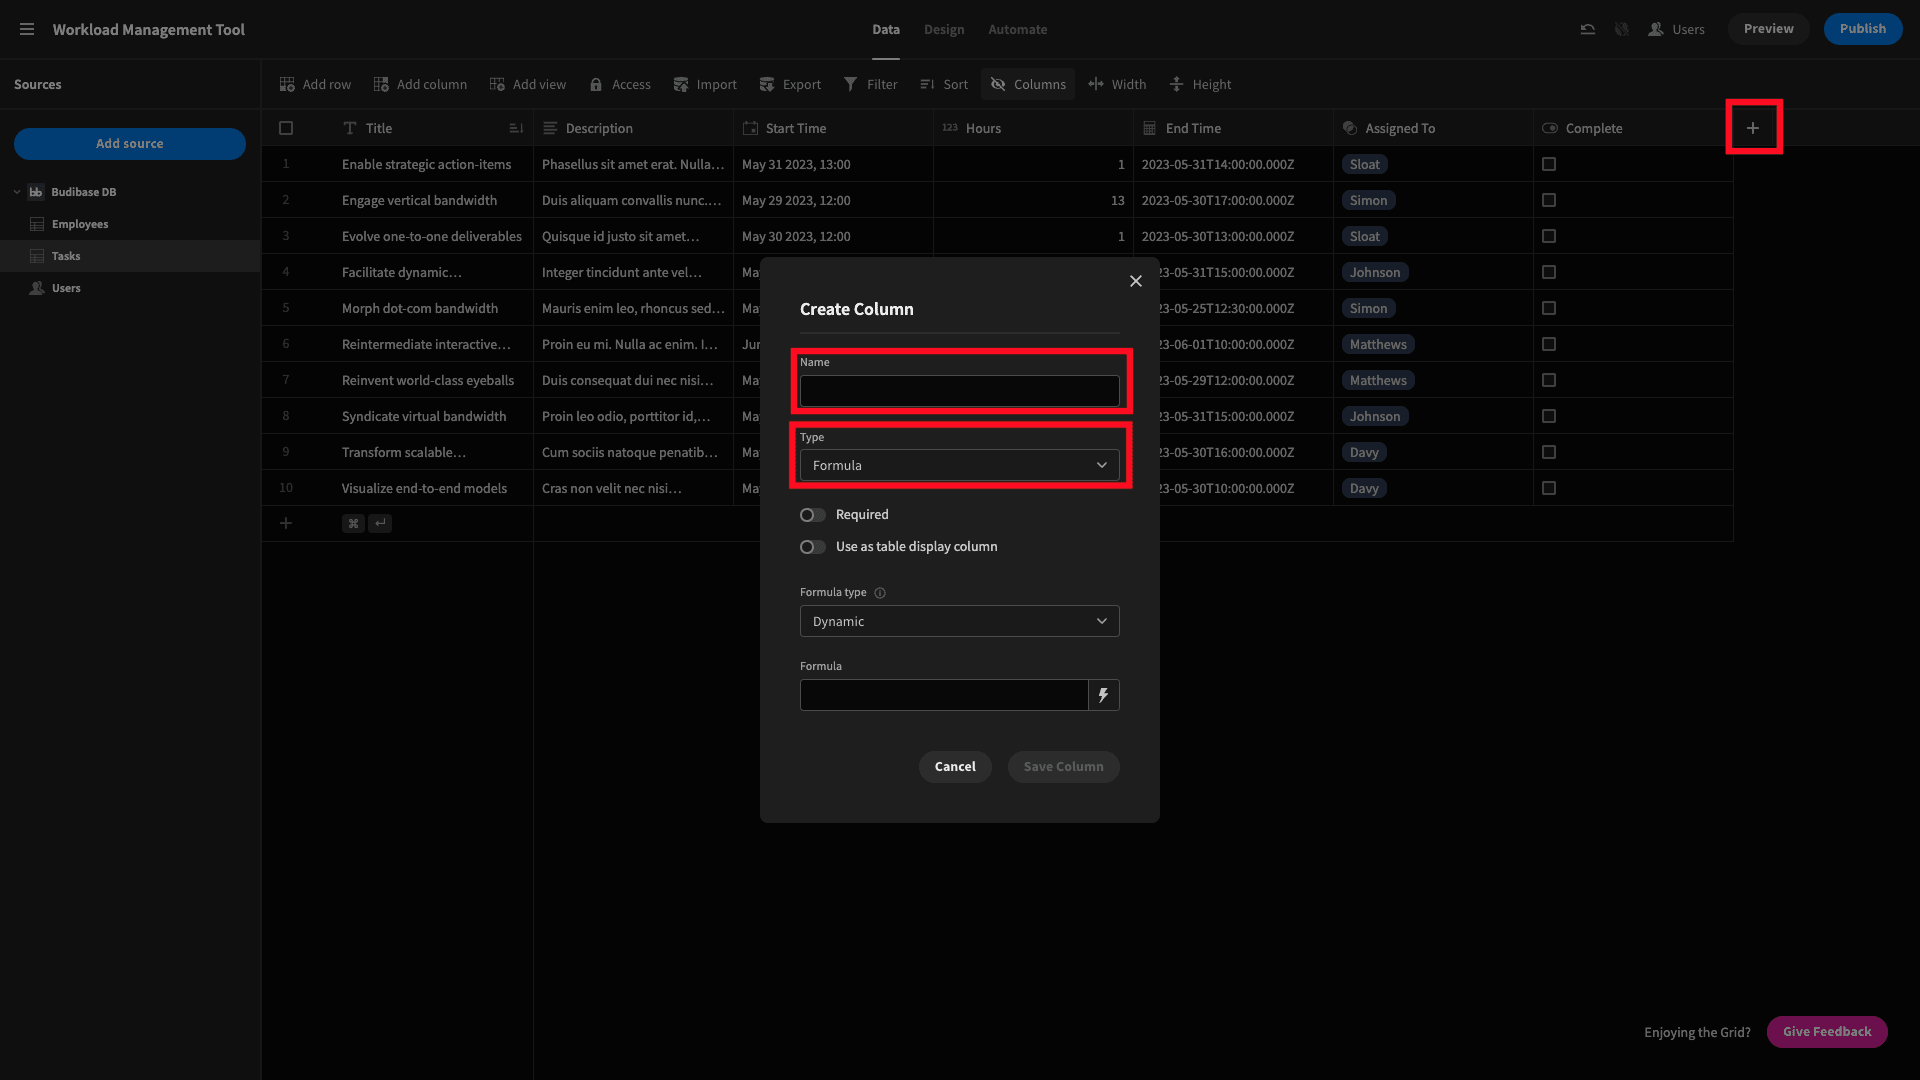
We’ll start with the End Time on the Tasks table. Use the plus icon to create a new column, select Formula, and give it a name:
Then, click on the lightening bolt beside Formula, and we can access Budibase’s built-in JavaScript editor:
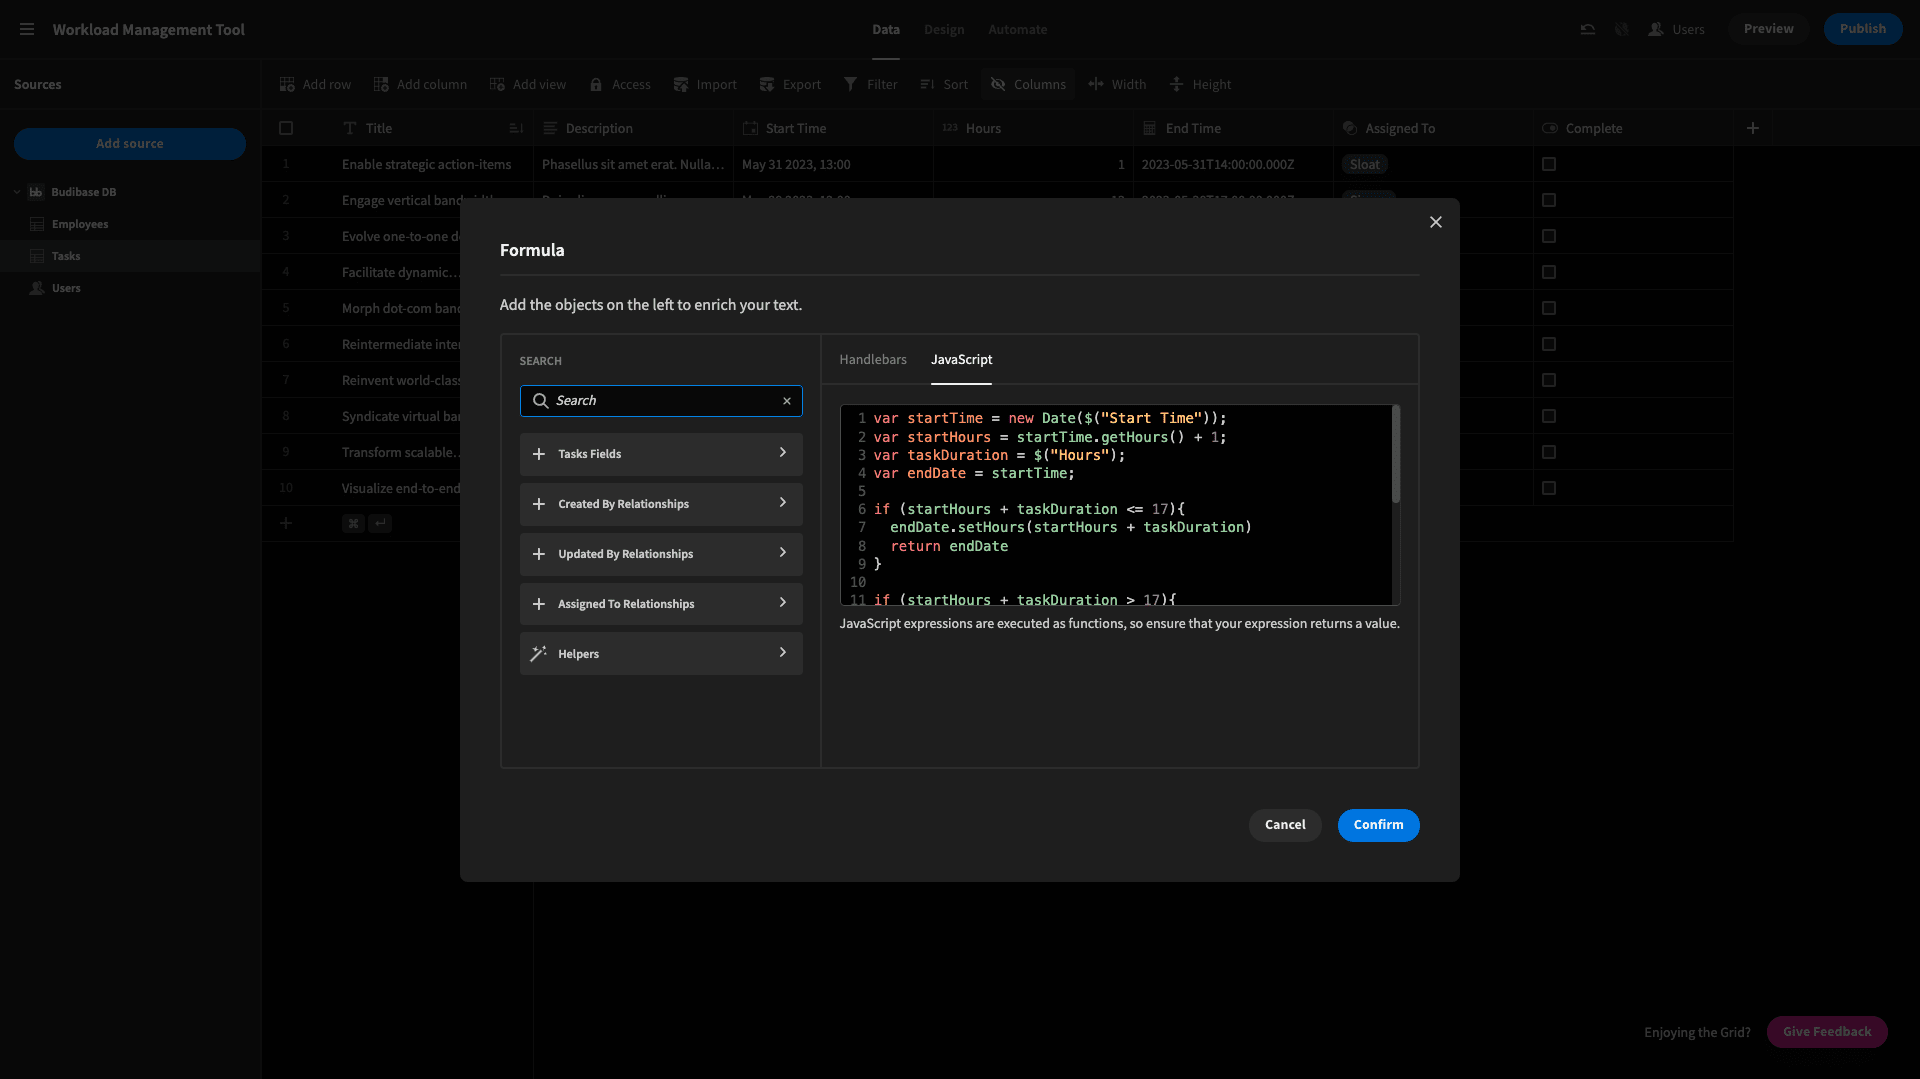
Here’s our code:
1var startTime = new Date($("Start Time"));
2
3var startHours = startTime.getHours() + 1;
4
5var taskDuration = $("Hours");
6
7var endDate = startTime;
8
9if (startHours + taskDuration <= 17){
10
11 endDate.setHours(startHours + taskDuration)
12
13 return endDate
14
15}
16
17if (startHours + taskDuration > 17){
18
19 endDate.setDate(endDate.getDate() + 1);
20
21 endDate.setHours(startHours + taskDuration - 8);
22
23 if(endDate.getDay() == 0){
24
25 endDate.setDate(endDate.getDate() + 1);
26
27 }
28
29 if(endDate.getDay() == 6){
30
31 endDate.setDate(endDate.getDate() + 2);
32
33 }
34
35 return endDate
36
37}We start by setting a few variables:
- startTime - which we set equal to the Start Time attribute in the relevant row.
- startHours - the hour of the day from our startTime variable.
- taskDuration - the number of hours it will take the task to complete.
- endDate - as a default value, we set this equal to startTime.
Then, we have an if clause, to check if startHours + taskDuration is less than or equal to 17 - ie, the task can be completed before 5 oclock. If so, we set the hour of the day for endDate to startHours + taskDuration, and return our new endDate value.
Then, we’ve got a second if clause to deal with cases where the end time will be after 17:00. This uses the getDay method to see what the day of the endDate will be. If it’s a Sunday (0), we add an extra day to our endDate variable.
If it’s a Saturday (6), we add two.
The formula variables on our Employees table are a little bit simpler. Again, here’s the code and we’ll talk you through it after.
1var dateNow = new Date();
2
3var available = "Yes";
4
5for (i=0; i<$("Tasks").length; i++){
6
7 var startTime = new Date($("Tasks." + i + ".Start Time"));
8
9 var endTime = new Date($("Tasks." + i + ".End Time"));
10
11
12
13 if (dateNow < endTime && dateNow > startTime){
14
15 available = "No";
16
17 }
18
19}
20
21return availableSo, we’re setting two variables to start. dateNow is the current date, and available gets a default value of Yes.
Then, we use a for loop to iterate through all of the Tasks that are related to the current employee. If dateNow falls between the startTime and endTime of any of these, we set available to No.
After the for loop, we return available.
The Next Available formula variable works pretty much the same way:
1var dateNow = new Date();
2
3var nextAvailability = new Date();
4
5for (i=0; i<$("Tasks").length; i++){
6
7 var startTime = new Date($("Tasks." + i + ".Start Time"));
8
9 var endTime = new Date($("Tasks." + i + ".End Time"));
10
11
12
13 if (dateNow < endTime && dateNow > startTime){
14
15 nextAvailability = endTime;
16
17 }
18
19}
20
21 return nextAvailabilityThis time we have a variable called nextAvailability with a default value of the current time. We loop through all of the assigned tasks just like before - only this time we set nextAvailability to the endTime of the last task.
And then we return this after the loop.
4. Create a calendar screen
That’s our data layer completely finished - so we can start on our UIs. The core of our app is built around a calendar screen for colleagues to view which tasks have been assigned to them, and when they’re due.
Here’s what this looks like:

We’re leveraging a cool custom component here, which you can find in our plug-ins repo on GitHub. All you need to do to start using it is paste the URL into the plug-ins section of your Budibase tenant.
Here’s our component tree for this screen:
We have:
- A data provider set to the employee row that relates to the current user.
- A repeater to access its attributes.
- A container and headline.
- A data provider that pulls the tasks related to the employee viewing the app.
- Our calendar component.
Within the calendar component, we map the Title to Title and the Date to Start Time:
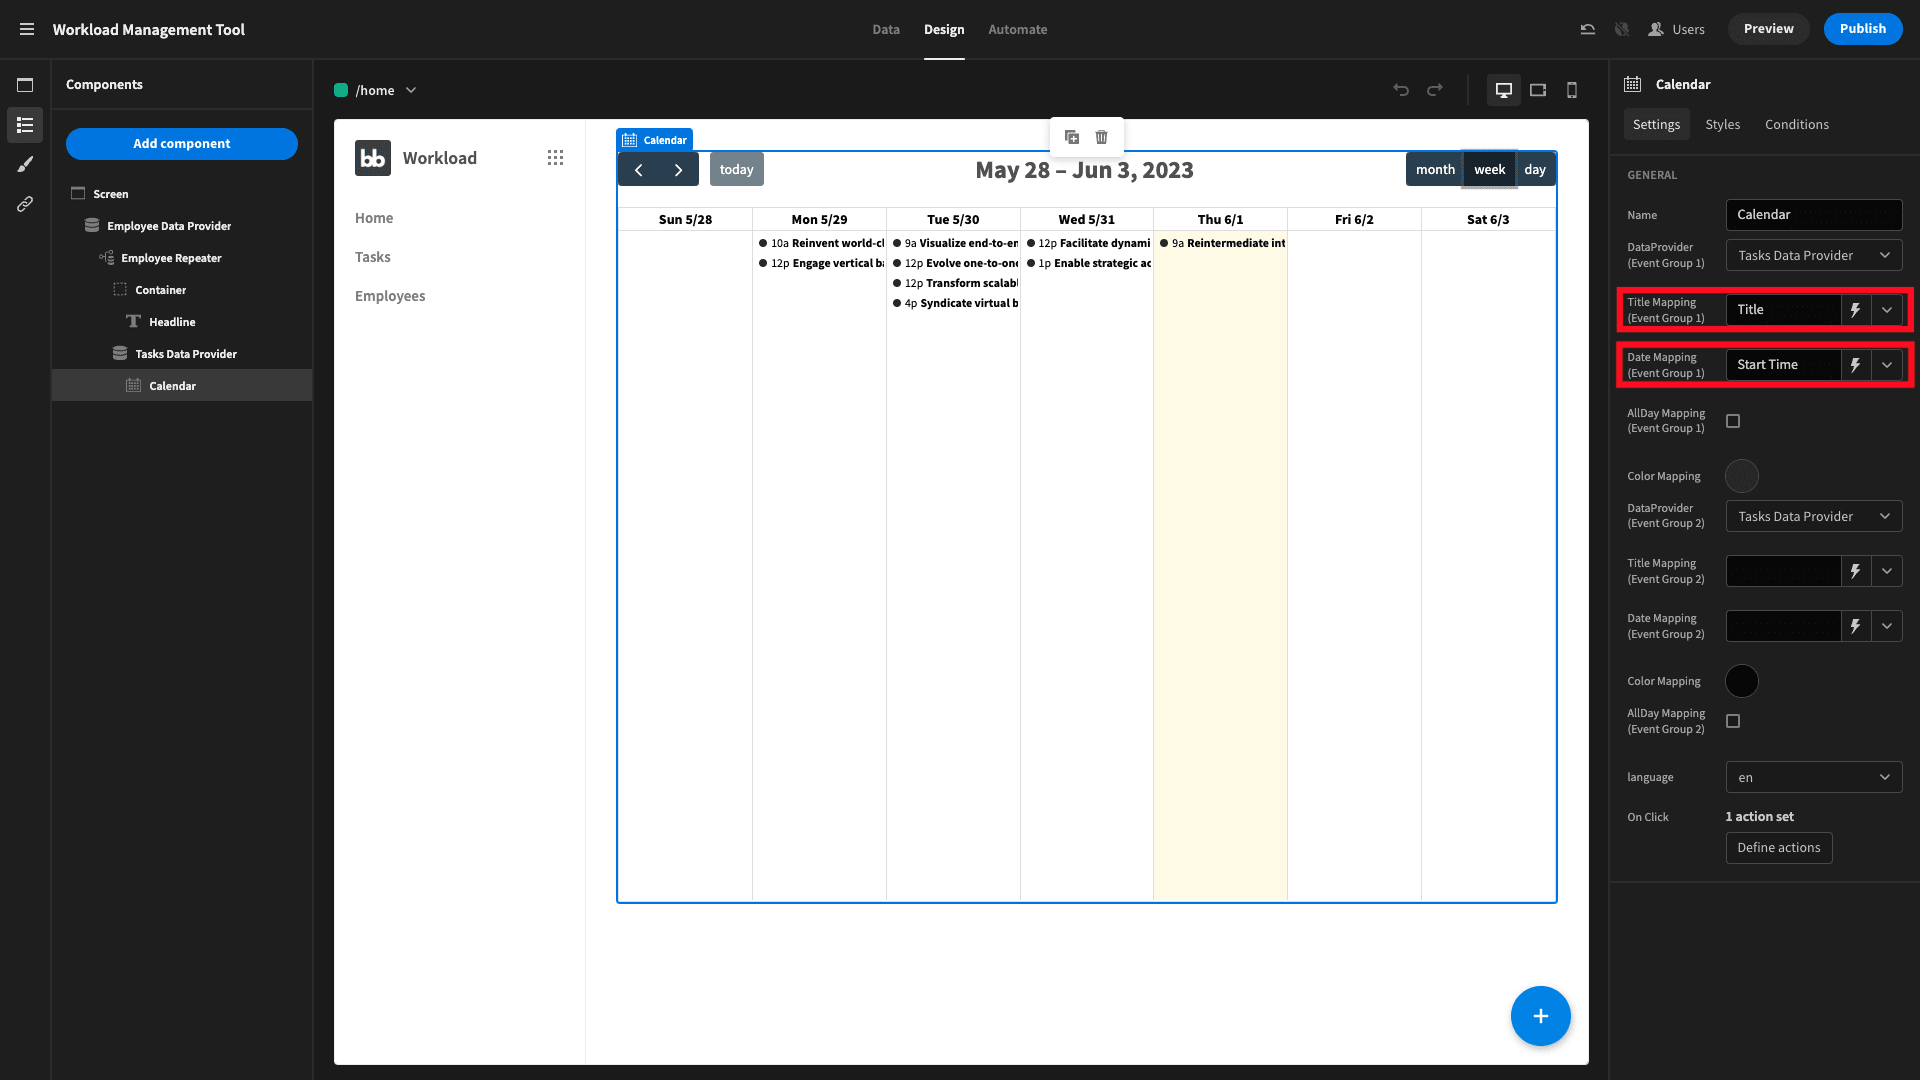
Our headline uses a handlebars expression to personalize the UX a little bit:
1Hello {{ Employee Repeater.Employees.First Name }}. Here are your tasks for this week.We’ve also given this a conditionality rule - so it’s hidden if the current user’s role is Power or Admin.
Next, we need to make a details screen that our colleagues can access by clicking on any given calendar event, like so:

We’ll create a new screen with the URL /task-details/:id. This lets us pass a row ID as a bindable URL variable.
Here’s what our screen looks like:
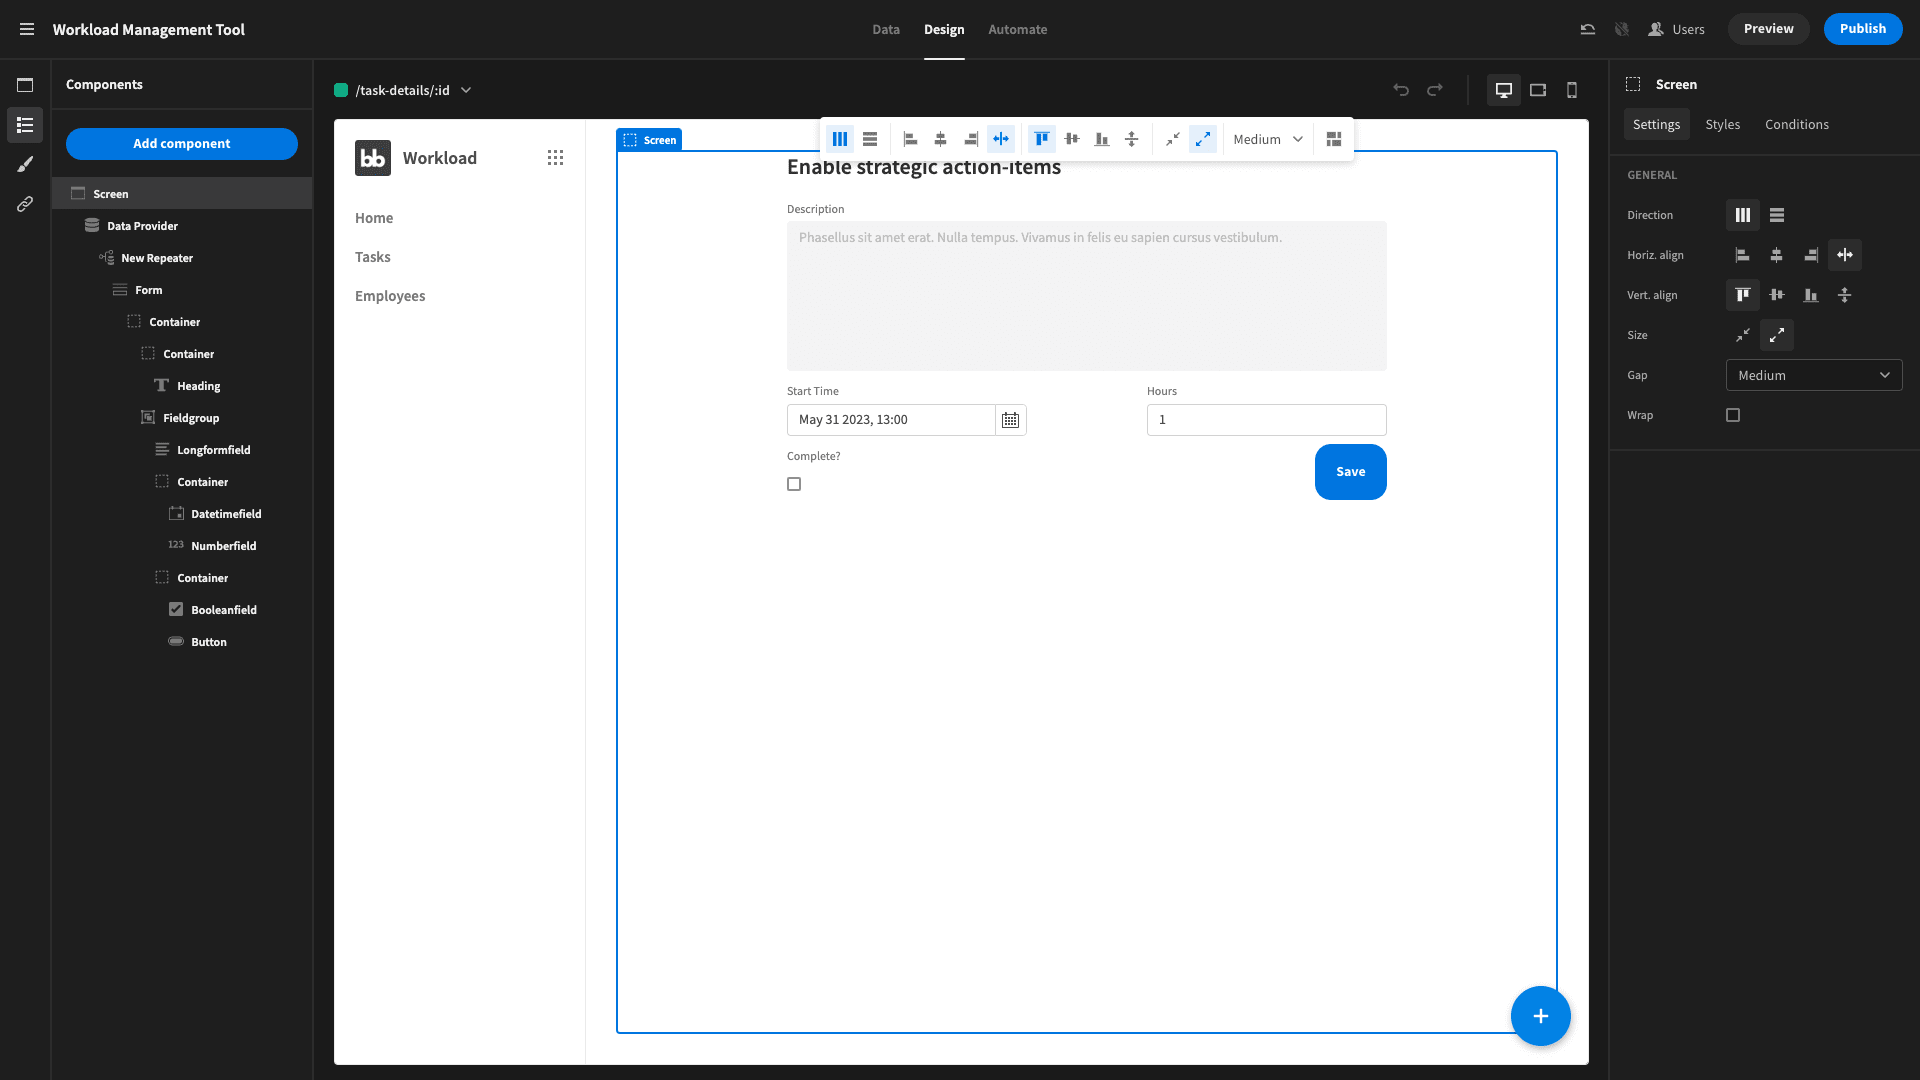
We started by adding and ejecting a form block component, set to update. Then we added a filter on the data provider so that the ID is equal to {{ URL.ID }}. We also removed the Title form field and replaced it with a headline, as well as disabling the description field.
Then, we added a couple of horizontal containers for our remaining fields and button, to improve the UX.
And that’s that.
Now, head back to the screen with your calendar UI on it. We’re going to select the Calendar component and hit the Define Actions button, to configure what happens if someone clicks on an event:
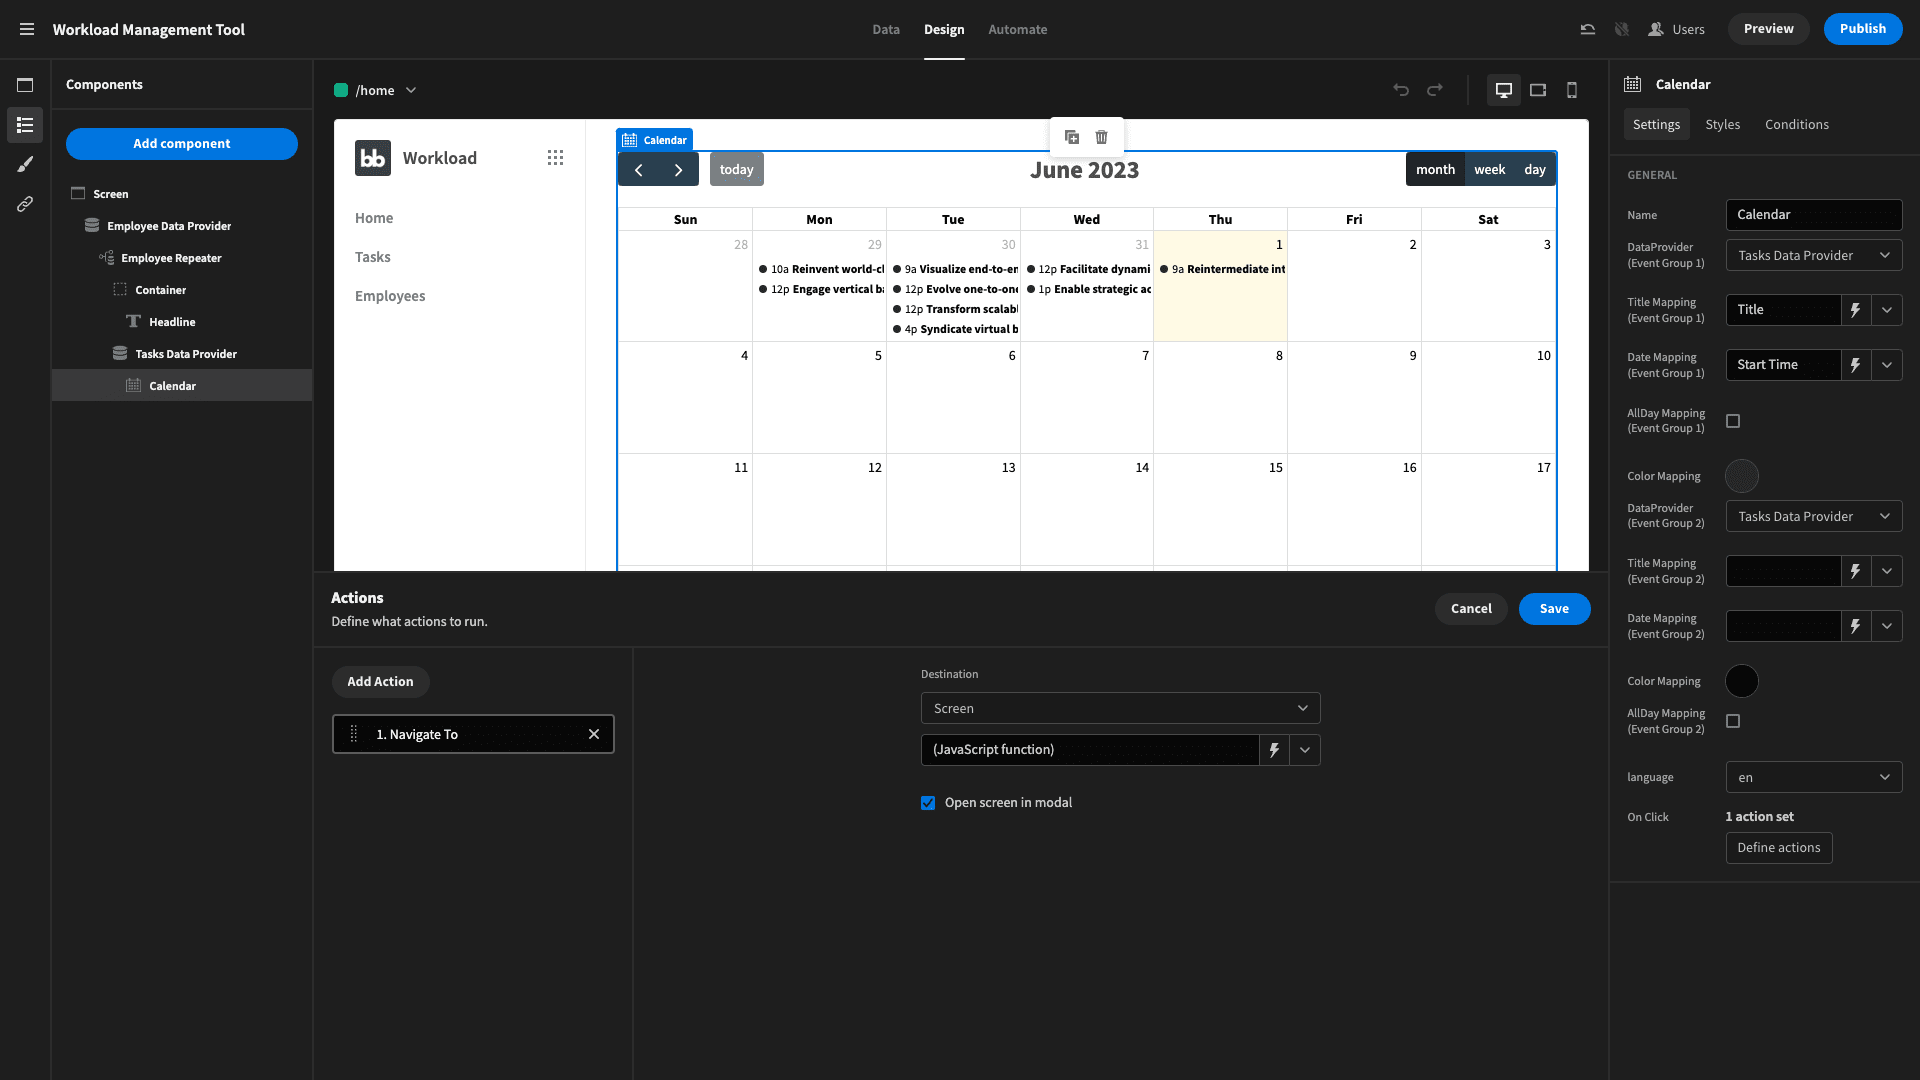
We’ve added a Navigate to option and selected the Open screen in modal option. Remember, our task-details screen allows us to bind the ID of a specific role within its URL - in the format /task-details/:id.
For native Budibase components, we could simply use a handlebars expression like /task-details/{{ clicked event.id }}.
However, our calendar plug-in is a community contribution, and the only exposed binding is {{ clicked event }}, which returns the whole row in a JSON object. So, we need to use the following JavaScript expression for our URL:
1return "/task-details/" + $("Clicked Event.extendedProps.event._id")And that’s our calendar UI finished.
5. Add CRUD screens
Next, we’re going to build a couple of screens for managing tasks and employees. This is really easy, since in Budibase we can autogenerate CRUD screens.
Hit Add Screen and then choose List View in the pop-up:
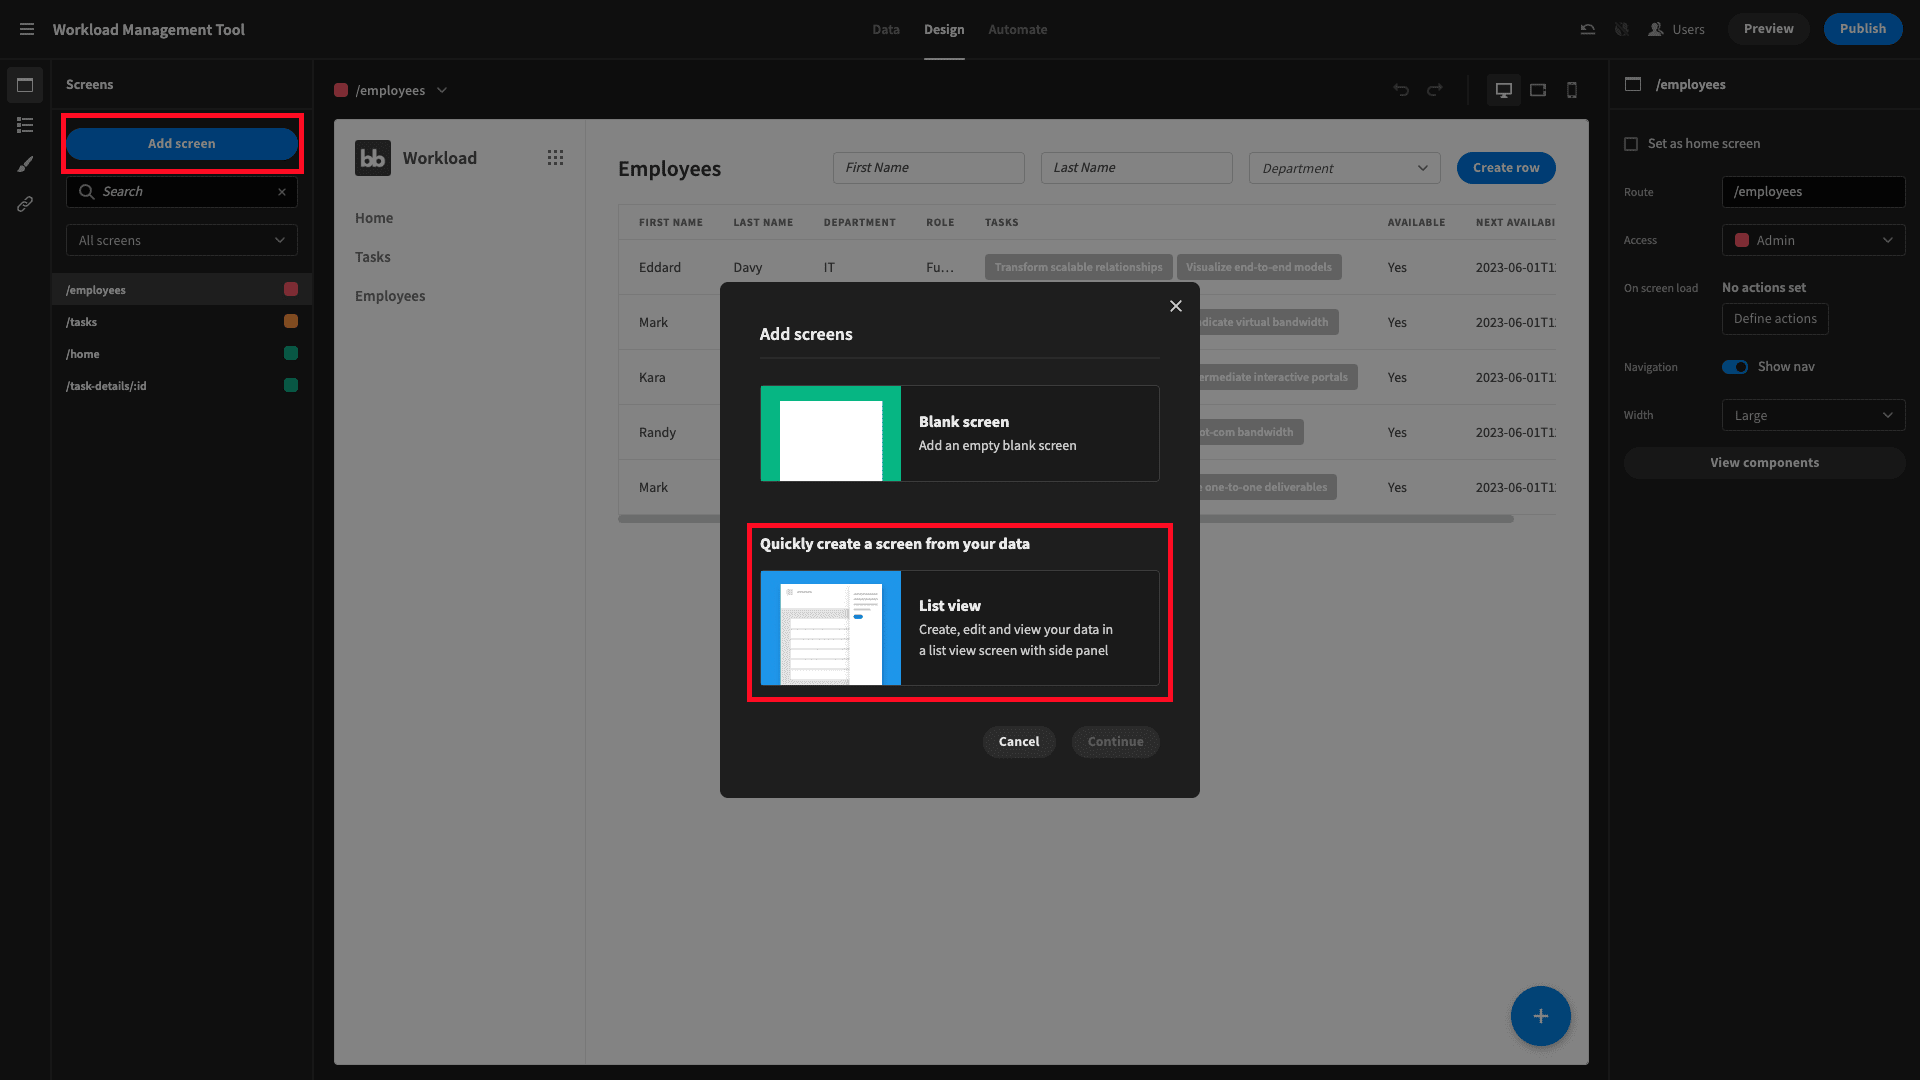
Then choose the table you want to generate screens from. We’ll start with employees:
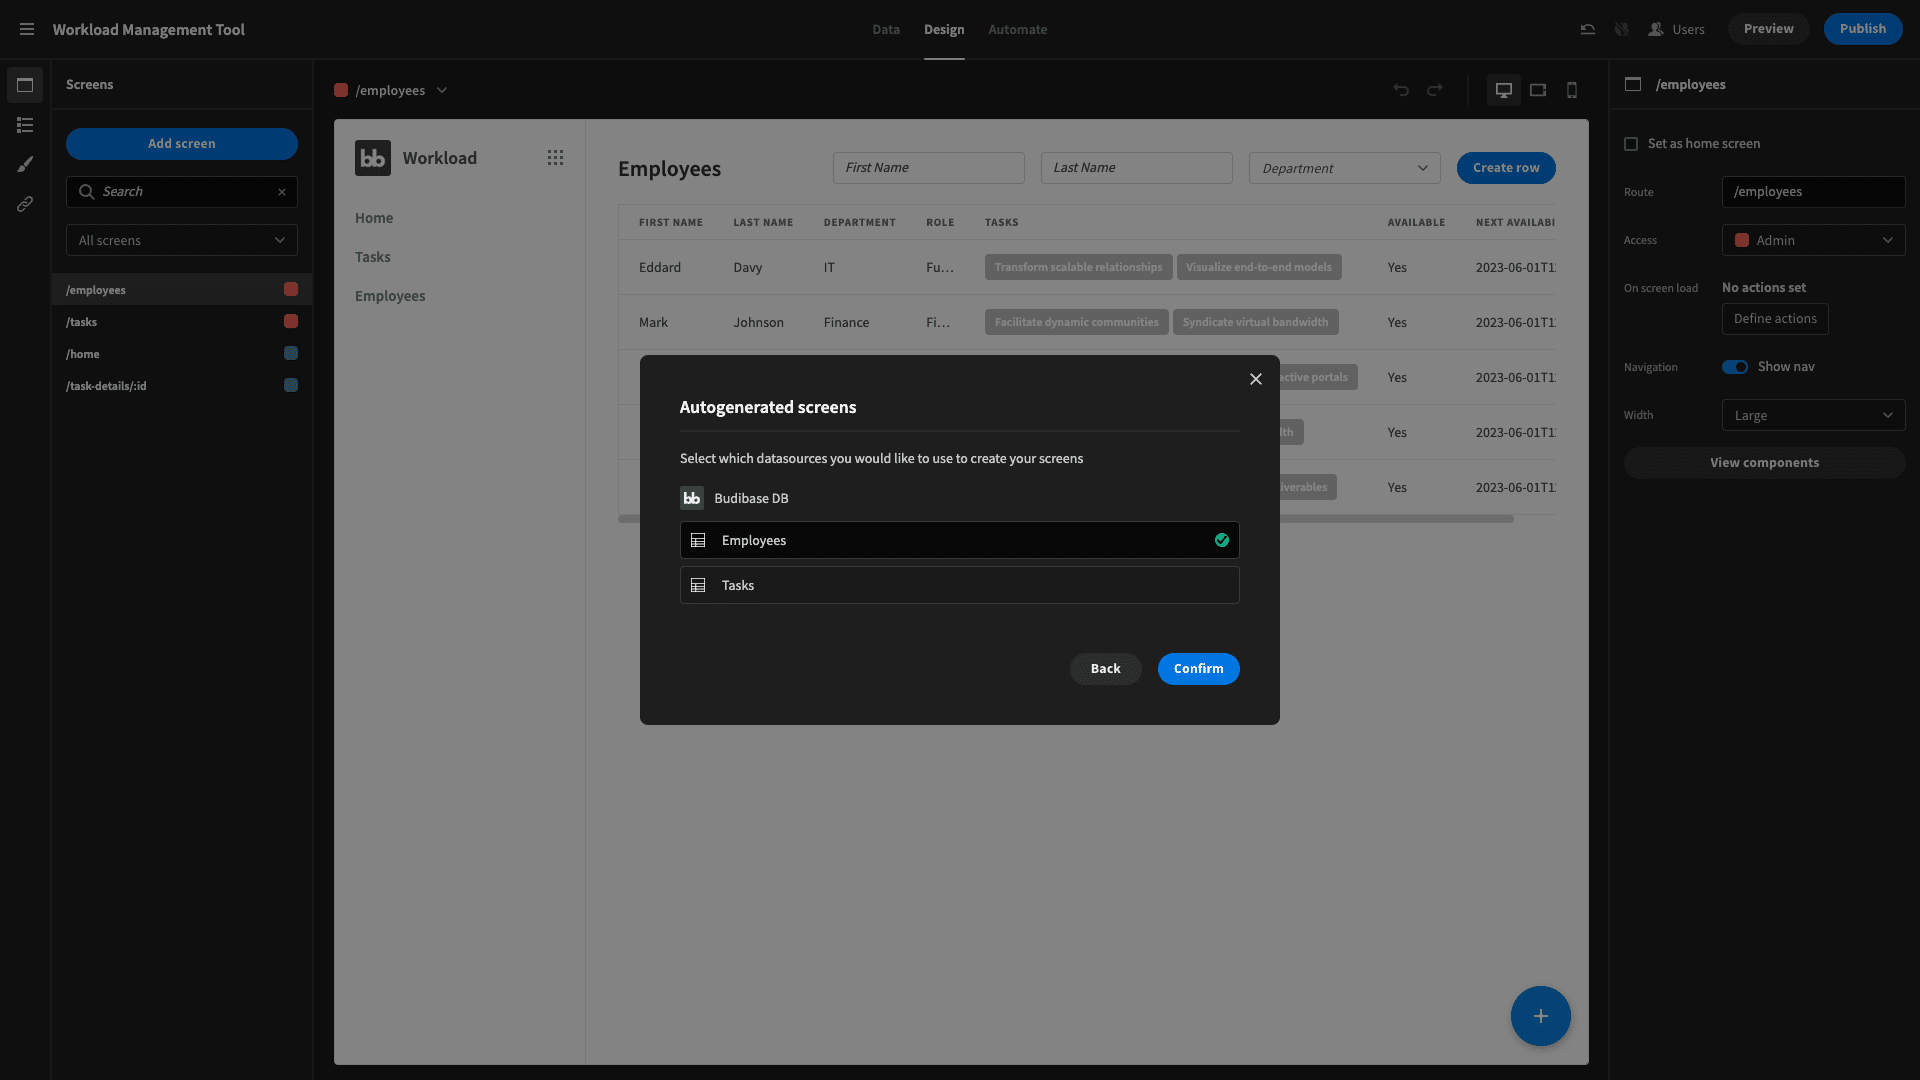
You’ll be prompted to choose and access level. You can set this now if you want, but we’ll return to it in the next step as well, so there’s no need to worry about it just yet.
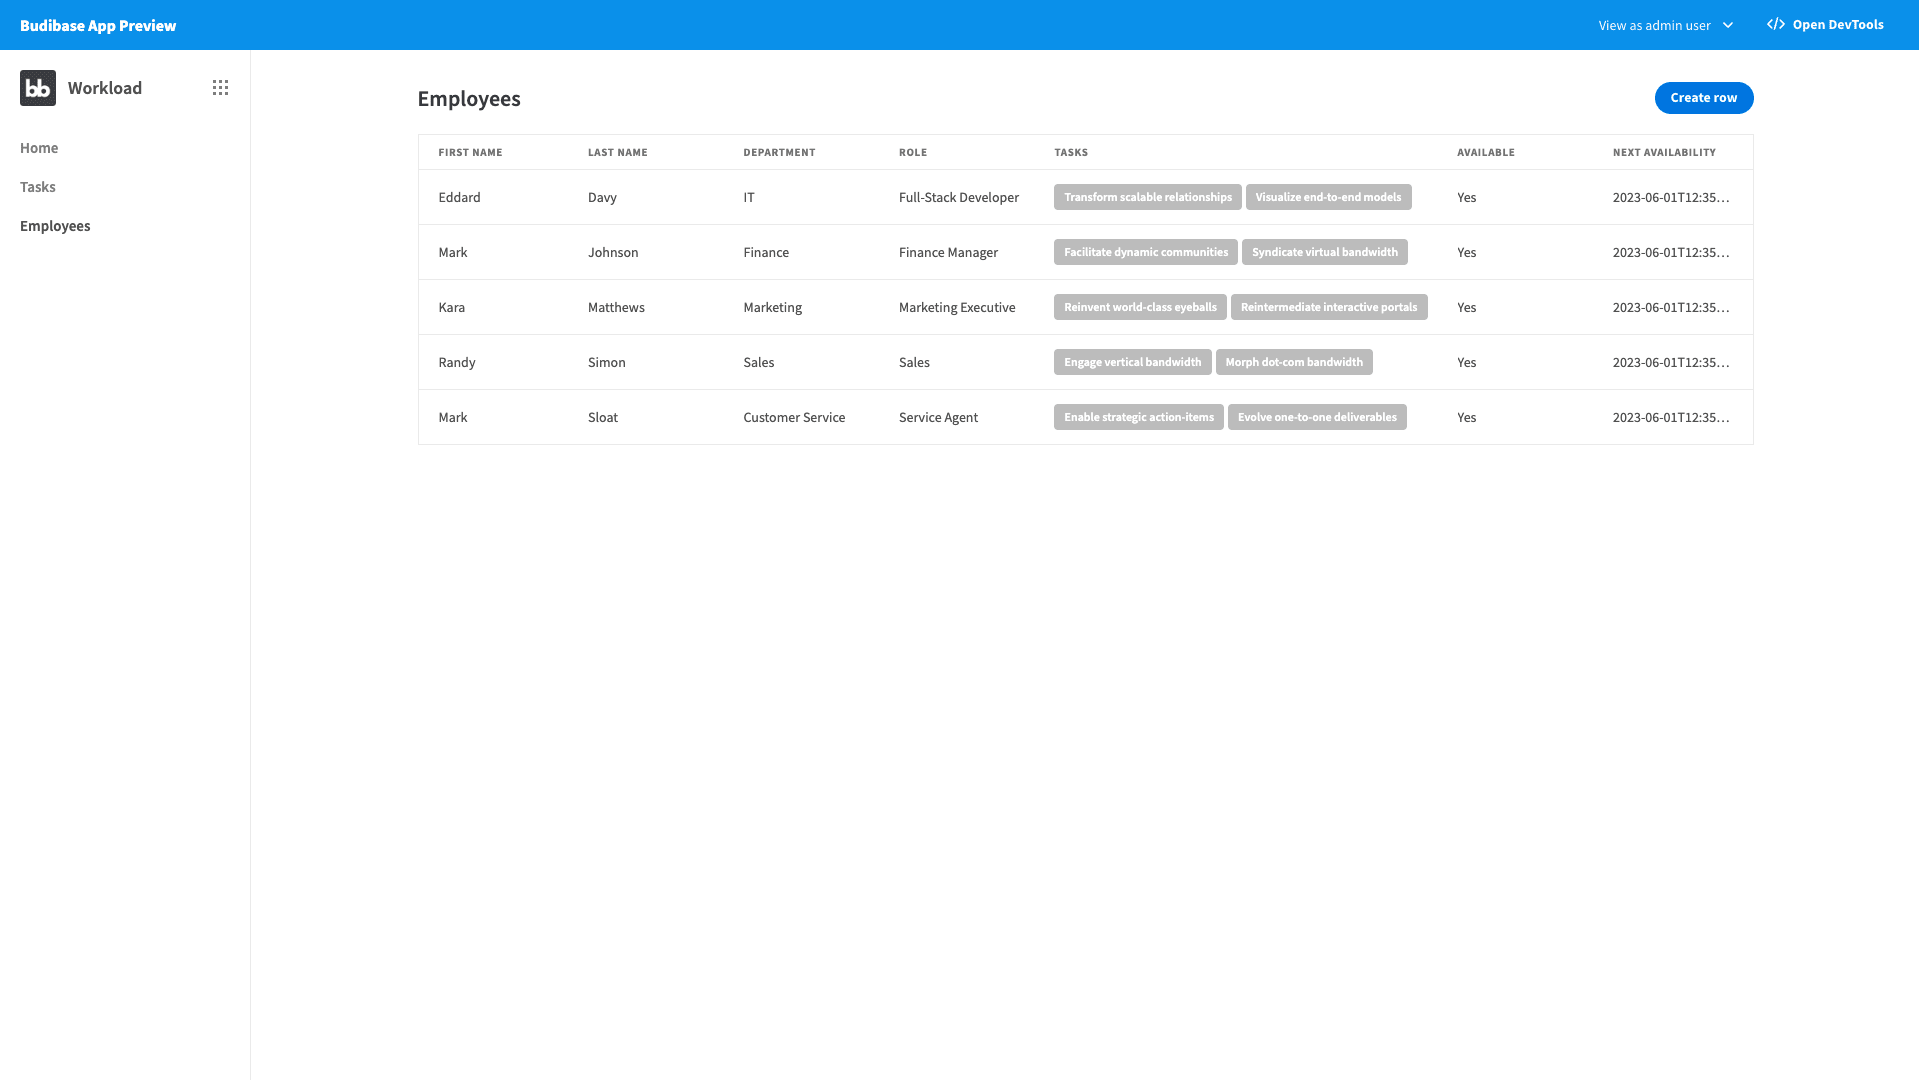
You’ve now got a screen like this, where you can read, edit, or add new employees:
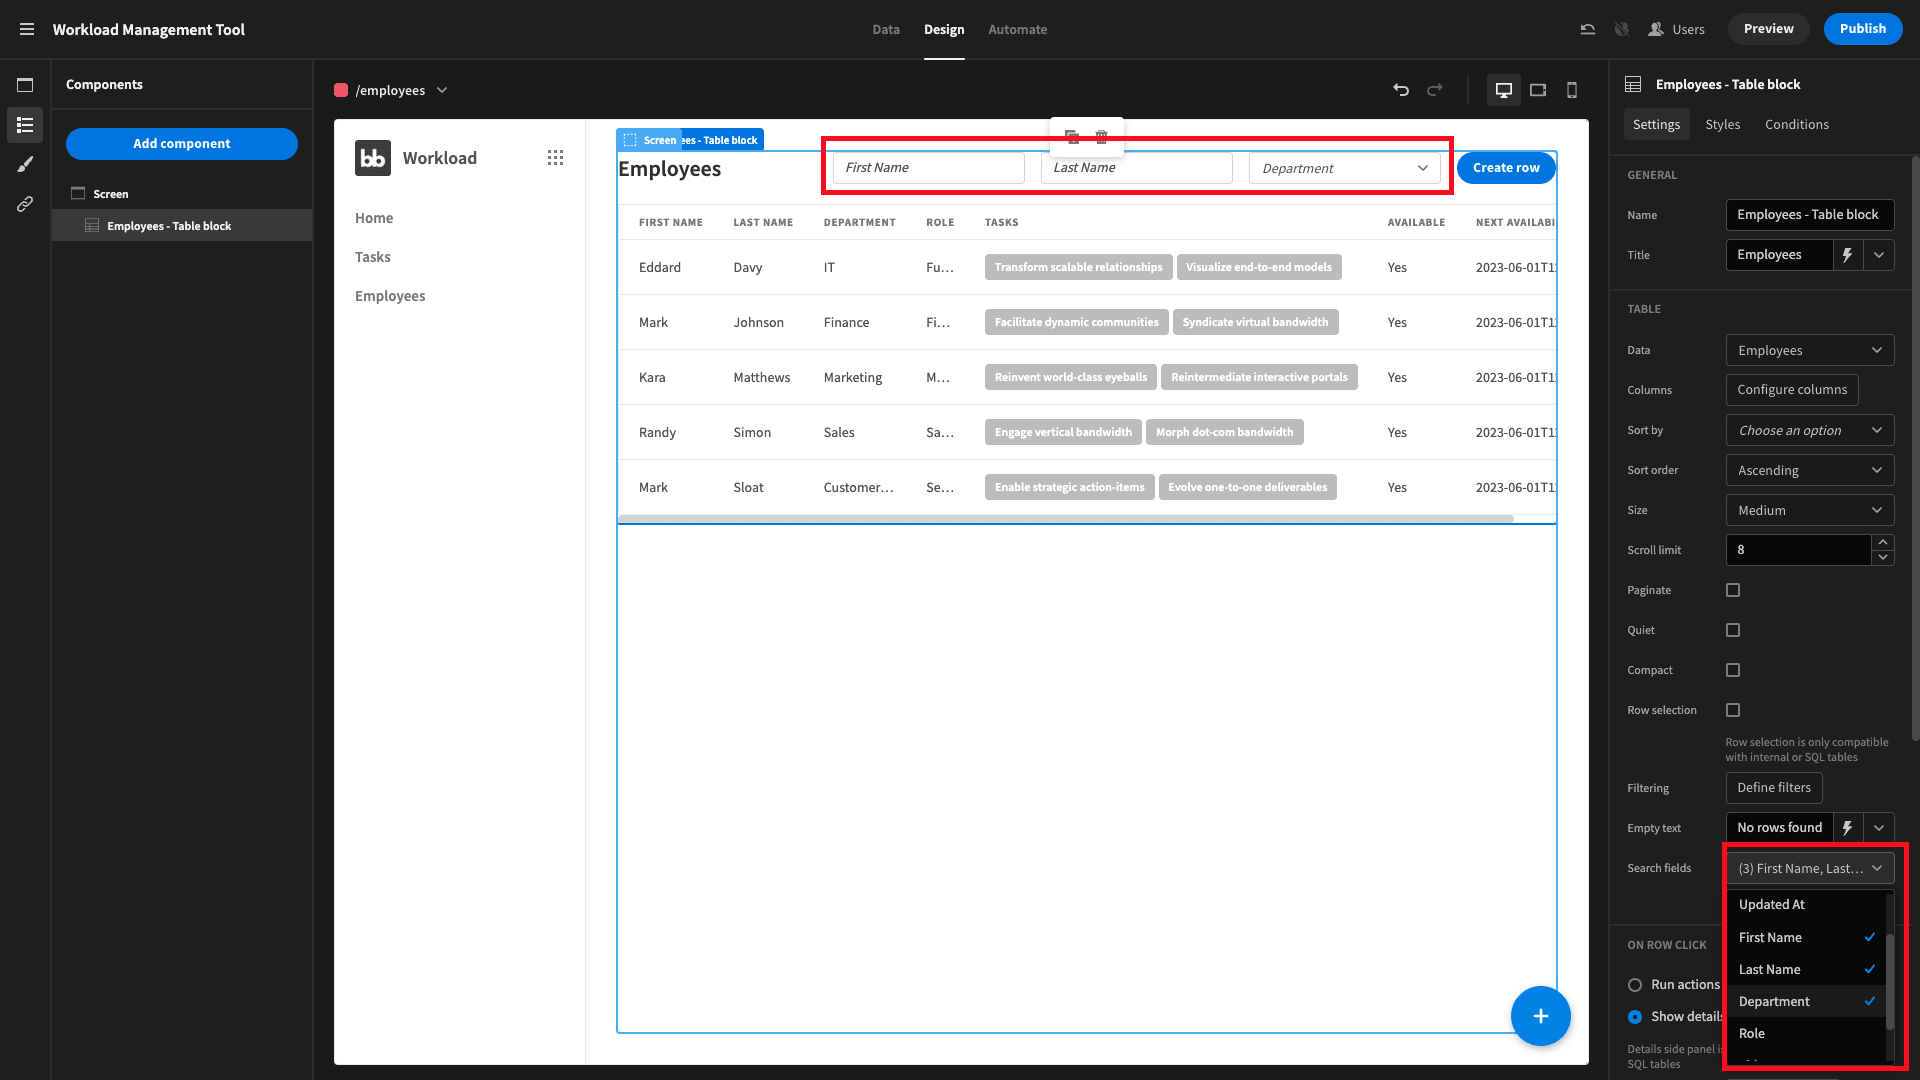
Lastly, we’ll add some search fields from the dropdown on the bottom right:
Then, we’ll repeat the same process for our Tasks table.
And that’s our CRUD screens finished.
6. Configure RBAC
Now, we want to implement our access control system. In Budibase, we can assign users to one of our predefined access roles, and then grant permissions based on screens, queries, data sources, automation runs, or individual components.
We’re going to implement three hierarchical roles in our app:
- Basic users can view the tasks that are assigned to them, and mark them as complete.
- Power users can view, update, or delete all tasks.
- Admin users can view, update, or delete employee’s details.
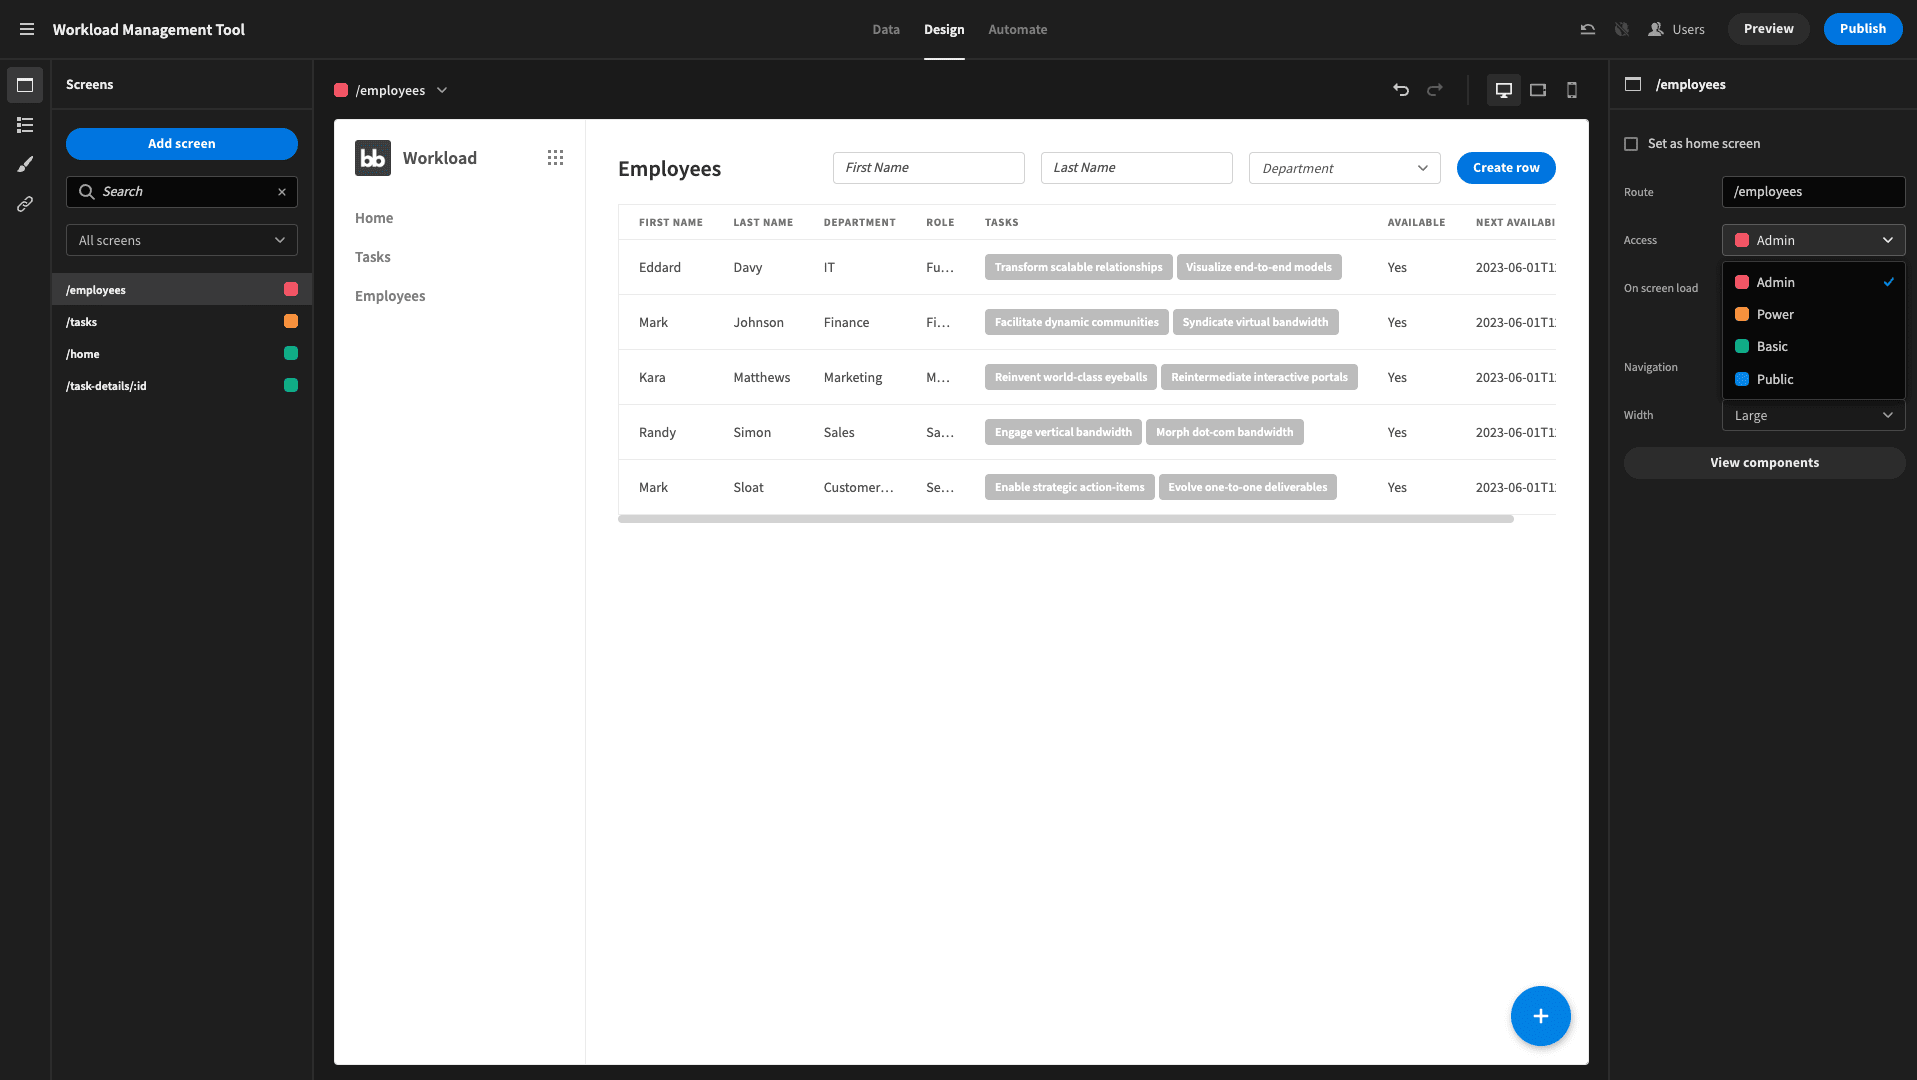
We can set the minimum access role for each screen with this drop-down:

Note, the /task-details screen also needs to be set to basic, so that colleagues can access our modal.
Next, go to Navigation and hit Configure links. Here, we can set the access role required for users to see each individual item in our navigational menu. Use the following options:
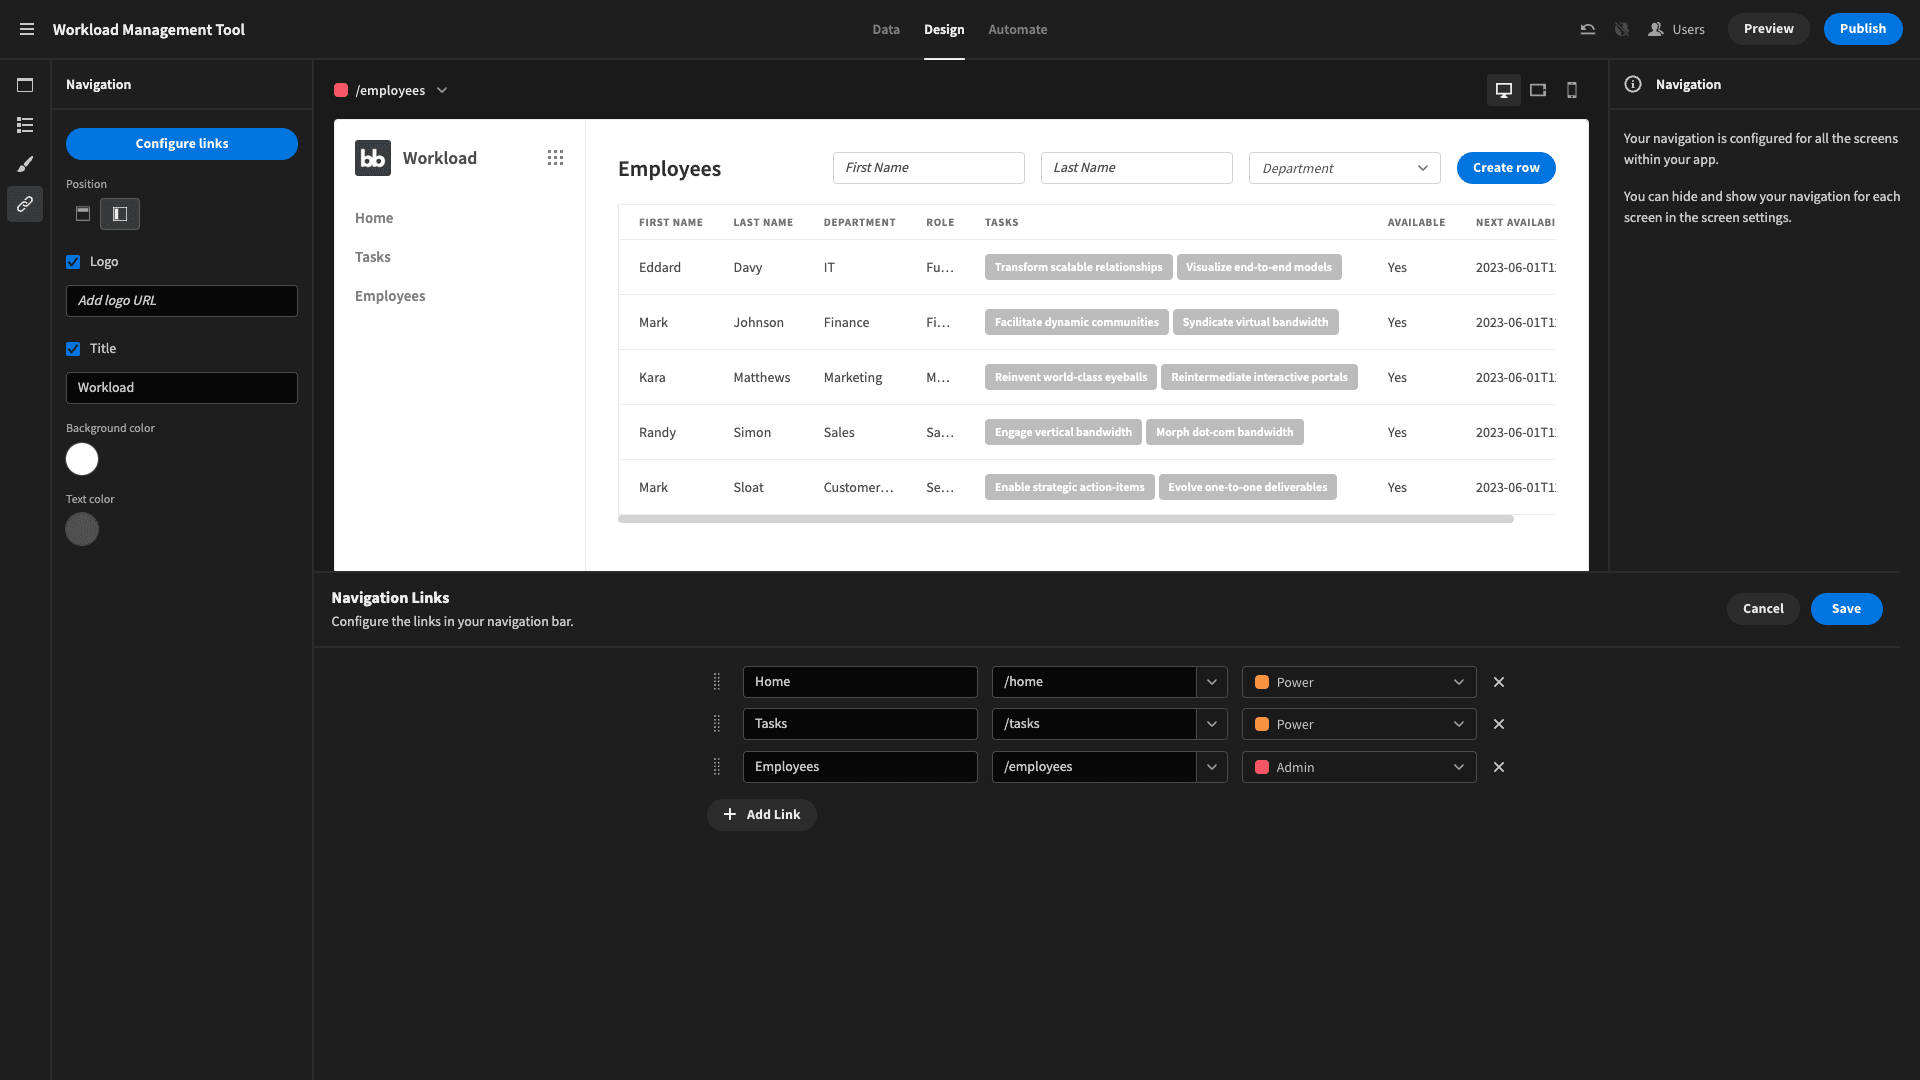
This way, basic users have a one screen app, and users with higher roles will only see the nav items for pages they’re permitted to access.
7. Tweak the design and publish your app
FInally, we can play around with the design of our app to make it a little bit easier on the eyes. Budibase offers a whole range of easy design tools to help you build professional apps in seconds.
We’ve just made a couple of changes from the defaults for our workload management tool.
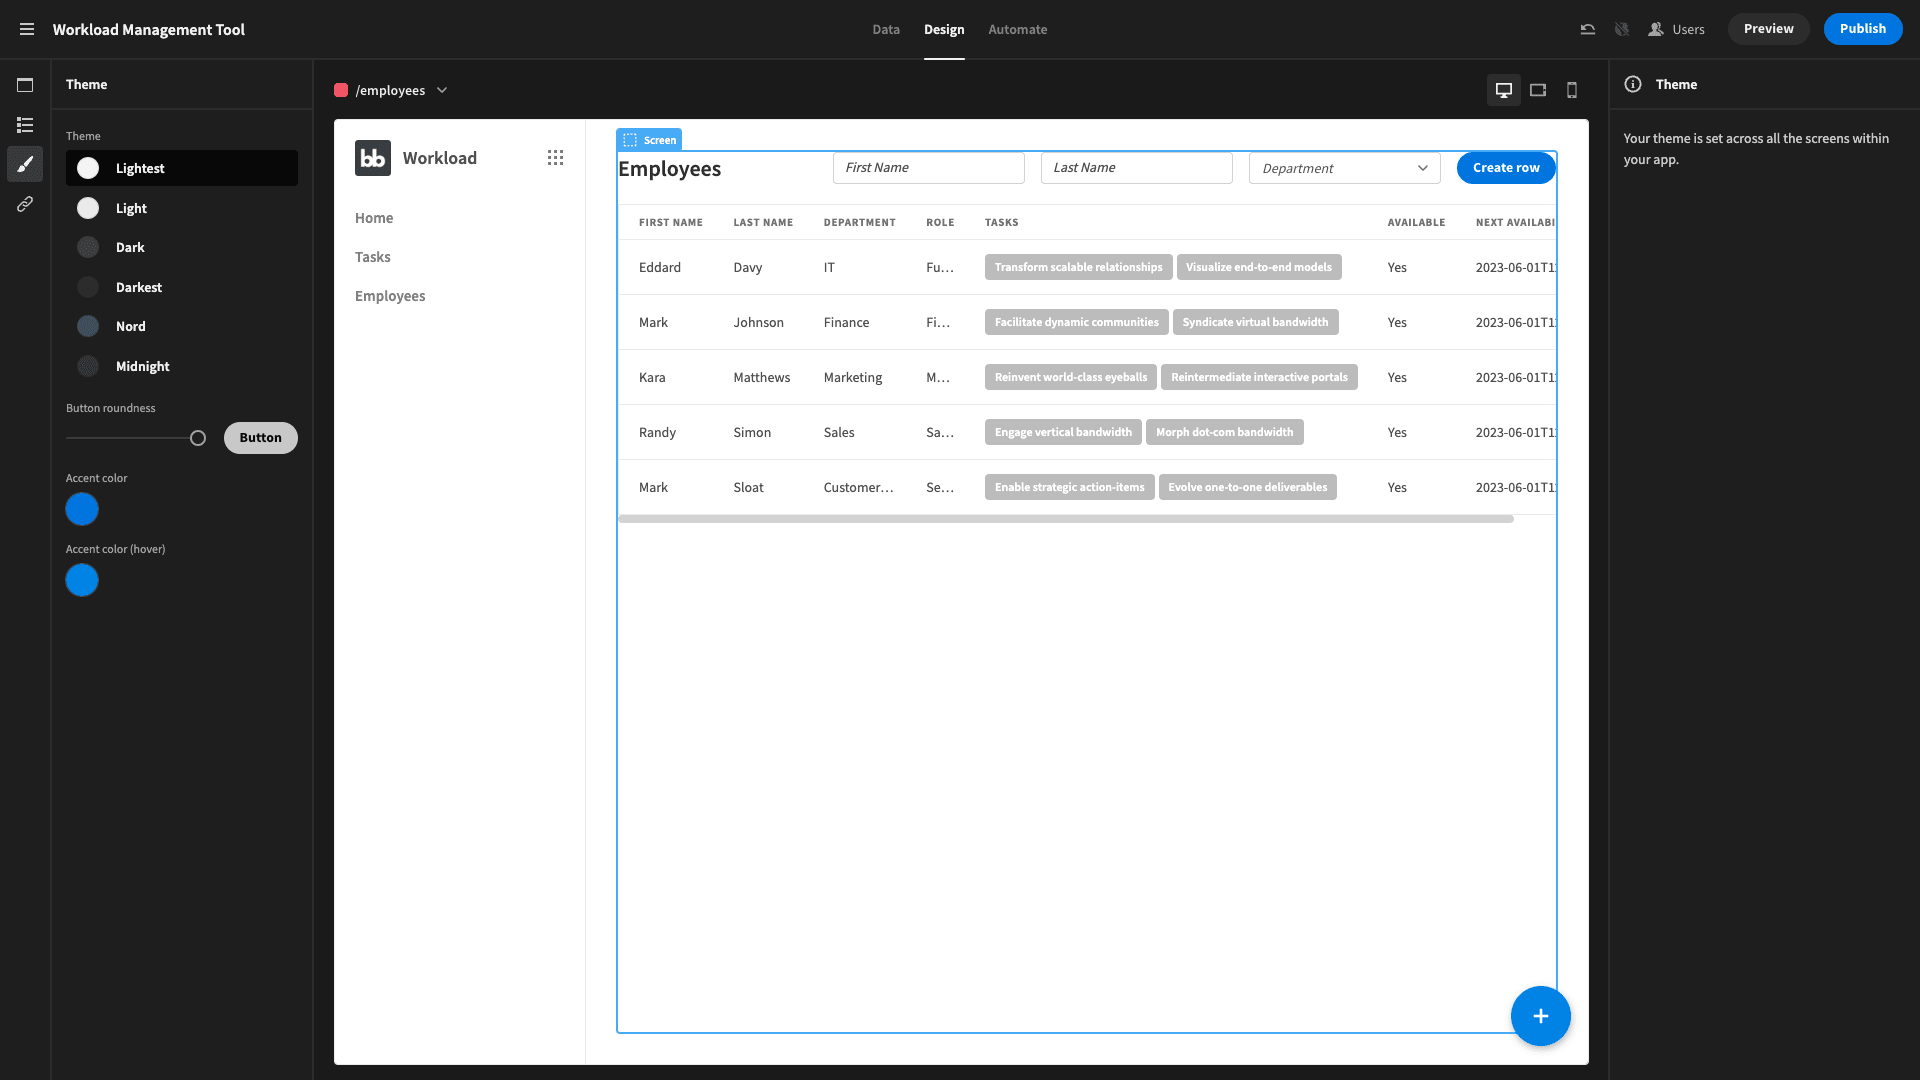
First, we’ve change our theme.
Budibase offers six distinct options, and we’ve chosen Lightest:
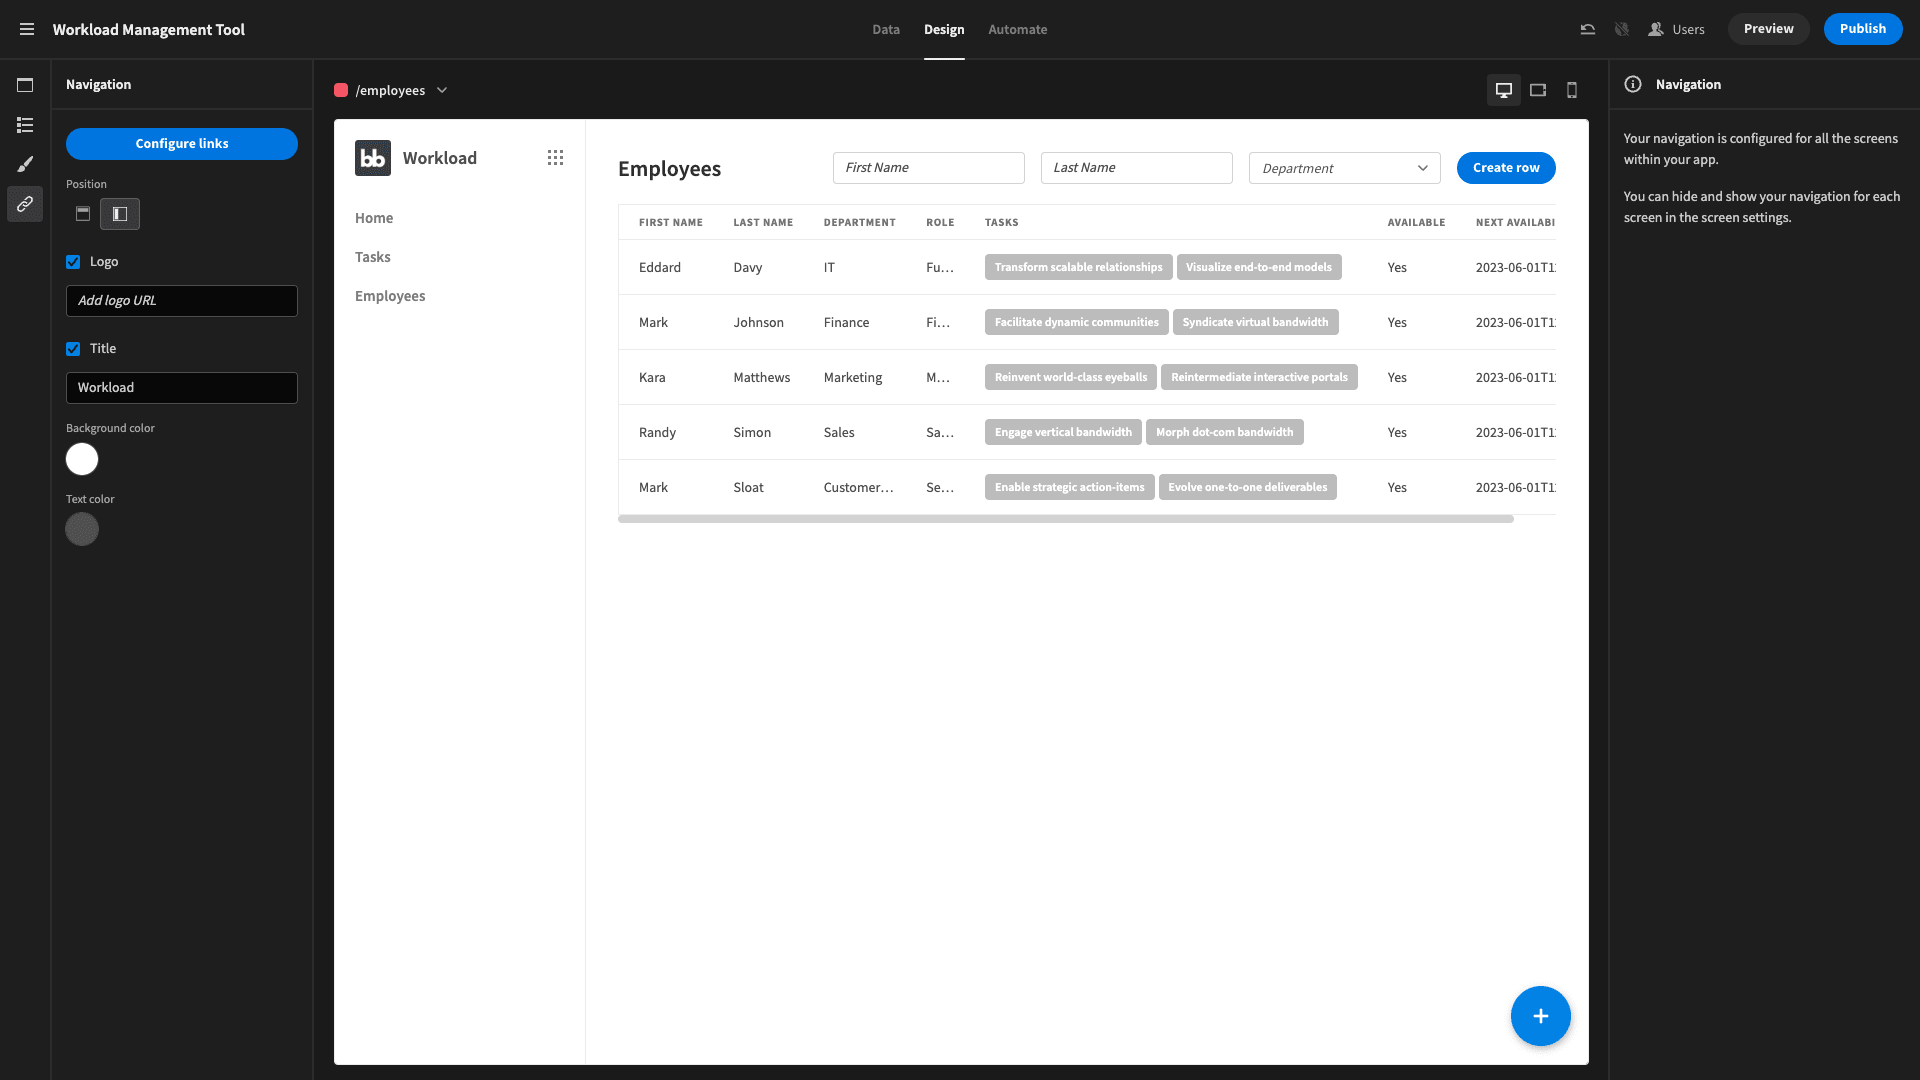
We’ve also opted for a side-panel nav rather than a top bar.
We can select this under the Navigation panel:
And that’s our employee management tool completed.
All that’s left is to hit publish and start using your new workload management tool, for free.
Take a look at our guide on how to make an app from an excel spreadsheet .
Build better tools faster with Budibase
Budibase is the fast, easy, cost-effective way to build all kinds of internal tools. With autogenerated screens, industry-leading extensibility, extensive data support, and much more, there’s never been a better way to build professional apps with minimal custom code.
Here’s why tens of thousands of businesses choose Budibase to manage internal processes.
Our open-source, low-code platform
At Budibase, our design philosophy is simplicity by default; extensibility when you need it. No other low-code platform boast so much power and flexibility without compromising on developer experiences.
We also offer the most generous free tier around. Check out our features overview to learn more about Budibase.
External data support
We’re proud to lead the pack for external data support. Budibase offers dedicated data connectors for SQL, Postgres, S3, Airtable, Mongo, Couch, REST, Oracle, Google Sheets, Arango, and many more.
We’ve even got our own built-in database, with full support for CSV uploads, formula variables, and relational data.
Optional self-hosting
Security minded organizations love Budibase for the power to host their low-code tools on their own infrastructure. We offer self-hosting with Kubernetes, Docker, Digital Ocean, N8N, Portainer, and more.
We’ve also got our own cloud-based service for near-instant deployments. Check out our pricing page to learn more about both options.
Custom plug-ins
Budibase is miles ahead for extensibility. Build your own data sources, components, or automation blocks with our dedicated CLI tools and deploy them across your tennant. You can even import community contributions by simply pasting a URL from Github.
Check out our plug-ins documentation to learn more.
Low-code automations
Use our built-in in editor to create custom automation rules, with minimal manual coding. Combine, nest, and configure automation actions and triggers to perfectly mimic your internal business rules.
You can even leverage external app events, using REST, Zapier, Webhooks, and more.
Role-based access control
Budibase offers configurable role-based access control, straight out of the box. Assign users to one of our pre-defined roles, and grant permissions at the level of screens, data sources, queries, automation rules, or even individual components.
We also offer free SSO through OpenID, OAuth, and more.
50+ free application templates
Businesses around the world choose Budibase for just about every use-case you could think of. To show off what our platform is capable of, we’ve built more than fifty free, customizable, and ready to deploy application templates .
To start using Budibase, sign up for free today.